
Subscribe to Our Youtube Channel
Related Manuals for Macally PHR-100ACE


Summary of Contents for Macally PHR-100ACE
- Page 1 IEEE1394A FireWire/Hi-Speed USB2.0 3.5” Hard Drive Data Encrypt Enclosure PHR-100ACE User’s Manual...
- Page 2 Declaration of Conformity Part2 Research declares that the PHR-100ACE conforms to the following standards, in accordance with the provisions of the EC Directive 89/366/EEC: EN 55022 (CISPR 22:1985), Class A.
-
Page 3: Table Of Contents
CONTENTS IMPORTANT: PLEASE READ BEFORE USING ENCRYPT KEYS! INTRODUCING FIREWIRE/USB2.0 HI-SPEED DATA ENCRYPT ENCLOSURE About this Guide System Requirements Registration Products and Services Package Contents Safety Precautions HARDWARE INSTALLATION SECURE KEY SOFTWARE INSTALLATION Software Installation for MAC FireWire Connection for MacOS USB Connection for MacOS Software Installation for PC IEEE1394A FireWire Connection for Windows98SE/ME/2000/XP 15... -
Page 4: Important: Please Read Before Using Encrypt Keys
IMPORTANT: Please Read Before Using Encrypt Keys! Please read it thoroughly before using PHR-100ACE encrypt enclosures, and save this note for future reference use. 1. For security purposes, the encrypt keys cannot be duplicated. Without the matching encrypt key, your data in the hard disk cannot be accessed. -
Page 5: Introducing Firewire/Usb2.0 Hi-Speed
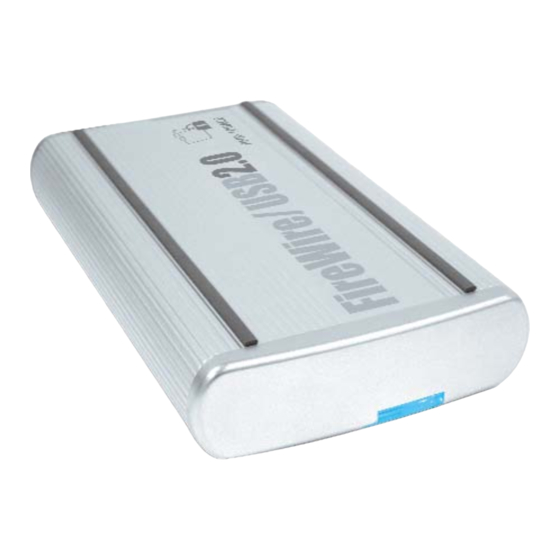
Introducing IEEE1394A FireWire/Hi-Speed USB2.0 3.5" Hard Drive Data Encrypt Enclosure-PHR-100ACE Thank you for choosing the PHR-100ACE aluminum IEEE1394A FireWire/Hi-Speed USB2.0 3.5" Hard Drive Data Encrypt Enclosure. This is an Aluminum enclosure which support 3.5” IDE Hard drive. It is simple to install and comes with all the parts you need to create an external IEEE1394A FireWire/ Hi-Speed USB2.0 device. -
Page 6: Products And Services
Package Contents The PHR-100ACE-Aluminum IEEE1394A FireWire/Hi-Speed USB2.0 3.5" Hard Drive Enclosure package includes the following software and documen- tation: The software CD contains the drivers and manual • • 6 pin to 6 pin FireWire Cable USB2.0 cable • •... - Page 7 ON TRANSPORTATION Save the packing materials as you may need to repack and transport the unit at a later date. Always remove the disc before moving the unit. ON POWER SOURCES When you are not using the unit for a long time, disconnect the power cord from the unit.
-
Page 8: Hardware Basic
Hardware Basic Precaution: Please make sure your hand is dry and remove static from your body by touching metal parts of your computer chassis. 1394A FireWire Data USB Data Power cable connector cable connector On/Off Switch Secure Key Port Power Connector Back Panel Base Plate... -
Page 9: Hardware Installation
Hardware Installation Enclosure Sleeve Front Back FireWire/USB2.0 Encrypt Drive PHR-100ACE Back Panel Front Panel 1. Unscrew to loosen the Back Panel and remove the Back Panel from the Enclosure. 2. Use your thumb to push the Base Plate out. - Page 10 3. Set the Enclosure Sleeve aside. 4. Install 4 white Anti-Shock Mounts w/10mm screw into both sides of the hard drive. Do not tighten the screws yet. 5. Set up the jumper ID as “Master” mode according to the HDD jumper setting spec or “Single Master”...
- Page 11 6. (1)Slide the hard drive into the front Base Plate first and (2) press down on the hard drive, make sure all 4 Anti-Shock Mounts sit inside the Support Slot. 7. Pressing down the hard drive and tighten all 4 screws to secure the hard drive to the Base Plate.
- Page 12 9. Install the Back Panel to the Enclosure.. 10. Secure the Back Panel with the 5mm screw 11. Plug in secure key, plug the AC adapter into the Enclosure and turn the power switch on. You may now connect the unit to your computer using a USB or FireWire Cable.
-
Page 13: Secure Key
Independing to OS, it provides real-time, automatic hardware based bit-by-bit data encryption to entire hard drive including boot sector in the enclosure. With Macally Encrypt enclosures, data security could never be simpler and easier. All you have to do is, plug one secure key into the secure key port with lock symbol, then power on and connect the enclosure to computer, use it just like a regular hard drive enclosure. -
Page 14: Software Installation
Software Installation Software Installation for Mac MacOS Software Installation FireWire Connection for MacOS MacOS will recognize the enclosure automatically, initialize (if the drive is not initialized) and mount the drive to desktop. USB2.0 Connection for MacOS MacOS will recognize the enclosure automatically, initialize (if the drive is not initialized) and mount the drive to desktop. -
Page 15: Software Installation For Pc
Software Installation for PC IEEE1394 FireWire Connection for Windows98SE/ME/2000/XP Plug the IEEE 1394 cable into any available port, Windows(98,ME,2000 or XP) will start installing for the proper driver. Please follow the on screen instruction to complete the driver installation. (You may need the Windows CD during the installation.) USB Connection for Windows ME/2000/XP Plug the USB cable into any available port, Windows(,ME,2000... - Page 16 Select on the “Specify a location” option and type in “x:\PHR-100ACE\DRI- VERS” where “x” is the letter of the CD-ROM drive with the Drivers CD inserted, or click on “Browse” to choose the corresponding driver folder in the CD. Then click “Next”.
-
Page 17: Ide Hard Drive Partition And Format Procedures
After the installation, you will get USB2.0 Hi-Speed performance, if PHR- 100ACE is connected to USB2.0 host adapter; if connected to USB1.1 port in your computer, you will get USB1.1 speed only. Note: If you don’t see the new drive letter added in My Computer after driver is loaded properly, the reason could be the hard disk has no par- tition and format yet, please partition and format the drive in the enclo- sure before using it. - Page 18 1. Please run FDISK utility from MS-DOS command prompt. 2. Follow the screens below to complete the Hard Disk Partition. Step 1 Step 2...
- Page 19 Step 3 Step 4 Step 5...
- Page 20 Step 6 Step 7 Step 8 3. After restart the computer, please verify the new drive in "My Computer". 4. Please do a full format to the hard drive before using it.
-
Page 21: For Windows2000/Xp
For Windows2000/XP If you can see a new entry under Disk drives of Device Manager, you are ready to partition and format the drive. 1. Open Control panel, “Administrative Tools” and “Computer management”. Step 2 2. Click on “Disk Management”. Step 3 3. - Page 22 Step 4 4. Write a signature to the new drive, click “Next”. Step 5 5. Click “Finish” to close the wizard.
- Page 23 6. Select the new “Unallocated” disk, and then right click to choose “Create partition”. Step 7 7. Follow the onscreen instruction to partition and fully format the drive.* *note: If it assigns a new hard drive letter but format dose not run automatically, please exit “Computer Management”, and find the new drive letter in My computer to format it completely.
Need help?
Do you have a question about the PHR-100ACE and is the answer not in the manual?
Questions and answers