PRESONUS FIRESTUDIO TUBE User Manual
24-bit/96k recording interface w/ two class a vacuum tube “superchannels”
Hide thumbs
Also See for FIRESTUDIO TUBE:
- Connection instruction (1 page) ,
- Connection instruction (1 page) ,
- User manual (39 pages)

Related Manuals for PRESONUS FIRESTUDIO TUBE


Summary of Contents for PRESONUS FIRESTUDIO TUBE
- Page 1 FIRESTUDIO TUBE 24-bit/96k Recording Interface w/ Two Class A Vacuum Tube “SuperChannels” User’s Manual Version 1.0 © 2008, PreSonus Audio Electronics, Inc. All Rights Reserved.
- Page 2 Some states do not allow limitations on how long an implied warranty lasts, so the above limitation may not apply to you. In no event will PreSonus be liable for...
-
Page 3: Table Of Contents
2.4.2 Types of Dynamics Processing ......................19 2.4.3 The Vocabulary of Dynamics Processors ..................21 3 CONTROLS & CONNECTIONS 3.1 PreSonus FireControl Software ......................23 3.1.1 FireControl Application Icon ......................23 3.1.2 FireControl Master Section ......................24 3.1.3 FireControl Mixer ........................25 3.1.4 FireControl Menus ........................ -
Page 5: Overview
X-MAX microphone preamplifiers, six line level inputs and Cubase LE 48-track music production software, the FireStudio Tube is ready to go out of the box for professional quality computer recording. All you need is a computer with FireWire connection, a few microphones and cables along with your instruments and you are... -
Page 6: Features
PreSonus X-MAX microphone preamps, MIDI I/O, and rock solid drivers, as well as a plethora of music recording and production software. The FireStudio Tube includes PreSonus ProPak Software Suite with Cubase LE 4 and over 2 GB of plug-ins, drum loops and samples – giving you everything you need for professional music recording and production. -
Page 7: What Is In The Box
OVERVIEW 1.3 WHAT IS IN THE BOX Your FireStudio Tube package contains the following: • FireStudio Tube Recording Interface • 6’ 6-pin to 6-pin FireWire cable • 6’ Standard IEC Power Cable • MIDI Breakout Cable • Software installation discs:... -
Page 8: System Requirements
OVERVIEW 1.4 SYSTEM REQUIREMENTS Below are the minimum computer system requirements for your FireStudio Tube. Macintosh • OS: Mac OS X 10.4.x or later • Computer: Apple Macintosh series with FireWire 400 port • CPU/Clock: PowerPC G4/1 GHz or higher (Intel/Dual 1 GHz recommended) •... -
Page 9: Operation
2.1 QUICK START UP 2.1.1 Installation in Microsoft Windows After inserting the Installation CD into your CD-ROM drive, the FireStudio Tube installer will take you through each step of the installation process. Please read each message carefully – ensuring especially you do not connect your FireStudio Tube early. - Page 10 FireStudio Tube. If a Found New Hardware wizard appears, follow the recommended steps. When the sync light remains solid blue, your FireStudio Tube is synced to your computer and ready to use! 8 | PreSonus 2008...
-
Page 11: Installation In Mac Os X
OPERATION 2.1.2 Installation in Mac OS X After inserting the Installation CD into your disc drive, browse the disc and run the FireStudio Tube installer, which will take you through each step of the installation process. 1) To begin installing the FireStudio Tube driver on your Mac, double click on the FireControl logo. - Page 12 FireControl Software. You must choose your system drive. Storage drives and partitions cannot be used as hosts for the driver. 6) The FireStudio Tube installer contains the installations for the entire FireStudio family of interfaces. Select “FireStudio Tube” from the list.
- Page 13 7) The FireStudio Tube installer requires that your user password be entered as a security measure. Enter your password and click “OK” 8) You will be notified that the FireStudio Tube installation requires that your Mac be restarted to finish the installation process.
-
Page 14: Cubase Le - Device Setup
2.1.3 Cubase LE 4 – Device Setup Once you have installed the FireStudio Tube drivers and connected your FireStudio Tube, you can use the Cubase LE 4 Music Creation and Production System software included with your FireStudio Tube to begin recording, mixing and producing your music. - Page 15 OPERATION ASIO 3) Select “PreSonus FireStudio” from the Driver dropdown list. A pop-up window will appear asking if you’d like to switch the ASIO driver. Click ‘Switch’ to begin using the FireStudio Tube Driver. For more help on using Cubase LE 4, please read...
-
Page 16: Cubase Le - Creating A Project
MIDI tracks to record and edit on. Follow these simple steps to begin recording your first audio in Cubase LE: 1) Plug an XLR microphone or instrument into FireStudio Tube channel one and turn on 48V phantom power if needed for your microphone (typically only for condenser microphones.) - Page 17 Connections menu for more details on your specific input and output routing. 9) Turn up the gain control knob on the front panel of the FireStudio Tube for channel 1 while speaking/singing into the microphone or playing your instrument. You should see the input meter in Cubase LE react to the input.
-
Page 18: Sample Hookup Diagram
2.2 SAMPLE HOOK UP DIAGRAM With the FireStudio Tube, you can simultaneously record and play back up to 16 channels. Since it is loaded with ten preamplifiers, you can plug in ten microphones to the FireStudio Tube along with six line level devices to record a full band. -
Page 19: Microphones
OPERATION 2.3 MICROPHONES The FireStudio Tube works with many microphones including dynamic, ribbon and condenser microphones. 2.3.1 Condenser Condenser microphones tend to generate a high-quality audio signal and are one of the most popular mic choices for today’s studio recording applications. Because of their design technology, condenser microphones require a power source, which can be provided from a small battery, external power supply or from phantom power. -
Page 20: A Brief Tutorial On Dynamics Processing
PreSonus President and Chief Technical Officer, Jim Odom. It is included to help you get the most out of your FireStudio Tube. This tutorial will take you through the basics of dynamics processing as well as explain the various types of dynamics processors, including a hard limiter. -
Page 21: Types Of Dynamics Processing
Care must be taken not to ‘over compress’ a signal. Too much compression destroys the acoustic dynamic response of a performance. (‘Over compression’, however, is used by some engineers as an effect, and with killer results!) 19 | PreSonus 2008... - Page 22 How fast the gate closes is determined by the release. How much the gate attenuates the unwanted signal while closed is determined by the range. 20 | PreSonus 2008...
-
Page 23: The Vocabulary Of Dynamics Processors
• Gain Makeup. When compressing a signal, gain reduction usually results in an overall reduction of level. The gain control allows you to restore the loss in level due to compression. (Like readjusting the volume.) 21 | PreSonus 2008... - Page 24 Range. The gate range is the amount of gain reduction that the gate closes down to. Therefore, if the range is set at 0dB, there will be no change in the signal as it crosses the threshold. If the range is set to -60dB, the signal will be gated (reduced) by 60 dB, etc. 22 | PreSonus 2008...
-
Page 25: Presonus Firecontrol Software
FireControl icon or by rig ght-clicking th e icon and sel ecting “Open PreSonus Fire eControl”. Right-c click the FireC Control icon a and select “Q uit” to comp letely exit the e FireControl... -
Page 26: Controls & Connections
CONTROLS & CONNECTIONS 3.1.2 FireControl Master Section The Master Section is always visible and gives you control over the FireStudio Tube’s outputs’ source and level as well as the Sample Rate and Buffer Size of the FireStudio drivers. Output Select Section Changes the Output Mixer displayed •... -
Page 27: Firecontrol Mixer
The Mixer section is only visible if the selected output pair’s Mixer Toggle is on. NOTE: The Mixer is common to all of the FireStudio Tube’s outputs, so if you add or remove a channel from the Mixer, every output with the Mixer Toggle on will be affected by the change. - Page 28 Changes the s source of the FireControl M Mixer channels Choosing “No o Input” will h hide the chann nel. “Inputs” are your hardwar e inputs (Mic/ /Inst/Line/SPD DIF). “PlayBack” are your softw ware DAW Pla ayBack outputs 26 | PreSonus 2008...
-
Page 29: Firecontrol Menus
Only the FireControl can change the Sample Rate. Enable WDM Audio. Unchecking this disables WDM audio in Windows. Disabling WDM Audio is useful when the FireStudio Tube is dedicated for DAW use only. Operation Mode. Changes how the FireStudio drivers output buffer size is set. -
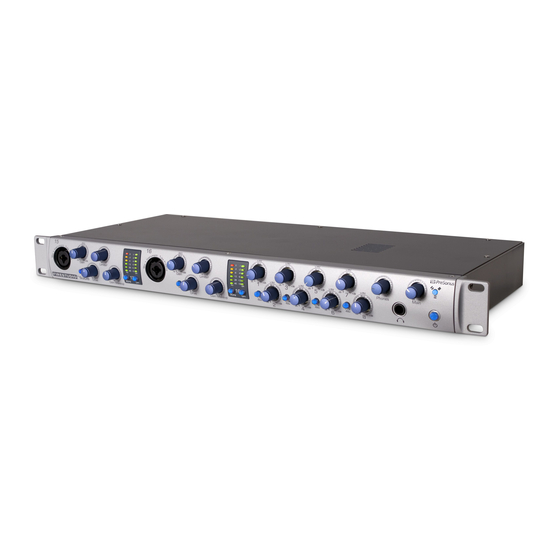
Page 30: Front Panel Layout
Both SuperChannels have a Mic/Line connector using the Neutrik Combo connector. This revolutionary style connector lets you use either ¼” phone or XLR connectors in the same female input. Channels 15 and 16 of FireStudio Tube are ¼” instrument and microphone XLR inputs. - Page 31 Plugging a line level source into the instrument inputs on the front of the FireStudio Tube not only risks damage to these inputs but also results in a very loud and often distorted audio signal.
- Page 32 Main. The Main knob controls the output level for the Main Outputs on the back of the FireStudio Tube with a range of -80db to +10dB. • ¼” Headphone Jack. This is where you connect your headphones to the FireStudio Tube. • Power Button. This button turns your FireStudio Tube on and off.
-
Page 33: Back Panel Layout
As these inputs are for line level signal only, there is no trim control for them on the FireStudio Tube. If you need to raise or lower the volume, the adjustment should be made from your line level device. - Page 34 FireWire Ports. There are two standard 6-pin FireWire ports on the back of the FireStudio Tube. Either (and only one) should be used to connect your FireStudio Tube to a vacant FireWire port on your computer. If your computer has a 4-pin connector (commonly found on laptops), you will need a 4 to 6- pin connector to connect your FireStudio Tube to your computer.
-
Page 35: Technical Information
2) Make sure the microphone does not require phantom power. If it does, press the 48V button. 3) Make sure nothing is plugged into the line input on the rear of the FireStudio Tube. The line inputs on channels 1 and 2 take precedence over the combo input on the front of the unit for channels 1 and 2. If a cable is plugged into the line input on channel, then the mic/instrument input on channel one will be inactive until the cable is removed from line input 1. -
Page 36: Specifications
(5) Green (±0.5 dBu) ..................-12 dBu (6) Green (±0.5 dBu) ..................-18 dBu Phantom Power (±2 VDC) ........................ +48 VDC Instrument Input 15 & 16 “SuperChannels” Type ................... Neutrik Combination ¼” TRS Female Unbalanced Input Impedance ............................ 1 MΩ 34 | PreSonus 2008... - Page 37 Input Voltage Range ........................ 90 to 240 VAC Power Requirements (Continuous) ......................24W As a commitment to constant improvement, PreSonus Audio Electronics, Inc. reserves the right to change any specification stated herein at any time without notification. 35 | PreSonus 2008...
Need help?
Do you have a question about the FIRESTUDIO TUBE and is the answer not in the manual?
Questions and answers