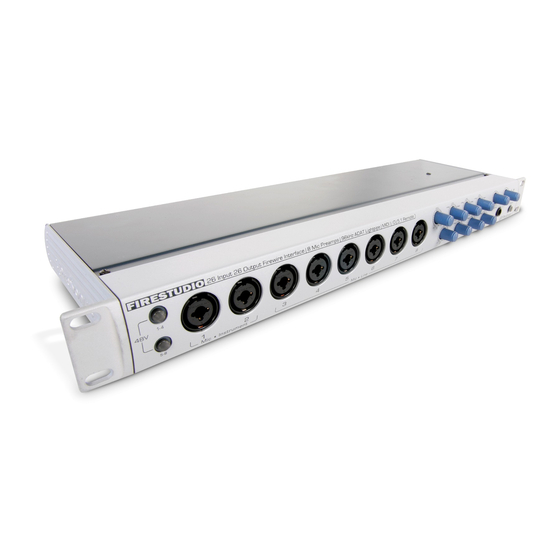
PRESONUS FIRESTUDIO User Manual
26x26 firewire recording system w/ optical i/o
Hide thumbs
Also See for FIRESTUDIO:
- Owner's manual (68 pages) ,
- User manual (51 pages) ,
- Quick setup (1 page)

Subscribe to Our Youtube Channel
Related Manuals for PRESONUS FIRESTUDIO


Summary of Contents for PRESONUS FIRESTUDIO
- Page 1 FIRESTUDIO 26x26 FireWire Recording System w/ Optical I/O User’s Manual v.1.1 PreSonus Audio Electronics, © 2008 All Rights Reserved.
- Page 2 PreSonus reserves the right to update any unit returned for repair. PreSonus reserves the right to change or improve the design of the product at any time without prior notice. This warranty does not cover claims for damage due to abuse, neglect, alteration or attempted repair by unauthorized personnel, and is limited to failures arising during normal use that are due to defects in material or workmanship in the product.
-
Page 3: Table Of Contents
Table of Contents 1.) General Overview 1.1 Introduction ......................4 1.2 Package Contents ....................4 1.3 System Requirements ..................5 2.) Installation and Hardware Overview 2.1 Installation (PC and Mac) ...................6 2.2 Hardware Controls and Analog/Digital Connections ..........8 2.3 Standalone Operation ..................10 2.3 Quick Start Up with Cubase LE ................10 3.) Control Console 3.1 Control Console - Overview ..................15 3.2 Control Console - Mixer ..................16... -
Page 4: Introduction
We encourage you to contact customer support at 1-225-216-7887 with any questions or comments you may have regarding your PreSonus FIRESTUDIO. PreSonus Audio Electronics is committed to constant product improvement, and we value your suggestions highly. We believe the best way to achieve our goal of constant product... -
Page 5: System Requirements
1 Overview 1.3 System Requirements Below are the minimum computer system requirements for your FIRESTUDIO. Windows - OS: Microsoft Windows XP SP1 - Computer: Windows compatible computer with FireWire port. - CPU/Clock: Pentium, Celeron with 1.6Ghz or higher - Memory(RAM): 512 MB (1 GB recommended) Macintosh - OS: MacOS X 10.4.x or later... -
Page 6: Installation And Hardware Overview
8.) Click on Finish when the next window opens. You should now see a blue sync light on your FIRESTUDIO, indicating that it is sync with your computer and ready to use. Note: The FIRESTUDIO Control Console application can be found in the Start... - Page 7 6.) Click on Install, and when the software installation is complete, click Close. 7.) You can now connect your FIRESTUDIO via the supplied FireWire cable and turn it on. You should see a blue sync light on the FIRESTUDIO, indicating it is in sync with the computer, and ready to use.
-
Page 8: Hardware Controls And Analog/Digital Connections
Headphone Output: This headphone output can be assigned any output from your DAW or the FIRESTUDIO Control Console, and has its own level control. e.) Main Level: This level control will attenuate the Main Output on the back of the FIRESTUDIO. - Page 9 BNC Wordclock I/O: These standard BNC connectors allow you to connect any device with BNC input or output to your FIRESTUDIO. This is to allow the FIRESTUDIO to function as a master clock, or to slave to any other device.
-
Page 10: Standalone Operation
2 Installation and Hardware Overview 2.3 Standalone Operation Your FIRESTUDIO is capable of operating in Stand Alone mode without a computer. The settings you make in the FIRESTUDIO Control Console application will be stored in flash memory on the FIRESTUDIO itself, allowing you to disconnect the FireWire connection from your computer and use any routing setup or hardware setting already made. - Page 11 2 Installation and Hardware Overview 2. Select VST Multitrack in the left column and then on the right side choose “ASIO PreSonus” for the ASIO Driver. 3. Click Switch. 4. Now click the File menu and New Project. Choose “empty” template and a...
- Page 12 Mic/Line, ADAT 1, ADAT 2 and SPDIF. The Aux ADAT channels are only available when your FireStudio is set to 44.1k or 48k Sampling Rates. 6. Depending on the version of Cubase LE you have, there may be a limitation for the maximum number of record-enabled input channels you can have active at any time.
- Page 13 If you do, remember to turn off the Input Monitor button to playback what you have recorded to your audio track. You can also monitor your input signals with the FireStudio Control Console by creating a mix or routing inputs directly to outputs.
- Page 14 2 Installation and Hardware Overview 10. Expand an audio track to reveal additional buttons. One is a Stereo/Mono switch. Do this if you are recording a stereo source like the left and right outputs of a keyboard or other stereo sound device. 11.
-
Page 15: Control Console
• Send mixes out of several types of outputs simultaneously (TRS, ADAT, SPDIF) to different devices for monitoring comparisons. Note that ADAT channels 9-16 are not currently available in the FireStudio in the Control Console. You cannot mix our route these channels with the FireStudio... -
Page 16: Control Console - Mixer
3 Control Console 3.2 Control Console - Mixer The Control Console’s Mixer is a flexible and easy-to-use solution for creating multiple mixes from your inputs and DAW playback streams, all with zero-latency. It is capable of creating 9 independent stereo mixes of all of your inputs and playback streams, and routing each mix to any stereo analog or digital output (except ADAT channels 9-16 when in 44.1k and 48k sample rates). - Page 17 3 Control Console • The bottom row of tracks is colored in grey and includes all playback streams from your DAW software. • There are tabs at the very bottom of the window to access each mix 1-9. These tabs can be renamed to anything you like by double-clicking on the name, typing a new name, and hitting ‘enter’...
- Page 18 3 Control Console Note: All settings for the Mixer are stored in flash memory on the FIRESTUDIO, and will be recalled each time the FIRESTUDIO is connected to the computer and the Control Console is opened. Track Elements 1. Pan Bar: This allows you to pan the track left or right, and shows numeric readout of the current setting.
-
Page 19: Control Console - Matrix Router
3 Control Console 3.3 Matrix Router The Matrix Router allows you to create custom routing of inputs and playback streams to any output for complete control of your studio. From simply routing a mix to a stereo output, to AD/DA conversion on the fly, to every input and playback stream having its own output, the Matrix Router can do it all quickly and easily. - Page 20 • Below the Router Preset buttons are the source selectors for the Main Output, and the headphone outputs (1 headphone output is on the front panel of the FIRESTUDIO, the other 2 are on the optional MSR remote). These outputs mirror the hardware outputs, so you can monitor what is outputting from any given output pair (ie.
- Page 21 • The matrix is arranged in columns (vertical) and rows (horizontal). The columns correspond to each hardware output on the FIRESTUDIO, and the rows correspond to individual input or playback sources. You can select one cell per column, and up to every cell per row.
- Page 22 Then, click on any preset to restore its settings. NOTE: All settings for the Matrix Router are stored in flash memory on the FIRESTUDIO, and will be recalled each time the FIRESTUDIO is connected to the computer and the Control Console is opened.
- Page 23 3 Control Console CONTROL CONSOLE EXAMPLE SETTINGS Example 1: All inputs routed to same channel outputs with optional Mix to SPDIF L/R output. Example 2: All analog inputs to same channel analog and digital outputs with optional Mix to SPDIF L/R output. Example 3: Analog input to digital outputs and digital inputs to analog outputs (AD/DA).
- Page 24 Example 4: All software (DAW) playback channels to all same channel Hardware outputs. Example 5: 8 channels of software (DAW) playback channels to 8 channels of analog and ADAT outputs. Example 6: 9 separate Mixes assigned to all FireStudio Hardware Outputs.
-
Page 25: Hardware Settings
The buffer size will affect the latency (roundtrip time it takes audio data to go into the computer and get processed back out to the FIRESTUDIO). The lower the buffer size is set, the lower the latency will be, and the higher the stress will be on your computer. -
Page 26: Applications And Example Settings
You can easily connect additional microphone preamplifiers to expand your inputs and outputs on your FireStudio via ADAT/SMUX optical light pipe connectors. • The DigiMax FS can connect to the FireStudio using 88.2k and 96k sample rates via dual SMUX optical ADAT using 2 standard optical cables audio. -
Page 27: Live Recording
Main Mixing Console or P.A. system. 1. Connect all audio sources to the FireStudio +/- DigiMax FS to be used as a preamp and computer recording. - Page 28 4 Applications and Example Settings Live Recording Scenario 1 Diagram...
- Page 29 2. Connect the direct or AUX outputs of the Mixing Console to the Line Level input channels of the FireStudio +/- DigiMax FS. 3. Anything you do with the FireStudio Control Console in setup scenario 2 will be entirely for your own monitoring purposes while you are recording.
- Page 30 4 Applications and Example Settings Live Recording Scenario 2 Diagram...
-
Page 31: Studio Recording
Doing so is specific to your recording software (DAW). • The FireStudio Control Console allows you to create up to 9 separate Mixes for each of your artists in your studio. You can control what each of your artists hear and what they want or need to hear. -
Page 32: Technical
Please note that many technical issues can arise when converting a standard computer into a DAW (Digital Audio Workstation). PreSonus will only provide support for issues that directly relate to your FIRESTUDIO. It may be necessary to contact the manufacturer of the computer, operating system and/or software to obtain additional technical support. -
Page 33: Technical Specifications
5 Technical 5.2 Technical Specifications Microphone Preamp (XLR Balanced) All measurements Microphone Input to Direct Output Frequency Response (+0,- 0.5dB) 20Hz to 50KHz Frequency Response (+0/-3.0 dB) 20Hz to 150KHz Input Impedance 1600 Ohm THD+N (unwtd, 1KHz @ +4dBu Output, Unity Gain) <...
Need help?
Do you have a question about the FIRESTUDIO and is the answer not in the manual?
Questions and answers