
Related Manuals for Walker Clarity 500


Summary of Contents for Walker Clarity 500
- Page 1 Clarity 500 ® Corded Telephone with Caller ID Featuring Model Clarity 500 Owners Manual Clarity Power Technology ® ™ Ñ Ç...
-
Page 2: Table Of Contents
Table Of Contents Safety Instructions ...................3 Getting Started....................6 Clarity 500 Features..................6 Connecting Your Telephone................8 Choosing a Location ..................8 Desktop Installation ..................9 Wall Mounting Instructions................10 Setup Menu ....................11 Operating Your Telephone ................13 Features ......................13 Caller ID and PhoneBook Operations ..............17 Operations of Caller ID ..................18 Voice Mail and Message Waiting Operations ..........21... -
Page 3: Safety Instructions
Important Safety Instructions When using your telephone equip- injury may result if the telephone ment, basic safety precautions should falls. always be followed to reduce the risk 18. Do not cover the slots and of fire, electric shock and injury to openings on this telephone. -
Page 4: Important Safety Instructions
Important Safety Instructions electrical shock. Never spill extensive work by a qualified liquid of any kind on the technician to restore the telephone. telephone to normal operation. 13. To reduce the risk of electrical E. If the telephone has been shock, do not take this phone dropped or the case has been apart. - Page 5 Important Safety Instructions The following items are included as authorized Canadian maintenance part of the CS-03 Requirements. The facility designated by the supplier. Any standard connecting arrangement code repairs or alterations made by the user for the equipment is CA11A. This to this equipment, or equipment mal- product meets the applicable Industry functions, may give the telecommunica-...
-
Page 6: Getting Started
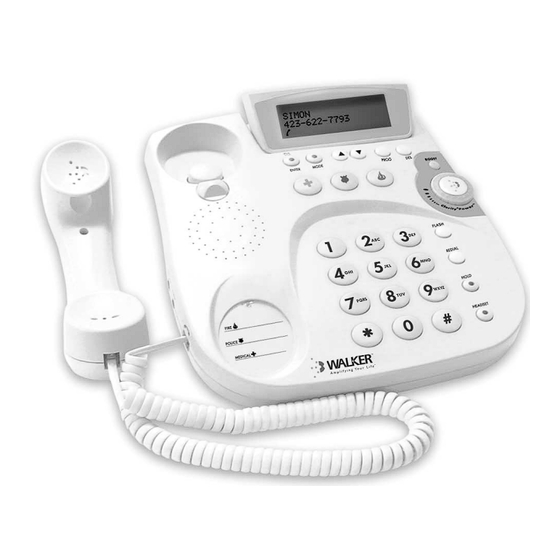
Getting Started CLARITY 500 FEATURES AND CONTROLS CLARITY POWER BOOST TONE/PULSE ON/OFF ON/OFF 1. Hook Switch 2. Handset Knob 3. LCD Screen 4. ENTER/Message Waiting Indicator 5. MODE/New Call Indicator 6. UP/DOWN Scroll 7. PROGRAM (PROG) 8. DELETE (DEL) 9. Emergency Speed Dial 10. - Page 7 Getting Started Bottom of Unit 1. Telephone Line Cord Jack 2. Power In Jack 3. Mounting Bracket 4. Quick Reference Guide 9 VDC 300 mA LINE...
-
Page 8: Connecting Your Telephone
Getting Started CHOOSING A LOCATION CONNECTING YOUR TELEPHONE • The Clarity 500 requires a modu- 1. Carefully remove your telephone lar phone jack and a standard 120 from its box. If there is any visible Volt outlet for operation. damage, do not attempt to oper- •... -
Page 9: Desktop Installation
Getting Started DESK MOUNT INSTRUCTIONS 4. Plug one end of the modular coiled handset cord into the hand Follow these instructions to place the set. Plug the other end into the phone on a desk or table top using the jack marked HANDSET located on supplied bracket. -
Page 10: Wall Mounting Instructions
Getting Started 4. Pull up on handset knob and turn so WALL MOUNTING INSTRUCTIONS that the knob extends out. This will hold the handset in the place when The phone unit may be mounted on a the phone is wall mounted. standard wall plate. -
Page 11: Setup Menu
Getting Started SETUP MENU Setup Menu Operations The Clarity 500 automatically enters Pressing the ENTER or MODE button the Setup mode when powered up or will exit the Setup Menu at any point during this process. Press the UP or... - Page 12 Getting Started VISUAL RINGER (toggle) Setup Menu, a dash will flash to enter a digit. Enter the one (1) digit access Allows you to turn the Visual Ringer (flashing keypad) ON or OFF. Press code. Press the DOWN ARROW to the DOWN ARROW to save informa- save information and advance to the tion and advance to next menu.
-
Page 13: Operating Your Telephone
Clarity Power BOOST Button set receive, both in Boost or non-Boost modes. The volume dial provides up to The Clarity 500 has a BOOST button 15 dB of volume before the CLARITY that controls the loudness of the receiv- POWER button is activated. Once the er. - Page 14 OFF. If the ringer is turned “OFF” and the Visual Ringer is enabled, Ringer Controls the dial pad will flash and the LCD The Clarity 500 features an extra loud will flash “RINGER OFF”. ringer that can be tailored to the users needs.
- Page 15 PhoneBook and, with ed, the HOLD INDICATOR will illumi- Caller ID service displays information nate. When Clarity 500 is on hold, the about the caller before you answer. handset can be placed in the cradle, and another extension on the phone Backlit Keypad line can be used to pick up the call.
- Page 16 The last number dialed will be phone. When the neckloop is plugged stored in the Clarity 500 for you until in, the handset is disabled. you dial another phone number or dis- connect the telephone from the wall Hearing Aid Compatibility jack.
-
Page 17: Caller Id And Phonebook Operations
Operating Your Telephone CALLER ID (CID) AND MODE button for 3 seconds will PHONEBOOK OPERATIONS: cause the phone to enter the Setup Menu. There are six buttons that control the Scroll Up/Down: ( CID and PhoneBook operations. Allows for a scrolling review either up or down through the CID lists or Enter/Dial: (ENTER BUTTON) the PhoneBook. -
Page 18: Operations Of Caller Id
Operating Your Telephone OPERATIONS OF CALLER ID Option Function: This is a software function that lets This telephone automatically displays the user to add a pre-programmed an incoming caller’s name and tele- area code and/or long distance phone along with the date and time of code onto a seven (7) or ten (10) the call. - Page 19 PRIVATE will appear if the name and/or number of the caller are The REPEAT call icon will light if the blocked. Clarity 500 receives more than one call from the same number. UNKOWN will appear if the name The FORWARD icon will light when the...
- Page 20 Operating Your Telephone Placing a Call from the List while reviewing a CID number the phone will show the local area Press MODE once and use the arrow codes available to add. If UP or DOWN to locate the desired programmed, the long distance record.
-
Page 21: Voice Mail And Message Waiting Operations
WAITING OPERATIONS cursor next to it - you can edit it at this point. Press DEL to backspace The Clarity 500 will work in conjunction until you get to where you want to with Voice Mail or Message Waiting start changes, and then complete the services. -
Page 22: Call Waiting
Operating Your Telephone PHONEBOOK OPERATIONS To Retrieve Messages: Pick up the handset and press the You can save up to 40 entries in the flashing ENTER key. PhoneBook. The number will automatically dial the previously entered Voice Mail access Viewing PhoneBook number. - Page 23 Operating Your Telephone Using the Dial Pad to Enter Letters Emergency Memory Keys When prompted to enter a name select The phone provides 3 one-touch mem- the appropriate letter using the digits ory keys for emergency dialing. These on the dial pad. Pressing the key once buttons are situated above the numeric will cause the first letter to appear;...
-
Page 24: Making And Receiving Calls
Operating Your Telephone To dial from the Emergency Memory will flash on the screen. button follow one of the two 2. Press DELETE again to confirm the sequences: action. After deleting all entries, 1. Press desired memory key, the NO CALLS will appear on the number will be displayed on the display screen. - Page 25 Operating Your Telephone Hands Free Dialing The telephone can be dialed without lifting the handset or pressing the HEADSET button (if a headset is plugged in). This feature allows you to dial the phone number and correct mistakes with the DEL button rather than hanging up and redialing.
-
Page 26: Trouble Shooting
Trouble Shooting No Dial Tone/Phone Will Not Operate •You may not be speaking directly into the transmitter. Always speak directly •Check all phone cords and connec- into the mouth piece in your normal tions. Make sure they are plugged in tone of voice. - Page 27 Compatibility •Extra devices attached to the tel- •The Clarity 500 is compatible with phone, such as cord detanglers, CID Digital PBX Systems. If a standard, units and answering machines may single line phone works on the cause static.
- Page 28 Federal Communications Commissions Requirements FCC Part 68 Information the format US:AAAEQ##TXXXX. The digits represented by ## are the REN without a decimal point. This equipment complies with Part 68 of FCC Rules and the requirements If this telephone equipment, the Clarity adopted by the ACTA.
- Page 29 If your home has specially wired alarm equipment connected to the telephone line, please ensure that the installation Your Clarity 500 has been tested and found to comply with the limits of a of this equipment does not disable alarm equipment by consulting your Class B digital device, pursuant to Part 15 of FCC rules.
- Page 30 THE PARTY RESPONSIBLE FOR by one of the following measures: PRODUCT COMPLIANCE Walker, A Division of Plantronics, Inc. 1. Where it can be done safely, 4289 Bonny Oaks Drive, Suite 106 reorient the receiving televi- Chattanooga, TN 37406 sion or radio antenna.
-
Page 31: Warranty And Service
U.S. and Walker or an authorized service cen- Canada. For warranty information in ter, is not a defect covered by this war- other countries, please contact your ranty. - Page 32 6. Reason for return and descrip- In the United States Walker Service Center tion of the problem. 4289 Bonny Oaks Drive, Suite 106 Chattanooga, Tennessee 37406 Please retain your sales receipt.
Need help?
Do you have a question about the Clarity 500 and is the answer not in the manual?
Questions and answers