Hitachi RAS-18SX8 Instruction Manual
Split type indoor unit/outdoor unit
Hide thumbs
Also See for RAS-18SX8:
- Service manual (254 pages) ,
- Service manual (254 pages) ,
- Installation manual (2 pages)
Table of Contents
Advertisement
SPLIT TYPE AIR CONDITIONER
INDOOR UNIT/OUTDOOR UNIT
OUTDOOR UNIT
RAC-18SX8
RAC-25SX8
RAC-35SX8
Instruction manual
To obtain the best performance and ensure years of
trouble free use, please read this instruction manual
completely.
Bedienungsanleitung
Bitte lesen Sie diese Bedienungsanleitung aufmerksam
durch, um durch richtige Bedienung jahrelangen und
störungsfreien Betrieb zu gewährleisten.
Mode d'emploi
Des performances optimales et un fonctionnement à
long terme seront assurés en appliquant les présentes
instructions après avoir entièrement lu ce mode
d'emploi.
MODEL
RAS-18SX8 / RAC-18SX8
RAS-25SX8 / RAC-25SX8
RAS-35SX8 / RAC-35SX8
Page 1~51
Seite 53~103
Page 105~155
INDOOR UNIT
RAS-18SX8
RAS-25SX8
RAS-35SX8
Manuale di istruzioni
Per garantire la migliore prestazione e la più lunga
durataleggere attentamente e al completo le seguanti
istruzioni.
Manual de instrucciones
Para obtener el mejor funcionamiento y asegurar años
de uso libre de problemas, lea cuidadosamente este
manual de instrucciones.
Manual de instruções
A fi m de obter um bom funcionamento e de garantir uma
utilização sem falhas durante muitos anos, é favor ler
este manual de instruções completamente.
O‰ËÁ›Â˜ ¯Ú‹Ûˆ˜
°È¿ Ó· Â›Ó·È ÂÁÁ˘Ë̤ÓË Ë Î·Ï‡ÙÂÚË ‰˘Ó·Ù‹ ÏÂÈÙÔ˘ÚÁ›·
Î·È Ë ¯ˆÚ›˜ ‚Ï¿‚˜ Ì·ÎÚÔÚfiıÂÛÌË ¯Ú‹ÛË Ù˘
Û˘Û΢‹˜, ‰È·‚¿ÛÙ fiϘ ÙȘ οوıÈ Ô‰ËÁ›Â˜.
Pag. 157~207
Página 209~259
Página 261~311
ÛÂÏ›‰· 313~364
Advertisement
Table of Contents

Related Manuals for Hitachi RAS-18SX8


Summary of Contents for Hitachi RAS-18SX8
-
Page 1: Outdoor Unit
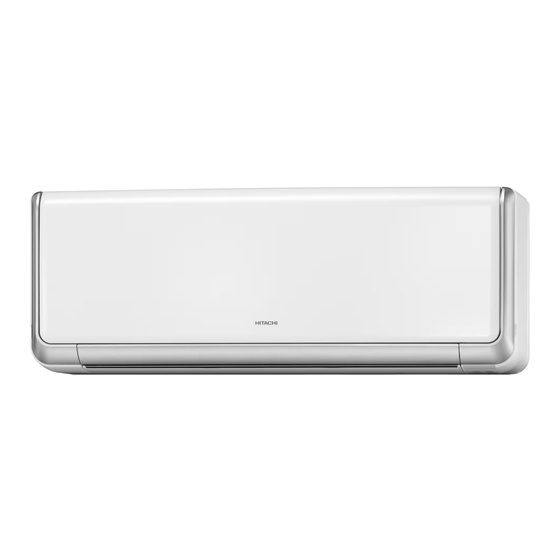
SPLIT TYPE AIR CONDITIONER INDOOR UNIT/OUTDOOR UNIT MODEL RAS-18SX8 / RAC-18SX8 RAS-25SX8 / RAC-25SX8 RAS-35SX8 / RAC-35SX8 OUTDOOR UNIT INDOOR UNIT RAS-18SX8 RAS-25SX8 RAS-35SX8 RAC-18SX8 RAC-25SX8 RAC-35SX8 Instruction manual Manuale di istruzioni Page 1~51 Pag. 157~207 To obtain the best performance and ensure years of Per garantire la migliore prestazione e la più... -
Page 2: Safety Precaution
SAFETY PRECAUTION • Please read the “Safety Precaution” carefully before operating the unit to ensure correct usage of the unit. • Pay special attention to signs of “ Warning” and “ Caution”. The “Warning” section contains matters which, if not observed strictly, may cause death or serious injury. The “Caution” section contains matters which may result in serious consequences if not observed properly. - Page 3 PRECAUTIONS DURING OPERATION • The product shall be operated under the manufacturer specifi cation and not for any other intended use. PROHIBITION • Do not attempt to operate the unit with wet hands, this could cause fatal accident. DON’T WET •...
-
Page 4: Names And Functions Of Each Part
NAMES AND FUNCTIONS OF EACH PART (Understanding The Operating Mechanism, page 43) INDOOR UNIT Micro Mesh Stainless Filter (internal) Catches dusts in the air. (Page 37) Titanium Heat Exchanger (internal) Movable Panel This panel opens during the operation and closes when operation stop. - Page 5 INDOOR UNIT CONTROL PANEL / CLEANING UNIT Open the front panel to operate. (How to open the front panel, page 8) Anti-mold Wasabi Cassette Electric Dust Collector Releases anti-mold elements Electrode with wasabi fragrance to Releases negative ions to catch prevent mold from growing pollens and dust in the air.
-
Page 6: Remote Controller
NAMES AND FUNCTIONS OF EACH PART (continued) REMOTE CONTROLLER Transmits the operation and timer settings to the indoor unit. The LCD shown in the illustration below is the display immediately after the reset switch is pressed. Usually not all the data are displayed. On the LCD shown below, the functions not available for this room air conditioner are also displayed. -
Page 7: Horizontal Airflow
(When the door is open) BUTTONS TO Operation Selector START OPERATIONS Press this button to select the operation mode. (Page 13, 14) MANUAL CLEAN Button Starts filter cleaning operation VERTICAL AIRFLOW Button while the air conditioner Use this button to swing the operation is stopped. - Page 8 INSTALLING ANTI-MOLD WASABI CASSETTE Open the front panel. • Hold and lift up the front panel. • Do not hold the movable panel • Push up the panel support until it when opening and closing the clicks to lock it. front panel.
- Page 9 Close the front panel. • Hold and lift up the front panel. • Push down the panel support until it clicks. • Push the both ends of the front panel first and • Pull it downward. then its center until it clicks. CAUTION •...
- Page 10 FILTER CLEANING UNIT OPERATION CHECK Make sure the power plug is firmly plugged into the power outlet. WARNING CAUTION • Be sure to use the power outlet exclusively for Do not operate with air conditioner wet hands Use of other power outlet may cause heat, which It may cause electric Wet Hand could result in fire.
-
Page 11: Prepare The Remote Controller
PREPARE THE REMOTE CONTROLLER Install the batteries. Open the cover and press the RESET button with a sharp tip item. • Use two AAA-size alkaline batteries. Push mark RESET and pull. • 18:88 lights up on the current time display and “AM” and “PM”... - Page 12 PREPARE THE REMOTE CONTROLLER (continued) Ampere setting (Standard/Save) can be selected. If you experience frequent circuit breaker tripping, set ampere to “Save” to avoid this problem. (Ampere is set to “Standard” at the time of purchase.) Press the (FUNCTION SELECTOR) button until (SAVE) blinks.
-
Page 13: Automatic Operation
AUTOMATIC OPERATION Based on the room temperature and outside temperature, the unit determines the most suitable operation mode (heating, dehumidifying or cooling) and a comfortable temperature. (Set the current time on the remote controller before starting operation.) Press the (OPERATION SELECTOR) button to set the operation mode to Auto. - Page 14 MANUAL OPERATION (HEATING, DEHUMIDIFYING, COOLING, DRY COOL) Select the operation mode. Set the fan speed. One of them lights up. One of them lights up. P r e s s t h e ( O P E R AT I O N Press the (FAN SPEED) button.
-
Page 15: Heating Operation
HEATING OPERATION Press the (HEAT) button to start heating operation. Press the (HEAT) button. • Adjust the room temperature and fan speed to your preference. Temperature range between 16°C~32°C can be set. (Page 14) Press the (START/STOP) button. STOP • A short beep sounds and heating operation stops. DEHUMIDIFYING OPERATION 3 types of dehumidifying operations can be performed by pressing the (DEHUMIDIFY) button. - Page 16 DEHUMIDIFYING OPERATION (continued) Operation mode In this situation Operating mechanism • In most of the cases, the room temperature at the time the button is pressed becomes the preset temperature. (When room temperature is below 12°C, set 13°C. When it is 13°C~22°C, set +2°C.
-
Page 17: Cooling Operation
COOLING OPERATION Press the (COOL) button to start cooling operation. Press the (COOL) button. • Adjust the room temperature and fan speed to your preference. (Page 14) Temperature range between 16°C~32°C can be set. Press the (START/STOP) button. STOP • A short beep sounds and cooling operation stops. DRY COOL OPERATION When you operates cooling operation with the dry function, press the (DRY COOL) button, the air conditioner... - Page 18 IONIZED MIST OPERATION • Stainless Plasma Air Purifying and Ionized Mist operations have an effect of reducing unpleasant smell of the wall and curtain in the room and controlling bacteria suspended in the air. • If the Ionized Mist operation is set while the air conditioner is in operation, the Ionized Mist operation will operate together with another operation.
- Page 19 INTERNAL CLEANING OPERATION The internal cleaning operation is automatically performed after cooling, dehumidifying or Dry Cool operation to control mold growth by configuring the (INTERNAL CLEAN) operation. (There is no mold removing function and disinfecting/sterilizing effect.) Press the (FUNCTION SELECTOR) button until (INTERNAL CLEAN) blinks.
-
Page 20: Sleep Operation
SLEEP OPERATION By configuring (SLEEP) operation while the sleep timer is set for Auto, heating, dehumidifying, cooling and Dry Cool modes, the air conditioner supports your comfortable sleeping environment. Press the (FUNCTION SELECTOR) button until (SLEEP) blinks. While (SLEEP) is blinking, point the remote controller towards the unit and press the (ON/OFF) button. - Page 21 AIR QUALITY MONITOR OPERATION The Air Quality sensor detects pollution of the air in the room and the air conditioner automatically performs the Stainless Plasma Air Purifying operation in the event the air is not clean. Press the (FUNCTION SELECTOR) button until (AIR QUALITY MONITOR) blinks.
- Page 22 MOLD MONITOR OPERATION The air conditioner detects indoor temperature and humidity. Once the temperature and humidity reaches to a level conductive to mold growth, the dehumidifying and Stainless Plasma Air Purifying operations automatically start. Press the (FUNCTION SELECTOR) button until (MOLD MONITOR) blinks.
- Page 23 PREFERENCE (COOLER/WARMER) OPERATION • When the (PREFERENCE) button is pressed during the Dry Cool operation activated by (DRY COOL) button, the air conditioner performs the Preference (Cooler/Warmer) operation. • When “Cooler” is set in the Preference operation, the airflow will be extended so that the air can reach even further.
-
Page 24: Powerful Operation
POWERFUL OPERATION • By pressing the (PREFERENCE) button during Auto, Heating, Dehumidifying, Cooling or Stainless Plasma Air Purifying operation, the air conditioner performs the “Powerful” operation. • The airflow will be extended so that the air can reach even further during powerful operation. (Extended Airflow) Press the (PREFERENCE) button during operation. -
Page 25: Adjusting The Vertical Airflow Direction
ADJUSTING THE VERTICAL AIRFLOW DIRECTION Please operate with the remote controller. (Moving by hands may cause malfunction.) Set automatically Dehumidifying/ Cooling Heating • Air conditioner automatically set to the suitable operation Dry Cool operation operation angle for each operation (Horizontal air deflector only. -
Page 26: Adjusting The Horizontal Airflow Direction
ADJUSTING THE HORIZONTAL AIRFLOW DIRECTION Adjust the horizontal airflow direction • The angle of horizontal airflow direction is set to the front at the time of purchase. • Every time the button is pressed, the mode of the horizontal air deflector changes as below. - Page 27 Horizontal airflow swing • While the horizontal air deflector is swinging, the display on the remote controller changes as below. The horizontal air deflector repeats swinging. (Display on the remote controller and the actual movement of the horizontal air deflector are not synchronized with each other.) •...
- Page 28 TIMER PRESET OPERATION 3 types of timers, (OFF TIMER) (ON TIMER), (OFF TIMER) and (ON TIMER) are available. Only one of these timers can be preset at a time. Operation mode, temperature, humidity and fan speed, etc. must be set before setting the timer. How to preset the timer (OFF TIMER) preset..................
- Page 29 How to cancel the preset timer Press the (CANCEL) button. (All the preset timer will erase) (OFF TIMER) / (ON TIMER), which are to be set using the clock function, • cannot be set during the operation set by the (IONIZED MIST) / (AIR PURIFYING) buttons or during the Quick Laundry or Condensation Control...
- Page 30 FURTHER CONVENIENT TIMER FUNCTION Dehumidifying (Condensation Control) operation and (ON TIMER) for heating operation can be set at the same time. Dehumidifying (Condensation Control) operation controls the condensation which may occur in the morning while (ON TIMER) for heating operation warms up the room by the time you wake up. Combination of (ON TIMER) and (DEHUMIDIFY) button...
-
Page 31: Sleep Timer Operation
SLEEP TIMER OPERATION Configuring the fan speed appropriate for sleeping and stop the operation at specified time. n The display below indicates sleep timer which is set for 2 hours at 11:38 p.m. and the turn off time will be 1:38 p.m. - Page 32 FILTER CLEANING OPERATION (Filter Cleaning Unit Operation Check, page 10) CAUTION Do not put your fingers or a stick etc into the top part of the indoor unit during filter cleaning operation. It may result in injury or malfunction. Automatic filter cleaning operation •...
- Page 33 (Troubleshooting, page 45) • The cleaning unit makes one cycle of back and forth movement to sweep the dust on the micro mesh stainless filter and the dust catcher puts the collected dust into the dust box. • One cycle of filter cleaning operation will take approximately 7 minutes. (CLEAN) indicator lit during filter cleaning operation.
- Page 34 FILTER CLEANING OPERATION (continued) Manual filter cleaning operation • Use the remote controller to run filter cleaning operation when the air conditioner operation is stop. • If the air conditioner is not in use for a long period, it is recommended to manually run filter cleaning before it is initialized.
- Page 35 IN THE EVENT THE NOISE OF FILTER CLEANING OPERATION IS VERY OBVIOUS, YOU CAN EXECUTE FILTER CLEANING AT THE TIME YOU PREFER BY COMBINING “MANUAL FILTER CLEANING OPERATION” AND THE “SETTING FOR PROHIBITING FILTER CLEANING OPERATION” Set to prohibit the filter cleaning operation. Return to the filter cleaning operation setting.
-
Page 36: Maintenance
MAINTENANCE WARNING • Before cleaning, stop unit operation with the remote controller and turn off the circuit breaker. CAUTION • Do not expose the unit to water as it may cause an electric shock. • For cleaning inside the air conditioner, consult your sales agent. •... - Page 37 Maintenance of micro mesh stainless filter No daily maintenance is required. However, filter should be cleaned if the dirt is noticeable due to the environment in which the air Upper micro mesh stainless filter conditioner is used. Stop the operation with the remote controller and unplug the power plug (or turn off the circuit breaker).
- Page 38 MAINTENANCE (continued) Maintenance of micro mesh stainless filter (continued) Remove the upper micro mesh stainless filter. Upper micro mesh stainless filter Hold this part to pull out Filter lock • Pull down the filter lock (1 place each on left •...
- Page 39 Maintenance of dust catcher No daily maintenance is required. However, filter should be cleaned if the dirt is noticeable due to the environment in which the air conditioner is used. Some type of dust may not go in the dust box but be accumulated on the rear surface of the dust catcher. It is recommended to check the dust amount on the dust catcher approximately once every 2 years and clean the dust catcher if it is dirty.
- Page 40 MAINTENANCE (continued) Maintenance of filter cleaning wiper and wiper cover No daily maintenance is required. However, filter should be cleaned if the dirt is noticeable due to the environment in which the air conditioner is used. Remove the front panel. (Refer to page 37 on removing the front panel) When the air-conditioner stops, point the remote controller to the indoor unit and press the...
- Page 41 Wash with water. • Please wash with water. • If the dirt is stubborn, use a mild detergent and wash with warm water below 40°C. • Dry completely in the shade. Attach the filter cleaning wiper and close the wiper cover. •...
- Page 42 MAINTENANCE (continued) Maintenance of electric dust collector electrodes and ionized mist generator Stop the operation with the remote controller and unplug the power plug (or turn off the circuit breaker). Open the front panel. (Refer to page 8 on opening the front panel) Horizontal air Slowly open the vertical air deflectors using deflectors...
- Page 43 UNDERSTANDING THE OPERATING MECHANISM NAMES AND FUNCTIONS OF EACH PART (Page 4) Movable panel CAUTION • Movable panel opens automatically when the air conditioner starts operation for efficient heat exchange of the air. It will Do not use a stove or any close automatically once the air-conditioner stops.
- Page 44 THE IDEAL WAYS OF OPERATION 1. An average room temperature setting is probably the best for you as well as being economical. • Excessive cooling or heating is not recommended for health reasons. High electricity bills may also result. • Close the curtains or blinds to prevent heat from flowing into or escaping the room as well as to make more effective use of electricity.
-
Page 45: Troubleshooting
TROUBLESHOOTING FILTER CLEANING OPERATION Filter cleaning is performed after the power is turned on (after • This is for filter cleaning operation check. the plug-in or after the circuit breaker is switched on after power failure) • If the front panel is not closed properly, filter cleaning operation will not start for safety reason. - Page 46 TROUBLESHOOTING (continued) FILTER CLEANING OPERATION (continued) • Filter may not be cleaned evenly depending on the environment in which the air conditioner is used. To solve this problem, clean the micro mesh stainless filter. Micro mesh • Depending on dust amount, the micro mesh stainless filter may not be completely stainless filter is cleaned by manual filter cleaning operation performed at your preferred time while still dirty...
- Page 47 PLEASE CHECK THE FOLLOWING BEFORE SERVICE • Do the batteries need replacement? Signal cannot be received (Remote controller • Is the polarity of the inserted batteries correct? display is dim or blank) • Is the power plug inserted properly? Operation does •...
- Page 48 TROUBLESHOOTING (continued) THE FOLLOWING CASES DOES NOT INDICATE MALFUNCTION Except for anti-mold wasabi cassette, no smell-generating material or Odors substance is used for air conditioner. This is due to the smell or odor, such as cigarette, cosmetics and food, present in the room that is sucked in and then blown out by the air conditioner.
-
Page 49: Temporary Operation
CONTACT YOUR SALES AGENT IMMEDIATELY ON FOLLOWING CASES In the event that any trouble or phenomenon listed below still occurs even after a check has been conducted according to the troubleshooting procedures on page 45~49 , disconnect the power plug from the outlet (or switch off the circuit breaker) and immediately contact your sales agent. -
Page 50: Regular Inspection
REGULAR INSPECTION PLEASE CHECK THE FOLLOWING POINTS EVERY EITHER HALF YEARLY OR YEARLY. CONTACT YOUR SALES AGENT SHOULD YOU NEED ANY HELP. Is the plug plugged into the socket firmly? If the earth line is disconnected or faulty, unit failure or WARNING electric shock hazard may result. - Page 51 OPERATION DISPLAY CHART Display Operation mode • Automatic operation (page 13) • Manual operation (page 14) • Heating operation (page 15) (DEHUMIDIFY) (Auto Dehumidifying, Condensation Control) operation • (page 15) • Cooling operation (page 17) • Dry Cool operation (page 17) (DEHUMIDIFY) (Quick Laundry) operation (page 15) •...
- Page 52 MEMO – 52 –...
Need help?
Do you have a question about the RAS-18SX8 and is the answer not in the manual?
Questions and answers