
Related Manuals for Harman Kardon AVR 255


Summary of Contents for Harman Kardon AVR 255
- Page 1 AVR 255/AVR 355 Audio/VideoReceiver OWNER’S MANUAL Resolution Audio Effects Surround Modes Back/Exit Source List Info Video Modes Composit...
-
Page 2: Table Of Contents
Video Equipment Connections Screen Saver AVR 355 Remote Function List System and Power Connections Default Surround Mode AVR 255 Remote Function List Main Room Remote Control Extension Tuner Operation Troubleshooting Guide Zone 2 IR Link To Select the Built-In Tuner... -
Page 3: Introduction
The AVR takes the “video” part of its name seri- Coax and optical digital outputs are available for With the purchase of a Harman Kardon AVR 255/ ously. Along with three HDMI inputs and three direct connection to digital recorders. A video... -
Page 4: Safety Information
I Harman Kardon’s exclusive Logic 7 ® exposed to liquid dripping or splashing. On the Do Not Use Extension Cords... -
Page 5: Unpacking
Harman Kardon's control, including the nature ble. Please respect the environment and discard of the finish, cleaning materials used, and those materials at a local recycling center. -
Page 6: Front Panel Controls
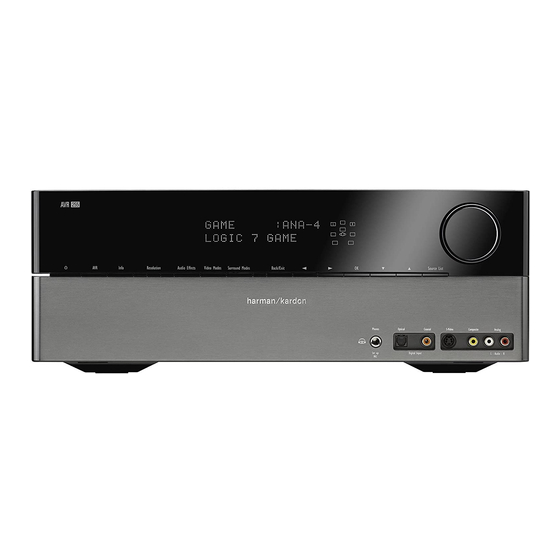
Front Panel Controls Info Resolution Audio Effects Video Modes Surround Modes Back/Exit Source List Composite Analog Volume Control Info Button Surround Mode Button System Power Control Resolution Button Back/Exit Button & Power Indicator Audio Effects Button Digital Optical Front Input Headphone Jack Video Modes Button Digital Coax Front Input... - Page 7 Front Panel Controls 1 Volume Control: Turn this knob clockwise ) Audio Effects: Press this button to directly % Surround Modes: Press this button to to increase the volume, counterclockwise to access the Audio Effects submenu, which allows select a surround sound (e.g.,multichannel) decrease the volume.
-
Page 8: Rear Panel Connections
Video 1 Component Video Inputs HDMI Inputs Analog 4 Audio OUT Download Mode Button Zone 2 OUT (AVR 355 only) Bridge II Connector (Stereo Jack IN AVR 255) Coaxial Digital Inputs A-BUS Connector (AVR 355 only) 8-Channel Direct Inputs Surround Back/Multiroom Speaker Outputs... - Page 9 RGB signals too, in the same way as tion, the Blue terminal is the positive, or "+" On the AVR 255, this input is an extra Audio described for the Y/Pr/Pb signals, then connected terminal that should be connected to the red (+) Input named Stereo Jack IN, where you can con- to the jacks with the corresponding color.
- Page 10 Analog 4 Audio Inputs: Connect these tion or through the use of optional, external IR AVR 255/AVR 355, you may use either a com- jacks to the PLAY/OUT audio jacks on a TV or “blasters”. If you are in doubt as to which of the posite or S-video connection, but not both.
-
Page 11: Main Remote Control Functions
Main Remote Control Functions AVR Power On AVR Power Off Source Selectors (The Bridge only on AVR 355) Audio Effects Button Transport Controls Menu Navigation LKM N Sleep Button Background Light Button (AVR 355 only) Main Tuning Buttons Last Button Numeric Keys Video Mode Button Menu Button... - Page 12 ç Source Selectors: Press these buttons to HDTV set-top box or a TV, press this button to Please refer to the section concerning operation select an input source for the AVR 355/AVR 255. return to the previous television channel. of the remote control.
-
Page 13: Zone 2 Remote Control Functions
Menu or to exit a Menu. D Source Selectors: Press these buttons to select an input source for the AVR 355/AVR 255. E Menu Navigation Buttons: Use these buttons to move Up, Down, Left or Right when using the Menu system of the AVR 355/AVR 255. - Page 14 Zone 2 Remote Control Functions I Sleep Button: Press this button to place the unit in the Sleep mode. Each press of the button selects the amount of time that will remain before the unit will automatically go into the Standby mode, as shown in the Main Infor - mation Display #, in the following order: Holding the button pressed for some seconds will directly turn off the Sleep time selection.
-
Page 15: Installation And Connections
HDMI standard. the speakers that may damage them. source and the AVR 255/AVR 355 to either the HDMI Output Connections Ó or Optical * Digital... -
Page 16: Analog And Digital Input Connections
AVR 355 only. The AVR 255 features a STEREO verify polarity. If you do not know the polarity of the Optical and Coaxial Digital Inputs... -
Page 17: Video Equipment Connections
Installation and Connections 9. Connections to a subwoofer are normally If a multichannel analog audio connection is 5. If another component video device is avail- made via a line level audio connection from the required for certain lossless formats (e.g. DVD- able, connect it to the Video 2 or Video 3 Subwoofer Output to the line-level input... -
Page 18: System And Power Connections
AVR 355 (AVR 255 has a fixed power cord) or a site and ask whether the unit to be controlled direct replacement of identical capacity be used. -
Page 19: Speaker Selection
It is appropriate to configure the AVR 255/ listening position. Ideally, the front-channel AVR 355 for either 5.1- or 7.1-channel opera- speakers should be placed so that their tweeters tion, but not for 6.1 channels. -
Page 20: System Configuration
As with any video simplicity of configuring the system using the now ready to power up the AVR 255/AVR 355 to display, constant display of a static image such as EzSet/EQ process, which takes the guesswork begin these final adjustments. -
Page 21: Audio And Video Input Selection
System Configuration Audio and Video Input Selection Audio Format From Source: This line is informational only. When a digital program is Please see Table A1 in the appendix for the fac- playing, its format will be identified here. When tory default input assignments for each source. analog audio programs are playing, this line You may assign any available input to any indicates NO AUDIO INPUT, referring to digital... -
Page 22: Resolution From Source
Step 3: Plug the EzSet/EQ microphone into the Adjust Lip Sync: Use this adjustment to AVR 255/AVR 355’s Headphone Jack 4, resynchronize the audio and video signals from a Use the Back/Exit Button to return to the Setup making certain that the mini-plug to 1/4"... - Page 23 30 to learn how to operate of ear protection, we strongly recommend that AVR 255/AVR 355. For those situations where Figure 6 you leave the room and ask someone else to run...
-
Page 24: Manual Setup
The subwoofer’s frequency response will include Step Three – Manual Setup Menu only the very lowest frequencies, since the sub- The AVR 355/AVR 255 is flexibly designed to be Now you are ready to program these adjust- woofer is designed to play only bass materials. - Page 25 Zone 2. The AVR 355/ mation contained in the left and right pro- AVR 255 is among the few receivers in its class For each main speaker, select one of the seven gram channels to the front speakers, and...
- Page 26 Step Two – Measure the goal of the AVR 355/AVR 255’s channel out- using an SPL meter. Less effective would be to put adjustment process is to examine the output Speaker Distances and noted in Table A3 in the measure the output by ear.
- Page 27 –10dB and +10dB. All channels default to 0dB. If you would like to set your levels using the AVR 355/AVR 255’s internal test tone, adjust the TEST TONE line as follows. Test Tone: This line determines whether the test tone is active.
-
Page 28: Operation
Logic 7 Cinema Exclusive to Harman Kardon for AV receivers, Logic 7 is an advanced mode that extracts the maximum surround information from Logic 7 Music either surround-encoded programs or conventional stereo material. Depending on the number of speakers in use and the Logic 7 Enhance selection made in the SURROUND SELECT menu, the “5.1”... - Page 29 Operation Surround Mode Chart MODE FEATURES DTS Neo:6 Cinema These two modes are available when any analog source is playing to create a six-channel DTS Neo:6 Music surround presentation from conventional Matrix-encoded and traditional Stereo sources. Select the Cinema version of Neo:6 when a program with any type of analog Matrix surround encoding is present.
-
Page 30: Basic Operation
Apple iPod device is inserted in an optional improve performance. Access these settings from To turn the unit off at the end of a listening Harman Kardon that is connected to D, as described in the Audio Effects Button... -
Page 31: Video Troubleshooting Tips
One of the most important features of the audio inputs. the AVR’s HDMI Inputs. No other connections AVR 255/AVR 355 is its ability to reproduce a NOTE: The 6-/8-Channel Inputs pass the incom- are necessary. full multichannel surround sound field from digi-... -
Page 32: Digital Audio Signals
The 6.1-channel signals – Dolby Digital EX and enter the Surround Modes Menu. Then use the AVR 355/AVR 255 is able to play the new audio DTS-ES Matrix and Discrete – each include a flag KL Buttons 5F to select the signal type... -
Page 33: Surround Modes
AVR 355/ signal (32kHz, 44.1kHz, 48kHz or 96kHz), will • Movie: Logic 7 Movie, DTS Neo 6:Cinema, AVR 255’s surround modes are available, there appear in the front-panel display. Dolby Pro Logic II Movie, Dolby Pro Logic IIx... -
Page 34: Tape Recording
AVR 355/ use the remote or front-panel buttons to control menu (described in the Advanced Functions sec- AVR 255 by doing so. the iPod. See the Function List Table on page 46 tion). You may restore the Now Playing screen to for a listing of the remote control buttons that NOTE: To access 6.1- and 7.1-channel modes,... -
Page 35: Multiroom Operation
Additional information will also be made avail- prehensive range of options for powering the room, which allows the surround back left/right able through the Harman Kardon Web Site at speakers in the second zone. amplifier channels to be used to power speakers www.harmankardon.com. - Page 36 IR Input jack on compatible on, slide the Zone Select Switch Z on the Harman Kardon audio components such as CD, Remote Control to Zone 2 (or, alternatively, use DVD or cassette players, the transport functions...
-
Page 37: Video Adjustments
• Custom: Allows manual adjustment of the materials from a lower resolution to a higher picture settings. The Brightness, Contrast, one (the AVR 255/AVR 355 upscales to a Color and Sharpness settings will appear on maximum of 1080p), the processor is adding screen as sliders with values ranging from 0 to pixels to the original image. -
Page 38: Audio Effects
100. Select a setting in which people and the temperature bar setting. The default setting a movie. The AVR 255/AVR 355 allows you to objects on screen look natural. There is no is 0dB, at the center of the temperature bar. -
Page 39: Resolution To Display
Advanced Features Resolution to Display: Select the highest Default Surround Mode resolution that your TV can show. If you use In normal operation, when the AVR senses a HDMI, resolution selection happens Dolby Digital or DTS digital audio data stream, it automatically. -
Page 40: Tuner Operation
In the Slide-In Menu opened by 1. Press the Source List Button on the front The AVR 255/AVR 355 is equipped with RDS pressing the Menu Button M with the unit in panel and use the K/L Buttons to scroll... -
Page 41: Rds Functions
Tuner Operation • The Program Type ( ) as shown in the list Program Search (PTY) You may search for a specific Program Type below. An important feature of RDS is its capability of (PTY) by following these steps: encoding broadcasts with Program Type (PTY) 1. -
Page 42: Programming The Remote
Programming the Remote The AVR 255/AVR 355 is equipped with a pow- 5. If the Power function of the unit to be pro- 3. To find out if the code for your unit is pre-pro- erful remote control that will control not only the... -
Page 43: Learning Codes From A Remote
Programming the Remote 2. Press the Learn Button t for 3 seconds. The Example: One blink, followed by a one-second Important Note: The following buttons are pause, followed by six blinks, followed by a one- learnable: DEVICE POWER ON/OFF, 0~9, LAST, Input Button pressed before lights up. -
Page 44: Activity Programming (Macros)
Programming the Remote Activity Programming (Macros) Example: Activity Button Programming. Programmed Device Functions To program Activity Button “2” to send the fol- Activities enable you to easily repeat frequently Once the AVR’s remote has been programmed for lowing commands: turn on the Audio receiver, used combinations of commands with the press the codes of other devices, press the appropriate turn on the TV, turn on a DVD, and turn on a... -
Page 45: Notes On Using The Avr Remote With Other Devices
Resetting the Remote Memory Remote With Other Devices. As you add components to your home-theater The AVR 355/AVR 255 remote’s punch-through • Manufacturers may use different code sets for system, occasionally you may wish to totally feature allows you to select one component for the same product category. - Page 46 Function List AVR 355 The Bridge Radio No. BUTTON Name AVR Zone 2 The Bridge 01 AVR Power On AVR Power On AVR Power On AVR Power On AVR Power On AVR Power On AVR Power On 02 AVR Power Off AVR Power Off AVR Power Off AVR Power Off...
-
Page 47: Function List
Function List AVR 355 Server CBL/SAT Game DVDR DMC250 DMC1000 CBL/SAT UR Function HDTV AVR Power On AVR Power On AVR Power On AVR Power On AVR Power On AVR Power On AVR Power On AVR Power On AVR Power On AVR Power On AVR Power Off AVR Power Off... - Page 48 Function List AVR 255 Radio No. BUTTON Name AVR Zone 2 DVDR 01 AVR Power On AVR Power On AVR Power On AVR Power On AVR Power On AVR Power On AVR Power On 02 AVR Power Off AVR Power Off...
- Page 49 Function List AVR 255 Server CBL/SAT Game DMC250 DMC1000 CBL/SAT UR Function HDTV AVR Power On AVR Power On AVR Power On AVR Power On AVR Power On AVR Power On AVR Power On AVR Power On AVR Power On...
-
Page 50: Troubleshooting Guide
Protect Warning in Display due to possible short and speaker ends • Amplifier is in protection mode • Contact your local Harman Kardon service depot due to internal problems No sound from surround or • Incorrect surround mode • Select a mode other than Stereo center speakers •... -
Page 51: Technical Specifications
Continuous Average Power (FTC) Usable Sensitivity IHF 1.3 µV/13.2dBf Signal-to-Noise Ratio Mono/Stereo: 70/68dB (DIN) AVR 255: 65 Watts per channel, 20Hz - 20 kHz Distortion Mono/Stereo: 0.2/0.3% AVR 355: 70 Watts per channel, 20Hz - 20 kHz Stereo Separation 40dB @ 1kHz @ <... -
Page 52: Appendix - Settings Worksheet
HDMI 1 Analog 2 HDMI 1 Blu-ray Disc, HD-DVD player Media Server, including Media Server Optical 2 Analog 5 S-Video 1 Harman Kardon DMC 1000 Optical 1 Analog 3 Component 1 Video game console Game HDMI 3 Analog 4 HDMI 3... - Page 53 APPENDIX – SETTINGS WORKSHEET Table A3 – Speaker/Channel Setting Defaults Audio Input All Digital and 2-Channel Analog Audio Inputs 6-/8-Channel Analog Audio Inputs* Your Settings Left/Right Speakers Center Speaker Left/Right Surround Speakers Left/Right Surround Back Speakers Subwoofer Left/Right Speakers Crossover 100Hz Large Center Speaker Crossover...
- Page 54 APPENDIX – SETTINGS WORKSHEET Table A5 – Source Settings Cable/Sat Media Server Radio Game Surround Modes Video Input Audio Input Resolution to Display Adjust Lip Sync Change Name Audio Auto Polling Zone 2 Audio Table A6 – Audio Effects Settings Default Cable/Sat Media Server...
- Page 55 APPENDIX – SETTINGS WORKSHEET Table A8 – Surround Modes Default Cable/Sat Media Server Radio Game Auto Select Logic 7 Movie or native digital format Virtual Surround Dolby Virtual Speaker Reference Stereo 7 CH Stereo Movie Logic 7 Movie Music Logic 7 Music Game Logic 7 Game Center Width...
- Page 56 APPENDIX – SETTINGS WORKSHEET Table A11 – Zone 2 Settings Source Input Device Type (if changed) Your Settings Status Source Cable/Sat Volume -25dB Surround Back Amps Main Room 56 APPENDIX...
- Page 57 APPENDIX – SETTINGS WORKSHEET APPENDIX 57...
- Page 58 250 Crossways Park Drive, Woodbury, New York 11797 www.harmankardon.com Harman Consumer Group, Inc.: 2, route de Tours, 72500 Château-du-Loir, France © 2008 Harman Kardon, Incorporated Part No.: CQX1A1318Z...
Need help?
Do you have a question about the AVR 255 and is the answer not in the manual?
Questions and answers