Table of Contents
Advertisement
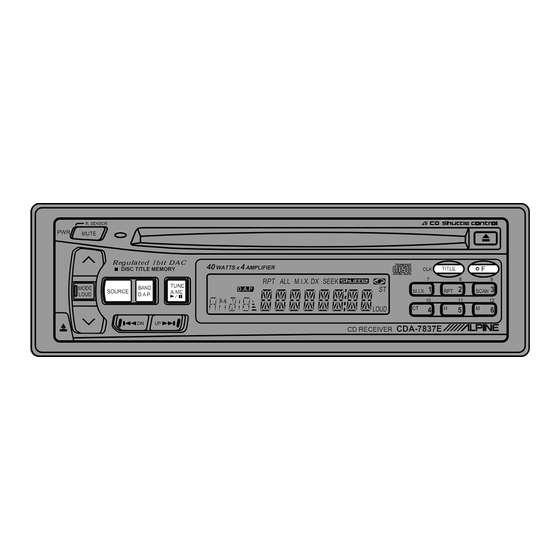
CDA-7837E/
CDM-7834E
FM/AM Compact Disc Receiver
• OWNER'S MANUAL (page 2- page 47)
Please read this manual to maximize your
enjoyment of the outstanding performance and
feature capabilities of the equipment, then retain
the manual for future reference.
R. SENSOR
PWR
MUTE
Re g ulated 1bit DAC
40
WATTS x
DISC TITLE MEMORY
TUNE
MODE
BAND
D.A.P.
SOURCE
A.ME
LOUD
D.A.P.
DN
UP
4
AMPLIFIER
TITLE
CLK
7
RPT ALL M.I.X. DX SEEK
1
ST
M.I.X.
RPT
10
LOUD
CT
H
4
CDA-7837E
CD RECEIVER
(CDA-7837E)
R
F
8
9
2
3
SCAN
11
12
M
5
6
Advertisement
Table of Contents

Related Manuals for Alpine CDM-7837E


Summary of Contents for Alpine CDM-7837E
- Page 1 CDA-7837E/ CDM-7834E FM/AM Compact Disc Receiver • OWNER'S MANUAL (page 2- page 47) Please read this manual to maximize your enjoyment of the outstanding performance and feature capabilities of the equipment, then retain the manual for future reference. R. SENSOR MUTE Re g ulated 1bit DAC WATTS x...
- Page 2 English Precautions This label is intended to alert the user to the presence of important Warning operating instructions. Failure to heed the instructions will result severe injury or death. DO NOT DISASSEMBLE OR ALTER. Doing so may lead to accident, fire or electric shock.
-
Page 3: Table Of Contents
English Contents Page 4 ................... Precautions 7 ............... Detachable Front Panel Basic Operation 8 ..............Initial System Start-up 8 ............. Turning Power On and Off 9 ..Non Fading Pre-Out (N.F.P.) On and Off (CDA-7837E only) 10 ......Adjusting Volume/Bass/Treble/Balance/Fader 11 ............. -
Page 4: Precautions
Do not attempt to insert a disc into the unit when the unit power is off. Maintenance If you have problems, do not attempt to repair the unit yourself. Return it to your Alpine dealer or the nearest Alpine Service Station for servicing. Irregular Shaped Discs Make sure the discs you use in this unit do not have any irregularities. - Page 5 English Precautions Inserting Discs Your player accepts only one disc at a time for playback. Do not attempt to load more than one disc. Make sure the label side is facing up when you insert the disc. Your player will automatically eject any disc that is inserted incorrectly.
-
Page 6: Installation Location
English Precautions Installation Location Make sure the CDA-7837E/CDM-7834E player/ receiver will not be exposed to: • Direct sun and heat • High humidity • Excessive dust • Excessive vibrations Handling the Detachable Front Panel • Do not expose to rain or water. •... -
Page 7: Detachable Front Panel
Detachable Front English English Panel Detaching the Front Panel Press and hold the PWR (Power) button for at MUTE least 3 seconds to turn off the power. Press the release button until the front panel pops out. Grasp the left side of the front panel and pull it out. -
Page 8: Basic Operation
English Basic Operation Initial System Start-Up Immediately after installing or applying power to the unit, it should be initialized. To do this, first, remove the detachable front panel. Behind the front panel, to the right of the connector, is a small hole. -
Page 9: Non Fading Pre-Out (N.f.p.) On And Off (Cda-7837E Only)
English Basic Operation Non Fading Pre-Out (N.F.P.) On and Off (CDA-7837E only) Press and hold the eject (h) button for at least 3 seconds. With each press, N.F.P. is toggled On or Off. N.F.P. ON: In this position, the Front Pre- Output will not be affected by the NFP OFF fader. -
Page 10: Adjusting Volume/Bass/Treble/Balance/Fader
English Basic Operation Adjusting Volume/Bass/ Treble/Balance/Fader Press and release the MODE/LOUD button repeatedly to choose the desired mode. BASS MODE Note: If the > or < button is not pressed in 5 LOUD seconds after selecting the BASS, TREBLE, BALANCE and FADER TREB modes, the unit automatically returns to the VOL mode. -
Page 11: Turning Loudness On/Off
English Basic Operation Turning Loudness On/Off Loudness introduces a special low- and high- frequency emphasis at low listening levels to compensate for the ear's decreased sensitivity to bass and treble sound. Press and hold the MODE/LOUD button for at least 2 seconds to activate or deactivate the MODE loudness mode. -
Page 12: Displaying Time
English Basic Operation Displaying Time Press the CLK (CLOCK) button to display the 12:00 time. The unit displays the time. Notes: • Selecting any tuner or CD function while in TITLE DISP the Clock mode will interrupt the time display momentarily. -
Page 13: Setting Time
English Basic Operation Setting Time Press and hold the CLK (CLOCK) button for at 12:30 least 3 seconds. The time indication will begin to blink. TITLE DISP (CDA-7837E)(CDM-7834E) Press the CT button while the time indication is 12:00 blinking to set seconds to "0". Example: To adjust to 9:35 9:00 Press the "H"... -
Page 14: Radio Operation
English Radio Operation Manual Tuning Press the SOURCE button to select the radio mode. SOURCE Press the BAND button repeatedly until the desired radio band is displayed. BAND D.A.P. Press the TUNE button repeatedly until "DX SEEK" and "SEEK" disappears from the SEEK TUNE display. -
Page 15: Automatic Seek Tuning
Réception English Radio Operation radio Automatic Seek Tuning Press the SOURCE button to select the radio mode. SOURCE Press the BAND button repeatedly until the desired radio band is displayed. BAND D.A.P. Press the TUNE button to illuminate the DX and SEEK indicators in the display. -
Page 16: Manual Storing Of Station Presets
English Radio Operation Manual Storing of Station Presets 1. Tune in the desired radio station you wish to store in the preset memory. 2. Press and hold any one of the preset buttons (1 through 6) for at least 2 seconds. The frequency display will begin to blink. -
Page 17: Automatic Memory Of Station Presets
Réception English Radio Operation radio Automatic Memory of Station Presets Press the SOURCE button to select the radio mode. SOURCE Press the BAND button repeatedly until the desired radio band is displayed. BAND D.A.P. Press and hold the A. ME button for at least 2 seconds. -
Page 18: Storing Into Direct Access Preset (D.a.p.) Band
English Radio Operation Storing into Direct Access Preset (D.A.P.) Band A combination of radio stations in any band (up to 6 stations) can be manually preset into the D.A.P. band. Press and hold the D.A.P. button for at least 2 D.A.P. -
Page 19: Tuning To Preset Stations
Réception English Radio Operation radio Tuning to Preset Stations Press the SOURCE button to select the radio mode. SOURCE Press the BAND button repeatedly until the desired band is displayed. BAND D.A.P. To select the D.A.P. band, press and hold the D.A.P. -
Page 20: Displaying Station Titles (Cda-7837E Only)
TITLE button. (Refer to page 21 to title stations.) 90.1 NORMAL Mode 12:58 CLOCK PRIORITY Mode ALPINE STATION TITLE Mode Title entered Title not entered Characters and Symbols < > Blank... -
Page 21: Titling Stations (Cda-7837E Only)
Press and hold the TITLE button for at least 3 seconds. The first digit will blink. TITLE or/ou/o BLPINE Press the DN (c ) or UP (f ) button to select the desired letter/numeral/symbol available for naming ("A" for example). or/ou/o ALPINE... - Page 22 When that character begins to blink, you may choose the next letter or ALPINE symbol of your title. Repeat the steps 4 and 5 above to complete the titling. All 8 character positions should be filled.
-
Page 23: Cd Operation
English CD Operation Inserting/Ejecting Disc Insert a CD half way into the slot with the label side facing up. The player automatically draws the disc into the disc compartment. The DISC indicator appears to show that a disc is loaded. Note: Three-inch (8 cm) CD's can not be used. -
Page 24: Normal Play And Pause
English CD Operation Normal Play and Pause Insert a CD. The CD player begins playback from the first track on the disc. The display shows the track number. When the last track is played back the player returns to the first track and begins playback from that point. -
Page 25: Track/Elapsed Time Display Switching
English CD Operation Track/Elapsed Time Display Switching (CDM-7834E only) Press and hold the CLK/DISP button for at least T-03 2 second to alternate between the Track DISP Number and Elapsed Time displays. 8'35 Music Sensor (Skip) Momentarily press the DN (c ) button once to T-04 return to the beginning of the current track. -
Page 26: Fast Forward And Backward
English CD Operation Fast Forward and Back- ward Press and hold the DN (c ) or UP (f ) button to quickly move backward or forward until you reach the desired section of the track. Repeat Play Press the RPT (Repeat) button to play back repeatedly the track being played. -
Page 27: Random Play)
English CD Operation M.I.X. (Random Play) Press the M.I.X. button in the play or pause M.I.X. mode. The M.I.X. indicator will illuminate and the tracks on the disc will be played back in a random sequence. After all the tracks on the disc have been played back once, the player M.I.X. -
Page 28: Scanning Programs
English CD Operation Scanning Programs Press the SCAN button to activate the Scan mode. The first 10 seconds of each track will be SCAN played back in succession. SCAN SCAN To stop the Scan, press the SCAN button to T03 SCAN deactivate the Scan mode. -
Page 29: To Display Cd Titles (Cda-7837E Only)
CD Title with each press of the TITLE button (see example below). (Refer to page 30 to title the disc.) NORMAL Mode 11'03 CLOCK PRIORITY Mode 12:58 CD TITLE Mode ALPINE Title entered Title not entered Characters and Symbols < > Blank... -
Page 30: Titling Disc (Cda-7837E Only)
English CD Operation Titling Disc (CDA-7837E only) Press the TITLE button to select the disc-titling TITLE mode. (Refer to page 29). Press and hold the TITLE button for at least 3 seconds. The first digit will blink. TITLE or/ou/o BLPINE Press the DN (c ) or UP (f ) button to select the desired letter/numeral/symbol available for naming. - Page 31 English CD Operation Titling Disc (Continued) Press the TITLE button to store the first character. The first character will stop blinking and the display will automatically advance to TITLE the next character. When that character begins to blink, you may choose the next letter or symbol of your title.
-
Page 32: Erasing Disc Title (Cda-7837E Only)
Press and hold the SOURCE button for at least 3 seconds to activate the title scanning mode. SOURCE ALPINE The title in the display will blink, for example "ALPINE". Press the DN (c ) or UP (f ) button repeatedly until the disc title you want to erase is dis- played. -
Page 33: Cd Shuttle Operation
English CD Shuttle Operation Controlling CD Shuttle (Optional) (CDA-7837E only) An optional 6-disc or 12-disc CD Shuttle may be connected to the CDA-7837E if it is Ai-NET compatible. With a CD Shuttle connected to the Ai-NET input of the CDA-7837E, the CD Shuttle will be controllable from CDA-7837E. -
Page 34: Searching Titled Discs (Title Search Menu) (Cda-7837E Only)
BAND D.A.P. The title in memory blinks in the display. ALPINE Press the DN (c ) or UP (f ) button to select the desired disc title. Press the BAND button to play the selected disc. -
Page 35: Controlling Cd Shuttle (Optional) (Cdm-7834E Only)
English CD Shuttle Operation Controlling CD Shuttle (Optional) (CDM-7834E only) The display example shows when playing Track 5 on Disc 3. TUNER Press the SOURCE button to activate the CD SOURCE Shuttle. The display shows the disc number and track number. CHANGER Press a Disc Select button corresponding to one of the discs loaded in the CD Shuttle... -
Page 36: Multi-Changer Selection (Cda-7837E Only)
English CD Shuttle Operation Multi-Changer Selection (CDA-7837E only) Alpine’s Ai-NET system will support up to 6 CD Shuttles. When operating two or more changers, the KCA-400C (Multi-Changer Switching device) must be used. If you use 1 Switching device, you can connect up to 4 CD RUE-4185 Shuttles. - Page 37 English CD Shuttle Operation RUE-4185 Multi-Changer Selection (Continued) BAND SOURCE A.PROC PROG Remote Control Press the BAND button on the Remote Controller until the desired changer indicator CHGR 1 appears on the display. BAND PROG CHGR 2 CHGR 6 To operate the selected changer, see "CD Operation"...
-
Page 38: Remote Control
English Remote Control (RUE-4185 supplied with CDA-7837E) Controls 1 Mute Button Press the button to lower the volume by 20 dB instantly. Press the button again to cancel. VOLUME MUTE 2 Power Switch Press the switch to turn the power on/off. Button 3 k k k k k Press the button to switch between the... - Page 39 English Remote Control (RUE-4185 supplied with CDA-7837E) Button Radio mode: SEEK (DN) Button CD/CD Shuttle mode: Press the button to go back to the beginning of the current track. VOLUME Button MUTE Radio mode: SEEK (UP) Button CD/CD Shuttle mode: Press the button to advance to the beginning of the next track.
-
Page 40: Battery Replacement
English Remote Control (RUE-4185 supplied with CDA-7837E) Battery Replacement Applicable battery: Use two "AAA" sized dry batteries or equivalent. Opening the battery cover Slide out the battery cover while firmly pressing outward. Replacing the battery Put the batteries in the case as illustrated. Closing the cover Push the cover as illustrated until a click is heard. -
Page 41: Disc Care
Using such accessories Transparent Sheet can cause the disc to be out of standard specifications and may create operational problems. We recommend not using these accessories on discs played in Alpine CD players. Disc Stabilizer... -
Page 42: In Case Of Difficulty
This guide will help you isolate the problem if the unit is at fault. Otherwise, make sure the rest of your system is properly connected or consult your authorized Alpine dealer. Initial Turn-on After Installation Symptom Cause and Solution No function or display. -
Page 43: Radio Mode
English In Case of Difficulty Radio Mode Symptom Cause and Solution Unable to receive stations. • No antenna or open connection in cable. – Make sure the antenna is properly connected; replace the antenna or cable if necessary. Unable to tune stations in the seek mode. •... - Page 44 English In Case of Difficulty CD Mode Cause and Solution Symptom CD insertion not possible. • There is a CD already in the transport. – Eject the CD in transport and remove it. • The CD is being improperly inserted. –...
- Page 45 - - - H temperature returns to within operation range. • Malfunction in the CD Shuttle. – Consult your Alpine dealer. Press the magazine eject button and pull out the magazine. Check the indication. Insert the magazine again. If the ERROR-01...
-
Page 46: Specifications
English Specifications FM TUNER SECTION Tuning Range ...................... 87.5 – 108.0 MHz Mono Usable Sensitivity ................9.3 dBf (0.8µV/75 ohms) 50 dB Quieting Sensitivity ..............13.5 dBf (1.3µV/75 ohms) Alternate Channel Selectivity ....................80 dB Signal-to-Noise Ratio ......................65 dB Stereo Separation ........................ - Page 47 English Specifications GENERAL Power Requirement ..............14.4V DC (11 – 16V (allowable)) Maximum Power Output (CDA-7837E) ................40W x 4 Maximum Power Output (CDM-7834E) ................35W x 4 Pre-Output Voltage ..................... 500 mV/10k ohms Note: The above spec is used for reference only.
Need help?
Do you have a question about the CDM-7837E and is the answer not in the manual?
Questions and answers