Table of Contents
Advertisement
Advertisement
Table of Contents

Related Manuals for Toshiba CAMILEO P10


Summary of Contents for Toshiba CAMILEO P10
- Page 1 User’s Manual CAMILEO P10...
- Page 2 Introduction Welcome and thank you for choosing a TOSHIBA product. For your convenience, your TOSHIBA product is furnished with two guides: a) a Quick Start Guide, and b) this comprehensive PDF User’s Manual on the included CD.
-
Page 3: Table Of Contents
Contents Section 1 Getting to Know Your Camcorder ........4 Overview................. 4 Check the Components ............4 Safety Instructions ..............5 System Requirements ............5 Front View and Side View ............. 6 Rear View ................6 Section 2 Getting Started ............... 7 Loading the Battery ............... - Page 4 Contents Section 4 Playback Mode..............19 Button Function ..............19 LCD Monitor Information ............ 20 Operations for Playback Mode .......... 21 Movie Playback ..............21 Movie Playback Mode Menu ..........22 Picture Playback ..............24 Picture Playback Mode Menu ..........25 Section 5 Setting Your Camcorder ............
- Page 5 Contents Section 12 Other Information .............. 41 TOSHIBA Support .............. 41 Operating Environment Conditions ......... 41 Regulatory Information ............. 41 Additional Information ............43...
-
Page 6: Section 1 Getting To Know Your Camcorder
Section 1 Getting to Know Your Camcorder Overview The camcorder with 5 Mega Pixel sensor can take H.264 movies. By way of using H.264 technology, more videos can be taken within certain amount of memory. High quality images with up to 8 mega-pixels can also be delivered smoothly. -
Page 7: Safety Instructions
Safety Instructions 1. Do not drop, puncture or disassemble the camcorder; otherwise the warranty will be voided. 2. Avoid all contact with water, and dry hands before using. 3. Do not expose the camcorder to high temperature or leave it in direct sunlight. Doing so may damage the camcorder. -
Page 8: Front View And Side View
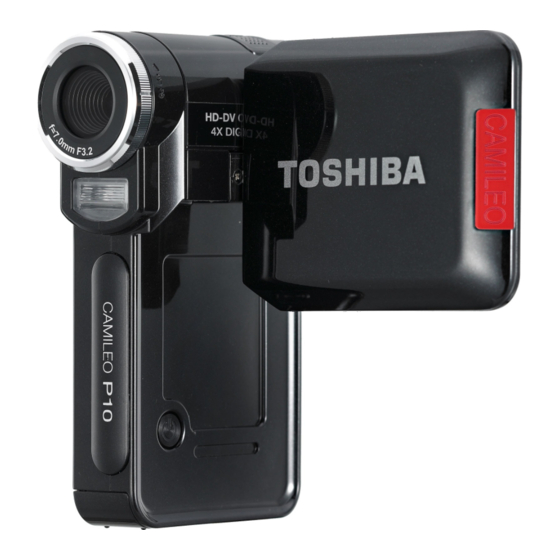
Front View and Side View Macro Switch Microphone Speaker LCD Panel Lens Flash Light Self-timer LED Power Button Battery/SD card Cover Rear View Menu/OK Button Direction Button Movie Shutter Button Picture Shutter Button Tele Button OK Button Wide Button RECORD/PLAY Button TV Port HDMI Port Mini USB 2.0 port... -
Page 9: Section 2 Getting Started
Section 2 Getting Started Loading the Battery Before using the camcorder, users must load Lithium-ion rechargeable battery. Insert the battery following to the correct polarity marks ( + or -). Close the battery cover firmly. Inserting and Removing an SD Card (Optional) The camcorder comes with internal memory which allows you to store pictures and movies. -
Page 10: Turning The Camcorder On And Getting Started
Turning the Camcorder On and Getting Started • To turn on the camcorder: Flip out the LCD panel; the camcorder will turn on automatically. Or press Power Button for one second to turn on it. • To take a movie, press the Movie Shutter Button ( •... -
Page 11: Section 3 Record Mode
Section 3 Record Mode Button Function Direction Button: Right Button: Flash Auto/Red Eye/OFF Left Button: Self timer ON/OFF Up Button: LCD Information ON/OFF Down Button: HD(1080p)/VGA mode switch Menu/OK Button: Menu ON Tele Button : Digital Zoom In Wide Button : Digital Zoom out OK Button: Menu ON/Validate the setting Power Button: Press down for one second to turn on or turn off the camcorder... -
Page 12: Lcd Monitor Information
LCD Monitor Information The indicator shown below may display on LCD when movies and pictures are recorded: Movie Resolution HD (1080p) (30fps) HD (720p) (30fps) WVGA (60fps) VGA (30fps) QVGA (30fps) Picture Resolution High Standard Number of images that can still be taken at current resolution Recording time of movie that can still be taken at current resolution Auto Flash Red Eye Reduction... -
Page 13: Movie Recording
Self-timer enabled Scene Skin Night Backlight Macro Position Focusing +1.0EV +0.6EV +0.3EV Exposure compensation value -0.3EV -0.6EV -1.0EV Manual White Balance SD Card inserted Battery: full power Battery: medium power (10) Battery: low power Battery: power empty Zoom meter: (11) 1080p:2X digital zoom Other video resolution:4X digital zoom (12) -
Page 14: Picture Recording
Video Quality HD (1080p) (30fps) HD (720p) (30fps) WVGA (60fps) VGA (30fps) QVGA (30fps) Picture Recording • Press the Picture Shutter Button ( ) to take a picture. • Press RECORD/PLAY Button to view the picture. • Three resolution settings are available: Image Quality High Quality:8 Mega Pixels Standard Quality:5 Mega Pixels... -
Page 15: Options For Record Menu
Options for Record Menu Movie Mode Picture Mode Effect • Resolution • Resolution • Scene • Stabilization • Flash • Exposure • Self-timer • (White Balance) Operations for Record Mode Operation Display Screen Press Menu/OK Button when in Record Mode. Use Right/Left Buttons to move between main menu options, which are Movie Mode, Picture Mode, and Effect. -
Page 16: Movie Mode Submenu Setting
Movie Mode Submenu Setting Operation Display Screen In Record Mode, press Menu/OK Button to enter record menu screen. Use Right/Left Buttons to select Movie Mode. The Movie Mode submenu contains 2 options, Resolution and Stabilization, for you to adjust the camcorder setting. -
Page 17: Picture Mode Submenu Setting
Picture Mode Submenu Setting Operation Display Screen In Record Mode, press Menu/OK Button to enter record menu screen. Use Right/Left Buttons to select Picture Mode. The Picture Mode submenu contains 3 options, Resolution, Flash, and Self timer, for you to adjust the camcorder setting. - Page 18 Flash (Picture Mode Only) This camcorder has three flash settings. To change flash setting by either hot key (Right Button) or Option Setting. • Auto ( ): The flash fires automatically according to light conditions. Use this mode for general photography.
-
Page 19: Effect Submenu Setting
Effect Submenu Setting Operation Display Screen In Record Mode, press Menu/OK Button to enter record menu screen. Use Right/Left Buttons to select Effect. The Effect submenu contains 3 options, Scene, Exposure, and WB, for you to adjust the camera setting. Scene You can select the mode according to the scene condition. - Page 20 Exposure The camcorder adjusts image exposure automatically. In certain circumstances you may wish to adjust the exposure compensation setting. Operation Display Screen In Effect submenu, press UP/Dow n button to select Exposure. Use Right/Left Buttons to choose preferred EV(Exposure Value). The change can be previewed immediately.
-
Page 21: Section 4 Playback Mode
Section 4 Playback Mode Button Function The Buttons have the following functions in Movie and Picture Playback Modes. Direction Button: Right Button: Go to the next movie/picture. Fast forward Left Button: Go to the previous movie/picture. Fast rewind Up Button: Volume increase/Information ON/OFF Down Button: Volume decrease Menu/OK Button: Enter to movie or picture option menu. -
Page 22: Lcd Monitor Information
LCD Monitor Information Indicators on the LCD screen while in Playback Mode: HD (1080p) (30fps) HD (720p) (30fps) WVGA (60fps) VGA (30fps) QVGA (30fps) High Standard Movie playback time counter Indicate the selected movie/picture is locked. Current Number/ Total number of movie or picture. Volume Indicate the screen is in movie playback mode:Play/Pause Magnification Indicator. -
Page 23: Operations For Playback Mode
Operations for Playback Mode The Playback Mode is for viewing and managing movies and pictures on the built-in memory or on an SD card. Operation Display Screen Press RECORD/PLAY Button ( ) to switch from Record Mode to Playback Mode Main Menu.There are 2 options in the Playback Mode, Movie and Picture. -
Page 24: Movie Playback Mode Menu
Movie Playback Mode Menu Operation Display Screen In Movie Playback Mode, press Menu/OK Button to enter Movie Playback menu screen. .Use Up/Down Buttons to select four options, Delete, Lock, Repeat One, and Repeat All. Delete Movies Operation Display Screen Use Up/Down Buttons to select the Delete option Press Menu/OK Button to go to the Delete menu. -
Page 25: Lock Movies
Lock Movies Single or all movies can be locked. This function can prevent the movies from being deleted accidentally. Operation Display Screen Use Up/Down Buttons to select the Lock option. Press Menu/OK Button to go to the Lock menu. Use Right/Left Buttons to select the movie. Use Up Button to lock/unlock all movies or Down Button to lock/unlock single movie. -
Page 26: Picture Playback
Picture Playback Operation Display Screen In Picture thumbnail preview folder, use direction buttons to locate the picture you want to view. Press OK button to view the picture. Use Right/Left Buttons to go to the next or last picture. While the picture is selected, use Tele Button to magnify. -
Page 27: Picture Playback Mode Menu
Picture Playback Mode Menu Operation Display Screen In Picture Playback Mode, press Menu/OK Button to enter Picture Playback menu screen. Use Up/Down Buttons to select three options, Delete, Lock, and Slideshow. Delete Picture Operation Display Screen Use Down Buttons to select the Delete option. Press Menu/OK Button to go to the Delete menu. -
Page 28: Lock Pictures
Lock Pictures Single or all pictures can be locked. This function can prevent the pictures from being deleted accidentally. Operation Display Screen Use Up/Down Buttons to select the Lock option. Press Menu/OK Button to go to the Lock menu. Use Right/Left Buttons to select the picture. Use Up Button to lock/unlock all pictures or Down Button to lock/unlock single picture. -
Page 29: Section 5 Setting Your Camcorder
Section 5 Setting Your Camcorder Setting Menu Operation Display Screen In Record Mode, press Menu/OK Button to enter record menu screen. Use Right/Left Buttons to select Setting. The Setting submenu contains 7 options for configuring your camcorder set up. They are Sound (operation sound),Information,Time Setting,Format,TV,Language,and Default Setting. -
Page 30: Time Setting
Time Setting Operation Display Screen In setting submenu, press UP/Down Button to select Time Setting. Press Menu/OK Button to go to the Time Setting menu. Move between date and time by using Up/Down Buttons. Adjust date and time by using Left/Right Buttons. - Page 31 Ensure that the appropriate TV standard of your area is selected – either NTSC or PAL. Wrong TV system setting may cause image flicker. NTSC standard: USA, Canada, Japan, South Korea and Taiwan etc. PAL standard: UK, Europe, China, Australia, Singapore and Hong Kong etc. Operation Display Screen In setting submenu, press Up/Down Button to...
-
Page 32: Default Setting
Default Setting To restore the default factory setting, select this option. Operation Display Screen In setting submenu, press Up/Down Button to select Default Setting. Press Menu/OK Button to go to the Default Setting confirmation screen. Use Right/Left Buttons to choose Yes or No. Choosing “Yes”... -
Page 33: Section 6 Viewing Pictures And Movies On A Tv
Section 6 Viewing Pictures and Movies on a TV Connecting to a High-Definition 16:9 (Wide) TV Connect one end of the HDMI cable to your camcorder’s HDMI Out port. Connect the other end of the cable to a television. Set video input source of a TV to “ HDMI” option. The steps for viewing stored pictures and movie on a TV are exactly the same as for viewing them on the LCD monitor. -
Page 34: Section 7 Viewing Pictures And Movies On Pc
Section 7 Viewing Pictures and Movies on PC Installing Bundled Software The CD-ROM supplied with this camcorder contains 2 pieces of software. • ArcSoft MediaImpression is a user-friendly application that helps you managing your media, burning your video into DVD, and uploading your videos to YouTube easily. •... -
Page 35: Section 8 Burning The Recorded Clip Into Dvd
Section 8 Burning the Recorded Clip into DVD Bundled software CD contains ArcSoft MediaImpression features burning the movie clip into DVD. You can share this DVD movie with family and friends by using regular DVD player. To create a DVD: Install ArcSoft MediaImpression (Refer to Section 7) Click Windows [ Start ] g[ (All) Programs ] g[ ArcSoft MediaImpression ]... - Page 36 The operation screen will appear: • Select the folder that contains the video files you want to burn. • Select the files • Click button to add the files into slide • Click [Burn to Disc] Click [ Start ] to start DVD burning.
-
Page 37: Section 9 Uploading Video Files To Youtube
Section 9 Uploading Video Files to YouTube Bundled software CD contains ArcSoft MediaImpression features uploading the recorded videos to YouTube. It will help you to share them with your family and friends on YouTube website. To upload video files to YouTube: Install ArcSoft MediaImpression (Refer to Section 7) Click Windows [Start] g [ (All) Programs ] g[ ArcSoft MediaImpression ]... - Page 38 Select the video file you want to upload and click [ Upload to YouTube] option at the bottom menu. If this is your first using of this function, please follow the instruction on YouTube Setting Panel.
- Page 39 Go to http://www.youtube.com/login, then log onto your YouTube account. (If you do not have YouTube account, sign up here first.) After you log onto your YouTube account, Click [ Get Authorization ] button below.
- Page 40 Then, Click [Allow] Button shown on YouTube website. Click [Save] Button to upload the video.
-
Page 41: Section 10 Specifications
Section 10 Specifications Specifications Image Sensor 5 Mega Pixel CMOS Sensor Operation Modes Movie Record, Picture Record Lens F3.2 (f = 7.2mm) Focus Range 200cm~infinite (Normal Mode) 90cm~200CM (Portrait Mode) Center: 20 cm (Macro Mode) Digital Zoom 1080p:2X Other video resolution:4X Shutter Electronic LCD monitor... -
Page 42: Section 11 Troubleshooting
Section 11 Troubleshooting Troubleshooting 1.If the LCD image is not clear when shooting, how can the focus be adjusted? Try to switch between Macro,Portrait Mode, and Normal Mode.(Macro Mode: For object in distance about 20cm, Portrait Mode: For object in distance of 90cm~200cm. Normal Mode: For object in distance beyond 200cm) 2.The flash is not working. -
Page 43: Section 12 Other Information
Residential, Commercial & Light Industry Environment. Any other working environment has not been verified by Toshiba and the use of this product in these working environments is maybe restricted or cannot be recommended. Possible consequences of the use of this product in non verified working environments can be: Disturbances of other products or of this product in the nearby surrounding area with temporarily malfunction or data loss/corruption as result. - Page 44 For more detailed information about the collection and recycling programmes available in your country, please visit our website (http://eu.computers.toshiba-europe.com) or contact your local city office or the shop where you purchased the product.
-
Page 45: Additional Information
Additional Information © 2008 TOSHIBA Europe GmbH. All rights reserved. TOSHIBA reserves the right to make technical changes. TOSHIBA assumes no liability for damages incurred directly or indirectly from errors, omissions or discrepancies between this product and the documentation. - Page 46 0970A8328L-A02F For further options & services see: computers.toshiba-europe.com...
Need help?
Do you have a question about the CAMILEO P10 and is the answer not in the manual?
Questions and answers
Theres a red light in the camera i have in chageing (idk if i miss said that)
The red light on the Toshiba CAMILEO P10 camera indicates that the device is charging. It remains constant while charging and turns off when charging is complete.
This answer is automatically generated