Table of Contents
Advertisement
Quick Links
Download this manual
See also:
Operating Manual
Advertisement
Table of Contents

Related Manuals for Zero88 Jester


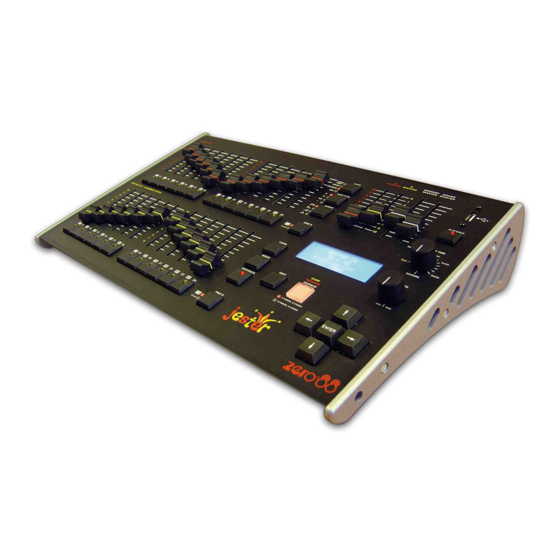
Summary of Contents for Zero88 Jester
- Page 1 Jester OPERATING MANUAL...
- Page 2 E & OE. the interference at the operators expense. 2 of 50 Jester Manual 73-403-00 Issue 1.1...
-
Page 3: Table Of Contents
Numeric Entry.........5 Other Features........36 Preset Mode........6 Online Help........36 Two Preset Operation.....7 Software Updates ......36 Wide Mode........9 Glossary (A to Z of the Jester) ..37 Program Mode ........11 Technical Specification ....47 Scene Memories......13 Index..........49 Chase Memories......16 Jester Manual 73-403-00 Issue 1.1... -
Page 4: Introduction
SUPER USER functions and the technical specification of the desk. As the Jester is available in two styles (12/24 and 24/48), this manual will refer primarily to the 12/24 model, with variations for the 24/48 notated in brackets. For example: Preset B controls faders 13-24 (25-48). -
Page 5: Master Controls And Displays
1 to 9 entering the numbers 1 to 9, and channels 10 onwards entering the number 0. Once the number is entered, press ENTER to confirm. Jester Manual 73-403-00 Issue 1.1 5 of 50... -
Page 6: Preset Mode
(A MASTER or B MASTER) has control of the PRESET faders, and which master has control of the stored scene. The accompanying lights on the front panel indicate the current state (A FADERS, B STORED or B FADERS, A STORED). ? 6 of 50 Jester Manual 73-403-00 Issue 1.1... -
Page 7: Two Preset Operation
8. As the A and B master faders are moved in tandem the scene set up on PRESET B will fade out and the new scene set on PRESET A will fade in. The crossfade is dipless. Jester Manual 73-403-00 Issue 1.1 7 of 50... - Page 8 SOLO: The selected channels will be sent to full and all other channels will be sent to blackout. When the button is released, all channels are returned to their fader levels. 8 of 50 Jester Manual 73-403-00 Issue 1.1...
-
Page 9: Wide Mode
7. If the PROGRAM/GO button is pressed again, the output levels are saved into the temporary store (overwriting the previous values) and the lights under the PROGRAM/GO button change to indicate A FADERS, B STORED. The B Jester Manual 73-403-00 Issue 1.1 9 of 50... - Page 10 When the button is released, all channels are returned to their fader levels. NOTES Stored Scene Any stored scene being output in PRESET Mode will be removed from the outputs if the desk is changed to PROGRAM, RUN or SUPER USER Modes. 10 of 50 Jester Manual 73-403-00 Issue 1.1...
-
Page 11: Program Mode
Program Mode, and the contents re-stored. Memory Types There are two memory types which can be programmed on the Jester desk. They are SCENE memories and CHASE memories. A SCENE memory consists of a single static state, recording the output level of each desk channel. - Page 12 PASTE button will have no effect. The COPY function also works in RUN Mode, to allow looks created there to be stored, ready to PASTE into a memory/submaster in PROGRAM Mode. 12 of 50 Jester Manual 73-403-00 Issue 1.1...
-
Page 13: Scene Memories
3. Use the PRESET A and PRESET B faders to set the required output levels. 4. Press the PROGRAM/GO button. The output levels are now stored in the selected submaster. The outputs remain unaltered. Jester Manual 73-403-00 Issue 1.1 13 of 50... - Page 14 Split Fade Times Sometimes you may wish a scene to have different up and down fade times. The Jester allows you to define these times, with the FADE TIME pot. 1. Select the memory you wish to alter the fade times of.
- Page 15 Select <Overwrite> and press ENTER. NOTES Overwriting The Jester has four methods of overwriting a memory: - Press Program, then press Enter at the prompt. - Press Program, then press Program again at the prompt. - Hold Program for a few seconds.
-
Page 16: Chase Memories
Name field (indicated as < > on the LCD) and press ENTER. The Jester enters Name mode. When naming items, the flash buttons on Preset B become letter entry keys, using multiple presses to select between groups of letters. For example, to enter a C, press the second flash button 3 times in quick succession. - Page 17 5. Press the PROGRAM/GO button. The LCD asks you if you wish to overwrite the step, select <Overwrite> and press ENTER. Overwrite can be forced by holding the PROGRAM/GO button or by using SHIFT+PROGRAM/GO. Jester Manual 73-403-00 Issue 1.1 17 of 50...
- Page 18 The contents of a scene memory, submaster or chase step can be copied, and then pasted into a different scene memory, submaster or chase step. The same memory data may be pasted into several destinations. 18 of 50 Jester Manual 73-403-00 Issue 1.1...
- Page 19 Ensure that the light in the COPY/PASTE button is on. 2. Use the submaster buttons to select a submaster. 3. Press and hold SHIFT and press the COPY/PASTE button. The memory data copied will be pasted into the submaster. Jester Manual 73-403-00 Issue 1.1 19 of 50...
- Page 20 DMX Input The Jester allows you to input a full universe of DMX and capture this to any memory, allowing the Jester to act as a backup console. When a DMX input is attached to the desk, the Jester automatically re-transmits any unpatched channels on the DMX output.
-
Page 21: Run Mode
PAUSE button. The FADING light goes out when the crossfade is completed. The LCD shows details of the current and next memory to be output. Jester Manual 73-403-00 Issue 1.1 21 of 50... - Page 22 3. Set all the PRESET faders and the A MASTER and B MASTER to zero. 4. Set the MEMORY MASTER and GRAND MASTER to full. 5. Set the FADE TIME control to the desired value. 22 of 50 Jester Manual 73-403-00 Issue 1.1...
- Page 23 FADING light flashes. 3. To pause the crossfade, press and hold the SHIFT button and press the PROGRAM/GO button. The PROGRAM/GO light and the red FADING light will flash and the outputs remain static. Jester Manual 73-403-00 Issue 1.1 23 of 50...
- Page 24 A MASTER). The channels can also be flashed, using the Flash Mode set on the LCD. As the Jester has two pages of channels 1-12 & 13-24 (1-24 & 25-48), the PAGE A button is used to switch between the two pages. When you switch to a new page of channels, all the faders reset in software to the level of the presets on that page.
- Page 25 Mode to <Beat> then use the channel flash button under the required submaster to set the beat. The Jester measures the time between one button press and the next, and takes that as the time for the chase, until another option is defined.
- Page 26 If the speed control is set to Manual, the chase will stop. Attack The Jester allows you to have several different types of chase – in particular: Snap on-Snap off, Snap on-Fade off, Fade on-Snap off, Fade on-Fade off.
-
Page 27: Auxiliary Control
Auxiliary Control Introduction The Jester provides 12(24) auxiliary buttons for you to control simple DMX devices such as smoke machines, strobe lights and scrollers. Each auxiliary can be patched to multiple DMX addresses, and can be defined with an ON and an OFF value. - Page 28 When using Auxiliaries with fader control, it is advisable to set the <Mode> to <Off>, in Super User. That way, when you press or release the flash button, the Auxiliary won’t jump ON or OFF. 28 of 50 Jester Manual 73-403-00 Issue 1.1...
-
Page 29: Super User Mode
The SUPER USER light next to the MODE button comes on. The monitor and LCD show the software version (eg Jester 48 V1.8) and the CPU Serial (eg 0010900 05251234), as well as the first two options in Super User. - Page 30 CHANNEL FLASH button, and OFF with the next. This is useful for long term effects in a show, which may need to be turned on or off for prolonged periods of time. Setting the Auxiliary to Off mode will disable the auxiliary. 30 of 50 Jester Manual 73-403-00 Issue 1.1...
- Page 31 <OK> and press ENTER. You will be returned to the Super User menu. Setting Memory Recovery Mode Recovery mode determines whether the Jester stores the current & next memories when restarted. If Recovery Mode is On - the desk remember which of the memories was current, and which was next, and on restart these memories will automatically be selected.
- Page 32 MIDI section of this manual. Set Date/Time You can set the Date & Time on the Jester by using the <Set Date/Time> option in Super User. Use the cursor keys to select <Set Date/Time> then press 32 of 50 Jester Manual 73-403-00 Issue 1.1...
- Page 33 Press ENTER whilst selecting <OK> to return to the Super User menu. There are no real-time triggers built into the Jester, and this time is only used for the system clock, visible in the bottom right of the monitor output.
-
Page 34: Midi Control
The MIDI signal that is transmitted by such instruments consists of a Velocity in the range 0 to 127. 34 of 50 Jester Manual 73-403-00 Issue 1.1... - Page 35 There may be the occasional Program Change signal if the voice is changed. MIDI and the Jester The Jester is designed only to receive MIDI information. It cannot transmit MIDI information to another device, although a Thru port is provided to allow daisy chaining.
-
Page 36: Other Features
Zero88 consoles have a long history of user-inspired development. If you have a suggestion for a feature which is not currently included in the Jester or any of our other consoles, visit the Zero88 website, follow the link to our forums and make a suggestion. -
Page 37: Glossary (A To Z Of The Jester)
Audio In See Sound2Light Auxiliary A button on the Jester which allows you to control DMX-controlled devices with on/off values via the preset A flash buttons. Auxiliaries are not recorded in cues. B Master The master fader which controls the levels of the channels on Preset B. - Page 38 Bump Button An American name for a Flash Button. Button A switch on the front panel of the Jester which is used to control an attribute of the desk. Conformité Européenne – A European product standard, displayed on all products on sale in the EU.
- Page 39 Deutsches Institut für Normung e.V. The MIDI standard specifies the use of 180degree 5 pin DIN plugs. Dipless The fades on the Jester are customised so that there will not be a ‘dip’ in the brightness on stage when crossfading from one scene to another. Direction The order in which chase steps are output.
- Page 40 SHIFT to set a split fade time. Fade Up The Fade Up time on the Jester is the time it will take for the channels which are programmed at a higher level in the incoming cue to that of the current cue to fade to their programmed level.
- Page 41 - The ability to push a fader up or down to ‘grab’ the level of the channel before gaining control of it. - The function of the Jester when a DMX-input is added to the memory data in program mode.
- Page 42 Another name for a Flash Disk. MIDI Musical Instrument Digital Interface. A signal from a keyboard or other musical sampling device can be input to the Jester and be used to control the level of channels and submasters. 42 of 50...
- Page 43 Another name for the sequential memory stack. Also known as a Cue Stack. A potentiometer, which can be turned to set various values between a given range. The two Pots on the Jester are the Fade Time Pot and the Speed Pot. Jester Manual 73-403-00 Issue 1.1...
- Page 44 The colour of the PROGRAM/GO button when the desk is in PROGRAM mode. Remote The Jester provides a REMOTE port on the rear of the desk, for triggering a button press externally. This is done by contact closure. 44 of 50...
- Page 45 Sound2Lite The ability to control lights in time to a beat. The Jester has a sound2lite input which listens to the input music and, according to the settings of the chase, changes the lights in time to the beat.
- Page 46 Universal Serial Bus. A standard for the transfer and storage of information. The Jester has a USB port mounted on the front panel to allow storage of show files. Video Graphics Array. The monitor output on the back of the Jester is VGA Text Mode (640x400, 70Hz).
-
Page 47: Technical Specification
Pin 2 Pin 3 +12V Pin 4 Not Used Shell Ground An inline external power supply unit is used to power the Jester. This is connected to the desk via a 4-pin XLR connector. Audio In Left Ring Right Sleeve Ground The desk has an audio port on the rear panel, in the form of a stereo ¼... - Page 48 If required, an external floppy drive can be connected to the desk, via USB 1.1 External Storage Devices (Memory Sticks) The primary method of storage for the Jester is via USB Memory Sticks (also known as Flash Disks or Mass Storage Devices). These can be connected via the USB port.
-
Page 49: Index
Memory Recovery, 31 Submaster, 11, 24 Memory Stick, 48 Super User, 29 MIDI, 34, 47 Updates, 36 Setup, 32 USB, 48 Mode, 5 VGA, 48 Online Help, 36 Wide Mode, 6, 9 Jester Manual 73-403-00 Issue 1.1 49 of 50... - Page 50 Zero88 Lighting Ltd. For news, views and Tel: +44 (0)1633 838088 Usk House the latest software, Fax: +44 (0)1633 867880 Llantarnam Park visit our website at: email: sales@zero88.com Cwmbran www.zero88.com Web: www.zero88.com Gwent NP44 3HD...
Need help?
Do you have a question about the Jester and is the answer not in the manual?
Questions and answers