Table of Contents
Advertisement
Available languages
Available languages
Advertisement
Chapters
Table of Contents

Related Manuals for Telefunken TX 101


Summary of Contents for Telefunken TX 101
- Page 2 Bluetooth SIG, Inc. and any use of such marks by SOPEG is under license. TELEFUNKEN Licensed by TELEFUNKEN Licenses Gmbh This user guide is property of SOPEG and made for TX 100 Bluetooth models. This document cannot be used for any other purpose.
- Page 3 Salvo que se indique expresamente lo contrario, la denominación TX 1** se refiere a todas las versiones del teléfono TX 101/102/103/151/152/153 en las presentes instrucciones de uso. Documento no contractual que puede sufrir modificaciones en caso de errores tipográficos.
-
Page 4: Table Of Contents
............................. 9 ATERÍA D. F .......................... 9 IJACIÓN MURAL ................10 NSTALACIÓN DE TERMINALES ADICIONALES F. U TELEFUNKEN TX 1** ADSL ..........10 TILIZACIÓN DEL CON UNA LÍNEA 2 DESCUBRA SU TELÉFONO ....................11 A. T ..........................11 ERMINAL B. P .................... - Page 5 ..21 ESPONDER A UNA LLAMADA EN LA LÍNEA FIJA CUANDO YA SE ESTÁ UTILIZANDO LA LÍNEA MÓVIL ....................21 ONTESTADOR DE LA LÍNEA MÓVIL C. U ................22 TILIZACIÓN DE UN AURICULAR LUETOOTH ......22 ARA RESPONDER A UNA LLAMADA EN LA LÍNEA FIJA CON UN AURICULAR LUETOOTH : .......
- Page 6 CASA N EL CASO DE QUE ESTÉ DESACTIVADA TENDRÁ QUE PULSAR TRAS HABER RETIRADO EL ............................30 TERMINAL ......................30 EINICIO DEL MICROTELÉFONO B. A ......................... 30 JUSTES DE LA BASE ........................30 ODO DE MARCACIÓN ............................30 LASHING PIN........................30 AMBIAR EL CÓDIGO C.
-
Page 7: Información Sobre Seguridad
La utilización de baterías de tipo diferente o no recargables puede resultar peligrosa. Ello podría producir interferencias y/o dañar el teléfono. TELEFUNKEN no se hace responsable de los daños ocasionados por la utilización de pilas diferentes a las suministradas. Utilice exclusivamente el adaptador de alimentación suministrado con el teléfono. -
Page 8: Preparación Para La Utilización
Coloque su teléfono a una distancia mínima de 1 metro con respecto a otros dispositivos eléctricos a fin de evitar los riesgos de interferencias. Su TELEFUNKEN TX 1** funciona mediante la emisión de frecuencias de radio entre el terminal y la base. La intensidad de la señal depende de la posición de la base. -
Page 9: Batería
D. Fijación mural Su TELEFUNKEN TX 1** puede fijarse en una pared gracias al soporte suministrado. Fije sólidamente el soporte en una pared y coloque encima la base del teléfono. Atención No instale su teléfono TELEFUNKEN TX 1**en un cuarto de baño... -
Page 10: Instalación De Terminales Adicionales
Utilice únicamente los cables de alimentación y de teléfono suministrados con el producto. E. Instalación de terminales adicionales Si ha comprado un teléfono TELEFUNKEN TX 1** con terminales adicionales, debe seguir los siguientes pasos: Por cada terminal y cargador adicionales 1. -
Page 11: Descubra Su Teléfono
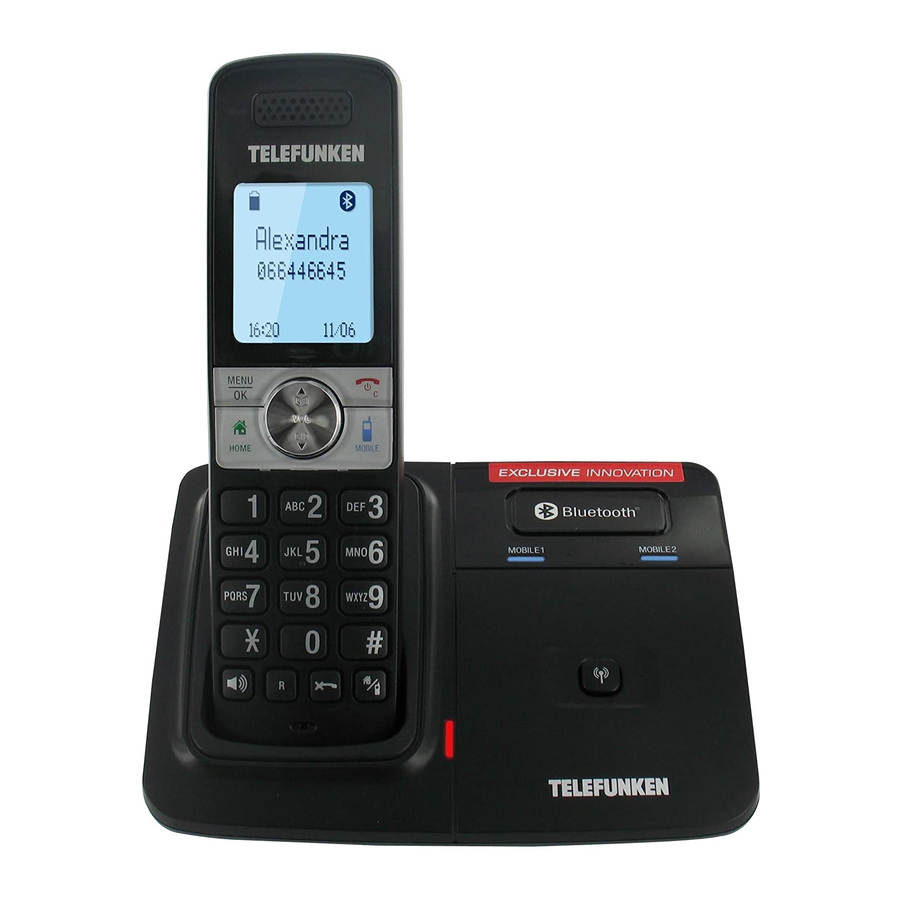
DESCUBRA SU TELÉFONO A. Terminal INDICADOR DE AURICULAR CARGA DIRECTORIO ARRIBA MENU/OK COLGAR / CANCELAR CASA LISTA DE LLAMADAS / ABAJO TECLADO ALFANUMÉRICO ALTAVOZ MANOS ESPERA LIBRES SILENCIO REPETICIÓN BORRANDO PAUSA B. Pantalla del microteléfono TX Bluetooth... -
Page 12: Iconos De La Pantalla Del Terminal
TX 1** que están conectados Bluetooth Dispositivos Bluetooth desconectados - dispositivos ® Bluetooth enlazados con el TX 101/151 que están desconectados Auricular Bluetooth - Icono fijo cuando hay un auricular ® Bluetooth conectado a la línea fija Nuevo mensaje (servicio de contestador del operador de su línea fija) -
Page 13: Base-Contestador
D. Base-contestador INDICADORES DE CONEXIÓN MÓVIL 1 / MÓVIL 2 BÚSQUEDA BORRANDO ALTAVOZ VOLUMEN + ATRÁS PANTALLA LED SOPORTE DE ADELANTE CARGA INDICADOR DE VOLUMEN - UTILIZACIÓN ENCENDIDO/APAGADO REPRODUCCIÓN / DEL CONTESTADOR PAUSA E. Iconos de la pantalla del contestador Pantalla Descripción Contestador desactivado y ningún nuevo mensaje. -
Page 14: Navegar Por Los Menús
9 metros con respecto a la base del TX 1**. Si su teléfono móvil no capta correctamente la señal desde su domicilio, el TELEFUNKEN TX 1** puede permitirle obtener una mejor recepción. Si hay un lugar en su casa donde la recepción sea mejor, puede dejar allí... -
Page 15: Enlazar Y Conectar Un Teléfono Móvil
5. Pulse de nuevo MENU/OK. 6. Una vez que su teléfono móvil haya reconocido el TELEFUNKEN TX 1**, confirme la solicitud de conexión en el teléfono móvil. 7. Introduzca en su teléfono móvil el código PIN que aparece en la pantalla del terminal del TX 1**. -
Page 16: Conexión Automática
No coloque el terminal en la base o el cargador durante el procedimiento de enlace, ya que este se vería interrumpido. Conexión automática Cuando un teléfono móvil está enlazado con el TX 1** pero no está conectado, en la pantalla aparece: Ajuste de móvil terminado –... -
Page 17: Dispositivos Enlazados
E. Dispositivos enlazados ® Una vez que haya enlazado su teléfono móvil o su auricular Bluetooth con el TX 1**, no necesitará repetir la operación, salvo si en algún momento elimina este dispositivo de la lista de dispositivos activos. Observación: en la lista solo aparecen los 15 primeros caracteres del nombre de los dispositivos. Cambiar el nombre de un dispositivo Puede cambiar el nombre de un dispositivo enlazado desde el TX 1**. -
Page 18: Eliminar Un Dispositivo Activo
4. Introduzca el nuevo código de 4 cifras con ayuda del teclado alfanumérico. 5. Pulse MENU/OK para confirmar. H. Copiar un directorio Puede copiar hasta 4 directorios de teléfonos móviles en la memoria de su TELEFUNKEN TX 1** ® a través de Bluetooth . - Page 19 Copia 1. Pulse MENU/OK y seleccione Bluetooth. 2. Seleccione DESCARGAR DIR. Si no hay ningún dispositivo enlazado/conectado al TX 1**, consulte los párrafos anteriores para realizar esta operación. 3. Seleccione uno de los dispositivos propuestos y confirme con MENU/OK. Si el directorio del teléfono móvil seleccionado ya ha sido copiado en la memoria del TX 1**, la pantalla muestra Móvil A última act.: DD/MM/AA Para continuar, pulse Si pulsa MENU/OK para continuar la operación, la copia del directorio del teléfono móvil seleccionado sustituirá...
-
Page 20: Utilización Del Teléfono
4 UTILIZACIÓN DEL TELÉFONO A. Línea fija Realizar una llamada Pulse la tecla CASA o la tecla ALTAVOZ e introduzca el número de teléfono. O Introduzca el número de teléfono y pulse la tecla CASA o la tecla ALTAVOZ. Responder a una llamada Cuando reciba una llamada en la línea fija, el teléfono sonará. -
Page 21: Para Finalizar La Comunicación En La Línea Móvil
Para finalizar la comunicación en la línea móvil: Pulse la tecla COLGAR/C del terminal. La comunicación de la línea fija seguirá en espera. Todos los terminales muestran Llamada Casa en espera. Para reanudar la llamada en espera de la línea fija: Pulse la tecla CASA del terminal. -
Page 22: Utilización De Un Auricular Bluetooth
C. Utilización de un auricular Bluetooth ® Puede utilizar un auricular Bluetooth para las llamadas en su línea fija. No obstante, deberá permanecer en un radio de 10 metros con respecto a la base del TX 1** para conservar la señal ®... -
Page 23: Función Silencio
Tras 15 minutos, la llamada en espera se desconectará automáticamente. Para poner una llamada en espera en la línea fija: Pulse ESPERA. En la pantalla aparece Llamada Casa en espera y la tecla CASA parpadea. Para reanudar una llamada en espera en la línea fija: Pulse CASA. -
Page 24: Pasar A Modo Manos Libres Durante Una Llamada
Pasar a modo manos libres durante una llamada Durante la llamada, pulse ALTAVOZ. G. Números marcados Volver a llamar a un número marcado Se guardan los 20 últimos números a los que se ha llamado. Puede seleccionarlos para llamar, grabarlos en el directorio o borrarlos. 1. -
Page 25: Timbre Del Microteléfono
Timbre del microteléfono Pulse SILENCIO/ELIMINACIÓN en el terminal y aparecerá Tono apagado. Tono de la base Pulse VOLUMEN- en la base del TX 1**hasta que L0 aparezca en la pantalla LED. I. Acceso a los contactos durante una llamada Esta función le permite acceder al contenido de los directorios y de la lista de llamadas durante una llamada. -
Page 26: Recorrer Las Entradas Del Directorio
Copie un número de la lista de llamadas. Pulse REPETICIÓN/PAUSA y utilice las teclas ARRIBA/ABAJO para recorrer los números. Pulse MENU/OK para copiar el número seleccionado. 6. Pulse MENU/OK y seleccione una de las siguientes categorías. CASA Oficina Otro 7. Confirme con MENU/OK. La pantalla muestra INTRODUZCA EL NOMBRE. 8. -
Page 27: Modificar Un Contacto
3. Pulse CASA o ALTAVOZ para llamar al contacto por la línea fija, o GSM para utilizar la línea móvil. Búsqueda alfabética Pulse una tecla del teclado alfanumérico, por ejemplo <8> una vez para la letra T, y pulse ARRIBA/ABAJO para recorrer los contactos. D. -
Page 28: Configurar El Código De País Para Los Directorios
2. Seleccione el directorio GSM que desee eliminar. 3. Pulse MENU/OK y seleccione Eliminar dir. 4. Pulse MENU/OK. La pantalla muestra Supresión del directorio. Pulse OK para confirmar. 5. Pulse MENU/OK para confirmar Observación: se le pedirá el código PIN para acceder al contenido de los directorios de teléfono móvil. -
Page 29: Ajustes
6 AJUSTES A. Ajustes del terminal TX 1** Volumen del timbre Puede regular el volumen del tono de llamada (1-6) o desactivarlo por completo. Puede elegir ajustes diferentes para las llamadas recibidas por la línea fija y las recibidas por la línea móvil. -
Page 30: Auto Hablar
4. Pulse MENU/OK e introduzca la hora con ayuda del teclado. 5. Pulse MENU/OK para guardar. Auto hablar Esta función permite responder a una llamada retirando el terminal de su base. Está activada por defecto. En el caso de que esté desactivada, tendrá que pulsar CASA tras haber retirado el terminal. 1. -
Page 31: Información Sobre Las Llamadas
Este producto es compatible con la identificación de llamadas que proponen algunos operadores de telefonía. En función de su contrato, podrá ver el nombre del interlocutor (si está registrado en su directorio), su número de teléfono o ambos. En todas las llamadas recibidas en la línea fija, el nombre, el número de teléfono y la fecha aparecen en la pantalla. -
Page 32: Borrar Un Número De La Lista De Llamadas
Borrar un número de la lista de llamadas 1. Desde la lista de llamadas, pulse ARRIBA/ABAJO para seleccionar el número que desea eliminar. 2. Pulse SILENCIO/ELIMINACIÓN para borrarlo. Borrar la lista de llamadas 1. Pulse MENU/OK y seleccione Lista. 2. Seleccione Borrar lista. 3. -
Page 33: Contestador
7 CONTESTADOR El contestador del TX 1** permite a sus interlocutores dejar mensajes vocales cuando usted no descuelga el teléfono. Se puede grabar un máximo de 99 mensajes (14 minutos en total como máximo). El tiempo de grabación máximo es de 14 minutos, incluyendo los menús vocales, el mensaje de respuesta y los mensajes entrantes. -
Page 34: Anuncio Vocal
Grabar una nota vocal 1. En modo de espera, pulse MENU/OK y seleccione Ajustes. 2. Seleccione Grab. nota. 3. Podrá grabar su nota vocal tras el anuncio vocal y la señal sonora. 4. Pulse <5> para finalizar la grabación. Su grabación se reproduce automáticamente a fin de que pueda verificarla, y luego el sistema vuelve al menú... -
Page 35: Tiempo De Grabación De Los Mensajes Entrantes
5. Pulse MENU/OK para confirmar su selección. Observación: Si elije el modo ahorro, el contestador se pondrá en marcha tras 2 tonos si ya hay nuevos mensajes o tras 6 tonos si aún no hay ninguno. Tiempo de grabación de los mensajes entrantes 1. -
Page 36: Utilizar El Contestador Desde La Base Del Teléfono
2. Seleccione Ajustes contestador. 3. Pulse MENU/OK y seleccione Código de acceso. 4. Elija entre Activado y COLGAR/C. 5. Pulse MENU/OK para confirmar. Si ha activado el código de acceso, también deberá seguir los siguientes pasos: Pulse MENU/OK. Introduzca el actual código de acceso de 4 cifras (por defecto: 0000). Pulse MENU/OK. -
Page 37: Borrar Todos Los Mensajes Antiguos
En modo de espera, pulse 2 veces para borrar todos los antiguos mensajes. 8 TERMINALES ADICIONALES Si ha adquirido el TELEFUNKEN TX 1** con terminal(es) adicional(es), tiene la posibilidad de realizar llamadas entre terminales, transferir llamadas de un terminal a otro y utilizar el modo conferencia. -
Page 38: Modo Conferencia A 3
C. Registrar un microteléfono suplementario Si ha comprado un TELEFUNKEN TX 1** con terminal suplementario, este ya está prerregistrado en la base, pero si lo ha comprado por separado, deberá seguir estas instrucciones: 1. -
Page 39: Anular El Registro De Un Terminal
Si el terminal no detecta la base, en la pantalla del terminal aparecerá NO HAY BASE. Anular el registro de un terminal 1. En modo de espera, pulse MENU/OK y seleccione Ajustes. 2. Pulse MENU/OK y seleccione ANULAR REG. 3. Introduzca el código PIN (por defecto, 0000). 4. -
Page 40: Garantía
Compruebe el ajuste del volumen de la base. Hay un ruido parásito en la línea o en otros aparatos eléctricos cercanos Se recomienda colocar el TELEFUNKEN TX 1** como mínimo a 1 metro de otros aparatos eléctricos a fin de evitar interferencias. - Page 41 Este teléfono cuenta con una garantía de 12 meses. El periodo de garantía comienza en el momento de la compra del teléfono. La garantía debe probarse mediante la presentación de la factura original o el recibo de compra donde aparezcan la fecha y el modelo adquirido. - Cobertura Si el teléfono es defectuoso, debe devolverlo completo a su distribuidor con una nota explicativa.
- Page 42 Telephone line cord Telephone adaptor plug 1 NiMH rechargeable battery pack Wall mount bracket If you have purchased a TELEFUNKEN TX 1** Multi-handset pack you will also have the following for each additional handset: TELEFUNKEN TX 1** handset TELEFUNKEN TX 1** charger...
- Page 43 ..............................48 ATTERY D. W ............................. 48 ALL MOUNTING E. S ......................48 ETTING UP FOR MULTIPLE PACKS TELEFUNKEN TX1** ADSL ? ........49 SING YOUR PHONE ON A ROADBAND LINE 2 GETTING TO KNOW YOUR PHONE ................... 50 A. H ..............................
- Page 44 B. M ....................59 ANSWER OR END A MOBILE CALL : ..........................59 O MAKE A MOBILE CALL : .......................... 60 O ANSWER A MOBILE CALL : ..........................60 O END A MOBILE CALL ..................60 NSWER A MOBILE CALL WHILE ON A HOME CALL : ....................
- Page 45 ..............................69 ATE FORMAT ..............................69 IME FORMAT ........................69 ET DATE AND TIME MANUALLY ..............................69 UTO ANSWER .............................. 69 ANDSET RESET B. B ............................70 ASE SETTINGS ..............................70 ET DIAL MODE ............................70 ET THE FLASH TIME PIN............................
-
Page 46: Important Safety Instructions
Do not overload wall outlets and extension cords as this can result in the risk of fire or electric shock. Unplug this product from the wall outlet and contact TELEFUNKEN under the following conditions: - When the power supply cord or plug is damaged or frayed. -
Page 47: Getting Started
Make sure it is at least 1 meter away from other electrical appliances to avoid interference. Your TELEFUNKEN TX 1** works by sending radio signals between the handset and base. The strength of the signal depends on where you locate the base. Putting it as high as possible ensures the best signal. -
Page 48: Battery
Note: Ensure the line cord is fed through the slot on the base so unit sits flush with the desk. D. Wall mounting Your TELEFUNKEN TX 1** is designed to mount on a standard wall mounting plate. Attach the wall mount bracket to your TX 1** base and attach to your wall mount plate. -
Page 49: Using Your Telefunken Tx1** Phone On A Broadband Adsl Line
Place the handset on the base to charge for at least 24 hours. When the handset is fully charged the <Fully charged battery icon> will be displayed. Using your TELEFUNKEN TX1** phone on a Broadband ADSL line If this product is to be used on a broadband ADSL line, then you must ensure that it is connected via an ADSL filter. -
Page 50: Getting To Know Your Phone
2 GETTING TO KNOW YOUR PHONE A. Handset B. Handset display TX Bluetooth... -
Page 51: Display Icons
C. Display icons Icons can be On (visible), Flashing or off (not visible): Home line - Steady when the home line is in use or there is an incoming home call. MOBILE line - Steady when the mobile line is in use or there is an incoming mobile call. -
Page 52: Answering System
3. Press MENU/OK to select a menu option or TALKOFF/CLEAR to return to the previous screen, or press and hold TALKOFF/CLEAR to return to standby mode. 3 BLUETOOTH® A. Introducing Bluetooth® ® Your new TELEFUNKEN TX 1** telephone system with Bluetooth wireless technology has the following features: ® Pair up to four Bluetooth enabled devices (mobile phones or headsets) with the telephone base. -
Page 53: Glossary Of Terms
However, if there is a location in your house with better reception, you can leave your mobile phone at that location while you use TELEFUNKEN TX 1** mobile line. In order for this to work, the telephone base must be within 30 feet of the mobile phone. -
Page 54: Bluetooth Setup
Passkey or Passcode. Bluetooth setup To use a Bluetooth enabled mobile phone with your TELEFUNKEN TX 1** , you must first pair and connect your Bluetooth device(s) with the telephone base. All TX 1** handsets can be used to make or answer calls on the mobile phone line. -
Page 55: Auto Connection
TELEFUNKEN TX 1** to complete the pairing process. If you put the handset back in the telephone base or charger while pairing, the process discontinues and the handset returns to idle mode. Auto connection... -
Page 56: Paired Devices
E. Paired devices All paired devices are stored on the Paired devices list. Up to four devices (one headset only) can be paired with the telephone base. To use a paired device, it must be connected and on the active devices list. Once you have paired a device with the telephone base, you do not need to repeat the pairing procedure again unless you delete the device from the paired devices list. -
Page 57: Replace An Active Device
Replace an active device You can replace an active device with a device on the paired devices list even if you already have two devices on the active devices list. 1. In standby mode, Press MENU/OK and choose Bluetooth. 2. Select Paired devices. 3. -
Page 58: Download Phonebook
5. Press MENU/OK to save. H. Download phonebook You can download up to four mobile phone phonebooks (phonebooks) to your TELEFUNKEN TX 1** telephone system via Bluetooth wireless technology. Each downloaded phonebook can store up to 1,500 entries with up to 30 digits for each phone number and 15 characters for each name. -
Page 59: Interruption Of Phonebook Download
may not transfer. For example, if you have HOME, MOBILE and WORK numbers for a particular contact, the three categories may not transfer to your TX 1** Interruption of phonebook download The following events do not affect the download You receive or make call on the home line You place the handset in the telephone base or charger You access to the mobile phone menu features The handset battery pack become depleted or the handset loses connection with the... -
Page 60: To Answer A Mobile Call
telephone base. if you have two mobile phones connected to the telephone base, the telephone system prompts you to select a mobile phone before you make a mobile call. To answer a mobile call: Press MOBILE. Note: You can also use your mobile phone to answer the call. If you answer with your mobile phone, it disconnects from the telephone base. -
Page 61: Mobile Phone Voicemail
If you are using a headset for a call which is transferred from TELEFUNKEN TX 1** handset, and you lose the Bluetooth connection or the battery of the headset is depleted, the call will be transferred back to the originating handset. -
Page 62: Earpiece/ Handsfree Volume
Earpiece/ handsfree volume Press UP/DOWN to adjust the listening volume of the earpiece or loudspeaker when during a call. Note: The handset earpiece volume setting (1-5) and speakerphone volume setting (1-6) are independent. When the volume reaches the minimum or maximum setting, you will hear two beeps. D. -
Page 63: Make A Handsfree Call
Make a handsfree call 1. Dial the number then press SPEAKER on the handset. <Speaker icon> is displayed. You will then hear your call over the handset loudspeaker. Press SPEAKER to switch the call between the earpiece and the loudspeaker. 2. -
Page 64: Find Handset (Paging)
3. Press MUTE/REMOVE to delete the selected entry. Find handset (Paging) You can ring a handset to help locate it. 1. Press PAGE on the base. All idle handsets ring and display ** Paging **. 2. Press PAGE on the base again to stop the paging, or press HOME, SPEAKER, MOBILE or any dial pad key (0-9, *, or #) on any handset. -
Page 65: Phonebook
Note: You can only view the numbers in the phonebook, call log or redial list while on a call and cannot edit, delete or save entries. Press and hold TALK OFF/CLEAR to exit redial list, phonebook or call log while on a call. 5 PHONEBOOK Your phone phonebook consists of a home phonebook and up to four downloaded phonebooks. -
Page 66: Dial An Entry
If you have edited the downloaded entries on TELEFUNKEN TX 1** , those changes are lost. To avoid losing changes made to the downloaded phonebook, we suggest you edit the number in your mobile phone, then download the phonebook. -
Page 67: Delete A Phonebook Entry
E. Delete a phonebook entry 1. In standby mode, press UP to access the phonebook. 2. Select Home phonebook or downloaded phonebook. 3. Browse and select the entry you want to delete. 4. Press MUTE/REMOVE, The display show Delete contact? Press Menu/ OK to confirm 5. -
Page 68: Set Up Pabx
Set up PABX Thanks to this function you can to set up automatically a prefix and make some external call with a PABX. Once the prefix set up, it will be automaticaly dialed for the home line’s calls Note : a “Pause” must be dialed after PABX Prefix 1. -
Page 69: Set Date And Time
Set date and time If you have subscribed to Caller ID service, the date and time is set automatically for all handsets when you receive your first call. The date and time is recorded with each answering machine message you receive. If you have not subscribed to Caller ID service, you can set the date and time manually. -
Page 70: Base Settings
B. Base settings Set dial mode The default dialing mode is suitable for your country and network operator. It is unlikely that you should need to change this setting unless advised to do so. 1. In standby mode, press MENU/OK then select Settings. 2. -
Page 71: View Call Details
The caller is blocking the telephone Private number. This caller’s number is unavailable. Unavailable When the list is full, and a new call is received, the oldest entry will be deleted automatically. IMPORTANT To use caller ID feature you must first subscribe to the service from Telephone Services providers. For more information please contact your providers. -
Page 72: Delete The Entire Call List
Delete the Entire Call list 1. In standby mode, press MENU/OK to Select Call log. 2. Press MENU/OK then UP/DOWN to Del all calls, 3. Press MENU/OK. The display shows Del all calls? Press OK to confirm. 4. Press MENU/OK to confirm. E. -
Page 73: Call Waiting On The Mobile Line
1. Press HOME on the handset to put your current call on hold and take the new call. 2. Press HOME on the handset at any time to switch back and forth between calls. Call waiting on the mobile line If you subscribe to call waiting service with your mobile phone service provider, you hear a beep if someone calls while you are already on a call. -
Page 74: Record And Play Memos
Record and play memos Memos are your own recorded messages used as reminders for yourself or others using the same answering system. You can record your own memos using a system handset. Playback and delete them in the same way as incoming messages. To record a memo 1.In standby mode, press MENU/OK then UP/DOWN to select Answering sys. -
Page 75: Set The Answer Delay
4. Press MENU/OK then UP/DOWN to select Answer & record or Answer only. 5. Press MENU/OK to confirm Set the answer delay 1. In standby mode, press MENU/OK and then UP/DOWN to select Answering sys. 2. Press MENU/OK then UP/DOWN to select Ans sys setup. 3.Press MENU/OK then UP/DOWN to select # of rings. -
Page 76: Remote Access
D. Remote access Remote access allows you to operate your answering machine and listen to your messages by calling your phone from another phone. To set the remote access /change remote access code 1. In standby mode, MENU/OK then UP/DOWN to select Answering sys. 2. -
Page 77: Play Messages
screening feature, set the telephone base volume to zero. Remember to raise the volume in order to hear your messages during playback. Play Messages If you have new messages, the telephone plays only the new messages (oldest first). If there are no new messages, the telephone plays back all messages (oldest first). -
Page 78: 3-Way Conference Home Or Mobile Call
1. Press MENU/OK then UP/DOWN to select Intercom. 2. Press MENU/OK. If you have only one other handset, it will ring. If you have extra handsets, your handset displays Intercom to: and a list of registered handsets. Press UP/DOWN to select the handset you want to call. -
Page 79: Register An Additional Handset
See your mobile phone User’s Manual for more information. Make sure the cordless handset, corded base and mobile phone are located near each other. Remove the TELEFUNKEN TX 1** from your mobile phone’s Bluetooth device history list (see your mobile phone User’s Manual for more information). - Page 80 You hear the busy tone when you press HOME Make sure the handset is in range of the base. Another handset registered to your TELEFUNKEN TX 1** base may be on the line. Answering machine does not record any messages Make sure the answering machine is switched on.
-
Page 81: Warranty
Sometimes your TELEFUNKEN TX 1** can interfere with other electrical equipment if it is placed too close. It is recommended that you place your TELEFUNKEN TX 1** at least one metre away from electrical appliances or metal obstructions to avoid any risk of interference. - Page 82 Compliance with current regulations: This telephone complies with the EC standards in force: RECYCLING OF ELECTRICAL AND ELECTRONIC EQUIPMENT AT THE END OF ITS LIFE CYCLE Used electrical and electronic devices must not be discarded with ordinary household refuse. The presence of the symbol on the product or its packaging serves as a reminder of this.
Need help?
Do you have a question about the TX 101 and is the answer not in the manual?
Questions and answers