Table of Contents
Advertisement
PF738
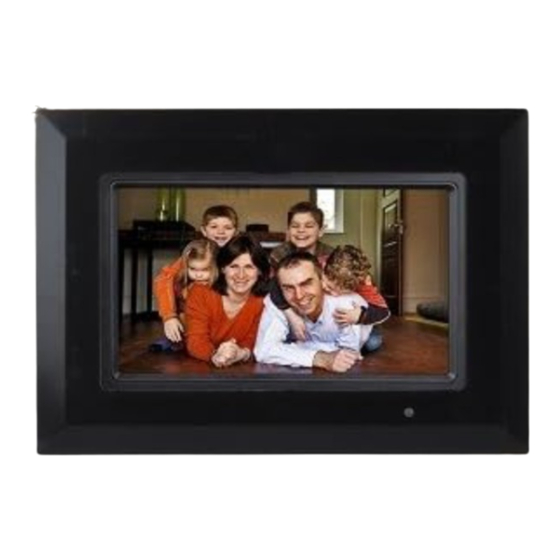
Digital Photo Frame
T a b l e o F C o n T e n T s
Warnings and Precautions .................................2
Important safety Instructions ............................3
In the box & Features .......................................4
Powering the Unit .............................................5
Changing the Remote battery ...........................5
setting the Time & setting the Date .................6
loading Photos onto the Unit ...........................7
Viewing Photos .................................................7
Main Menu ........................................................8
operational notes .............................................9
Taking a Frame off .........................................10
Putting a Frame on .........................................11
locations of Controls & Definitions ......... 12-15
service & Parts Information ...........................16
Advertisement
Table of Contents

Summary of Contents for GPX PF 738
-
Page 1: Table Of Contents
Digital Photo Frame T a b l e o F C o n T e n T s Warnings and Precautions ...2 Important safety Instructions ...3 In the box & Features ...4 Powering the Unit ...5 Changing the Remote battery ...5 setting the Time &... -
Page 2: Warnings And Precautions
Warnings and Precautions To PReVenT FIRe oR sHoCK HaZaRDs, Do noT eXPose THIs UnIT To RaIn oR MoIsTURe. This symbol, located on back or bottom of the unit, is intended to alert the user to the presence of uninsu- lated “dangerous voltage” within the product’s enclosure that may be of sufficient magnitude to constitute a risk of electric shock to persons. -
Page 3: Important Safety Instructions
Important safety Instructions 1. Read Instructions - all the safety and operating instruction should be read before the product is operated. 2. Retain Instructions - The safety and operating instruction should be retained for future reference. 3. Heed Warnings - all warning on the product and in the operating instruc- tions should be adhered to. -
Page 4: In The Box & Features
Remote Control, Remote battery, included • aC/DC adaptor, Ul listed • Documentation Features Digital Photo Frame displays photos, pictures, and videos and plays digital file format music • JPeG Picture File Format 7" TFT Color Display • Resolution: 480 x 234 •... -
Page 5: Powering The Unit
Powering the Unit Changing the Remote battery The Remote Control has a button cell battery pre loaded into it. Step 1: Push the Release button and pull out the battery Compartment to access the battery. Step 2: Replace the old battery with an equivalent new battery (CR2025). Step 3: The positive side of the battery, as indicated by a plus symbol, must be facing up with inserted into the remote. -
Page 6: Setting The Time & Setting The Date
setting the Time Step 1: Press the Power Button to turn the unit on. Step 2: navigate to the setup Menu on the unit by selecting “setup” on the main menu. Step 3: Go to the third option on the setup Menu, which is “Custom setup”. The last option in Custom setup is “set Time”... -
Page 7: Loading Photos Onto The Unit
loading Photos onto the Unit Step 1: Press the Power Button to turn the unit on. Step 2: To load photographs onto the unit, insert a sD, MMC, XD, or Ms memory card, or a Usb thumb drive. Step 3: select the Copy/Del option from the main menu. -
Page 8: Main Menu
Main Menu Photo select the Photo option to view photos loaded onto the unit. Setup select the setup option to adjust the Interval Time, Transition Effect, Play Mode, Show Type, TFT Brightness, TFT Contrast, TFT Saturation, OSD Language, Style, Media, Default, and Set Time. Calendar select the Calendar option to view and adjust the date. -
Page 9: Operational Notes
operational notes • In order to play your photos, videos and music, you will need one of the following: a Usb mass storage device (thumb drive) or an sD/MMC/XD/Ms memory card . • You cannot access an external memory card when a Usb mass storage device is connected. -
Page 10: Taking A Frame Off
Taking a Frame off Step 1: Lay the unit down on a flat surface, with the display facing upward. Step 2: Place a soft cotton cloth over the display. This will keep the display clean of finger prints while changing the frame. Step 3: Put your thumbs just inside the frame, over the cloth covered display. -
Page 11: Putting A Frame On
Putting a Frame on Step 1: If there is currently a frame on the unit, remove it and grab the desired frame. Step 2: Match the small clear window on the frame with the infrared receiver on the unit. • If the small clear window on the frame is not matched up with the infra- red receiver on the unit, the unit will not respond to the remote control. -
Page 12: Locations Of Controls & Definitions
locations of Controls... - Page 13 Control Definitions LCD Display Use the lCD Display as the primary interface for viewing digital photos loaded onto the frame and for navigating the unit’s menus. SD/MMC/XD/MS Memory Card Slot Use the sD/MMC/XD/Ms Memory Card slot to load the named memory card types onto the unit.
- Page 14 locations of Controls...
- Page 15 Control Definitions Power Button Press the Power button to turn the unit off and on. Display Button Press the Display button to view on-screen photo information when in slideshow mode. Directional Buttons Press the Directional buttons to change the orientation of photos while they are playing in slideshow mode.
-
Page 16: Service & Parts Information
Para descargar este manual de instrucción en inglés, español, o francés visite la sección de la ayuda en www.gpx.com. Pour télécharger ce manuel d’instruction en anglais, espagnol, ou le Français visitez la section de soutien à www.gpx.com.


Need help?
Do you have a question about the PF 738 and is the answer not in the manual?
Questions and answers