Table of Contents
Advertisement
Advertisement
Chapters
Table of Contents

Related Manuals for Polaris 2011 GEM


Summary of Contents for Polaris 2011 GEM
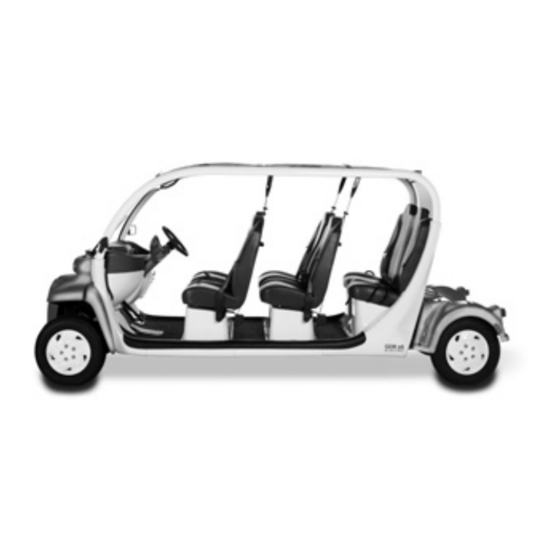
- Page 1 Global Electric Motorcars® by 2011 Owner’s Manual...
-
Page 2: Table Of Contents
Table of Contents . Introduction ..................3 . Vehicle Identification and Specifications ........8 . Things to Know Before You Operate Your Vehicle .....16 . Understanding the Standard Features of Your Vehicle ....21 . Understanding the Optional Features of Your Vehicle ....56 . -
Page 3: Gem Owner's Manual
GEM Owner’s Manual - Page 2... - Page 4 Introduction CONTENTS . About this Manual ................4 . Introduction to Safe Ownership of GEM models ......5 . Cautions, Warnings and Notes ............7 NOTE: This manual is subject to change. For the latest version please visit www.gemcar.com, and click on About GEM, Current GEM Owners, and Owners Manuals.
-
Page 5: Introduction
Introduction ABOUT THIS MANUAL Thank you for purchasing your GEM car by Polaris Industries Inc. Your vehicle is designed to operate exclusively on battery power. It is an emission-free vehicle. The ideal application for a battery-powered neighborhood electric vehicle (NEV) occurs when the daily driving pattern is predictable and the distance is relatively short. - Page 6 Introduction If questions arise after reading the manual, you may contact us at 866.764.0616. Please have your Vehicle Identification Number (VIN) and date of purchase information available. NOTE: All information and specifications in this Owner’s Manual are current at the time of printing. However, due to GEM policy of continuous product improvement, we reserve the right to make changes, at any time, without written notice or obligation.
- Page 7 Introduction Specific to GEM car models, the following safe habits should always be followed: • GEM battery-electric vehicles are open vehicles. For this reason, safety belts should always be worn by all occupants to prevent being thrown from the vehicle during operation. If your GEM car is equipped with doors, these were designed and are intended only to keep wind and water out of the vehicle and should not be relied upon to keep occupants in the vehicle or to protect them in case of collision.
- Page 8 Introduction and provides the “fuel” to the GEM cars electric drive system) is sufficient to cause death by electrocution. For this reason, GEM car owners should NEVER attempt to do any maintenance or repair work on their GEM cars electric drive system, including the battery pack, unless they have had special training.
- Page 9 Vehicle Identification and Specifications CONTENTS . Vehicle Information ..............9 . General Specifications ...............10 GEM Owner’s Manual - Page 8...
-
Page 10: Vehicle Identification And Specifications
Vehicle Identification and Specification VEHICLE INFORMATION 0001 Figure 1 - VIN/Certification Label Location For all model vehicles, the Vehicle Identification Number (VIN) can be found on the VIN/Certification Label, located on the left rear section of the roof panel. The VIN indicates the model year, the model type and the serial number of the vehicle. -
Page 11: General Specifications
Vehicle Identification and Specifications GENERAL SPECIFICATIONS GEM e2 Specifications Motor: GE Heavy Duty 5 hp, shunt DC electric motor Drive System: Single speed front wheel drive trans axle Tire: 2-ply street rated tires 12” 165/70R-12 Battery Pack: Six 12-volt lead acid batteries of specific make and model number Accessory Power Supply: 12 volt, 30 amp DC/DC converter... -
Page 12: General Specifications
Vehicle Identification and Specifications GENERAL SPECIFICATIONS GEM e4 Specifications Motor: GE Heavy Duty 5 hp, shunt DC electric motor Drive System: Single speed front wheel drive trans axle Tire: 2-ply street rated tires 12” 165/70R-12 Battery Pack: Six 12-volt lead acid batteries of specific make and model number Accessory Power Supply: 12 volt, 30 amp DC/DC converter... - Page 13 Vehicle Identification and Specifications GENERAL SPECIFICATIONS GEM eS Specifications Motor: GE Heavy Duty 5 hp, shunt DC electric motor Drive System: Single speed front wheel drive trans axle Tire: 2-ply street rated tires 12” 165/70R-12 Battery Pack: Six 12-volt lead acid batteries of specific make and model number Accessory Power Supply: 12 volt, 30 amp DC/DC converter...
- Page 14 Vehicle Identification and Specifications GENERAL SPECIFICATIONS GEM eL Specifications Motor: GE Heavy Duty 5 hp, shunt DC electric motor Drive System: Single speed front wheel drive trans axle Tire: 2-ply street rated tires 12” 165/70R-12 Battery Pack: Six 12-volt lead acid batteries of specific make and model number Accessory Power Supply: 12 volt, 30 amp DC/DC converter...
- Page 15 Vehicle Identification and Specifications GENERAL SPECIFICATIONS GEM eL XD Specifications Motor: GE Heavy Duty 7 hp vented, shunt DC electric motor Drive System: Single speed front wheel drive trans axle Tire: 2-ply street rated tires TR13” P185/70R13 86H Battery Pack: Nine 8-volt lead acid batteries of specific make and model number Accessory Power Supply:...
- Page 16 Vehicle Identification and Specifications GENERAL SPECIFICATIONS GEM e6® Specifications Motor: GE Heavy Duty 7 hp vented, shunt DC electric motor Drive System: Single speed front wheel drive trans axle Tire: 2-ply street rated tires TR13” P185/70R13 86H Battery Pack: Six 12-volt lead acid batteries of specific make and model number (e6 w/S option) Nine 8-volt lead acid gel batteries of specific make and model number Accessory Power Supply:...
- Page 17 Things to Know Before You Operate Your Vehicle CONTENTS . Driving and Alcohol ..............17 . Safety Information ..............18 GEM Owner’s Manual - Page 16...
-
Page 18: Things To Know Before You Operate Your Vehicle
Things to Know Before You Operate Your Vehicle DRIVING AND ALCOHOL Your ability to drive your GEM car can be seriously impaired with blood alcohol levels far below the legal minimum. If you are drinking alcohol, don’t drive. Ride with a designated non-drinking driver, call a cab, or use public transportation. -
Page 19: Safety Information
Things to Know Before You Operate Your Vehicle SAFETY INFORMATION WARNING Your vehicle is battery powered. If handled improperly, batteries can be dangerous. Follow the precautions provided on pages 18-19 during charging operations to avoid personal injury or damage to electrical components in the vehicle. •... - Page 20 Things to Know Before You Operate Your Vehicle • Electrolyte can leak from damaged or defective flooded batteries. Avoid contact with skin, eyes or clothing. • Batteries contain acid, which can cause severe burns. If battery fluid comes in contact with your skin, flush the affected areas with water for at least 15 minutes and then seek medical assistance.
-
Page 21: Roll Over Warning
Things to Know Before You Operate Your Vehicle ROLL OVER WARNING Do not attempt sharp turns or abrupt maneuvers or other unsafe driv- ing actions that can cause loss of vehicle control and possible roll over. Failure to operate this vehicle safely may result in an accident, roll over, and serious injury or death. - Page 22 Understanding the Standard Features of Your Vehicle CONTENTS . Instrument Pod ................22 . Windshield Wipers ..............23 . Foot Pedals ................36 . Parking Brake ................37 . Main Disconnect Switch .............39 . Safety Belts ................42 ............... . Convenience Items GEM Owner’s Manual - Page 21...
-
Page 23: Understanding The Standard Features Of Your Vehicle
Understanding the Standard Features of Your Vehicle INSTRUMENT POD Figure 2 - Instrument Pod 1. Turn Signal/Windshield Wiper & Washer/Horn Lever 2. Trip/Odometer Switch 3. Headlight Switch 4. Forward/Reverse Switch 5. Key Switch 6. LCD Display NOTE: Further explanation of these vehicle features are found on the next nine pages. -
Page 24: Turn Signal
Understanding the Standard Features of Your Vehicle TURN SIGNAL/WINDSHIELD WIPER & WASHER /HORN LEVER Figure 3 - Turn Signal Lever The turn signal lever is multi-functional, controlling the turn signals, horn, wiper, and washer, if so equipped. Figure 3 illustrates how to activate the different functions. -
Page 25: Windshield Wipers
Understanding the Standard Features of Your Vehicle HORN Press the turn signal lever inward toward the instrument pod to activate the horn. WINDSHIELD WIPER Push the turn signal lever away from the steering wheel to turn on the windshield wiper. Pull the turn signal lever towards the steering wheel to turn off. - Page 26 Understanding the Standard Features of Your Vehicle HEADLIGHT SWITCH Headlight switch turns the headlights and taillights on and off. FORWARD/REVERSE SWITCH Drive High With the key turned on and ‘High’ selected, pushing down on the accelerator pedal will move the vehicle in a forward direction with the speed range of 0-25 MPH.
- Page 27 Understanding the Standard Features of Your Vehicle NOTICE Always bring the vehicle to a complete stop before changing the position of the forward/reverse switch. KEY SWITCH When the key is in the ‘ON’ position (turned clockwise), the display will light up and all accessories may be turned on.
- Page 28 Understanding the Standard Features of Your Vehicle LCD DISPLAY Figure 4 - LCD Display GEM Owner’s Manual - Page 27...
- Page 29 Understanding the Standard Features of Your Vehicle LCD Display Indicators Left Turn Indicator Low Fluid Level/Parking Brake On Indicator High Motor Temperature Warning Indicator Odometer/Trip Meter Charger Connected Indicator State of Charge Indicator/Battery Discharge Indicator (BDI) Current Limiting Mode Indicator Safety Belt Warning Indicator Reverse Indicator Drive-Low Setting...
-
Page 30: Turn Indicators
Understanding the Standard Features of Your Vehicle TURN INDICATORS The turn signal arrows will flash corresponding to the direction of the turn signal lever. HIGH TEMPERATURE MOTOR OR MOTOR CONTROLLER If the motor temperature icon is lit or an error code 41 is displayed in the speedometer/ error code display, your motor or motor controller may be overheating. - Page 31 Understanding the Standard Features of Your Vehicle NOTICE If the high motor temperature warning indicator is lit, or code 41 is displayed, pull over and park the vehicle in a cool location as soon as possible. Wait until motor temperature is reduced and the high motor temperature icon turns off before continuing to drive.
- Page 32 Understanding the Standard Features of Your Vehicle CHARGER CONNECTED The charger connected icon and state of charge/Battery Discharge Indicator gauge turns on approximately 8-10 seconds after the extension cord is plugged in. After charging is 100% complete, the charger connected icon will be the only thing lit and the bar graph will not be illuminated.
-
Page 33: Current Limiting Mode
Understanding the Standard Features of Your Vehicle CURRENT LIMITING MODE The current limiting mode is designed to protect the batteries and motor. If the current limiting mode icon is illuminated, it is an indication of one of the following issues: Battery Pack Under-Voltage Battery pack under-voltage would coincide with a low charge reading on the state of charge gauge. - Page 34 Understanding the Standard Features of Your Vehicle SAFETY BELT The safety belt icon reminds you to fasten your safety belt. The icon remains on for 45 seconds. WARNING • Riding in the cargo area could result in death or serious injury. •...
-
Page 35: Windshield Wiper
Understanding the Standard Features of Your Vehicle WINDSHIELD WIPER NOTE: The windshield wiper circuit is protected by a 10 amp fuse located in the fuse block behind the fuse access panel. If the wiper is not working check the fuse and if blown, replace it with the same type and rating. - Page 36 Understanding the Standard Features of Your Vehicle NOTICE When replacing a blown fuse, it is important to use only a fuse having the correct amperage rating. The use of a fuse with a rating other than indicated may result in an electrical system overload. If a properly rated fuse continues to blow, it indicates a problem in the circuit that must be corrected.
-
Page 37: Foot Pedals
Understanding the Standard Features of Your Vehicle FOOT PEDALS Figure 6 - Foot Pedals 1. Brake Pedal 2. Accelerator Pedal BRAKE PEDAL The brake pedal (Figure 6) is located on the floor to the left of the accelerator pedal. To slow or stop the vehicle, firmly press the brake pedal. ACCELERATOR PEDAL The accelerator pedal (Figure 6), is located on the floor, close to the center of the vehicle and is used to control your speed. -
Page 38: Parking Brake
Understanding the Standard Features of Your Vehicle PARKING BRAKE Figure 7 - Parking Brake (GEM e2, GEM eS, GEM eL, GEM eL XD) ® Figure 8 - Parking Brake (GEM e4, GEM e6 GEM Owner’s Manual - Page 37... -
Page 39: Parking Brake
Understanding the Standard Features of Your Vehicle 1. Parking Brake (models e2, eS, eL, eL XD) Figure 7 2. Parking Brake (models e4, e6®) Figure 8 The parking brake located to the lower right of the driver seat. To engage the parking brake, lift up on the handle. To release, press the button on the end of the brake handle and lower it. -
Page 40: Main Disconnect Switch
Understanding the Standard Features of Your Vehicle MAIN DISCONNECT SWITCH AND FUSE PANEL Figure 9 - Main Disconnect Switch The main disconnect switch (MDS) (Figure 9), is located inside the fuse access panel on the lower dash. The switch is clearly labeled ‘ON’ and ‘OFF’. - Page 41 Understanding the Standard Features of Your Vehicle NOTICE When replacing a blown fuse, it is important to use only a fuse having the correct amperage rating. The use of a fuse with a rating other than indicated may result in an electrical system overload.
-
Page 42: Convenience Items
Understanding the Standard Features of Your Vehicle CONVENIENCE ITEMS SEAT ADjUSTMENT - 4 & 6 PASSENGER ONLY The front seats on the GEM e4 and GEM e6® models are equipped with manual seat adjustments. The seat adjustment handle is directly under the front of the seat. - Page 43 Understanding the Standard Features of Your Vehicle SAFETY BELTS Figure 10 - Safety Belts (Bench Seat) Figure 11 - Safety Belts (Bucket Seat) 1. Belt 2. Latch 3. Buckle The GEM car is equipped with safety belts for both driver and passengers.
- Page 44 Understanding the Standard Features of Your Vehicle Research has shown that safety belts save lives. Safety belts can reduce the seriousness of injuries in a single vehicle accident. Some of the worst injuries happen when people are thrown from the vehicle. Safety belts provide protection, and they reduce the risk of injury caused by striking the inside of the vehicle.
- Page 45 Understanding the Standard Features of Your Vehicle WARNING In a collision, you and your passengers can suffer death or serious injury if you are not properly buckled up. You can strike the interior of your vehicle or other passengers, or you can be thrown out of the vehicle. Always be sure you and others in your vehicle are buckled up properly.
- Page 46 Understanding the Standard Features of Your Vehicle and not resting on your neck. The retractor will withdraw any slack in the belt. 6. To release the belt, push the red button on the latch. If necessary, slide the buckle down the webbing to allow it to retract fully. WARNING A frayed or torn belt could rip apart in a collision and lead to death or serious injury.
- Page 47 Understanding the Standard Features of Your Vehicle WARNING Maximum occupancy is limited to six people (including the driver) in the GEM e6®, four people in the GEM e4 and two people in the GEM e2, GEM eS, GEM eL, and GEM eL XD. Overloading can result in an accident which could cause death or serious injury.
- Page 48 Understanding the Standard Features of Your Vehicle SEAT BELTS AND PREGNANT WOMEN We recommend that pregnant women use seat belts throughout their pregnancy. Keeping the mother safe is the best way to keep the baby safe. Pregnant women should wear the lap part of the belt across the thighs and as snug across the hips as possible.
-
Page 49: Child Restraint
Understanding the Standard Features of Your Vehicle CHILD RESTRAINT Everyone in your vehicle needs to be buckled up at all times - babies and children, too. Every state in the United States and all Canadian provinces require that small children ride in proper restraint systems. This is the law, and you can be prosecuted for ignoring it. - Page 50 Understanding the Standard Features of Your Vehicle INFANTS AND CHILD RESTRAINTS Safety experts recommend that children ride rearward-facing in the vehicle until they are at least one year old and weigh at least 20 lbs (9 kg). Two types of child restraints can be used rearward-facing: infant carriers and “convertible”...
- Page 51 Understanding the Standard Features of Your Vehicle TIPS FOR GETTING THE MOST OUT OF YOUR CHILD RESTRAINT • Before buying any restraint system, make sure that it has a label certifying that it meets all applicable Safety Standards. The manufacturer also recommends that you try a child restraint in the vehicle seats where you will use it before you buy it.
- Page 52 Understanding the Standard Features of Your Vehicle • If the belt still cannot be tightened, or if pulling and pushing on the restraint loosens the belt, disconnect the latch plate from the buckle, turn the buckle around, and insert the latch plate into the buckle again.
- Page 53 Understanding the Standard Features of Your Vehicle The belt-positioning booster seat is for children weighing more than 40 lbs (18 kg), but who are still too small to fit the vehicle’s seat belts properly. If the child cannot sit with knees bent over the vehicle’s seat cushion while the child’s back is against the seat back, they should use a belt-positioning booster seat.
- Page 54 Understanding the Standard Features of Your Vehicle Not all child restraint systems will be installed as we have described here. Again, carefully follow the instructions that come with the child restraint system. TRANSPORTING PETS Pets should be restrained in the rear seat in a pet harness, or in a pet carrier that is secured by seat belts.
- Page 55 Understanding the Standard Features of Your Vehicle Figure 13 - Upper Dash 1. Cup Holder 2. Glove Box Door 3. Package Tray 4. Glove Box Lock The glove box (Figure 13), is located on the top center of the upper dash and is equipped with a lock to protect against theft or damage.
- Page 56 Understanding the Standard Features of Your Vehicle Electrical wiring, circuit boards and components are located under and behind the upper and lower dash. NOTICE Liquids can damage electrical components and the circuit board. Handle liquids with care. Do not spray water directly into the upper or lower dash. GEM Owner’s Manual - Page 55...
- Page 57 Understanding the Optional Features of Your Vehicle REAR ACCESSORY OPTIONS Figure 15 - TrunkBack Figure 16 - LinksBack Figure 17 - Clip-In StakeBack GEM Owner’s Manual - Page 56...
-
Page 58: Understanding The Optional Features Of Your Vehicle
Understanding the Optional Features of Your Vehicle 1. Release Handle - Your ignition key opens this lock, always lock after changing optional accessory backs. 2. Cover 3. Cover Lock - There is a separate key for this lock. Rear accessories options are available from your dealer and they are interchangeable. - Page 59 Understanding the Optional Features of Your Vehicle As the picture shows on page 56, the release handle is located on the back panel, just below the rear window opening ledge. To remove or install rear accessories: 1. Remove contents of rear accessory. 2.
- Page 60 Understanding the Optional Features of Your Vehicle HAZARD WARNING FLASHERS Your vehicle’s hazard warning flasher is an emergency warning system. When you activate it, all front and rear directional signals will flash intermittently. Use it when your vehicle is disabled on or near the road.
- Page 61 Understanding the Optional Features of Your Vehicle HEATED SEATS Heated seats provide comfort and warmth on cold days and can help soothe sore muscles and backs. For 2-passenger vehicles, the front driver and passenger seats are heated. For 4-passenger and 6-passenger vehicles both front and second row seats are heated.
-
Page 62: Stereo System
Understanding the Optional Features of Your Vehicle WARNING Persons who are unable to feel pain to the skin because of advanced age, chronic illness, diabetes, spinal cord injury, medication, alcohol use, exhaustion, or other physical conditions must exercise care when using the seat heater. It may cause burns even at low temperatures, especially if used for long periods of time. - Page 63 Understanding the Optional Features of Your Vehicle PUBLIC ADDRESS SYSTEM The optional Public Address (PA) System features a heavy-duty microphone, speaker, and a four-tone siren. Refer to your PA system user’s manual for detailed operating instructions. CHROME FRONT & REAR BUMPERS The chrome bumpers are for appearance only and will protect the body panels from minor dents and scratches in some parking maneuver situations.
- Page 64 Understanding the Optional Features of Your Vehicle RUGGED BUMPERS The rugged bumpers will protect the body panels for minor dents and scratches in some parking maneuver situations. They will not provide any protection to the vehicle in front or rear collisions. NOTICE The bumpers are not designed for pushing or towing purposes.
- Page 65 Understanding the Optional Features of Your Vehicle GRAB HANDLE PACKAGE Grab handles can be added at each seat position to assist you in entering and exiting your GEM car. The interior grab handles are not intended to retain passengers in the vehicle. Seat belt must be worn at all times.
- Page 66 Understanding the Optional Features of Your Vehicle SOFT DOOR OPERATION From either inside or outside the vehicle, locate the zipper at the bottom front or mid rear of each door. Unzip the door to open. The door can be held in the open position using the straps and snaps located on the pillars/door supports.
- Page 67 Understanding the Optional Features of Your Vehicle FRAMED CANVAS DOOR OPERATION To open the doors from outside the vehicle, locate the knob and slide in the direction of the arrows (1). To open doors from inside the vehicle, locate the mid-center nylon strap (2) and pull towards the front of the vehicle.
- Page 68 Understanding the Optional Features of Your Vehicle STEERING COLUMN LOCK OPERATION To lock, turn the key forward (clockwise) while turning the steering wheel until you feel the lock/key set into place, then remove the key. To unlock, insert the key and turn it backwards (counterclockwise). ADjUSTABLE TILT STEERING COLUMN OPERATION To operate pull the lever to the left of the column backward toward the driver to release the tilt column and push it forward away from the...
- Page 69 Understanding the Optional Features of Your Vehicle DOME LIGHT OPERATION The dome light is turned on or off by pressing the button (1) located on the side of the light. The dome light is powered by 4-AA batteries. To replace the batteries, remove the light cover and install new batteries per the illustration inside the battery compartment.
- Page 70 Understanding the Optional Features of Your Vehicle WINDSHIELD WASHER OPERATION The windshield washer can be used with the windshield wipers to remove dirt and debris from the vehicles windshield. To operate the washer, first turn on the windshield wipers, then press in on the turn signal lever (1).
- Page 71 Understanding the Optional Features of Your Vehicle HIGH/LOW BEAM HEADLIGHT OPERATION The high/low beam headlights (1) are operated by moving the headlight switch (2) located on the steering column to the low beam, down position, or the high beam, up position. To turn off the lights, move the switch to the “Off”...
- Page 72 Understanding the Optional Features of Your Vehicle ACCESSORY OUTLET Figure 17 - Accessory Outlet 1. Accessory Outlet The optional accessory outlet (Figure 17) is located on the lower dash, to the right of the fuse access panel. This outlet will accept a standard automotive 12-volt accessory outlet and is intended for moderately powered accessories, such as a cellular phone.
- Page 73 Understanding the Optional Features of Your Vehicle ACCESSORY OUTLET CONTINUED NOTICE • Do not plug in devices requiring power exceeding 25 watts. Damage to the vehicle electrical system may occur or an accessory fuse may blow. • The fuse for the power outlet plug is located in the fuse block under the access panel in the center of the lower dashboard.
- Page 74 Operation and Maintenance CONTENTS . Basic Operation .................74 . What to do in Emergencies ............74 . Basic Maintenance ..............76 . Care and Cleaning ..............101 . Vehicle Maintenance Schedule ..........104 GEM Owner’s Manual - Page 73...
-
Page 75: Operation And Maintenance
Operation and Maintenance BASIC OPERATION Basic procedure of how to operate the vehicle. 1. Unplug the electrical charge cord from the front of the vehicle. 2. Fasten safety belts and adjust mirrors as necessary. 3. Turn key ‘On’. 4. Depress brake pedal and move direction switch to desired position. 5. - Page 76 Operation and Maintenance NOTE: If any other codes are present, contact your GEM car Dealer or Customer Service at 1.866.764.0616 for assistance. TRANSPORTING YOUR VEHICLE The best way to transport your vehicle is in an enclosed trailer. If it is necessary to transport your vehicle on an open trailer, follow these guidelines: 1.
-
Page 77: Battery Charging
Operation and Maintenance NOTICE TOWING THE VEHICLE IS NOT RECOMMENDED. This vehicle is not designed for dolly towing. Any vehicle failures resulting from dolly towing will void warranty. BASIC MAINTENANCE WARNING The main disconnect switch should be turned off before any vehicle maintenance is started. - Page 78 Operation and Maintenance The GEM car has a battery control and recharge system specially designed for electric vehicle usage. Depending on the model and options of your GEM, it may be equipped with Flooded-wet cell or valve regulated Gel type lead acid batteries.
- Page 79 Operation and Maintenance • New batteries will not perform to their fullest capacity until they have been discharged and recharged 20 to 30 times. Batteries should be fully charged before the first use. • When recharging, it is preferable to have the battery pack at room temperature.
- Page 80 Operation and Maintenance WARNING • Battery fluid is a corrosive acid solution and can burn or blind you. • Do not allow battery fluid to contact eyes, skin or clothing. If acid splashes in eyes or on the skin, flush the area immediately with large quantities of water.
-
Page 81: Battery Charger
Operation and Maintenance BATTERY CHARGER The battery pack should be charged whenever convenient and no matter the state of charge. If no green bars are lit, the battery pack should be put on charge as soon as possible. A full recharge cycle (state of charge showing only 1 red bar) can take 8 hours or more for standard battery pack, and up to 14 hours for heavy duty battery pack. - Page 82 Operation and Maintenance BATTERY CHARGE RECEPTACLE Figure 18 - Charging Receptacle Charging Receptacle The Battery Charge Receptacle (Figure 18), is located on the hood. It accepts a standard, 3 wire, grounded, extension cord and should not exceed the following: • 12 gauge wire with three wire grounded;...
-
Page 83: Battery Care
Operation and Maintenance BATTERY CARE Your GEM car is equipped with either six 12-volt Gel batteries, six 12-volt Flooded batteries, or nine 8-volt Gel batteries. All types are shown in Figure Figure 19 - Gel and Flooded Batteries NOTICE Each vehicle is programmed at the factory for a particular battery type. Switching battery types should only be done by a GEM factory-trained technician. - Page 84 Operation and Maintenance Flooded Battery Fill Well Top of Battery Battery Plates Figure 20 - Fill Wells of flooded battery 1. Bottom of Fill Well 2. Fill Cap Each battery contains 6 screw out fill caps to expose the fluid wells. Figure 20 shows one cap removed to show the fill wells.
- Page 85 Operation and Maintenance Battery Location for the GEM e4, GEM eS, GEM eL, and GEM eL XD Models Four of the batteries are located under the bench seat and two of the six batteries are located under the battery access cover in the center of the bed. The battery access cover, as shown in Figure 21, can be removed by unscrewing four fasteners #8 X 3/4”...
- Page 86 Operation and Maintenance Battery Location for the GEM e2, GEM e4, and GEM e6® Models (Standard) On the GEM e2 and GEM e4 models four batteries are under the seat and two of the six batteries are located under the maintenance plate located in the center of the rear spat.
-
Page 87: Battery Maintenance
Operation and Maintenance BATTERY MAINTENANCE WARNING - HIGH VOLTAGE The battery pack is at a high voltage. High voltage is always present at the battery terminals. Never touch the battery terminals when performing monthly battery maintenance procedures. Failure to follow these directions may result in death or serious injury. - Page 88 Operation and Maintenance NOTE: For best battery life, add only distilled water. 2. Make sure the battery caps are firmly in place after maintenance and before washing. (See step 3) 3. Batteries should be kept clean and free of corrosion. Wash the tops and terminals of batteries with a solution of baking soda and water (1 cup baking soda per gallon of water) once per month.
- Page 89 Operation and Maintenance WARNING If battery cable terminals are damaged or corroded, they should be replaced or cleaned as necessary. Failure to do so may cause them to overheat during opera- tion, possibly leading to fire which may result in death or serious injury. 5.
- Page 90 Operation and Maintenance BATTERY CARE DURING STORAGE To allow for extended storage time, your GEM car has several features to enhance battery life. A fully charged vehicle can be stored (with the ignition key in the ‘OFF’ position), for up to 10 days. It will lose some of its charge during this period.
- Page 91 Operation and Maintenance WARNING - HIGH VOLTAGE The main disconnect switch will disable the vehicle by disconnecting the battery pack from the motor. It does not disable the battery pack. HIGH VOLTAGE will be present at the battery terminals. HIGH BATTERY VOLTAGE IS ALWAYS PRESENT. DO NOT TOUCH THE BATTERY TERMINALS.
- Page 92 Operation and Maintenance BRAKE FLUID LEVEL 1. Reservoir 2. Cap 3. Maximum Level Mark 4. Minimum Level Mark The brake fluid reservoir (Figure 23) is located under the hood, above and to the rear of the left front tire. The fluid level of your brake system is a very important safety component.
- Page 93 Operation and Maintenance NOTE: The vehicle is equipped with a four-wheel hydraulic braking system. WARNING Use standard DOT3 brake fluid. Use of any other fluid may result in loss of braking ability, leading death or serious injury. TIRES Proper tire inflation pressure is essential to the safe and satisfactory operation of your vehicle.
- Page 94 Operation and Maintenance 2. Range Improper inflation pressures can cause uneven wear patterns to develop across the tire tread. These abnormal wear patterns will reduce tread life resulting in premature replacement. Under-inflation increases tire rolling-resistance, resulting in lower vehicle range. 3.
- Page 95 Operation and Maintenance WARNING Improperly inflated tires are dangerous and can cause accidents. Overinflated or under inflated tires can affect vehicle handling and can • fail suddenly, leading to an accident that may cause death or serious injury. • Unequal tire pressures from one side of the vehicle to the other can cause the vehicle to drift to the right or left.
- Page 96 Operation and Maintenance WARNING • Do not use a tire size other than that specified on your vehicle’s tire label. • Improperly sized tires can cause vehicle components to wear out prematurely and may change your vehicle’s ride, handling, and steering behavior. In addition, it may affect the accuracy of your speedometer/odometer.
- Page 97 Operation and Maintenance WARNING Do not use a tire, wheel size or rating other than that specified for your vehicle. Some combinations of unapproved tires and wheels may change suspension dimen- sions and performance characteristics, resulting in changes to steering, handling, and braking of your vehicle.
- Page 98 Operation and Maintenance TIRE CHANGING AND jACKING AND TIE-DOWN POINTS Figure 24 - Jacking and Tie Down Points (X) Tie-down points for transporting your GEM car, see page 75 for transporting vehicle. In the event of a flat tire, GEM recommends using the GEM dealer network or Customer Service to change it, because they have the proper equipment.
- Page 99 Operation and Maintenance • Set the parking brake and block both the front and rear of the tire diagonally opposite the jacking position. For example, if the right front tire is being changed, block the left rear wheel. • Use a small floor style jack or low profile scissors jack only. •...
- Page 100 Operation and Maintenance FUSE ACCESS PANEL/FUSE BLOCK The fuse block (Figure 25) is located inside the fuse access panel (Figure 26), which is on the lower dash. The ignition key opens the fuse access panel. To open, turn the key counterclockwise one quarter turn.
- Page 101 Operation and Maintenance A sticker is attached to the inside of the fuse access panel showing the function and amp rating of each fuse as shown in Figure 27. The ‘Spare’ and ‘Heater Coil’ fuses are used for accessories. Figure 27 - Fuse Decal GEM Owner’s Manual - Page 100...
-
Page 102: Key Replacement
Operation and Maintenance KEY REPLACEMENT To obtain an extra or replacement key for your vehicle please call Global Electric Motorcars Customer Service at 1.866.764.0616. Please have your key code and VIN ready. Please refer to page 9 for key numbers or refer to key numbers stamped on key. - Page 103 Operation and Maintenance CLEANING THE SEATS To clean the seats of your GEM car, use GEM Foaming All Surface Cleaner available at your local GEM car dealer. Rubbing seats with warm water and a clean, damp cloth will also remove dirt. Substances such as tar, asphalt, and other soils will stain if not removed quickly.
- Page 104 Operation and Maintenance WARNING Do not use volatile solvents for cleaning purposes. Many are potentially flammable, and if used in closed areas they may cause respiratory harm. PROTECTION FROM THE ELEMENTS Covering your vehicle is optional, however, prolonged exposure to UV light may deteriorate the exterior and interior finish.
- Page 105 Operation and Maintenance MONTHLY VEHICLE MAINTENANCE MONTHLY TASKS 1. Check all six (6) flooded batteries for proper water level. (Not necessary if vehicle is equipped with maintenance free gel batteries). 2. Check battery terminals for tight connections. 3. Check tires for correct air pressure and wear. 4.
- Page 106 Limited Warranty and Customer Service CONTENTS . Limited Warranty .................106 .Global Electric Motorcars Customer Service........111 . Change of Address ................112 . Transfer of Limited Warranty ..............114 GEM Owner’s Manual - Page 105...
-
Page 107: Limited Warranty And Customer Service
Limited Warranty and Customer Service LIMITED WARRANTY COVERAGE PERIOD Polaris Sales Inc. warrants from the date of delivery to the first consumer, that each GEM car sold as “NEW” and “UNUSED” and pre-delivered by an authorized GEM dealer, will be free from any defect in material and/or workmanship for a period of: ONE (1) YEAR or 8,000 MILES;... - Page 108 Limited Warranty and Customer Service NOTE: To qualify for warranty protection, the selling dealer must file the warranty registration information on the Internet site GEM Connect within ten days of purchase. If this is not on file, we can not honor your warranty claim.
- Page 109 Limited Warranty and Customer Service This limited warranty shall not apply to damage or repair costs caused by: 1) Failure to operate, maintain, and service, as specified in the GEM car Owner’s Manual. 2) Abuse, misuse, neglect, accident, collision, or operation other than the specified design, use and speed.
- Page 110 Limited Warranty and Customer Service THERE ARE NO OTHER EXPRESS WARRANTIES ON YOUR GEM CAR BEYOND THOSE SET FORTH HEREIN, AND NO IMPLIED WARRANTIES OF MERCHANTABILITY OR FITNESS TO THE FULL EXTENT ALLOWED BY LAW. POLARIS AND ITS DEALERS SHALL NOT BE LIABLE FOR LOSS OF USE, INCONVENIENCE, LOST TIME, COMMERCIAL LOSS OR ANY INCIDENTAL, CONSEQUENTIAL OR OTHER DAMAGES.
- Page 111 Limited Warranty and Customer Service Global Electric Motorcars Business Hours 8:00 AM - 5:00 PM M-F CST 1.888.871.4367 Web Site: www.gemcar.com Some states do not allow the exclusion or limitation of incidental, consequential or other damages, or limitation on the length of an implied warranty, so the above limitations and exclusions may not apply to you.
- Page 112 Limited Warranty and Customer Service CUSTOMER SERVICE Prepare For Appointment If you’re having warranty work done, please be sure to have your Vehicle Identification Number (VIN) available along with all documents included with your warranty folder. All work to be performed may not be covered by the warranty.
- Page 113 Limited Warranty and Customer Service CHANGE OF ADDRESS Change of Address/2nd Owner Address Please copy the form on page 113 and mail to Global Electric Motorcars at the address below, to keep records current. Global Electric Motorcars Warranty Department 1301 39th St. N Suite 2 Fargo, North Dakota 58102 1.866.764.0616 Contact Global Electric Motorcars Customer Service...
- Page 114 Limited Warranty and Customer Service CHANGE OF ADDRESS FORM/2ND OWNER ADDRESS FORM |__|__|__|__|__|__|__|__|__|__|__|__|__|__|__|__|__| Vehicle Identification Number (See page 9, Vehicle Identification and Specifications section) ______________________________________________________ Last Name _________________________________________________ First Name _________________________________________________ Street Address _________________________________________________ City State Zip Code _________________________________________________ Phone # _______________________________________________________________ E-mail Address GEM Owner’s Manual - Page 113...
- Page 115 Limited Warranty and Customer Service TRANSFER OF LIMITED WARRANTY/SERVICE CONTRACT Transfer of Factory Limited Warranty/Service Contract Factory Limited Warranty/Service Contract may be transferred upon the sale of the Vehicle to another private party. The Factory Limited Warranty/Service Contract transfer must be made at the time of the Vehicle transfer.
- Page 116 Word Index CONTENTS . Word Index ................116 GEM Owner’s Manual - Page 115...
-
Page 117: Word Index
Word Index About This Manual, 3-7 Customer Assistance, 111 Accelerator Pedal, 36 Customer Service, 5, 107, 109,111 Accessory Outlet, 71 Driving and Alcohol, 17 Alcohol, 17 Emergencies, 74-75 Basic Operation, 74 E-Meter, 24, 30 Basic Maintenance, 76-104 Error Code, 30, 74 Battery, 18-19, 76-90 Extension Cord Use, 81 Battery Access, 84-85... - Page 118 Word Index Maintenance Schedule, 104 Turn Signal Indicator, 22-23 Main Disconnect Switch, 39 Turn Signal Lever, 22-23 Motor, 10-15, 29-30 Upper Dash, 54 New Owner Registration, 112-114 Vehicle Identification Number or Odometer, 30 VIN, 9 Parking Brake, 37-38 Vehicle Information, 9 Rear Accessories, 56-58 Warranty, 106-114 Right Turn Signal Indicator, 27-29...
- Page 119 Notes GEM Owner’s Manual - Page 118...
- Page 120 1301 39th Street N, Suite 2 Fargo, ND 58102 tel: 866.764.0616 e-mail: service@gemcar.com www.gemcar.com PN 9923696 Copyright © 2011 Polaris Industries Inc. All rights reserved. Printed in the USA.
Need help?
Do you have a question about the 2011 GEM and is the answer not in the manual?
Questions and answers