Table of Contents
Advertisement
Advertisement
Table of Contents

Related Manuals for AEG Electrolux 88101K-MN


Summary of Contents for AEG Electrolux 88101K-MN
- Page 1 88101K-MN User manual Ceramic glass induction...
-
Page 2: Table Of Contents
Contents Thank you for choosing one of our high-quality products. To ensure optimal and regular performance of your appliance please read this instruction manual carefully. It will enable you to navigate all processes perfectly and most efficiently. To refer to this manual any time you need to, we recommend you to keep it in a safe place. -
Page 3: General Safety
Safety information • To avoid small children and pets unintentionally switching the appliance on, we recom- mend activation of the child safety device. General safety • The appliance may only be installed and connected by trained, registered service engi- neers. •... -
Page 4: Description Of The Appliance
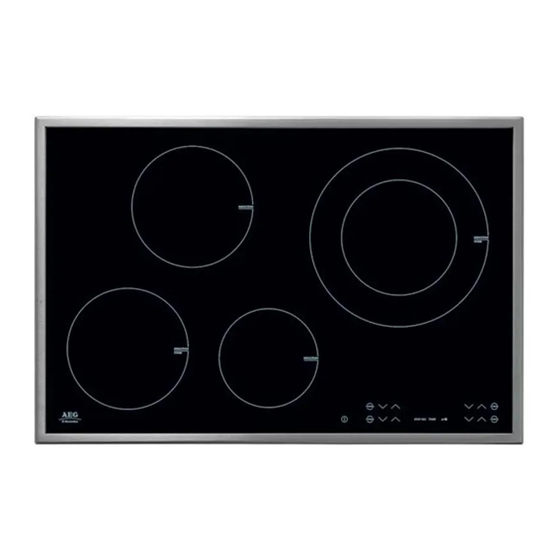
Description of the appliance Description of the appliance Cooking surface layout Induction cooking zone 1850 W, with power function 2500 W Induction cooking zone 2400 W, with power function 3700 W Control panel Induction cooking zone 1400 W, with power function 1800 W Induction cooking zone 1850 W, with power function 2500 W Control panel layout Lock... -
Page 5: Touch Control Sensor Fields
Description of the appliance Touch Control sensor fields The appliance is operated using Touch Control sensor fields. Functions are controlled by touching sensor fields and confirmed by displays and acoustic signals. Only touch the sensor fields which activate a desired function. Do not cover other sensor fields. If the control bar is touched for longer than 6 seconds, a signal sounds and the appliance switches itself off. -
Page 6: Operating The Appliance
Operating the appliance Residual heat can be used for melting and keeping food warm. The induction cooking zones create the heat required for cooking directly in the base of the cookware. The glass ceramic is merely heated by the residual heat of the cookware. Operating the appliance Use the induction cooking zones with suitable cookware. -
Page 7: Using The Child Safety Device
Operating the appliance Length of the auto- Intermediate heat set- Heat setting matic warm up ting [min:sec] 0:10 0:10 0:10 1:20 3:10 4:20 5:50 8:10 10:10 10:30 2:00 2:30 2:50 Locking/unlocking the control panel The control panel, with the exception of the “On/Off” sensor field, can be locked at any time in order to prevent the settings being changed e.g. -
Page 8: Switching The Power Function On And Off
Operating the appliance Setting the child safety device Step Control panel Display/Signal Switch on the appliance. Do not set a heat setting. Acoustic signal Touch until the signal sounds Touch Appliance switches off. The child safety device is engaged. Overriding the child safety device The child safety device can be released in this way for a single cooking session;... -
Page 9: Power Management
Operating the appliance Power Management The cooking zones of the cooking surface have a maximum power. The maximum power is reached when the heat setting 9 has been set for all cooking zones. Two cooking zones generate a pair (see figure) and therefore, the power management shares the maximum available power between these cook- ing zones. - Page 10 Operating the appliance Control panel Display Touch once Pilot light of the fourth cooking zone flashes The heat setting indicator of the selected cooking zone goes out, as long as the timer time can be set. If the pilot light is flashing more slowly, the heat setting indicator appears again and the heat setting can be re-set or modified.
-
Page 11: Automatic Switch Off
Operating the appliance Displaying the time remaining for a cooking zone Step Control panel field Display Pilot light of the cooking zone selected flashes Select cooking zone faster The time remaining is displayed After a few seconds the pilot light flashes more slowly. Switching off the acoustic signal Step Control panel field... -
Page 12: Tips On Cooking And Frying
Tips on cooking and frying Tips on cooking and frying Information about acrylamides According to the latest scientific research, intensive browning of food, especially in products containing starch, may present a health risk due to acrylamide. Therefore we recommend cooking at low temperatures and not browning foods too much. Cookware for induction cooking zones Cookware material Suitable... -
Page 13: Tips On Energy Saving
Tips on cooking and frying Tips on energy saving Place cookware on the cooking zone before it is switched on. If possible, always place a lid on the cookware. Examples of cooking applications The information given in the following table is for guidance only. Heat Cooking process suitable for... -
Page 14: Cleaning And Care
Cleaning and care Cleaning and care WARNING! Sharp objects and abrasive cleaning agents will damage the appliance. Clean the appliance and remove the residues with water and washing up liquid after each use. Remove also the remnants of the cleaning agents! Scratches or dark stains on the glass ceramic that cannot be removed do not affect the functioning of the appliance. - Page 15 What to do if ... Problem Possible cause Remedy Repeated acoustic signal (6x), One or more sensor fields have Uncover sensor field appliance switches off been covered for longer than 10 seconds Acoustic signal sounds when The control panel is wholly or Remove objects.
-
Page 16: Disposal
Disposal Operating noises Depending on the material and the processing of the base, the following noises may occur when using induction cooking zones. • Cracking noise when using cookware made of different mate- rials (Sandwich construction) • Whistling when using an individual cooking zone or sev- eral cooking zones with high powers when the cookware is made of different materials (Sand- wich construction) -
Page 17: Installation Instructions
Safety information Installation Instructions Safety information WARNING! This must be read! The laws, ordinances, directives and standards in force in the country of use are to be followed (safety regulations, proper recycling in accordance with the regulations, etc.) Installation may only be carried out by a qualified electrician. The minimum distances to other appliances and units are to be observed. - Page 18 Safety information Assembly min. 500 min. min. 5 750+1 min. 55 490+1 min. 55 min. 5 min. 20 min. 5 min.38 min. 25 min. 5 min. 5 min. 20...
-
Page 19: Service
Service Rating Plate 88101K-MN 949592333 55GBD C2 AU AEG-ELECTROLUX Service In the event of technical faults, please first check whether you can remedy the problem yourself with the help of the operating instructions (section “What to do if…”). If you were not able to remedy the problem yourself, please contact the Customer Care Department or one of our service partners. - Page 20 Warranty – 'Warranty Period' means i) where you use the Appliance for personal, domestic or household purposes in Australia the period of 24 months and in New Zealand the period of 24 months; ii) where you use the Appliance for commercial purposes, in Australia the period of 3 months and in New Zealand the period of 3 months, (if the period stated is 0 months you are not covered by this product warranty) following the date of original purchase of the Appliance;...
-
Page 21: Important Notice
pliance was purchased or the law applicable in New Zealand if the Appliance was purchased in New Zealand. Where the Appliance was purchased in New Zealand for business purposes the Consumer Guarantee Act does not apply. Limitation of Liability 10. To the extent permitted by law: –... - Page 24 www.electrolux.com...
Need help?
Do you have a question about the 88101K-MN and is the answer not in the manual?
Questions and answers