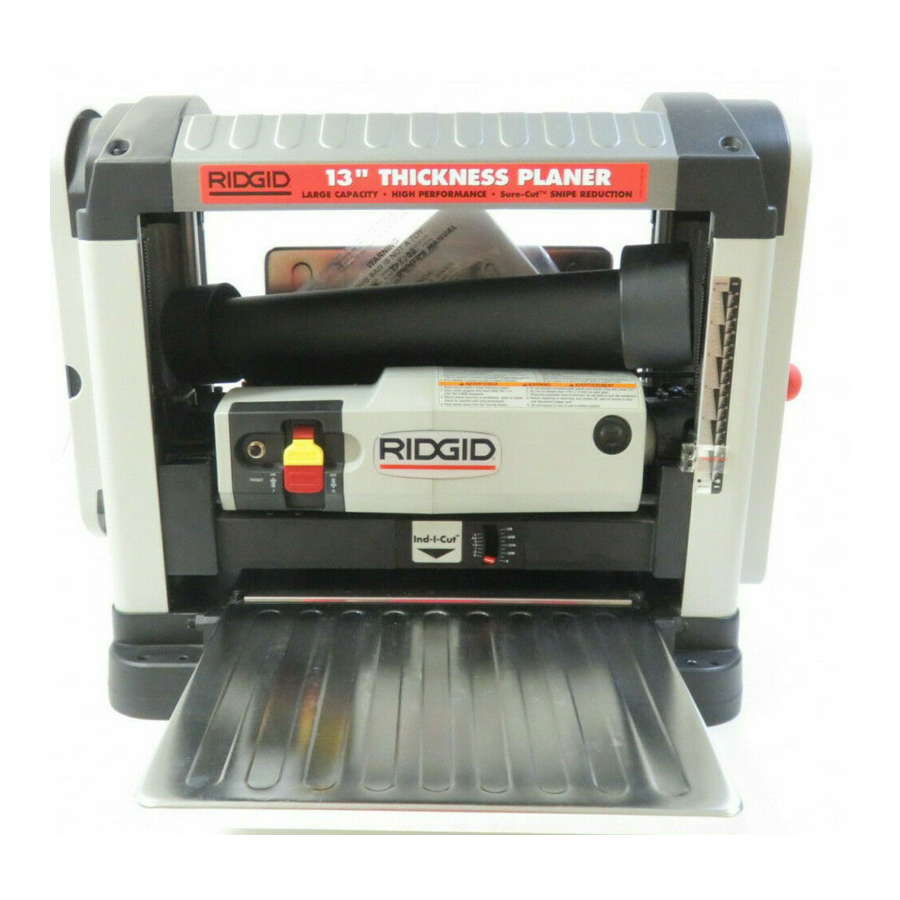
RIDGID TP1300 Owner's Manual
13 inch thickness planer with legset
Hide thumbs
Also See for TP1300:
- Owner's manual (7 pages) ,
- Owner's manual (72 pages) ,
- Operator's manual (36 pages)
Table of Contents
Advertisement
Quick Links
F o r Y o u r S a f e t y :
R e a d a l l i n s t r u c t i o n s c a r e f u l l y
S a v e t h i s m a n u a l f o r f u t u r e
r e f e r e n e c e
Part No. SP6452
T P 1 3 0 0
O W N E R S M A N U A L
1 3 I N C H
T H I C K N E S S P L A N E R
W I T H L E G S E T
Printed in Taiwan
Advertisement
Table of Contents

Related Manuals for RIDGID TP1300


Summary of Contents for RIDGID TP1300
- Page 1 T P 1 3 0 0 O W N E R S M A N U A L 1 3 I N C H T H I C K N E S S P L A N E R W I T H L E G S E T F o r Y o u r S a f e t y : R e a d a l l i n s t r u c t i o n s c a r e f u l l y S a v e t h i s m a n u a l f o r f u t u r e...
- Page 2 17 18 70 71...
-
Page 3: Repair Parts
Repair Parts Parts List for 13" Thickness Planer Model No. TP13002 RIDGID parts are available on-line at www.ridgidparts.com Figure 1 Always order by Part Number - Not by Key Number Part No. Description Part No. Description 820380-6 Scr Hex Soc Butt Hd... - Page 4 See Figure 3...
- Page 5 Part No. Description Part No. Description 817453-4 Ring Retaining 827703 Cover Side RH 827772 Sprocket 827715 Scale Thickness 827794 Chain 827760 Spring Coil 7.62x15.75x0.7 827758 Spring Coil Left 823742-1 Ball Steel 827790 Block Bearing 827698 Block Guard 827791 Plate Retainer Left 827700 Block Step 827693...
- Page 6 Repair Parts Parts List for 13" Thickness Planer Model No. TP13002 RIDGID parts are available on-line at www.ridgidparts.com Figure 3 Always order by Part Number - Not by Key Number Part No. Description Part No. Description 827808 Cord w/plug 827812...
- Page 7 Repair Parts Parts List for 13" Thickness Planer Model No. TP13002 RIDGID parts are available on-line at www.ridgidparts.com Figure 4 - Legstand Always order by Part Number - Not by Key Number Part No. Description Part No. Description 829635 Stiffener Upper Long...
-
Page 8: Wiring Diagram
Maintenance (continued) WARNING: To reduce the risk of 13. Repeat procedures 5 through 10 for the second knife. thrown blades and other cutter 14. Check that all knife lock screws are head parts make sure the knife tight and reinstall the dust chute. lock bar containing the seven knife lock screws is positioned as shown in the cutter head side...
Need help?
Do you have a question about the TP1300 and is the answer not in the manual?
Questions and answers