AEG ARCTIS Operating Instructions & Installation Manual
Aeg upright freezer
Hide thumbs
Also See for ARCTIS:
- Operating instructions manual (36 pages) ,
- User manual (24 pages) ,
- Operating instruction (16 pages)
Table of Contents
Advertisement
Quick Links
Advertisement
Table of Contents

Related Manuals for AEG ARCTIS


Summary of Contents for AEG ARCTIS
- Page 1 ARCTIS Upright Freezer Operating Instructions 818 21 13-00/4...
- Page 2 "Something not working". If these instructions should not be sufficient, please contact your local AEG Service Force Centre. Printed on paper manufactured with environmentally sound processes. he who thinks ecologically acts accordingly ...
-
Page 3: Table Of Contents
Contents Safety ............Environmental Information . - Page 4 Contents Maintenance and Cleaning ........22 Energy Saving Advice .
-
Page 5: Safety
Safety The safety of our appliances is in accordance with recognised techno- logical standards and appliance safety legislation. We nevertheless feel that it is important to acquaint you with the following safety guideli- nes: Use for Intended Purpose • The appliance is intended for household use. It is suited for freezing and frozen storage of foods as well as the preparation of ice. - Page 6 Safety • Children often do not recognise the dangers involved with household appliances. Please provide for the necessary supervision and do not allow children to play with the appliance! Daily Operation • Containers with flammable gases or fluids can develop leaks through contact with the cold.
-
Page 7: Environmental Information
In case of malfunction • If a malfunction should occur at the appliance, refer first to the sec- tion "What to do if ..." in these operating instruction. If the instruc- tions in this section are not sufficient, do not undertake any further work on your own. -
Page 8: Appliance Transport
Appliance Transport Two persons are required for transport of the appliance. There are two recessed handles at the front of the base and at the back of the appli- ance at the top for improved gripping. 1. Grip the appliance with the recessed handles positioned as in the draw- ing, and transport the appliance.. -
Page 9: Installation
3. Wash the inside of the appliance with lukewarm water with a little bicarbonate of soda added (5 ml to 0.5 litre of water). Do not use soap or detergent as the smell may linger. Dry the appliance thoroughly. Installation Installation Location The appliance should be installed in a well ventilated, dry room. -
Page 10: The Freezer Needs Ventilation
Installation The freezer needs ventilation Air is fed under the door through the vent slots in the base and is exhausted upwards along the back wall. To ensure proper air circulation never cover or alter the vent openings. Important! If the appliance is installed under, for example, a hanging cabinet, a clearance of at least 10 cm between the top of the appliance and the cabinet... -
Page 11: Electrical Connection
Electrical Connection A properly installed socket outlet with earthing contact is required for electrical connection. Electrical fuse protection must be of at least 10 ampere. If the outlet socket is no longer accessible after installation of the appliance, appropriate measures must be taken during electrical instal- lation to assure that the appliance can be disconnected from the mains (e.g. - Page 12 Reversing The Door 1. With the door closed, remove the cross-head screws from the lower door bearing and remove the door bearing downwards. 2. Remove the door fitting from the door bearing (1, 2). Move the bearing pivot from the right to the left hand hole (3).
- Page 13 Reversing The Door 4. Move the upper bearing pivot to the left. 5. Carefully slide the door onto the top bearing pivot and close. 6. Place the lower door bearing with the bearing pivot in the lower left of the door and fasten. 7.
-
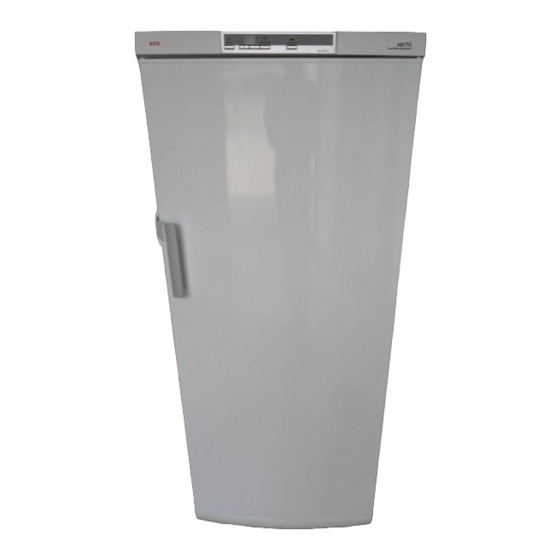
Page 14: Description Of The Appliance
Description of the appliance View of the appliance á Control panel à Compartments with lid and drawer (for storage and freezing) â Compartments with drawers (for storage) ä Drawer (for frozen food storage only), can serve as a water collector when defrosting 818 2113-00/4... -
Page 15: Control Panel
Control panel 1 Warning indicator light (red) 2 Fast freeze indicator light (yellow) 3 Fast freeze button 4 Mains power light (green) 5 Temperature regulator and ON/OFF-switch Prior to Initial Start–Up Before connecting the appliance to the mains and putting it into oper- ation for the first time, leave the appliance to stand for 30 minutes if was transported upright. -
Page 16: Initial Use - Temperature Adjustment
Initial Use - Temperature Adjustment The temperature regulator is also the ON/OFF-switch. A coin is needed to turn the temperature regulator. This makes it more difficult to change the temperature setting accidentally (child protec- tion). • Position " " means: Position "1"... -
Page 17: Switching The Appliance Off
Switching the Appliance Off • 1. To switch off, turn the temperature regulator to position " ". The green mains power light goes out. If the appliance is not going to be used for an extended period: • 1. Turn the temperature regulator to position " ". -
Page 18: Freezing
Freezing The both uppermost compartments are best suited for freezing. Important! • The temperature in the freezer compartment must be –18 °C or col- der before freezing food. • Please observe the freezing capacity given on the rating plate. The freezing capacity is the maximum quantity of fresh food that can be frozen within a period of 24 hours. -
Page 19: Frozen Storage
• Make flat packages, because these freeze more quickly. • Do not fill plastic containers for frozen goods to the brim with liquid or paste–like goods, because liquids expand during freezing. Note for inspection authorities: Batch plans for the determination of freezing performance or warm-up time can be requested directly from the manufacturer. -
Page 20: Storage Goods Symbols/Freezing Calendar
Storage Goods Symbols/Freezing Calendar • The symbols on the drawers show different types of frozen goods. • The numbers indicate storage times in months for the appropriate types of frozen goods. Whether the upper or lower value of the indi- cated storage time is valid depends on the quality of the foods and pre-treating before freezing. -
Page 21: Defrosting
Defrosting During use and when the door is opened, moisture is deposited as frost inside the appliance, particularly on the evaporator. This frost must be removed from time to time using a soft plastic scraper. Under no cir- cumstances use hard or pointed objects for this purpose. The freezer compartment should always be defrosted when the layer of frost has reached a thickness of approx. -
Page 22: Maintenance And Cleaning
Maintenance and Cleaning Before any maintenance or cleaning work is carried out DISCONNECT the appliance from the ELECTRICITY supply. Warning! • Do not use detergents, abrasive powders, highly perfumed cleaning products, wax polishes or cleaning products containing bleach or alcohol. •... -
Page 23: Energy Saving Advice
Energy Saving Advice • Do not install the appliance close to sources of heat, such as a cooker, dishwasher or radiator. • Locate the appliance in a cool well ventilated room and make sure that the air openings of the appliance are not obstructed. •... -
Page 24: Something Not Working
Something not Working Correcting Malfunctions A malfunction may be caused by only a minor fault that you can rectify yourself using the following instructions. Do not perform any other work on the appliance if the following information does not provide assistance in your specific case. -
Page 25: Noises During Operation
If after the above checks there is still a fault, call your local AEG Service Force Centre. In-guarantee customers should ensure that the above checks have been made as the engineer will make a charge if the fault is not a mechanical or electrical breakdown. -
Page 26: Regulations, Standards, Guidelines
Regulations, Standards, Guidelines This appliance was designed for household use and was manufactured in accordance with the appropriate standards. The necessary measures in accordance with appliance safety legislation regulations (GSG), acci- dent prevention regulations for refrigeration appliances (VBG 20) and the regulations of the German Society of Electrical Engineers (VDE) were observed in the manufacture of this appliance. -
Page 27: Customer Service
Customer Service If you cannot find the remedy for a malfunction in these operating instructions, please contact your dealer or our customer service depart- ment. Addresses and telephone numbers are listed in the accompanying booklet "Guarantee Conditions/Customer Service Locations". Selective ordering of replacement parts can save unnecessary travel and costs. - Page 28 ìëÉK= jçêÉ= íÜ~å= RR= ãáääáçå= bäÉÅíêçäìñ= dêçìé= éêçÇìÅíë= EëìÅÜ= ~ë= êÉÑêáÖÉê~íçêëI= ÅççâÉêëI= ï~ëÜáåÖ= ã~ÅÜáåÉëI î~Åììã=ÅäÉ~åÉêëI=ÅÜ~áå=ë~ïë=~åÇ=ä~ïå=ãçïÉêëF=~êÉ=ëçäÇ=É~ÅÜ=óÉ~ê=íç=~=î~äìÉ=çÑ=~ééêçñK=rpa=NQ=Äáääáçå=áå=ãçêÉ íÜ~å=NRM=ÅçìåíêáÉë=~êçìåÇ=íÜÉ=ïçêäÇK AEG Hausgeräte GmbH Postfach 1036 D-90327 Nürnberg http://www.aeg.hausgeraete.de © Copyright by AEG 818 2113 – 00/4 - 1102 Subject to change without notice...
Need help?
Do you have a question about the ARCTIS and is the answer not in the manual?
Questions and answers