AEG FAVORIT 34030 VI User Manual
Aeg dishwasher favorit 34030 vi
Hide thumbs
Also See for FAVORIT 34030 VI:
- User manual (20 pages) ,
- User manual (20 pages) ,
- User manual (20 pages)
Table of Contents
Advertisement
Advertisement
Table of Contents

Related Manuals for AEG FAVORIT 34030 VI


Summary of Contents for AEG FAVORIT 34030 VI
- Page 1 EN DISHWASHER FAVORIT 34030 VI USER MANUAL...
- Page 2 Please spend a few minutes reading to get the very best from it. ACCESSORIES AND CONSUMABLES In the AEG webshop, you’ll find everything you need to keep all your AEG appliances looking spotless and working perfectly. Along with a wide range of accessories...
-
Page 3: Table Of Contents
Contents CONTENTS 4 Safety information 7 Product description 7 Control panel 10 Use of the appliance 10 Setting the water softener 11 Use of dishwasher salt 12 Use of detergent and rinse aid 13 Loading cutlery and dishes 16 Washing programmes 17 Select and start a washing programme 18 Care and cleaning... -
Page 4: Safety Information
Safety information SAFETY INFORMATION Before the installation and use, read this manual carefully: • For your safety and the safety of your property. • To help the environment. • For the correct operation of the appliance. Always keep these instructions with the appliance also if you move or give it to a different person. -
Page 5: Frost Precautions
Safety information • Do not fill the rinse aid dispenser with other products than the rinse aid, (dishwasher cleaning agent, liquid detergent). This can cause damage to the appliance. • Make sure that the spray arms can move freely before you start a washing programme. •... -
Page 6: Electrical Connection
Safety information • The first time you use the appliance, make sure that the hoses do not have water leaks. Electrical connection • The appliance must be earthed. • Make sure that the electrical information on the rating plate agrees with the power sup- ply. -
Page 7: Product Description
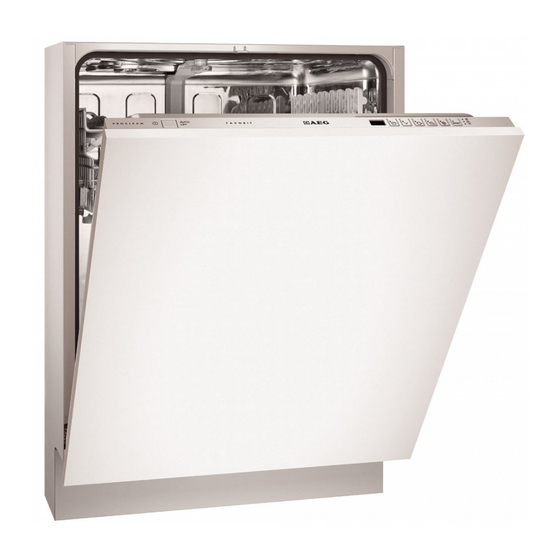
Product description PRODUCT DESCRIPTION Upper basket Water hardness dial Salt container Detergent dispenser Rinse aid dispenser Rating plate Filters Lower spray arm Upper spray arm CONTROL PANEL... -
Page 8: Delay Start Button
Control panel On/off button Programme indicator lights Indicator lights Programme button Delay start button Indicator lights End-of-programme The indicator comes on when: • The washing programme is completed. • You adjust the level of the water softener. • You activate/deactivate the audible signals. •... -
Page 9: Setting Mode
Control panel Setting mode The appliance must be in setting mode for these operations: • To select and start a washing programme. • To adjust electronically the level of the water softener. • To deactivate/activate the audible signals. Press the on/off button. The appliance is in setting mode when: •... -
Page 10: Use Of The Appliance
Use of the appliance USE OF THE APPLIANCE 1. Be sure that the set level of the water softener agrees with the water hardness in your area. If not, adjust the water softener. 2. Fill the salt container with dishwasher salt. 3. -
Page 11: Use Of Dishwasher Salt
Use of dishwasher salt Manual adjustment Turn the water hardness dial to the position 1 or 2 (refer to the table). Electronic adjustment 1. Switch on the appliance. 2. Make sure that the appliance is in setting mode. 3. Press and hold the programme button until the programme light A starts to flash and the programme light B comes on. -
Page 12: Use Of Detergent And Rinse Aid
Use of detergent and rinse aid It is correct that water comes out from the salt container when you fill it with salt. USE OF DETERGENT AND RINSE AID Use of detergent To help the environment, do not use more than the correct quantity of detergent. Follow the detergent manufacturer recommendations on the detergent packaging. -
Page 13: Loading Cutlery And Dishes
Loading cutlery and dishes 4. Close the rinse aid dispenser. Press the lid until it locks into position. Adjust the rinse aid dosage Factory set: position 3. You can set the rinse aid dosage between position 1 (lowest dosage) and position 4 (highest dosage). -
Page 14: Lower Basket
Loading cutlery and dishes Lower basket Put the saucepans, lids, plates, salad bowls and cutlery in the lower basket. Arrange the service dishes and large lids around the edge of the bas- ket. The cutlery basket Put the forks and spoons with the handles down. Put the knives with the handles up. -
Page 15: Upper Basket
Loading cutlery and dishes Upper basket The upper basket is for plates (maximum 24 cm in diameter), saucers, salad bowls, cups, glasses, pots and lids. Arrange the items to let water touch all surfaces. Prevent to put plates in the first three sectors in the front part of the basket. -
Page 16: Washing Programmes
Washing programmes 1. Move the front runner stops (A) out. 2. Pull the basket out. 3. Put the basket in the upper position. 4. Put back the front runner stops (A) in their initial position. CAUTION! If the basket is in the upper position, do not put cups on the cup racks. -
Page 17: Select And Start A Washing Programme
Select and start a washing programme Programme Programme time (mi- Energy (kWh) Water (litre) nute) 100 - 110 1,4 - 1,6 19 - 21 130 - 140 1,0 - 1,2 14 - 16 The water pressure and temperature, the variations of the mains supply and the quantity of dishes can change the consumption values. -
Page 18: Care And Cleaning
Care and cleaning How to cancel a washing programme or a delay start If a washing programme or a delay start has not started, you can change the selection. When a washing programme or a delay start are in progress, it is not possible to change the selection. -
Page 19: To Clean The External Surfaces
Care and cleaning • Flat filter (C). 1. To unlock the filters (A) and (B), turn the handle on the microfilter (B) approxi- mately 1/4 counterclockwise and remove. 2. Hold the coarse filter (A) by the handle and remove it from the microfilter (B). 3. -
Page 20: What To Do If
What to do if… WHAT TO DO IF… The appliance does not start or stops during operation. First try to find a solution to the problem (refer to the chart). If not, contact the service centre. Malfunction Fault code Possible cause Possible solution The appliance •... -
Page 21: The Washing Results And Drying Results Are Not Satisfactory
What to do if… Malfunction Fault code Possible cause Possible solution The mains plug is not Put in the mains plug. connected in. Blow out fuse in the Replace the fuse. household fuse box. The delay start is set. If you want to cancel the delay start, refer to 'Select and start a washing programme'. -
Page 22: Technical Data
Technical data Problem Possible cause Possible solution There are streaks, milky stains, Rinse aid dosage is too high. Decrease the rinse aid dosage. or a bluish layer on glasses and dishes. Dry water drop stains on Rinse aid dosage is too low. Increase the rinse aid dosage. - Page 23 WARNING! To discard the appliance, follow the procedure: • Pull the mains plug out of the socket. • Cut off the mains cable and mains plug and discard them. • Discard the door catch. This prevents the children to close themselves inside the appli- ance and endanger their lives.
- Page 24 156982591-A-412010...
Need help?
Do you have a question about the FAVORIT 34030 VI and is the answer not in the manual?
Questions and answers
Can you fit existing coloured door to new dishwasher