Advertisement
Quick Links
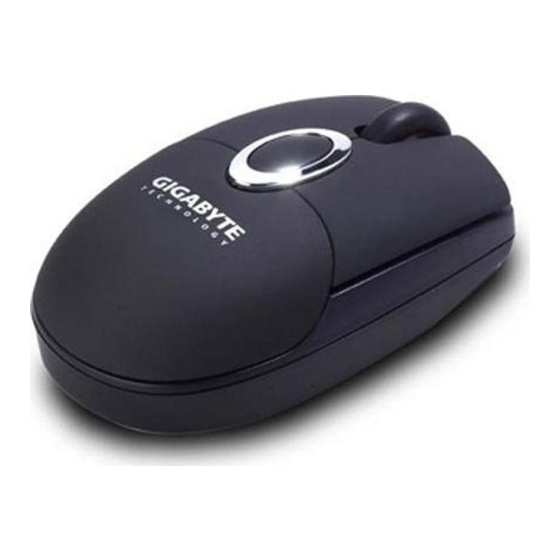
GM-W9C
Rechargeable RF Wireless
Optical Mouse
User's Manual
FCC NOTE
These limits are designed to provide reasonable protection. This equipment
generates, uses and can radiated radio frequency energy and, if not installed and
used in accordance with the instructions, may cause harmful interference to radio
communications. However, there is no guarantee that interference will not occur
in a particular installation if this equipment does cause harmful interference to
radio or television reception, which can be determined by turning the equipment
off and on, the user is encouraged to try to correct the interference by one or
more or the following measures:
•
Reorient or relocate the receiving antenna.
•
Increase the separation between the equipment and receiver.
•
Connect the equipment into an outlet on a circuit different from that to
which the receiver is connected.
•
Consult the dealer or an experienced radio/TV technician for help.
Changes or modifications not expressly approved by the party responsible for
compliance can void the user's authority to operate the equipment. The
antenna(s) used for this transmitter must not be co-located or operating in
conjunction with any other antenna or transmitter.
Packing List................................................................2
FCC NOTE..............................................................3
Connecting with Computer..................................4
English/
/日本語
Rechargeable RF optical mouse.
Insert Batteries.........................................................4
Power saving function key - can
To Change the Wireless Connection Channel....5
be switch off or suspend the
mouse by ID connect button.
Low Battery Alert................................................5
Low battery alarm LED.
Charging Batteries............................................6
Beauty color & shape can catch
Power Saving Mode...........................................7
your eye.
Dual Mode..............................................................7
Recharge way can be from USB or
regular Nokia DC adapter.
Trouble Shooting......................................................8
Can be used during recharge
mode, saving your time.
The first time you take out this Mouse and Receiver from the packing, Factory
Preset ID enables Plug and Play function.
Plug the Receiver into PC USB Port. Under Win2000 or higher, wait for the OS to
detect the RF device. Under Win98 or lower, installation of driver for the device is
necessary.
Insert the batteries into the Mouse and move it for a while, then it starts working.
A. Push the battery compartment cover backwards and open it. (➀)
B. Insert 2 AAA batteries into the compartment with correct orientation. (➁)
C.
Slide the battery cover into the compartment and close the cover. (➂)
Content
Connecting with Computer
Inserting Batteries
Packing List
➀
➁
To Connect the Wireless Connection Channel
When Factory ID has been changed or wish to be changed, link ID as below:
A. Press the ID button on the bottom of the Mouse.
B. Press the ID button on the top of the Receiver, if the LED starts blinking rapidly,
means ID Link is done.
C. If the Mouse still doesn't work after above process, repeat this procedure again
after 15 seconds.
➂
Advertisement

Related Manuals for Gigabyte GM-W9C


Summary of Contents for Gigabyte GM-W9C
-
Page 1: Inserting Batteries
RF device. Under Win98 or lower, installation of driver for the device is necessary. Insert the batteries into the Mouse and move it for a while, then it starts working. Inserting Batteries A. Push the battery compartment cover backwards and open it. (➀) B. - Page 2 Suspend Mode. Press the left button to wake up the Mouse again. B. Power Off Mode: When you wish to set the mouse to power off mode, press mouse ID for 3 seconds. The optical LED will flash once and then fade out, showing Mouse power is already off.
- Page 3 ➀ ➁ • • • • ➂ Windows 2000 Windows 98 (➀) (AAA) (➂) 1.3 mm DC 1.0 mm DC 600mAh 1.2V (➁)
- Page 4 目 次 パッキングリスト……………………………………………….2 FCC の 注意……………………………...…...…3 コンピュータに接続する...…...…...…………….….4 電池を入れる………………………………………………………4 ワイヤレス接続のチャンネルを変更する…………….…5 電池の低電力警告…………...…..…….………….5 電池の充電...………………….…….6 節電モード...………………………………7 デュアルモード……………………………...……7 トラブルシューティング…………………………...…8 Nokia ACP-7 ACP-8 ACP-9 LCH-9 DCH-9 500mA Nokia パッキングリスト Nokia 5.3V/500mA FCC の 注意 この装置はテストされており、FCC 規定の第 15 部に準拠した、クラス B のデジタルデバ イスの制限に従っています。 この制限は合理的な保護を提供するために作成されています。 この装置は、無線周波数のエネルギーを発生させ、使用し、放射することができ、指示に 従って取り付け及び使用をしない場合、無線通信に有害な干渉をもたらす可能性がありま す。この装置がラジオやテレビの受信に有害な干渉をもたらすかどうかは、この装置をオ フにしたりオンにしたりすることで判断できますが、特定の取り付けによって干渉を起こ さないようにすることができるという保証はありません。干渉を補正するには、下記のい...
- Page 5 コンピュータに接続する 初めて梱包からマウスとレシーバを取り出した際には、工場出荷時の ID によってプラグ・ アンド・プレイの機能が働きます。 レシーバを PC の USB ポートに差し込みます。Win2000 以上では、OS が RF デバイスを 検知するのを待ってください。Win98 以下では、デバイス用のドライバのインストールが 必要です。 電池をマウスに入れてしばらく動かすと、動作し始めます。 電池を入れる A. 電池コンパートメントのカバーを後ろに押し、開きます。(➀) B. 単 4 電池 2 本をコンパートメントに正しい方向に入れます。(➁) 電池カバーをコンパートメントにスライドさせ、カバーを閉じます。(➂) 電池の充電 A. 黒い 1.3mm の DC ジャックをレシーバの DC ソケットに差します。 B. 銀の 1.0mm の DC ジャックをマウスの DC ソケットに差します。電池の充電が始まり、 マウスの警告...
- Page 6 トラブルシューティング マウスが反応しない場合、電池の電源状態を確認してください。 DC ジャックが正しくそれぞれマウスとレシーバの DC ソケットに接続されているこ とを確認してください。 C. 電池を入れてもオプティカル LED が光らない場合は、電池の極を確認してください。 D. 添付のアクセサリ(DC ジャックケーブル)を使用してください。DC ジャックケーブ ルに不具合がある場合、ノキアの充電器(5.3V/500mA 定格電圧機能)を使用するこ とができます。 電池の低電力警告 LED が消えない場合は、DC ジャックケーブルがきちんと接続され ているかどうか確認してください。 保守につきましては、お買い求めのお店やエンジニアにお問い合わせください。故障 の際に個人で分解することは禁止されています。...
Need help?
Do you have a question about the GM-W9C and is the answer not in the manual?
Questions and answers