Table of Contents
Advertisement
Advertisement
Table of Contents

Subscribe to Our Youtube Channel
Related Manuals for DeLonghi EC730


Summary of Contents for DeLonghi EC730
- Page 1 Coffee Maker EC730...
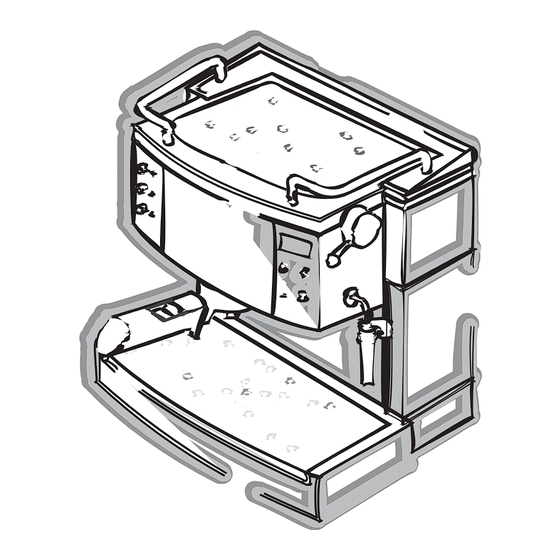
- Page 2 ON/OFF button ON/OFF button indicator light Coffee/hot water button Preheating completed indicator light Steam selected indicator light Steam button Display Clock Timer push- push- Cup rail button button Cup warmer plate Timer Timer ON activated push- Steam knob light button Coffee filter with crema enhancer Water level indicator Power cable...
-
Page 3: Using For The First Time
Thank you for choosing this coffee machine. To get the very best out of your new coffee machine it is advisable to read these instructions before using the appliance. This is the only way to ensure optimum results and maximum safety. Using for the first time Before using the machine for the first time, wash all the acces- sories in warm soapy water and rinse. - Page 4 How to prepare espresso coffee Filling the water tank Remove the tank by pulling sideways and lifting the intake tubes out of the water (fig. 2). Rinse and fill with clean cold water (fig 3).The water level is shown by a floating ball. Replace the tank in the housing, making sure the tubes are in the water.
- Page 5 2 Press the TIMER ON button. The corresponding light comes on 08:30 (see fig. 9). 3 Thirty minutes before the programmed time (in our example 7.30), the appliance comes on automatically so it will be perfect- ly preheated when you want to use it (after two hours it goes off automatically).
- Page 6 5. Place the cup or cups under the filter holder spouts (fig. 13). You are recommended to heat the cups before making the cof- fee by rinsing them with a little hot water or placing them to warm on the top plate for at least 15-20 minutes (fig. 14). 6.
-
Page 7: How To Make Cappuccino
Note: to ensure a tight fit and avoid water leaking from the rim of the filter holder, you are recommended to grease the bottom of the lateral tabs from time to time with butter or oil (as shown in fig. 18). IMPORTANT: Should the coffee holder for pods be used after one for ground coffee, it’s necessary to clear the ground coffee remained in the espresso boiler outlet (fig. - Page 8 6. When the required temperature is reached, interrupt steam deliv- ery by rotating the steam knob clockwise.Then press the steam button (fig. 25). 8. Pour the frothed milk into the cups containing the espresso coffee.Your cappuccino is now ready. If desired, add sugar and sprinkle a little powdered chocolate or cinnamon on top of the froth.
-
Page 9: Cleaning And Maintenance
Cleaning and maintenance Before performing any cleaning or maintenance operations, turn the machine off, unplug it from the power socket and allow it to cool down. 1. Do not use solvents or detergents when cleaning the coffee maker. A soft, damp cloth is sufficient. 2. -
Page 10: Cleaning Pod Filter Holder
Cleaning the pod filter holder (if fitted) About every 200 coffees, clean the pod filter holder as follows: • Push the filter holder button and remove the filter (fig. 36). Clean the inside of the filter holder. Never wash in a dishwasher. •... -
Page 11: Problem Solving
Problem solving PROBLEM POSSIBLE CAUSES SOLUTION The espresso coffee is • The ‘OK’ pilot light was not • Wait until the OK pilot on when the coffee deliv- light comes on. cold. ery switch was pressed. • The preheating was not •... - Page 12 PROBLEM POSSIBLE CAUSES SOLUTION The coffee crema is dark • The ground coffee is too • Press the coffee less. tightly pressed. (the coffee comes out • The quantity of ground • Decrease the quantity slowly from the spout). coffee is too much. of ground coffee.
-
Page 13: Safety Warnings
Safety Warnings • This appliance is designed to make coffee. Please be careful to avoid burns from the sprays of hot water or steam and avoid any improper use. • When the appliance is in use, do not touch any of the machine’s hot surfaces. -
Page 14: Electrical Requirements
Electrical requirements Green and Yellow to Earth Before using this appliance ensure that the voltage indicated on the product corresponds with the main voltage in your 13 amp home, if you are in any doubt about your supply contact your Fuse local electricity company.
Need help?
Do you have a question about the EC730 and is the answer not in the manual?
Questions and answers