
Related Manuals for Denon AVR-2809


Summary of Contents for Denon AVR-2809
- Page 1 AV SURROUND RECEIVER AVR-2809 Owner’s Manual Bedienungsanleitung Manuel de l’Utilisateur English Deutsch Français PRESET CODE Book 1 Book 2 Italiano Español Nederlands Svenska...
- Page 2 EN60065, EN55013, EN55020, EN61000-3-2 et EN61000-3-3. poussière. benzène et un diluant avec l’appareil. D’après les dispositions de la Directive 2006/95/EC et 2004/108/EC. DENON EUROPE Division of D&M Germany GmbH An der Landwehr 19, Nettetal, D-41334 Germany • Never disassemble or modify the unit in any way.
- Page 3 ENGLISH Contents CAUTION: Menu Operations • The ventilation should not be impeded by covering the ventilation openings with items, such as newspapers, tablecloths, curtains, etc. Operations ·····················································································19 • No naked flame sources, such as lighted candles, should be placed on the unit. Getting Started Example of Display of Default Values ········································20 •...
- Page 4 Amp Assign·············································································31 s Volume Control ·······································································32 Status ····························································································46 Main Remote Control Unit (RC-1102) ·········································56 d Source Delete ·········································································32 a MAIN ZONE ············································································46 Operating DENON Audio Components ········································56 f On-Screen Display ··································································32 s ZONE2 / ZONE3 ······································································46 Presetting ·····················································································56 g Quick Select Name ·································································33 Audio Input Signal ········································································46 Operating Preset Components ····················································56...
- Page 5 • Before turning the power switch on In addition to the AVR-2809, the included main remote control unit After reading them, be sure to keep them for future reference. Check once again that all connections are correct and that there are (RC-1102) can also be used to operate the equipment listed below.
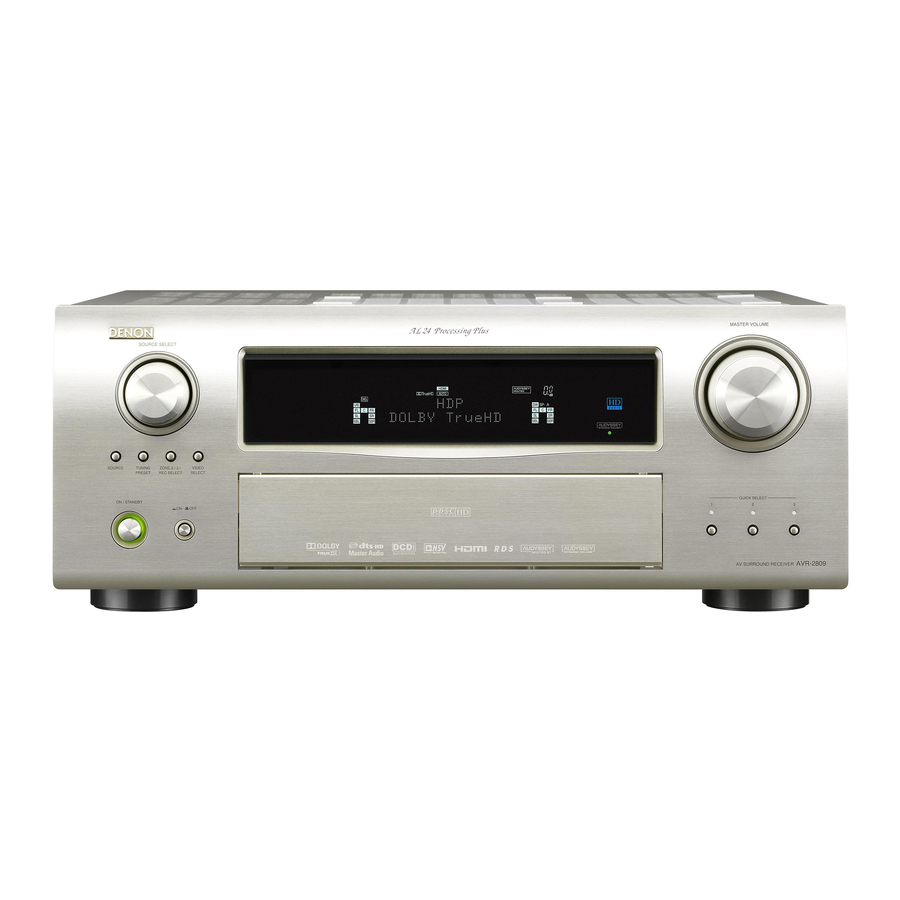
- Page 6 ENGLISH Operating Range of the Remote Control Part Names and Functions Unit For buttons not explained here, see the page indicated in parentheses ( ). Point the remote control unit at the remote sensor when operating it. Front Panel (RC-1106) 30° 30° Approx. 7 m Q2 Q3 Q4 (RC-1102) NOTE The set may function improperly or the remote control unit may not operate if the remote control sensor is exposed to direct sunlight,...
- Page 7 ENGLISH RETURN button ········································································(19) Display V.AUX INPUT connectors ························································(16) SETUP MIC jack ······································································· (22) MULTEQ XT button ································································· (43) W7 DYNAMIC VOLUME button ···················································· (44) b About Dynamic Volume Audyssey Dynamic Volume™ solves the problem of large variations in volume level between television programs, commercials, and between the soft and loud passages of movies. Audyssey Dynamic EQ™...
- Page 8 ENGLISH Rear Panel RS-232C connector ···································································(18) AC inlet (AC IN) ·········································································(19) Analog audio connectors (AUDIO) ································ (12 ~ 16) REMOTE CONTROL jacks ························································(18) AC OUTLET ···············································································(19) FM/AM antenna terminals (TUNER ANTENNA)····················(17) TRIGGER OUT jacks ·································································(18) Digital audio connectors (OPTICAL / COAXIAL)··········· (12 ~ 16) PRE OUT connectors ·····················································(10, 17 , 18) DOCK CONTROL jack ·······························································(13) COMPONENT VIDEO connectors ······································(12 ,14) EXT. IN connectors ···································································(16) Speaker terminals (SPEAKERS) ··············································(10) HDMI connectors ···················································· (11, 12, 14, 15) SIGNAL GND terminal ·····························································(13) VIDEO / S-VIDEO connectors ·····································(12 ~16, 18)
- Page 9 ENGLISH Remote Control Unit n Main remote control unit (RC-1102) n Sub remote control unit (RC-1106) Signal transmission indicator ··················· (56) Mode select buttons ·································· (56) The time for which the backlight stays on can Quick select / System call buttons ····· (55, 60) be changed (vpage 61 “Setting the Time the Backlight Stays Lit”). DYNAMIC VOLUME button (DYN) ············ (44) MultEQ XT button (EQ) ······························ (43) NOTE Surround mode buttons ····················(38 ~ 40) M.
- Page 10 Connections for all compatible audio and video signal formats Preparations are described in these owner’s manuals. Please select the types of connections suited for the equipment you are connecting. With some types of connections, certain settings must be made Cables Used for Connections on the AVR-2809. For details, refer to the instructions for the respective connection items below. Select the cables according to the equipment being connected. NOTE Audio cables Video cables • Do not plug in the power cord until all connections have been completed.
- Page 11 • When viewing HDMI or component video signals via the AVR-2809, the on-screen display appears when MENU button is operated. • When only HDMI or component video signals are input to the AVR-2809, the characters of the on-screen display are not displayed over the picture.
- Page 12 2 second intervals. In this case, please switch off the power supply, and wait until the AVR-2809 has cooled down, and the surrounding ventilation is good.
- Page 13 Dolby TrueHD, Bitstream Blu-ray • When the AVR-2809 and Blu-ray Disc player / DVD player are connected using an HDMI cable, also DTS-HD connect the AVR-2809 and monitor using an HDMI cable. • If the connected monitor or Blu-ray Disc player / DVD player only has a DVI-D connector, use an HDMI/ DVI converter cable.
- Page 14 Setup” – “HDMI Audio Out” to “TV” (vpage 28). Blu-ray Disc Player / DVD Player • When you want to listen to TV audio by AVR-2809, connect optical digital or analog. If the TV you are using has both connection jacks, use the optical digital connection.
- Page 15 Record Player CD Player iPod ® Use a DENON control dock for iPod (ASD-1R, ASD-3N or ASD-3W sold Turntable (MM cartridge) CD player separately) to connect the iPod to the AVR-2809. For instructions on the control dock for iPod settings, refer to the control dock for iPod’s operating instructions.
- Page 16 ENGLISH ENGLISH TV/CABLE Tuner Satellite Receiver Select the terminal to use and connect the device. Select the terminal to use and connect the device. TV tuner DBS / BS tuner When using a coaxial cable for the digital audio connection, make the settings at menu “Input Setup” •...
- Page 17 Select the terminal to use and connect the device. Digital video recorder • When recording via the AVR-2809, the playback device’s cable must be of the same type as the cable used to connect the AVR-2809’s VCR OUT connector. Example: TV IN → S-Video cable : VCR OUT → S-Video cable TV IN →...
- Page 18 • When recording via the AVR-2809, the playback device´s cable must on the main remote control unit and select “EXT. IN” or make the be of the same type as the cable used to connect the AVR-2809´s settings at menu “Input Setup” – “Input Mode” – “Input Mode”...
- Page 19 ENGLISH External Power Amplifier Antenna Terminals An FM antenna cable plug can be connected directly. n A M loop antenna assembly Power amplifier Remove the vinyl tie and take out Direction of broadcasting station the connection line. AM loop antenna (supplied) Bend in the reverse direction. antenna a.
- Page 20 (vpage 62 ~ 64). an external controller using the RS-232C • When using an S-Video cable or a video cable for connection between the AVR-2809 and an input device, connector, perform the operation below connect to the video connectors.
- Page 21 Connecting the Power Cord Menu Operations Wait until all connections have been completed before connecting the power cord. With the AVR-2809, settings and operations for most functions can be performed by operating while looking at the menus displayed on the Symbols used to indicate buttons in this manual Connection to the AC outlet monitor screen.
- Page 22 ENGLISH Example of Display of Default Examples of On-screen Display and Front Display Values Some typical examples are described below. GFront displayH GOn-screen displayH In lists of selectable items or adjustable ranges, the item Screen title surrounded by a border is the default value. MENU *MENU 1.Auto Setup Auto Setup 2.Manual Setup [Selectable items] A B A + B...
- Page 23 ENGLISH Menu Map Auto Setup (vpage 22 ~ 25) MENU n Start Menu n Parameter Check 1.Auto Setup • Step 1: Speaker Detection • Speaker Confi guration Check 2.Manual Setup • Step 2: Measurement • Distance Check 3.Input Setup • Step 3: Calculation • Channel Level Check 4.Parameter • Step 4: Check • Crossover Frequency Check 5.Information • Step 5: Store • EQ Check • Restore Manual Setup (vpage 26 ~ 33)
- Page 24 ENGLISH Auto Setup ® • Audyssey MultEQ XT automatically measures the acoustical Preparations problems in the listening environment to create the best audio Symbols used to indicate buttons in this manual experience for your home theater. Button located on both the main unit Connect the included calibrated setup microphone to •...
- Page 25 Turn the AVR-2809 volume. off, check the speaker connections and repeat the measurement •...
- Page 26 ENGLISH Step 2 : Measurement Step 3 : Calculation Step 4 : Check F Menu screen F F Menu screen F F Menu screen F Auto Setup Auto Setup Auto Setup Audyssey MultEQ XT Audyssey MultEQ XT Audyssey MultEQ XT Auto Setup Step2:Measurement Step3:Calculation Step4:Check Audyssey MultEQ XT Please place microphone Calculating Please check the results Step2:Measurement at ear height at Please wait...
- Page 27 • The front L speaker was not properly Cancel Speaker :None detected. The auto setup measurement results are stored in the AVR-2809. Retry Cancel q Select “Store 0”, then press • “Storing Please wait ... ” is displayed on the on-screen display •...
- Page 28 ENGLISH Manual Setup Subwoofer Make detail settings for various parameters. Symbols used to indicate buttons in this manual Select subwoofer use. Speaker Setup Button located on both the main unit [Selectable items] BUTTON and the remote control unit Use this procedure to set the speakers manually or if you wish to <BUTTON>...
- Page 29 ENGLISH d Distance f Channel Level • Select “Large” or “Small” not according to the physical size of the Set distance from listening position to speakers. Adjust channel levels to obtain equal volume from all speakers. speaker but according to the low frequency reproduction capabilities Before making the settings, measure the distance from the based on the frequency set at “Crossover Frequency”...
- Page 30 ENGLISH HDMI Setup d Auto Lipsync g Crossover Frequency Select crossover frequency from which subwoofer handles low Automatic compensation for timing shift in audio and video Make settings for HDMI video/audio output. range signal. output. F Menu screen F [Selectable items] [Selectable items] ON 2.Manual Setup 40Hz 60Hz 80Hz 90Hz 100Hz...
- Page 31 ENGLISH Distance FL h Power Off Control s 2ch Direct/Stereo Set distance from listening position to front left speaker. Interlock power OFF with HDMI control. Make speaker settings for 2-channel mode playback. [Variable range] 0.00m ~ 18.00m [Selectable items] ON Setting Distance FR To change the settings, select “Custom”. Set distance from listening position to front right speaker.
- Page 32 ENGLISH Direct Mode Zone Setup f Auto Surround Mode Select “MultEQ XT” use for DIRECT or PURE DIRECT mode. Make setting for memorizing surround mode setting for each Make settings for audio playback in a multi-zone system. input signal type. [Selectable items] F Menu screen F [Selectable items] : Use “MultEQ XT”. 2.Manual Setup : Memorize settings.
- Page 33 ENGLISH Level Lch Volume Limit Option Setup Adjust the left channel output level. Make a setting for maximum volume. Make various other settings. [Variable range] –12dB ~ ~ +12dB [Selectable items] F Menu screen F : Do not set a maximum volume. 2.Manual Setup –20dB : Set the maximum volume to –20 dB. The “Level Lch”...
- Page 34 ENGLISH Master Volume d Source Delete Master volume display during adjustment. For details, see “Amp Assign / Multi-zone Connections and Operations” Remove input sources that are not used from the display. (vpage 62, 63). [Selectable items] [Selectable items] : Turn display on. : Use this source. s Volume Control : Turn display off.
- Page 35 ENGLISH Default g Quick Select Name A0 Setup Lock Reset the settings to the default values. Change the Quick Select name. Protect settings from inadvertent change. Up to 16 characters can be input. [Selectable items] [Input characters] j Remote ID Setup : Turn protection on. A ~ Z a ~ z 0 ~ 9 ! # % & ’ ( ) * + , - . / : ; = “ ? @ [ \ ] (space) Set remote control ID.
- Page 36 ENGLISH Input Setup Use this procedure to select the input source and make the settings b The menu settings below can be made for these input sources related to playing input sources. Symbols used to indicate buttons in this manual when “iPod Dock” is set to “Assign”. Button located on both the main unit 3.Input Setup BUTTON...
- Page 37 ENGLISH i/p Scaler s Preset Skip f Video Make settings for i/p scaler function. Set the preset memories that you do not want to display when Setting the video source. tuning. [Input source] DVD HDP TV/CBL Video Select V.AUX A ~ G Switch video input source while listening to audio signal. Select the preset channel(s) you do not want to display.
- Page 38 ENGLISH Progressive Mode Operating from the main unit or main remote g Input Mode control unit Select optimum progressive mode for video material. Make input mode and decode mode settings for this source. INPUT MODE The selectable input modes depend on the input source and Press [Input source] DVD HDP TV/CBL Each time you press the button, the input mode display will change.
- Page 39 OPT3 Input source TV/CBL V.AUX • Even if “iPod Dock” is set to “Assign”, if AVR-2809 and control dock for iPod are not connected, the input is used as the normal input Default setting HDMI1 HDMI2 None HDMI3 None HDMI4 None source.
- Page 40 The mode switches each time the button is pressed. Shuffl e Mode [Selectable items] DOLBY PLgx Make settings for shuffl e mode. : The signals are decoded in DOLBY PLgx or DOLBY When DENON control dock for iPod ASD-1R is PLg for playback. DOLBY PLg connected [Selectable items] DTS NEO:6 : The signals are decoded in DTS NEO:6 for playback.
- Page 41 : This is displayed when the input signal is “DTS-ES Matrix 6.1” z3: When playing sources recorded in monaural in the MONO MOVIE and the AVR-2809’s “AFDM” setting is set to “ON”. mode, the sound will be off balance with a single channel (left or z2 : This is displayed when the input signal is “DTS-ES Discrete...
- Page 42 ENGLISH Stereo Playback Parameter Selecting the mode DIRECT/STEREO Select by pressing Adjusting the parameters Symbols used to indicate buttons in this manual [Selectable items] Button located on both the main unit MENU Press BUTTON STEREO and the remote control unit The menu is displayed. <BUTTON> Button only on the main unit This is the mode for playing in stereo. The tone can be adjusted. b To operate from the main remote control unit, be sure to set the [BUTTON] Button only on the remote control unit...
- Page 43 ENGLISH F Menu screen F Surround Parameter 4.Parameter Compress dynamic range (difference between loud and soft sounds). Adjust surround sound parameters. 1.Surround Parameter [Selectable items] Auto Middle High 2.Tone The parameters (items) which can be adjusted differ 3.Audyssey Settings 4.RESTORER depending upon the following conditions. 5.Night Mode 6.Audio Delay •...
- Page 44 ENGLISH Dimension A3 Room Size A5 SB CH Out (for Multi-channel sources Shift sound image center to front or rear, to adjust playback balance. Determine size of acoustic environment. Select playback mode for surround back channels. [Selectable items] [Selectable items] [Variable range] 0 ~ 3 ~ 6 Small : Simulate acoustics of a small room.
- Page 45 ENGLISH A5 SB CH Out (for 2-channel sources) Tone Audyssey Settings Determine whether to use surround back speakers. Adjust the tonal quality of the sound. Select MultEQ XT, Dynamic EQ and Dynamic Volume. [Selectable items] A8 Tone Control S1 MultEQ XT : The surround back channel signal is played. Turn tone adjustments off.
- Page 46 ENGLISH S2 Dynamic EQ S3 Dynamic Volume S4 Setting Audyssey Dynamic EQ solves the problem of deteriorating sound Audyssey Dynamic Volume solves the problem of large variations in Can be set when “Dynamic Volume” is set to “ON”. quality as volume is decreased by taking into account human volume level between television programs, commercials, and between Set Dynamic Volume effect.
- Page 47 ENGLISH RESTORER Night Mode Audio Delay This function restores compressed audio signals to how they Optimized setting for late-night listening. Compensate for mismatched timing between video and audio. were before compression and corrects the sense of volume of Set the dynamic range compression of the output audio. Delay audio.
- Page 48 ENGLISH Information Status Audio Input Signal Symbols used to indicate buttons in this manual Shows information about current settings. Shows information about audio input signals. Button located on both the main unit BUTTON and the remote control unit F Menu screen F <BUTTON> Button only on the main unit F Menu screen F [BUTTON] Button only on the remote control unit 5.Information 5.Information 5-2.Audio Input Signal...
- Page 49 ENGLISH HDMI Information Auto Surround Mode Preset Station Shows information about HDMI input signals and monitor. Shows information about auto surround mode settings. Shows information about preset stations. The surround mode for which the last memory function was used F Menu screen F F Menu screen F for the different input signal types is displayed. 5.Information 5.Information F Menu screen F...
- Page 50 ENGLISH Playback Operations During Playback Preparations Symbols used to indicate buttons in this manual Button located on both the main unit Adjusting the Master Volume BUTTON and the remote control unit Turning the Power On <BUTTON> Button only on the main unit <MASTER VOLUME> [MASTER Either turn or press [BUTTON] Button only on the remote control unit <POWER>...
- Page 51 ENGLISH Playing Video and Audio Listening to Preset Stations • If the desired station cannot be tuned in with auto tuning, tune it in Equipment manually. Operation on the Main Unit • When tuning in stations manually, press and hold <TUNING PRESET> <SOURCE SELECT> change frequencies continuously. Press , then turn Basic Operation •...
- Page 52 ENGLISH RDS (Radio Data System) RDS Search Symbols used to indicate buttons in this manual RDS (works only on the FM band) is a broadcasting service Use this function to automatically tune to FM stations that Button located on both the main unit which allows a station to send additional information along provide the RDS service.
- Page 53 To continue searching, repeat steps 2 and 3. • With the default settings, the iPod can be used connected to the q S et the iPod in the DENON control dock for iPod. VCR (iPod) connector. b If no other TP station is found when all the frequencies have been (vSee the control dock for iPod’s operating instructions.)
- Page 54 • Depending on the type of iPod and the software version, AMP] somefunctions may not operate. MENU : ”Input Setup” – ”iPod” – “Repeat” (vpage 38) [ iPod] • DENON will accept no responsibility whatsoever for any loss of iPod Shuffl ing playback data. [8], [9], Surround [CHANNEL +]...
- Page 55 ENGLISH Other Operations and Functions Other Operations Recording on an External Equipment <ZONE2/3 / REC SELECT> <SOURCE • To cancel, press , then turn (REC OUT mode) SELECT> until “ZONE2 Source” is displayed. You can listen to one program source while recording a different • Make a test recording before starting the actual recording. Playing Super Audio CD program source.
- Page 56 Put the television power on standby and check if the AMP] AVR-2809 goes into standby. • When you want to listen to TV audio by AVR-2809, connect optical digital or analog (vpage 14). QUICK SELECT If the TV you are using has both connection jacks, use the optical If the AVR-2809 does not work please check the following.
- Page 57 ENGLISH Channel Level Quick Select Function Last Function Memory You can adjust the channel level either according to the playback With this function, the currently playing input source, input mode, This stores the settings as they were directly before the standby sources or to suit your taste, as described below. surround mode, MultEQ XT settings and volume can be stored in mode was set.
- Page 58 The SAT TU ( ), NET/TU ( ) mode is not indicator AMP] used on the AVR-2809, so use the learn function to store the [MODE SELECTER] [RC SETUP] Press and hold in for at least 3 seconds. signals (vpage 59).
- Page 59 ENGLISH Functions of Buttons by Component EL Display MODE SELECTOR iPod EL Display Device Mode [MODE DVD player Blu-ray Disc CD player [1], Device operated DVD recorder CD recorder Video deck TAPE iPod (Default setting) player (Default setting) SELECTOR] [8 9], Playback Playback Playback Playback Playback Playback Playback...
- Page 60 ENGLISH EL Display EL Display MODE SELECTOR Satellite Receiver / Cable TV Device Mode [MODE [1], Device operated TV (HITACHI) TV (SONY) SELECTOR] [8 9], [6 7], [3], [2], Punch through Punch through Punch through Punch through [SOURCE ON], [SOURCE OFF] SOURCE ON Power on Power on...
- Page 61 If your AV devices are of a brand other than DENON or if they AMP mode. learned. In this case, use the device’s own remote control unit.
- Page 62 ENGLISH Calling out System Call Function Signal transmission [AMP] AMP] indicator Press , to select “SYSTEM CALL”. This function lets you register a series of operations at a single [ DVD] button. [MODE For example, the amplifier can be turned on, the input source [SYSTEM CALL] Press ) at which the signals...
- Page 63 Press and hold in for at least 3 seconds. reset. The signal transmission indicator flashes twice. The sub remote control unit (RC-1106) included with the AVR-2809 [RC SETUP] Press and hold in for at least 3 seconds. can be used as the exclusive multi-zone remote control unit.
- Page 64 Stereo 5.1ch ZONE3 The amp assign function lets you assign the amplifiers for the different channels built into the AVR-2809 to Stereo the speaker outputs for the different zones. Select the desired playback environment from among “Setting 1” to “Setting 3”, then set the corresponding ZONE2/3-MONO “Amp Assign”...
- Page 65 MAIN ZONE (7.1-channel system) ZONE2 Front B Bi-Amp Monitor Monitor Power amplifier Blu-ray Disc player / n Amp Assign mode setting and speakers connected to the various speaker ZONE2 AVR-2809 DVD player video output terminals Input ZONE2 Speaker terminal SURROUND BACK / audio output...
- Page 66 ENGLISH Symbols used to indicate buttons in this manual Multi-zone Operations Turning off the Sound Temporarily Button located on both the main unit In the zone mode for which you want to mute the sound, press BUTTON and the remote control unit [MUTE] Turning the Power On and Off <BUTTON> Button only on the main unit The sound is reduced to the level set at menu “Manual Setup” – “Zone [BUTTON] Button only on the remote control unit Setup”...
- Page 67 ENGLISH Other Information Number of surround back speakers w Setting for primarily watching movies using diffusion type About Speaker Installation speakers for the surround speakers We recommend using 2 speakers. For the greatest sense of surround sound envelopment, diffuse When using dipolar speakers in particular, be sure to use 2 speakers. radiation speakers such as bipolar types, or dipolar types, provide Surround back speakers a wider dispersion than is possible to obtain from a direct radiating...
- Page 68 It is fully The AVR-2809 is equipped with a digital signal processing circuit that The surround channel signals are converted into stereo and full band compatible with conventional products, including conventional DTS...
- Page 69 Interface” are trademarks or registered trademarks of HDMI Licensing LLC. AL24 Processing for All Channels DENON has further developed its proprietary AL24 Processing, an analog waveform reproduction technology, to support the 192 kHz sampling frequency. AL24 Processing Plus, thoroughly suppresses quantization noise associated with D/A conversion of LPCM signals to reproduce the low-level signals with optimum clarity that will bring out all the delicate nuances of the music.
- Page 70 ENGLISH Surround Modes and Parameters Signals and adjustability in the different modes Channel output Parameter (default values are shown in parentheses) Surround mode Surround Surround D. Comp AFDM Front L/R Center Subwoofer SB CH Out Cinema EQ. Mode Room Size Level Delay time Subwoofer Back L/R PURE DIRECT, DIRECT...
- Page 71 ENGLISH Signals and adjustability in the different modes Parameter (default values are shown in parentheses) Surround mode NEO:6 MUSIC Dynamic PRO LOGIC g/gx MUSIC mode only EXT. IN only Tone Night Mode Dynamic EQ mode only MultEQ XT Volume RESTORER (NOTE6) (NOTE6) (NOTE7)
- Page 72 ENGLISH Differences in Surround Mode Names Depending on the Input Signals Input signals Button DTS-HD DOLBY DOLBY DIGITAL SACD Linear DTS-HD DTS ES DTS ES DOLBY DOLBY Note Linear DTS-HD DOLBY DOLBY DOLBY DOLBY Surround mode ANALOG High DSCRT MTRX DOLBY DIGITAL DIGITAL Master DIGITAL DIGITAL DIGITAL DIGITAL (multi (multi Resolution (With...
- Page 73 ENGLISH Button Input signals DTS-HD DOLBY DOLBY DIGITAL SACD Linear DTS-HD DTS ES DTS ES DOLBY DOLBY Note Linear DTS-HD DOLBY DOLBY DOLBY DOLBY Surround mode ANALOG High DSCRT MTRX DOLBY DIGITAL DIGITAL Master DIGITAL DIGITAL DIGITAL DIGITAL (multi (multi Resolution (With (With...
- Page 74 ENGLISH Relationship Between Video Signals and Monitor Output Video Input signals Monitor output Video S-VIDEO Input signals Monitor output convert HDMI COMPONENT S-VIDEO VIDEO HDMI COMPONENT S-VIDEO VIDEO convert MONITOR OUT HDMI COMPONENT S-VIDEO VIDEO HDMI COMPONENT S-VIDEO VIDEO — VIDEO VIDEO VIDEO VIDEO — VIDEO —...
- Page 75 Set does not • External noise or interference is • Reset the microprocessor. power indicator • Please re-install AVR-2809 in a – operate properly. causing the set to malfunction. will flash in red place having good ventilation.
- Page 76 • Blu-ray Disc player / DVD player • Use a DTS-compatible player. – is not compatible with DTS sound playback. GAudioH • The AVR-2809’s “Decode Mode” • Set to the “Auto” or “DTS” Symptom Cause Countermeasure Page setting is set to “PCM”.
- Page 77 HDMI connected device, When you only want to operate display is not component video signals via shown. the AVR-2809, the on-screen AVR-2809 has the the power on/off each device, set MENU same operations. “Power Off Control” to “OFF”. display appears when the ⋅...
- Page 78 ENGLISH Specifications Audio section Tuner section [FM] [AM] • Power amplifier (note: µV at 75 Ω/ohms, 0 dBf = 1 x 10 Rated output: Front (A, B): Receiving Range: 87.5 MHz ~ 108.0 MHz 522 kHz ~ 1611 kHz 115 W + 115 W (8 Ω/ohms, 20 Hz ~ 20 kHz with 0.08 % T.H.D.) Usable Sensitivity: 1.0 µV (11.2 dBf) 18 µV...
- Page 79 01500, 01504 Onkyo 40101, 40868 Carver 40157, 40179 40000, 40032, 40037, 40087, Hitachi 00003, 00008 Supercable 00276 Optimus 40420 Denon Anelog Tuner 40179, 40393, 40420, 40468 Hongtian Jiangsu 01462 Taihan 00778 40420 Orion 40393 62863 (ID1), 62275 (ID2), Hwalin 00303...
- Page 80 TaeKwang 20439 Axis 01111 Viewsonic 01272, 01329 Digiality 01685 Tandberg 20109 B@ytronic 01412 Vizio 01126 Digifusion 01645, 01743 Denon 40766, 42868 Teac 20280, 20283, 20308, 20309 Base 01718 Voodoo 01272 Digihome 01284 40053, 40420 Technics 20229 Beko 00455 Xbox 01805...
- Page 81 00173, 00345, 00847, 00853, EP Sat 00455 Koscom 01043 Morgan’s 00200, 00713, 01232, 01412 peeKTon 01457 Grundig 00879, 01284, 01291 00099, 00133, 00173, 00200, Esat 00879 Kosmos 00442, 01333 Motorola 00856, 00869, 01473 Handan 01622 00455, 00710, 00722, 00724, Eurieult 00882 Kreiling 00249, 00658, 01626...
- Page 82 Satplus 01100 01455 US Digital 01535 Digiturk 01076 01175, 01693, 01848, 01850 00099, 00392, 00639, 01076, Satstation 01083 Systec 01334 USDTV 01535 SKY Italia 01848 DirecTV 01142, 01377, 01392, 01442, SatyCon 01631 Tantec 00455 Variosat 00173 Sky XL 01412 01640 Schaub Lorenz 01214 Tarbs...
- Page 83 Denko 10264 Amtron 10000, 10180 Caihong 10009, 10817 10017, 10030, 10047, 10054, Baohuashi 10264 Colortyme 10060, 10178 10009, 10037, 10180, 10250, Denon 10145, 10511 Cailing 10748 Anam Baosheng 10009, 10817 10700, 10861 Commercial Solutions 10047, 11447 Denver 10037, 10587 Candle...
- Page 84 10037, 10217, 10343, 10352, 10808, 10865, 10880, 11217, 10000, 10030, 10060, 10178, Feiyan 10264 Huodateji 10051 Gericom Harley Davidson Dual 10394, 10778, 11037, 11137, 11298 10180, 11904 Feiyue 10009, 10817 Hygashi 10217 11149 Gevalt 11371 Harman/Kardon 10054 Fenner 10009, 10374 Hyper 10009, 10217 Dual Tec...
- Page 85 10037, 10180, 10218, 10371, 10163, 10208, 10217, 10346, 10037, 10200, 10327, 10370, Jinfeng 10051, 10208, 10226, 10817 Memphis 10009 Neckermann Konka 10418, 10587, 10641, 10714, Luxor 10361, 10480, 10548, 10631, 10418, 10556 Jinque 10009, 10264, 10817 Mercury 10001, 10009, 10037, 10060 10817, 11084 11037, 11163 10037, 10163, 10371...
- Page 86 10037, 10217, 10218, 10264, 10009, 10037, 10264, 10370, 10009, 10017, 10030, 10035, 10009, 10030, 10036, 10053, Plantron 10009, 10037, 10264 Osaki Radiotone 10374, 10556 10418, 10648, 10668, 11037 10036, 10037, 10047, 10054, 10054, 10093, 10180, 10200, Sharp Playsonic 10037, 10217, 10714, 10715 10060, 10090, 10092, 10093, 10650, 10653, 10668, 11193, Osio...
- Page 87 10009, 10037, 10163, 10218, Soundesign 10178, 10180 Tai Yi 10009 Teleview 10037 Tristar 10218, 10264 Watson 10394, 10668, 10714, 11037 Soundwave 10037, 10418, 10715 Taishan 10009, 10374, 10817 Tempest 10009, 10264, 10455 Triumph 10037, 10346, 10556 Watt Radio 10163 Sova 11952 Tandberg 10109, 10361, 10367...
- Page 88 10047, 10051, 10093, 11917, TV/DVD Combination Telefunken 10698 Samsung 30899 Hinari 20352 11922 Thomson 10625 Sansui 30695 Hitachi 20000 Saba 10625 Advent 11933 Transonic 10587 Schneider 31367 Hypson 20037 Samsung 11959 Akai 11675 United 10587, 11037, 11982 Internal 20278, 20637 30713, 30884 Sansui 10463, 11904, 11911...
- Page 89 Toshiba 31045 Dell 21972 20240 21137 Genexxa 20000, 20037, 20104, 20278 ITT Nokia 20041, 20104, 20106, 20240 20046 Denon 200842, 20081 Go Video 20240, 20432, 20614, 21137 Brandt 20041, 20320 20037, 20278 Derwent 20041 20000, 20035, 20037, 20039, Janeil 20240...
- Page 90 20037, 20081, 20162, 20226, 20000, 20002, 20104, 20121, Karcher 20081, 20278, 20642 Radiola 20081 Sentra 20278 Metz 20836, 21062, 21162, 21262, 20184, 20209, 20240, 20278, 20000, 20032, 20037, 20047, Orion 20037, 20278 Radionette 20037, 21137 21562 20348, 20352, 20479, 20742, Sharp 20048, 20209, 20807 20037, 20106, 20209, 20278,...
- Page 91 30717, 30723, 30730, 30831, Bush Alba 30713, 30717, 30730, 30783, 20845, 21008, 21145, 21972, 30833, 30884, 31051, 31140, 30490, 30634, 31634, Hewlett Packard 21972 30884, 31140, 31530, 31695 Denon 21996 31367, 31483, 31695, 31832 [32134] Howard Computers 21972 Alco 30790 Tosonic 20278 Byd:sign...
- Page 92 30651, 30675, 30713, 30730, Gran Prix 30831, 30898 Kawasaki 30790 30690, 30730, 31730 Oppo 31224 Dual 30783, 30790, 30831, 31023, Grandin 30713, 31233 Kendo 30672, 30699, 30713, 30831 McIntosh 31533 Optim 30843 31530 30675, 30713, 30831, 31023, Greenhill 30717 Kennex 30713, 30770, 30898 30713 Optimus...
- Page 93 Skymaster 30730, 30768 Xenius 30790 Cytron 31347 Telefunken Richmond 31233 31832, 31923 Skyworth 30898 XLogic 30768, 31152, 31228 Denon 30490 30869 Teletech 30713, 30768 Sliding 31115 30770, 30788 Denver 31056 30672, 30690, 30699, 30713, Tensai 30651, 30690, 30770 Roadstar 30730, 30833, 30898, 31051,...
- Page 94 b1 : These preset codes can be recorded in the SAT/CBL mode. Polaroid 31086 DVD preset codes : Diese voreingestellten Codes können im SAT/CBL -Modus aufgenommen werden. ProVision 31321 DVD-Voreinstellungscodes : Ces codes de présélection peuvent être enregistrés en mode SAT/CBL. Codes préréglés DVD 30646 (default /standard /...
- Page 95 Denon Brand Company, D&M Holdings Inc. Printed in China 5411 10106 009DA...
Need help?
Do you have a question about the AVR-2809 and is the answer not in the manual?
Questions and answers