
Subscribe to Our Youtube Channel
Related Manuals for Medion MD 30227


Summary of Contents for Medion MD 30227
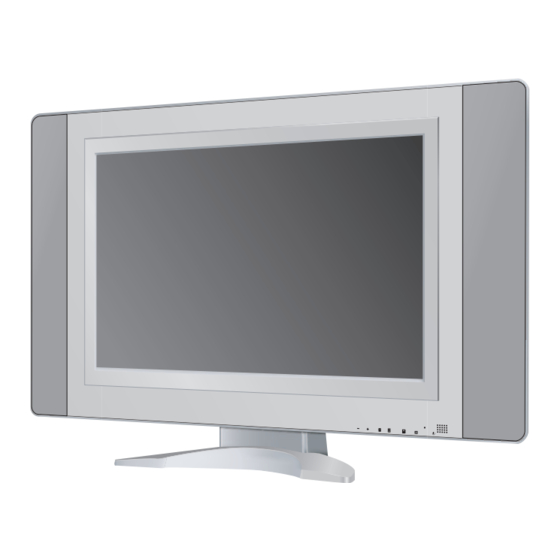
- Page 1 MD 30227 27” Flat Panel LCD TV User’s Manual © 2004 Medion®. All rights reserved.
-
Page 2: Important Safety Instructions
important safety instructions This section contains important notices on the proper use of the LCD TV in order to maximize the lifetime of the product. Please read through this section carefully. WARNING: TO REDUCE THE RISK OF FIRE OR ELECTRIC SHOCK, DO NOT EXPOSE THIS APPLIANCE TO RAIN OR MOISTURE. -
Page 3: Caution
important safety instructions Caution READ THE SAFETY AND OPERATING INSTRUCTIONS before operating your LCD TV and retain the instructions for future use. Important Safety Instructions FOLLOW INSTRUCTIONS AND HEED ALL WARNINGS on the LCD TV and in this manual. 1. Read these instructions. 2. -
Page 4: Note To Catv System Installer
important safety instructions 19. Unplug this product from the wall outlet and refer servicing to qualified service personnel under the following conditions: a. When the power cord or plug is damaged or frayed. b. If liquid has been spilled into the product. c. -
Page 5: Grounding The Antenna System
important safety instructions Grounding the Antenna System If an outside antenna is connected to this equipment, be sure the antenna system is grounded in order to provide some protection against voltage surges. Note: This equipment is designed to operate in the U.S.A. and other countries where the broadcasting system and AC house current is exactly the same as in the U.S.A. -
Page 6: Table Of Contents
table of contents Contents Important safety instructions ..2 Setting it up… Caution .....3 …The first time ....20 Important Safety Instructions . - Page 7 table of contents Using the Universal Remote (cont’d) Specifications ....46 To Learn Commands ...36 Display ....46 To Clear stored Learned Commands TV .
-
Page 8: Getting Started
getting started Thank you …for your purchase of this LCD TV. We hope you will be happy with the LCD TV as much as we enjoyed making it for you. Before you begin using your LCD TV, please read through the Important Safety Instructions section found on pages 2-5. -
Page 9: Included Accessories
getting started Included Accessories An accessory box comes packaged with your LCD TV. This contains the manual, Quick Start Guide (QSG), remote control and cables. Check the accessories before installation. User manual Remote control and batteries (AAA x 4) Power cord Component Video (YPbPr) cable Composite video cable Audio cable... -
Page 10: Making The Connections
making the connections Connection configurations The following illustrations show the different audio and video ports available on your LCD TV. Pages 11-15 show example configurations with DVD players, VCR’s, Camcorders, Video game consoles, PC’s, Cable boxes and Antennas. 27” Flat Panel LCD TV User’s Manual... -
Page 11: Side Input Terminals
making the connections Side Input Terminals The following illustrations show the different audio and video equipment you can connect to the side of the LCD TV. Connect the outputs of the various devices to the corresponding inputs on the side of the LCD TV as shown below. Most cables and AV connectors on your equipment follow a standard color code. -
Page 12: Antenna/Cable (Analog) Connection
making the connections The following illustrations show the different audio and video equipment you can connect to the rear of the LCD TV. Antenna/Cable (analog) Connection Connect the 75 Ohm antenna cable from your antenna/cable company to the TV input on the rear of the LCD TV. -
Page 13: Cable Box & Vcr Connection
making the connections Cable Box & VCR Connection First, connect the 75 Ohm cable from your cable company to the input of the cable box. Next, connect the output of the cable box to the input of the VCR. Finally, connect the output of the VCR to the TV input on the rear of the LCD TV. -
Page 14: Rear Input Terminals
making the connections Rear Input Terminals Connect the outputs of the various devices to the corresponding inputs on the rear of the LCD TV as shown below. Most cables and AV connectors on your equipment follow a standard color code. Observing this code can be very helpful when connecting your AV equipment. -
Page 15: Pc Connections
making the connections PC Connections This LCD TV features a DVI port that is optimized for PC connections. If available, this will provide the best digital-to-digital signal quality. If your PC is not equipped with DVI, connect the VGA cable (supplied) from the output of your computer to the VGA port on the rear of the LCD TV. -
Page 16: Understanding The Controls
understanding the controls Understanding the controls LCD TV front panel Located on the front of the LCD TV, these buttons control the basic functions of the LCD TV. Advanced functions require use of the remote control. Volume down Decreases the volume. Volume up Increases the volume. -
Page 17: Universal Remote Control
understanding the controls Universal remote control Below are the illustrations of the universal remote control. The LCD touch screen of the universal remote control is used to input channels and navigate all of the menus of the LCD TV. Press SCREEN to toggle between SCREEN I and SCREEN II. Screen I Screen II 27”... -
Page 18: Battery Installation
understanding the controls Battery Installation Your LCD Universal Remote requires 4 new AAA alkaline batteries (included). To install the batteries: 1. Turn the remote over, pull on the tab and lift the cover off. 2. Insert the batteries, matching the batteries to the (+) and (-) marks inside the battery compartment. -
Page 19: Setting Up The Universal Remote For The Lcd Tv
understanding the controls Setting up the universal remote for the LCD TV The remote control is pre-programmed for your convenience. To reset the remote control, follow the instructions below: 1. Install four AAA-type batteries into the battery compartment of the remote control. 2. -
Page 20: Setting It Up
setting it up… …the first time 1. Remove the LCD TV packaging and position the LCD TV in a safe and well-ventilated location. 2. Refer to pages 10-15 for your equipment connections. 3. Connect the power cord to the AC inlet terminal and to a properly grounded power outlet. -
Page 21: Operating The Lcd Tv
operating the LCD TV Basic controls Turning the LCD TV on and off There are a number of ways you can turn the LCD TV on and off. Make sure the main power switch is turned on, then: • Press the power button on the universal remote control. •... -
Page 22: On Screen Display (Osd)
operating the LCD TV On Screen Display (OSD) With the LCD TV powered on, press the MENU button. VIDEO AUDIO TUNER PARENTAL ADVANCED :Move :Enter MENU:Exit • On the touch screen of the universal remote control press the buttons to scroll through the menu items, then press the or OK button to access the sub-menu. -
Page 23: Audio
operating the LCD TV AUDIO The AUDIO menu gives you control over the BASS, TREBLE, BALANCE, SUBWOOFER and AUDIO DEFAULTS. BASS TREBLE BALANCE SUBWOOFER AUDIO DEFAULTS :Move :Enter MENU:Exit TUNER The TUNER menu gives you control over the SYSTEM (cable or antenna), CHANNEL (present channel), CHANNEL EDIT (add or remove a channel), and AUTOSCAN (automatically scan for channel). -
Page 24: Pip
operating the LCD TV PIP MODE PIP SOURCE PIP H-POS. PIP V-POS. :Move :Enter MENU:Exit The PIP menu allows you to set the PIP mode (toggle the size of the PIP), PIP source, PIP H-POS (horizontal position of the PIP), PIP V-POS. (vertical position of the PIP). Using Picture-in-Picture The PIP feature allows you to view two video input sources simultaneously on the LCD TV. -
Page 25: Parental
operating the LCD TV PARENTAL MPAA TVPG Password 0-9: Input Menu: Exit The PARENTAL menu lets you set the child lock feature of the LCD TV. This menu lets you set the program rating from MPAA (Motion Picture) or TVPG (TV parental guidelines). Input the password to enable this option. -
Page 26: Using As A Computer Monitor
using as a computer monitor Using VGA/DVI mode You can use this LCD TV as a display for your computer. There are two terminals, VGA and DVI, which you can connect to your computer. 1. Connect the VGA or DVI cable from the LCD TV to the appropriate connector on the computer. -
Page 27: Adjusting The Display In Vga/Dvi Mode
using as a computer monitor Adjusting the display in VGA/DVI mode When the LCD TV is in VGA/DVI mode, you can make screen adjustments via the VGA/DVI ADJ (depending on the source connected to the LCD TV) menu. This menu will only be available if there is a VGA or DVI source connected to the LCD TV. -
Page 28: Using The Universal Remote
using the universal remote …to control other devices Convention: In this section button names shown in upper case and Bold are LCD screen buttons, e.g., MODE, CODE, QUIT, etc. Other names refer to the hard rubber buttons, e.g., TV, VCR, Power. Setup Button The Setup button is used for setting up the remote. -
Page 29: Quick Setup Guide
using the universal remote Quick Setup Guide See pages 49 through 52 for various codes. To program your remote to control your DVD player, VCR, or Cable, etc.: 1. Press and hold Setup (the remote beeps). 2. Release Setup when you hear a second beep. 3. - Page 30 using the universal remote Quick Setup Guide (cont’d) To turn on your DVD, VCR, or Cable Box, etc.: 1. Press DVD, VCR, or CBL. 2. Press Power. To clear stored learned commands under a Mode: 1. Press and hold Setup (the remote beeps). 2.
-
Page 31: Button/Lcd Key Descriptions
using the universal remote Button/LCD Key Descriptions CC activates the Closed Caption feature if your device has that PIP (Picture-in-Picture) button feature. operates your television’s Picture-In-Picture feature. SUB-T (Subtitle) brings up DVD Subtitle Menu for SUB controls Sub Subtitle selection Woofer in Audio and display. -
Page 32: Dvd
using the universal remote TITLE LCD key brings up the DVD Title Menu screen. SUB-T (Subtitle) LCD key brings up DVD Subtitle Menu for Subtitle selection and display. RETURN LCD key goes back to previous on-screen selection. INFO LCD key brings up DVD Display or Control Menu for Chapter/Track/Title number, Time remaining/elapsed indication, system information, etc. -
Page 33: Direct Library Code Entry
using the universal remote Direct Library Code Entry To enter Codes directly from Library Code Tables using the Setup button. When a valid code is entered for a Mode, that Mode is reset to its Default Button Label screen and any learned functions for that Mode are deleted i.e., the Mode is reset back to its power-on default configuration. -
Page 34: Code Search
using the universal remote Code Search If you can’t find the code for your brand of product in the code list, you can search the entire Code Library for a particular device that might not be listed in the code list or is listed under a different manufacturer. -
Page 35: Code Learning
using the universal remote Code Learning You can teach the LCD Remote to learn commands from your existing remotes. The Remote can store original remote commands consisting of up to 40 buttons each per Mode. Only one original remote type can be stored under any one Mode (see Tips on Learning). -
Page 36: To Learn Commands
using the universal remote To Learn Commands No functions can be stored under the LEARN, SLEEP, Setup, TV, VCR, DVD, CD AUX, SAT, CBL, or AUDIO buttons, or the SCREEN button. Gather all the remotes that you want to learn “from” and have them all lined up on your coffee table side by side. -
Page 37: To Clear Stored Learned Commands Under A Mode
using the universal remote To Clear stored Learned Commands under a Mode 1. Press and hold the Setup button until the LED remains on (after approximately 2-3 seconds) and the display shows the Main Setup Screen. 2. Release the Setup button. 3. -
Page 38: Changing Button Labels
using the universal remote Changing Button Labels Lets you select which buttons and individual button label segments are shown in the display. You can select any LCD button for change except the SCREEN button. Each button can use any one of the available labels. Each button allows just the “frame” to be shown. -
Page 39: Restoring Default Button Labels
using the universal remote Restoring Default Button Labels 1. Press and hold the Setup button until the LED remains on (after approximately 2-3 seconds) and the display shows the Main Setup Screen. 2. Release the Setup button. 3. Press and release MODE. The LED blinks off once. 4. -
Page 40: Advanced Options/Features
using the universal remote Advanced options/features TV or CD/Audio Volume/Mute Punch-Through User selectable TV or Audio Device Volume Punch-through is a feature which lets you select which device is controlled by the Volume/Mute keys. Normally other types of remotes punch-through to the device programmed under the TV Mode when the Volume/Mute keys are pressed e.g. -
Page 41: Lcd Panel And Backlight On-Time
using the universal remote LCD Panel and Backlight On-Time The LCD Panel and Backlighting remain on for a user-selectable time period (10, 20, 30,……90 seconds). The power-on default is 10 seconds from the last button press. To change the LCD/Backlight On-time: 1. -
Page 42: Input Lcd Key
using the universal remote INPUT LCD Key The INPUT button performs the TV/VCR antenna switch function when in VCR Mode. The INPUT button performs the A.B switch function when in Cable Mode. The INPUT button performs the TV/SAT switch function when in SAT Mode. The INPUT button performs the Input source switch function when in TV Mode. -
Page 43: Troublshooting
troubleshooting Troubleshooting–television Below you can find some troubleshooting tips and solutions. If you encounter any problems, please go through this helpful list before you contact your dealer. No picture or sound • Make sure the power cord is properly connected to the power outlet. - Page 44 troubleshooting Video and audio is • Press the MENU button on the touch screen of the universal abnormal remote control and select ADVANCED; using the buttons on the touch screen of the universal remote control, highlight FACTORY RESET and press the button select YES.
-
Page 45: Troubleshooting-Remote
troubleshooting Troubleshooting–remote LCD does not show • Replace the batteries with 4 new AAA alkaline batteries. anything when you touch • Check batteries are properly installed. it, or press the Setup button The remote does not • Try all code programming procedures with all the codes from the operate your audio or appropriate part of the Library Code Tables. -
Page 46: Specifications
specifications Specifications Item Specification Display Screen size 27” TFT (Thin-Film Transistor) LCD TV panel Resolution 1280 x 720 (WXGA) Aspect ratio 16:9 Display area (HxV) 597.12 x 335.88 mm Pixel pitch (HxV) 0.1555 x 0.4665 Colors 16.7 million Contrast ratio 500:1 Brightness 500 Cd/m3... -
Page 47: Power
specifications Power Power supply Built-in, 90-264V @ 50/60Hz Power consumption 140W Power consumption (Standby) < 5W Environment Temperature (Operating) 5°C to 35°C Humidity (Operating ambient) 20% to 80% RH Dimensions and weight Dimension (W x H x D) 912.3 x 554 x 194.8 mm (with stand) 912.3 x 494.5 x 105 mm (without stand) Weight 17 kg (with stand) -
Page 48: Pip Combinations
specifications PIP Combinations AV 1 AV 2 S-Video S-Video 2 S-Video YPbPr CVBS CVBS CVBS SD/HD • • • • • • • • • • • • • • • • • • AV 1 CVBS • • • •... -
Page 49: Product Codes
product codes Code list JVC ....025 235 239 326 339 428 436 KENWOOD ...... 025 235 428 436 725 ADMIRAL ..........224 KLH ..........230 237 ADVENTURA ..........726 KODAK ........130 226 525 AIKO ............. 826 LLOYD ..........324 726 AIWA ........ -
Page 50: Cable
product codes RANDEX ..........525 GE ............556 REALISTIC ....... 027 029 035 124 129 GENERAL INSTRUMENT ..053 453 454 552 554 ....... 130 224 226 324 335 425 426 ........654 752 754 947 952 ....428 525 631 635 726 737 837 937 HAMLIN ........ -
Page 51: Dvd
product codes DX ANTENNA ........458 859 MITSUBISHI ..........841 ECHOSPHERE ........... 464 MUSTEK ..........744 ECHOSTAR ..067 366 460 464 560 660 962 NAD ............. 944 EXPRESSVU ..........464 NAKAMICHI ..........844 FUJITSU ........... 760 860 ONKYO ..........843 GE .......... -
Page 52: Audio
product codes LXI ..........379 868 THETA DIGITAL ......... 774 MAGNAVOX ......... 268 681 774 TOSHIBA ..........773 MARANTZ ......268 470 570 874 VICTOR ..........869 MCS ..........379 670 YAMAHA ......074 168 286 872 972 MGA ............. 770 ZENITH ...... -
Page 53: Warranty
STATEMENT ARE YOUR SOLE AND EXCLUSIVE REMEDIES. EXCEPT AS INDICATED ABOVE, IN NO EVENT WILL MEDION OR ITS SUPPLIERS BE LIABLE FOR LOSS OF DATA OR FOR INDIRECT, SPECIAL, INCIDENTAL, CONSEQUENTIAL (INCLUDING LOST PROFIT OR DATA), OR OTHER DAMAGE, WHETHER BASED IN CONTRACT, TORT, OR OTHERWISE. - Page 54 RIGHTS APPLICABLE TO THE SALE OF THIS PRODUCT TO YOU. Please note the following: Be sure to keep your purchase receipt in a safe place. MEDION, at its option, may require a copy of the receipt to validate the warranty period effective date (i.e. date of purchase).
Need help?
Do you have a question about the MD 30227 and is the answer not in the manual?
Questions and answers