Electrolux ESF 63020 User Manual
Hide thumbs
Also See for ESF 63020:
- User manual (40 pages) ,
- User manual (24 pages) ,
- User manual (88 pages)
Table of Contents
Advertisement
Advertisement
Table of Contents

Related Manuals for Electrolux ESF 63020


Summary of Contents for Electrolux ESF 63020
- Page 1 Dishwasher ESF 63020...
- Page 2 We were thinking of you when we made this product...
- Page 3 electrolux 3 Welcome to the world of Electrolux You’ve chosen a first class product from Electrolux, which hopefully will provide you with lots of pleasure in the future. Electrolux ambition is to offer a wide variety of quality products that would make your life even more comfortable.
-
Page 4: Table Of Contents
4 electrolux Contents Safety information Select and start a washing Product description programme Control panel Unloading the dishwasher First use Washing programmes Set the water softener Care and cleaning Filling with dishwasher salt Something not working Use of rinse aid Technical data Adjusting the dosage of rinse aid Consumption values... -
Page 5: Safety Information
safety information electrolux 5 Safety information • Do not take any dishes out of the dishwasher before the end of the dish- washing cycle. In the interest of your safety and to • After use, isolate the appliance from ensure the correct use, before in- the power supply and turn off the wa- stalling and first using the appliance, ter supply. -
Page 6: Safety Information
6 electrolux safety information carried out by a qualified and compe- Child safety tent person. • This appliance is designed to be • For safety reasons it is dangerous to operated by adults. Don’t allow chil- alter the specifications or attempt to dren to use the dishwasher unsuper- modify this product in any way. -
Page 7: Product Description
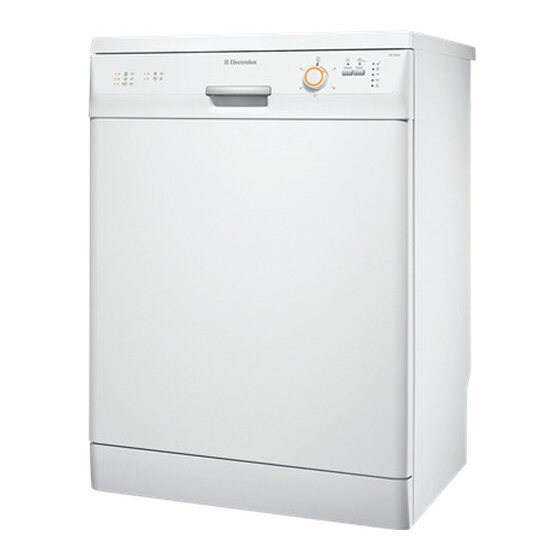
product description electrolux 7 Product description Upper basket Rating plate Water hardness dial Filters Salt container Lower spray arm Detergent dispenser Upper spray arm Rinse aid dispenser Worktop... -
Page 8: Control Panel
8 electrolux control panel Control panel Programme guide Programme knob Start/cancel button Delay start button Indicator lights On/Off indicator light Programme marker Indicator lights Wash Illuminates when the washing and rins- ing phases are running. Illuminates when the drying phase is running. -
Page 9: First Use
first use electrolux 9 Indicator lights Rinse aid Illuminates when rinse aid needs to be filled. 1) The salt and rinse aid indicator lights are never illuminated while a washing programme is running even if filling with salt and rinse aid is necessary. wise, until the programme marker, placed on the knob, corresponds with the desired washing programme indi-... -
Page 10: Set The Water Softener
10 electrolux set the water softener If you want to use combi detergent tablets ("3 in 1", "4 in 1", "5 in 1" etc... ) follow the instructions given in "Use of detergent". Set the water softener The dishwasher is equipped with a water The softener should be adjusted accord- softener designed to remove minerals ing to the hardness of the water in your... -
Page 11: Set The Water Softener
set the water softener electrolux 11 Adjusting the water Use of salt Water hardness hardness setting °dH °TH mmol/l manually electronic ally < 4 < 7 < 0,7 level 1 Setting manually The dishwasher is factory set at po- sition 2. 1. -
Page 12: Filling With Dishwasher Salt
12 electrolux filling with dishwasher salt if the current level is 10, by pressing 5. To memorize the operation, switch start/cancel button once, level 1 is off the dishwasher by returning the selected. programme knob to the Off position. Filling with dishwasher salt Only use salt specifically designed for use in dishwashers. -
Page 13: Use Of Rinse Aid
use of rinse aid electrolux 13 replenished, assuming the dishwasher remains switched on. If you are using salts that take longer The salt indicator light on the control to dissolve then this can take longer. panel can remain illuminated for 2-6 The function of the machine is not hours after the salt has been affected. -
Page 14: Adjusting The Dosage Of Rinse Aid
14 electrolux adjusting the dosage of rinse aid The dispenser holds about 110 ml of rinse aid, which is sufficient for be- tween 16 and 40 dishwashing cy- Clean up any rinse aid spilt during cles, depending upon the dosage filling with an absorbent cloth to setting. -
Page 15: Loading Cutlery And Dishes
loading cutlery and dishes electrolux 15 Loading cutlery and dishes Sponges, household cloths and any ob- – Dishes and items of cutlery must ject that can absorb water may not be not lie inside one another, or cover washed in the dishwasher. each other. -
Page 16: Loading Cutlery And Dishes
16 electrolux loading cutlery and dishes unloading sharp items such as kni- The lower basket ves. The lower basket is designed to take saucepan, lids, plates, salad bowls, cut- Forks and spoons should be placed in lery ect. the removable cutlery basket with the Service dishes and large lids should be handles facing downwards and the kni- arranged around the edge of the basket,... -
Page 17: The Upper Basket
loading cutlery and dishes electrolux 17 Glasses with long stems can be placed upside down in the cup racks. For taller items, the cup racks can be folded upwards. The upper basket The upper basket is designed for plates (dessert plates, saucers, dinner plates of up to 24 cm in diameter), salad bowls, cups and glasses Arrange items on and underneath the... -
Page 18: Use Of Detergent
18 electrolux use of detergent 2. Refit the basket in the higher position and replace the stops (A) in their original position. When the upper basket is raised you will not be able to use the cup racks. After loading your machine always close the door, as an open door can be a hazard. -
Page 19: Rinse Aid Dispenser
use of detergent electrolux 19 Detergent tablets from different manufactures dissolve at different rates. For this reason, some deter- gent tablets do not attain their full cleaning power during short wash- ing programmes. Therefore, please use long washing programmes when using detergent tablets, to en- sure the complete removal of deter- gent residuals. -
Page 20: Select And Start A Washing Programme
20 electrolux select and start a washing programme 1. Fill up the dispensers for salt and rinse aid again. 2. Adjust the water hardness setting to If the drying results are not the highest setting and perform satisfactory we recommend that washing programme without loading you: any dishes. - Page 21 select and start a washing programme electrolux 21 1. After having selected the washing programme, press the delay start button. Interrupt or cancel a washing pro- – The corresponding indicator light gramme in progress ONLY if it’s illuminates. absolutely necessary. Attention! Hot 2.
-
Page 22: Unloading The Dishwasher
22 electrolux unloading the dishwasher will be cooler and the drying will be improved. Unloading the dishwasher • Hot dishes are sensitive to knocks. stainless steel will eventually become The dishes should therefore be al- cooler than the dishes. lowed to cool down before removing from the appliance. -
Page 23: Care And Cleaning
care and cleaning electrolux 23 Programme Degree of soil Type of load Programme de- scription Normal or light soil Crockery and cut- Main wash up to lery 60°C Final rinse Quick Normal soil Crockery and cut- Prewash lery Main wash up to 50°C Eco 50°... - Page 24 24 electrolux care and cleaning Put the flat filter back in the base of the washing compartment and en- sure that it fits perfectly under the two guides (C). 8. Place the coarse filter (A) in the mi- crofilter (B) and press together. 9.
-
Page 25: Frost Precautions
care and cleaning electrolux 25 Prolonged periods of non- operation NEVER use the dishwasher without If you are not using the machine for any filters. Incorrect repositioning and prolonged period of time you are ad- fitting of the filters will produce poor vised to: washing results and may result in 1. -
Page 26: Something Not Working
26 electrolux something not working Something not working The dishwasher will not start or stops indications described in the chart, with- during operation. out calling out an engineer. Certain problems are due to the lack of Switch off the dishwasher, open the simple maintenance or oversights, door and carry out the following sugges- which can be solved with the help of the... -
Page 27: Something Not Working
something not working electrolux 27 Fault code and malfunction Possible cause and solution • The programme does not start • The dishwasher’s door has not been properly closed Close the door • The main plug is not plugged in Insert the main plug •... - Page 28 28 electrolux something not working The wash results are not satisfactory The dishes are not clean • The wrong washing programme has been selected. • The dishes are arranged in such a way as to stop water reaching all parts of the surface. The baskets must not be overloaded.
-
Page 29: Technical Data
technical data electrolux 29 Technical data Dimensions Width x Height x Depth 60,0 x 85,0 x 61,0 (cm) Electrical connection Information on the electrical connection is given on the Voltage - Overall power - rating plate on the inner edge of the dishwasher’s Fuse door. -
Page 30: Hints For Test Institutes
30 electrolux hints for test institutes Hints for test institutes Testing in accordance with EN 60704 and rinse aid dispenser have been filled with salt and rinse aid respectively and must be carried out with appliance fully loaded and using the test programme using the test programme (see (see "Consumption values"). -
Page 31: Installation
installation electrolux 31 cup racks: position A Upper basket Installation Any electrical and/or plumbing work required to install this appliance should be carried out by a qualified electrician and/or plumber or com- petent person. Remove all packaging before position- ing the machine. If possible, position the machine next to a water tap and a drain. - Page 32 32 electrolux installation • Remove the machine’s worktop by Water supply connections unscrewing the two rear retaining This dishwasher may be fed with either screws, pull the worktop from the hot (max. 60°) or cold water. Neverthe- back of the machine and slide out the less we advise you a cold water supply.
-
Page 33: Water Outlet Hose Connection
installation electrolux 33 This appliance has been fitted with safety features which will prevent the water used in the appliance from returning back into the drinking wa- ter system. This appliance complies with the applicable plumbing regu- lations. Likewise the internal diameter of the Water outlet hose connection couplings used for connections to the The end of the drain hose can be con-... -
Page 34: Electrical Connection
34 electrolux environment concerns This could constitute a fire hazard Electrical connection through overheating. If necessary, have the domestic wir- ing system socket replaced. In case that the electrical cable has to be Safety standards require the appli- replaced, contact your local Service ance to be earthed. -
Page 35: Environment Concerns
environment concerns electrolux 35 this product, please contact your local service or the shop where you pur- council, your household waste disposal chased the product. - Page 36 36 electrolux...
- Page 37 electrolux 37...
- Page 38 38 electrolux...
- Page 40 www.electrolux.com www.electrolux.com.my www.electrolux.com.sg 156994410-00-15062007...
Need help?
Do you have a question about the ESF 63020 and is the answer not in the manual?
Questions and answers