Philips Saeco Syntia HD8833 Operating Instructions Manual
Hide thumbs
Also See for Saeco Syntia HD8833:
- Instructions manual (84 pages) ,
- Instruction manual (60 pages) ,
- Operating instructions manual (25 pages)
Table of Contents

Related Manuals for Philips Saeco Syntia HD8833


Summary of Contents for Philips Saeco Syntia HD8833
-
Page 1: Operating Instructions
Register your product and get support at www.philips.com/welcome Type HD8833 SUP 037R OPERATING INSTRUCTIONS READ THESE OPERATING INSTRUCTIONS CAREFULLY BEFORE USING THE MACHINE. THESE OPERATING INSTRUCTIONS CAREFULLY BEFORE USING THE MACHIN... -
Page 2: Important Safeguards
IMPORTANT SAFEGUARDS When using electrical appliances, basic safety precautions should always be followed, including the following: 1. Read all instructions. 2. Do not touch hot surfaces. Use handles or knobs. 3. To protect against fire, electric shock and injury to persons do not immerse cord, plugs, or appliance in water or other liquid. - Page 3 CAUTION This appliance is for household use only. Any servicing, other than cleaning and user maintenance, should be performed by an authorized service center. Do not immerse machine in water. To reduce the risk of fire or electric shock, do not disassemble the machine.
-
Page 4: General Information
GENERAL INFORMATION The coff ee machine is suitable for preparing espresso coff ee using either coff ee beans or ground coff ee and is equipped with a device to dispense steam and hot water. The structure of the ma- chine has been designed for domestic use only and is not suitable for continuous professional- type operation. - Page 5 Danger of Burns Never direct the steam/hot water wand towards yourself or others: Danger of scalding! Al- ways use the handles or knobs provided. Machine Location - Suitable Location for Operation and Maintenance For best use, it is recommended to: •...
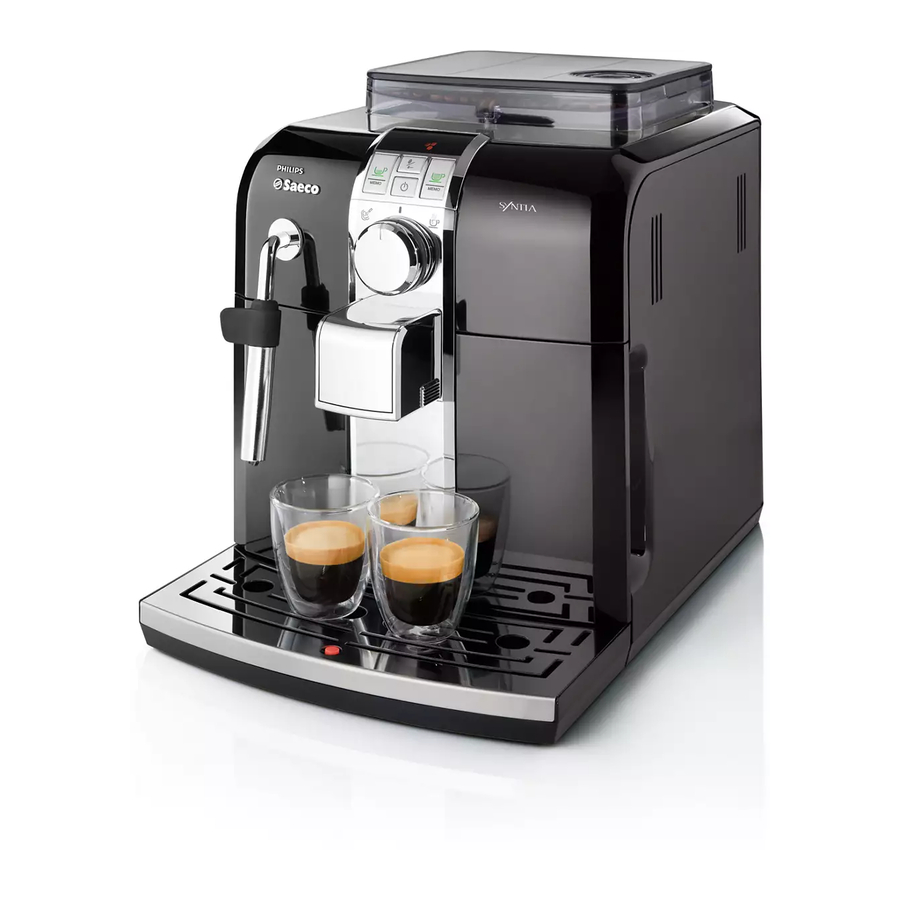
- Page 6 Coff ee bean hopper cover Coff ee bean hopper Grinder adjustment knob Control panel Dispensing spout Pre-ground coff ee Cup holder grill compartment Full drip tray indicator Brew group Service door Coff ee grounds drawer Wand protective gripper Hot water/steam wand ON-OFF power button Drip tray Water tank...
-
Page 7: Preliminary Operations
• Remove the water tank from its seat. INSTALLATION For your safety and the safety of • Rinse and fi ll it with fresh water ma- others, carefully follow the instruc- king sure that it is not fi lled exceeding tions provided in the “Safety Regu- the MAX level indicated in the water lations”... -
Page 8: Circuit Priming
• Switch the power button to “I” to turn Circuit Priming the machine on. • To prime the water circuit, place a container under the steam wand (Pannarello, if supplied). • Turn the selector dial clockwise to set it • The “STAND-BY” button blinks. to the“... -
Page 9: Using The Machine For The First Time Or After A Long Period Of Inactivity
9 Dispense water until the no water si- Using the machine for the gnal is displayed, then turn the selec- first time or after a long tor dial counter-clockwise to set it to period of inactivity. the “ ” position. Steady on These simple operations will make it pos- sible to always brew excellent coff ee. -
Page 10: Saeco Adapting System
“INTENZA” water filter (op- ADJUSTMENTS tional) The machine that you have bought allows To improve the quality of the used water, for certain adjustments that will permit it is advisable to install the water fi lter. you to use it to its full potential. Remove the water filter from its packa- Saeco Adapting System ging, immerse it vertically (with the ope-... -
Page 11: Adjusting The Coff Ee Length
The machine allows slight adjustments to At this point the button “ ” is program- the coff ee grinder to adapt it to the kind med; each time it is pressed and released, of coff ee used. the machine will brew the same amount of coff ee that was just programmed. -
Page 12: Dispensing Spout Adjustment
Selection must be made prior to selecting Dispensing Spout the coff ee. The system sets the aroma ac- Adjustment cording to the personal taste of the user. Most cups on the market can be used with this coff ee machine. After selecting “Strong aroma”, the fun- The height of the dispensing spout may ction for brewing coff ee with pre-ground... -
Page 13: Using Pre-Ground Coff Ee
• Coffee brewing stops automatically Using Pre-ground Coff ee when the pre-programmed level is This function allows using reached; however, it is possible to in- pre-ground and decaff eina- terrupt coff ee brewing by pressing the ted coff ee. button initially pressed. Pre-ground coffee must be poured into After dispensing the product, the cof- the appropriate compartment positioned... -
Page 14: Steam Dispensing
• Turn the selector dial clockwise to set it cleaned and free of any milk residue. to the “ ” position. To prepare your cappuccino, we recommend discharging Note: The lights that indica- the water in the steam wand. te the aroma are off when dispensing hot water. -
Page 15: Cleaning And Maintenance
• Fill 1/3 of the container you wish to use CLEANING AND MAIN- to prepare the cappuccino with cold TENANCE milk. General Cleaning • Empty and clean the coffee grounds To ensure better results when drawer daily, with the machine turned preparing a cappuccino, use cold milk straight from the fridge. -
Page 16: Brew Group
Pannarello. water and carefully clean the upper fi lter. • We recommend cleaning the water tank daily. For an easier removal of the • Thoroughly wash and dry all the parts water tank, move the steam wand / of the brew group. Pannarello upwards: •... - Page 17 Warning! Remove the "Inten- DESCALING za" fi lter (if installed) before Limescale normally builds up with the use adding the descaling solution. of the appliance. The machine must be descaled when the Note: should the containers icon appears on the display. fi ll up, temporarily suspend Steady-on the dispensing process in order to...
- Page 18 Note: if the " " button 10 When the " " icon lights up steady lights up steady immediately on the display, remove the water tank. after start-up, the machine needs circuit priming; turn the selector dial clockwise to the " " position. When the "...
- Page 19 16 When the rinsing water in the water 22 When the second rinse cycle is over, tank is fi nished, the " " light starts the machine enters the stand-by mode blinking. and the " " button starts blinking. Empty the container under the steam wand and the one under the dispensing 17 Turn the selector dial to the "...
- Page 20 The descaling solution is to be disposed of according to the manufacturer’s instructions and/or the regulations in force in the country of use. After completing the des- caling cycle, wash the brew group as described in the "Brew Group" section in the "Cleaning and Maintenance"...
-
Page 21: Control Panel Display
CONTROL PANEL DISPLAY Ready Signals • The machine is ready for brewing coff ee from • The machine is programming the amount bean and hot water dispensing. of coff ee to be brewed for each espresso coff ee. Steady on Blinking Steady on Blinking... -
Page 22: Warning Signals
CONTROL PANEL DISPLAY Warning Signals Alarm Signals • The machine is warming up to brew coff ee • Return the hot water / steam knob to its Blinking and dispense hot water or steam. correct position. • Insert the brew group in the machine. Slow Blinking •... -
Page 23: Troubleshooting
TROUBLESHOOTING Machine Actions Causes Solutions The machine does not turn on. The machine is not connected to the power Connect the machine to the power source. source. The coff ee is not hot enough. The cups are cold. Warm the cups with hot water. No hot water or steam is dispensed. -
Page 24: Technical Specifications
TECHNICAL SPECIFICATIONS The manufacturer reserves the right to make changes to the technical specifi cations of the product. Nominal Voltage - Power Rating - Power Supply ............See label on the inside of the service door Housing material . - Page 25 • 25 •...
- Page 26 • 26 •...
- Page 27 • 27 •...
- Page 28 The manufacturer reserves the right to change the features of the product without prior notice. www.philips.com/saeco...
Need help?
Do you have a question about the Saeco Syntia HD8833 and is the answer not in the manual?
Questions and answers
my coffee makers isn’t working what can I do?
If your Philips Saeco Syntia HD8833 coffee maker isn't working, try these troubleshooting steps:
1. Check Voltage – Ensure the voltage matches the nameplate rating.
2. Prime the Circuit – If the machine is not dispensing coffee, follow the instructions in the "Using the Machine for the First Time" section to prime the circuit.
3. Adjust Coffee Grind – If coffee brews slowly, the grind may be too fine. Adjust the grind setting as described in the "Coffee Grinder Adjustment" section.
4. Clean Brew Group – A dirty brew group can cause issues. Clean it according to the "Brew Group" section.
5. Clean Dispensing Head – If coffee leaks from the dispensing head, it may be clogged. Clean the dispensing head and its holes.
6. Wait for Auto-Adjustment – If the machine was just installed or the coffee blend changed, allow it time to self-adjust according to the "Saeco Adapting System" instructions.
7. Use Cold Water – Always fill the water tank with cold water, not warm or hot.
8. Avoid Caramelized or Flavored Beans – These can damage the machine.
If the problem persists, contact Saeco Customer Service or an authorized service center.
This answer is automatically generated