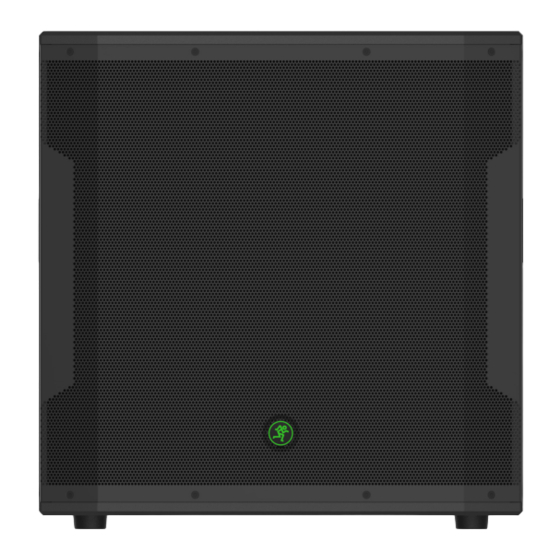
Mackie SRM1850 Owner's Manual
1600w 18" powered subwoofer
Hide thumbs
Also See for SRM1850:
- Specifications (6 pages) ,
- Owner's manual (20 pages) ,
- Quick start manual (13 pages)
Table of Contents
Advertisement
Quick Links
Advertisement
Table of Contents

Summary of Contents for Mackie SRM1850
- Page 1 SRM1850 1600W 18" POWERED SUBWOOFER O W N E R ’ S M A N U A L...
-
Page 2: Important Safety Instructions
For more information about where you can drop off your waste equipment for recycling, please contact your local city office, waste authority, or your household waste disposal service. SRM1850 Powered Subwoofer... -
Page 3: Table Of Contents
Hookup Diagrams ............ 5 • Front ported for maximum low-frequency extension and punch SRM1850 Subwoofer: Rear Panel Features ....9 1. Power Connection ......... 9 • Stereo XLR inputs plus stereo XLR full-range 2. Power Switch ..........9 and high-pass outputs 3. -
Page 4: Introduction
SRM1850 subwoofers. and high-pass outputs plus a variable digital crossover that includes presets for the SRM550 and SRM650 3. Connect the high pass outputs from the SRM1850 loudspeakers. subwoofers to the inputs of powered loudspeakers (or to an amplifier powering passive loudspeakers). -
Page 5: Hookup Diagrams
SRM1850 subwoofer. The channel A and B high pass outputs of the SRM1850 subwoofer are connected directly to the channel 1 inputs of each SRM650 loudspeaker. Be sure that the gain knob on each is set to “line” or get ready to be blasted! Select the SRM650 high pass mode on the SRM1850 for a matched system. - Page 6 SRM1850 subwoofer. The channel A high pass output of each SRM1850 subwoofer is connected directly to the channel 1 input of each SRM650 loudspeaker. Be sure that the gain knob on each is set to (or near) “line” or get ready to be blasted! Select the SRM650 high pass mode on each SRM1850 for a matched system.
- Page 7 Simply plug the signal source (i.e., mixer output) into the input jack(s), and patch that subwoofer’s full range jack to the next subwoofers’s input jack, and so on, daisy-chaining multiple SRM1850 subwoofers. See above for a visual representation of daisy-chaining.
- Page 8 1 inputs of the main pair of SRM650 loudspeakers. Be sure that the gain knob on each is set to (or near) “line” or get ready to be blasted! Select the SRM650 high pass mode on each SRM1850 connected to an SRM650 for a matched system.
-
Page 9: Srm1850 Subwoofer: Rear Panel Features
Press the bottom of this rocker switch inwards to turn off the subwoofer. As a general guide, the mixer (or other signal source) should be turned on first, SRM1850 subwoofers next, and loudspeakers last. As such, the loudspeakers should also be turned off first, followed by the subwoofers, then the mixer. -
Page 10: Normal/Invert Switch [Polarity]
“split” the work with the to loudspeakers. It’s a great way to add side fills, too! SRM1850 subwoofer. The subwoofer handles all of the low frequencies and the loudspeakers handle the rest. They are wired as follows, according to standards As a result, it is more efficient and a bit louder. -
Page 11: Stereo/Mono Switch [Full Range]
For example, if a mixer’s L/R outputs are connected 11. Extra Knobs, Buttons and LEDs to the A and B inputs of an SRM1850 subwoofer and the What’s cooler than extra bells and whistles on a new full range outputs are connected to strategically placed toy? Well, a lot of things, I suppose, but that didn’t stop... -
Page 12: Placement
Placement The Ins and Outs of Polarity The SRM1850 subwoofer is designed to sit on the SRM1850 subwoofers include a switch that allows floor or stage. It is not designed to be pole-mounted you to quickly invert the polarity of the subwoofer’s or suspended. -
Page 13: Smart Protect
[e.g. excessive distortion], operating temperature, the thermal switch resets itself, you can still damage the speaker in the SRM1850 by and the SRM1850 subwoofer resumes normal operation. overdriving it past the point of amplifier clipping. -
Page 14: Appendix A: Service Information
AC line fuse is blown, please see the "Repair" section next. • Is there a light dimmer or other SCR-based device on the same AC circuit as the SRM1850? Use an No sound AC line filter or plug the subwoofer into a •... -
Page 15: Appendix B: Connections
To locate the nearest service center, visit www.720trees.com, click “Contact Tech Support” and select “Locate a Service Center or Distributor” [3]. Service for SRM1850 subwoofers living outside the United States can be obtained through local dealers or distributors. -
Page 16: Appendix C: Technical Information
Design Class D Mounting Methods The SRM1850 subwoofer is designed to sit on the floor or stage. It is NOT designed to be pole-mounted or suspended. The cabinet has no rigging points and is not suitable for rigging. Never attempt to suspend the SRM1850 by its handles. -
Page 17: Srm1850 Subwoofer Dimensions
22.0 in 23.9 in 22.8 in 558 mm 608 mm 579 mm 23.9 in 16.8 in 608 mm 428 mm SRM1850 Subwoofer Frequency Response SRM550 / SRM650 VARIABLE : HIGH VARIABLE : LOW 2000 20000 Frequency Response [Hz] Owner’s Manual... -
Page 18: Srm1850 Subwoofer Block Diagram
SRM1850 Subwoofer Block Diagram SRM1850 Powered Subwoofer... -
Page 19: Limited Warranty
Limited Warranty Please keep your sales receipt in a safe place. This Limited Product Warranty (“Product Warranty”) is provided by LOUD Technologies Inc. (“LOUD”) and is applicable to products purchased in the United States or Canada through a LOUD-authorized reseller or dealer. The Product Warranty will not extend to anyone other than the original purchaser of the product (hereinafter, “Customer,”... - Page 20 16220 Wood-Red Road NE Woodinville, WA 98072 • USA Phone: 425.487.4333 Toll-free: 800.898.3211 Fax: 425.487.4337 www.720trees.com...


Need help?
Do you have a question about the SRM1850 and is the answer not in the manual?
Questions and answers