Advertisement
Available languages
Available languages
Quick Links
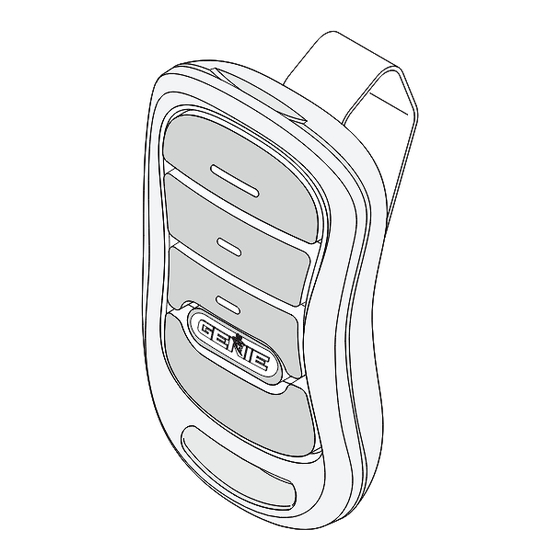
3 Button Remote
OPERATING INSTRUCTIONS
WARNING
Moving Door can cause serious injury
or death.
• Wall Console must be mounted in sight
of door, at least 5 feet above fl oor and
clear of moving door parts.
• Keep people clear of opening while door is moving.
• Do NOT allow children to play with the Remote or
door opener.
If safety reverse does not work properly:
• Close door then disconnect opener using the
manual release handle.
• Do NOT use Remote or door opener.
• Refer to Door and Door Opener Owner's Manuals
before attempting any repairs.
1 PROGRAM THE OPENER
PROGRAM
PRESS
and HOLD until you
1
SET
SEE BOTH Blue LEDs come ON
RELEASE
2
SEE round
Blue LED
come ON
PROGRAM
PRESS
and RELEASE
3
SET
SEE long Purple LED
fl ashing
PRESS remote and RELEASE
4
(the button you want to program.)
5
PRESS and RELEASE remote button again
SEE both LEDs fl ash Blue and go OFF
Note: It is possible to press the remote button too quickly or lightly.
If the LED's do not go off, press the remote button several more
times to achieve confirmation (the LED's turn off). If the LED's
turn red, return to Step 1 and repeat steps 1 through 6.
6 PRESS and RELEASE remote button a third time
Programming is complete. This remote button can
now be used to operate door opener.
Repeat as necessary for other remotes or buttons on
the same remote.
FCC and IC CERTIFIED
This device complies with FCC Part 15 and Industry Canada license exempt RSS standard(s). Operation is subject to the
following two conditions: (1) this device may not cause interference, and (2) this device must accept any interference,
including interference that may cause undesired operation of the device. This equipment generates, uses and can radiate
radio frequency energy and, if not installed and used in accordance with the instructions, may cause harmful interference
to radio communications. However, there is no guarantee that interference will not occur in a particular situation. If this
equipment does cause harmful interference to radio or television reception, which may be determined by turning the
equipment OFF and ON, the user is encouraged to try and correct the interference by one or more of the following
measures: (a) Re-orient or relocate the receiver antenna, (b) Increase the separation between the opener and receiver,
(c) Connect the opener into an outlet on a circuit di erent from that to which the receiver is connected, and (d) Consult
your local dealer. Any modi cations or changes to this equipment which are not expressly approved by the manufacturer
could void the users authority to operate the equipment.
©2013 GMI Holdings, Inc. DBA The Genie Company
5 SECS
SEE long Purple LED
come steady ON
2 REMOTE OPERATION
• Point Remote at the garage door and press the
button. Door will move.
• Press the Remote Button again and the door will
stop.
• Press the Remote Button again and the door will
move the opposite way. The door automatically
stops at the end of the open or close cycle.
3 LOST OR STOLEN REMOTE
ALL Remote Codes will be erased from Opener
These instru
keypad shown below.
1. Press
both lights come ON
blue. Release button.
2. Lights go out and
Round BLUE light
comes ON.
4. Press both
simultaneously on the
powerhead and hold for
5 seconds.
5. Reprogram the Opener with the remaining Remote(s)
(Repeat Section 2 for each remote).
Follow these instructions to erase remote codes for
ALL other Genie® openers.
1. Press and HOLD the Learn Code button on the
powerhead for 10 seconds or until Radio Signal LED
indicator goes out.
2. Reprogram the Opener with the remaining Remotes
following the programming instructions for that
powerhead.
3. Reprogram the Opener with a remote or any other
access device using the instructions accompanying
those devices.
4 BATTERY REPLACEMENT
Replace remote battery with a CR 2032 coin cell battery.
1. Open the remote case using a washer or coin that fi ts
into the slot at the top of the remote.
2. Replace battery. Match battery
polarity with symbols
inside battery housing.
3. Align components and
snap case closed.
Part Number 38381502287
(powerhead) memory.
ctions are for openers with the type
PROGRAM
and hold until
SET
PROGRAM
3. Press
again and see long
SET
purple LED fl ashing.
and
Test remote operation.
Remote should not activate
door opener.
5 SECS
NOTE: For openers
manufactured between
1995-1997,
use the two upper
buttons on the remote
For additional information or help contact Customer Service:
Call 1-800-35-GENIE or write:
GMI Holdings Inc. d/b/a The Genie Company
1 Door Drive
Mt. Hope, Ohio 44660
5 SECS
09/2013
Advertisement

Subscribe to Our Youtube Channel
Summary of Contents for Genie 3 Button Remote
-
Page 1: Remote Operation
Any modi cations or changes to this equipment which are not expressly approved by the manufacturer Mt. Hope, Ohio 44660 could void the users authority to operate the equipment. Part Number 38381502287 ©2013 GMI Holdings, Inc. DBA The Genie Company 09/2013... - Page 2 1 Door Drive distribudor local. Los cambios o modi caciones no aprobados expresamente por el fabricante podrian invalidar la Mt. Hope, Ohio 44660 autoridad del usario de operar el equipo. Part Number 38381502287 ©2013 GMI Holdings, Inc. DBA The Genie Company 09/2013...


Need help?
Do you have a question about the 3 Button Remote and is the answer not in the manual?
Questions and answers