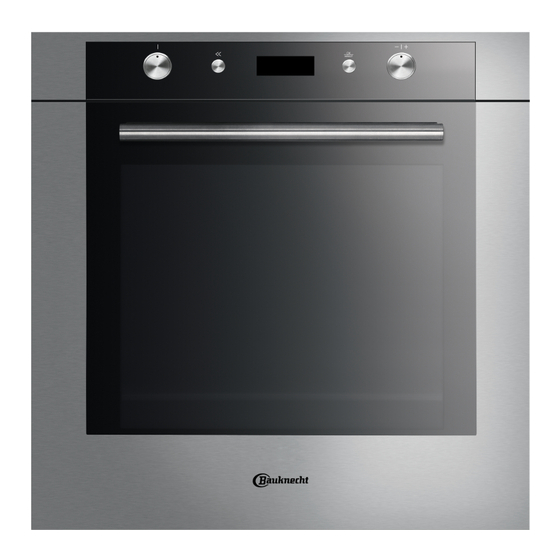
Bauknecht Oven Important Safety Instructions Manual
Hide thumbs
Also See for Oven:
- Important safety instructions manual (19 pages) ,
- Important safety instructions manual (17 pages)
Table of Contents
Advertisement
IMPORTANT SAFETY INSTRUCTIONS
YOUR SAFETY AND THAT OF OTHERS IS PARAMOUNT
This manual and the appliance itself provide important safety warnings, to be read and observed at all times.
This is the danger symbol, pertaining to safety, which alerts users to potential risks to themselves and others.
All safety warnings are preceded by the danger symbol and the following terms:
DANGER
WARNING
All safety warnings give specific details of the potential risk present and indicate how to reduce risk of injury, damage and electric
shock resulting from improper use of the appliance. Carefully observe the following instructions:
-
The appliance must be disconnected from the power supply before carrying out any installation work.
-
Installation and maintenance must be carried out by a qualified technician, in compliance with the manufacturer's
instructions and local safety regulations. Do not repair or replace any part of the appliance unless specifically stated in the
user manual.
-
Regulations require that the appliance is earthed.
-
The power cable must be long enough for connecting the appliance, once fitted in its housing, to the power supply
socket.
-
For installation to comply with current safety regulations, an all-pole disconnect switch with minimum contact gap of 3
mm must be utilized.
-
Do not use multiple plug adapters or extension leads.
-
Do not pull the power supply cable in order to unplug the appliance.
-
The electrical components must not be accessible to the user after installation.
-
Do not touch the appliance with any wet part of the body and do not operate it when barefoot.
-
This appliance is designed solely for use as a domestic appliance for cooking food. No other type of use is permitted (e.g.
heating rooms). The Manufacturer declines any liability for improper use or incorrect setting of the controls.
-
The appliance is not intended for use by persons (including children) with any physical, sensory or mental impairment, or
without experience and knowledge of the appliance, unless supervised or previously instructed in its use by those
responsible for their safety.
-
The accessible parts of the appliance may become very hot during use. Young children should be kept away from the
appliance and supervised to ensure that they do not play with it.
-
During and after use, do not touch the heating elements or interior surfaces of the appliance - risk of burns. Do not allow
the appliance to come into contact with cloths or other flammable materials until all the components have cooled
sufficiently.
-
At the end of cooking, exercise caution when opening the appliance door, letting the hot air or steam exit gradually
before accessing the oven. When the appliance door is shut, hot air is vented from the aperture above the control panel.
Do not obstruct the vent apertures.
-
Use oven gloves to remove pans and accessories, taking care not to touch the heating elements.
-
Do not place flammable materials in or near the appliance: a fire may break out if the appliance is inadvertently switched
on.
-
Do not heat or cook sealed jars or containers in the appliance. The pressure that builds up inside might cause the jar to
explode, damaging the appliance.
-
Do not use containers made of synthetic materials.
-
Overheated oils and fats catch fire easily. Always remain vigilant when cooking foods rich in fat and oil.
-
Never leave the appliance unattended during food drying.
-
If alcoholic beverages are added when roasting or cooking cakes and sweets (for example, rum, cognac, wine), remember
that alcohol evaporates at high temperatures. As a result, there is a risk that vapours released by the alcohol may catch fire
upon coming into contact with the electrical heating element.
Scrapping of household appliances
-
This appliance is manufactured with recyclable or reusable materials. Scrap the appliance in accordance with local
regulations on waste disposal. Before scrapping, cut off the power cords so that the appliances cannot be connected to
the mains.
-
For further information on the treatment, recovery and recycling of household electrical appliances, contact your
competent local authority, the collection service for household waste or the store where you purchased the appliance.
Indicates a hazardous situation which, if not avoided, will cause serious injury.
Indicates a hazardous situation which, if not avoided, could cause serious injury.
GB20
Advertisement
Table of Contents

Related Manuals for Bauknecht Oven


Summary of Contents for Bauknecht Oven
-
Page 1: Important Safety Instructions
At the end of cooking, exercise caution when opening the appliance door, letting the hot air or steam exit gradually before accessing the oven. When the appliance door is shut, hot air is vented from the aperture above the control panel. -
Page 2: Installation
Never drag pots or pans across the bottom of the oven as this could damage the enamel coating. Make sure that the electrical cables of other appliances do not touch hot parts of the oven or become trapped in the door. -
Page 3: Troubleshooting Guide
N.B: during prolonged cooking of foods with a high water content (e.g. pizza, vegetables, etc.) condensation may form on the inside of the door and around the seal. When the oven is cold, dry the inside of the door with a cloth or sponge. -
Page 4: Maintenance
MAINTENANCE Use safety gloves. WARNING Ensure the oven is cold before carrying out the following operations. Disconnect the appliance from the power supply. REMOVING THE DOOR To remove the door: Open the door fully. Lift the catches and push them forwards as far as they will go (fig. 1). -
Page 5: Replacing The Oven Lamp
Only use 25-40W/230V type E-14, T300°C incandescent lamps, or 20-40W/230 V type G9, T300°C halogen lamps. Lamps are available from our After-sales Service. Important: If using halogen lamps, do not handle with bare hands since fingerprints can damage them. Do not use the oven until the lamp cover has been repositioned. GB24... -
Page 6: Instructions For Oven Use
WIRE SHELF (n. 1): the wire shelf can be used to grill food or as a support for pans, cake tins and other ovenproof cooking receptacles. DRIP TRAY (n. 1): the drip tray is designed to be positioned under the wire shelf in order to collect fat or as an oven tray for cooking meat, fish, vegetables, focaccia, etc. -
Page 7: Control Panel Description
: to select and confirm settings LIST OF FUNCTIONS Turn the “Functions” knob to any position and the oven switches on: the display shows the functions or the associated submenus. The submenus are available and selectable by turning the knob to the functions GRILL, SPECIALS, SETTINGS, RECIPES and FAVOURITES. -
Page 8: Function Details
USING THE APPLIANCE FOR THE FIRST TIME - LANGUAGE SELECTION AND SETTING THE TIME For correct use of the oven, when it is switched on for the first time you will have to select the desired language and set the correct time. -
Page 9: Preheating The Oven
Turn +/- to adjust ... Specials: For defrosting food Start If you wish to preheat the oven quickly before inserting food, change the oven’s default selection as follows: Turn the “Functions” knob to select the fast preheating function. Confirm by pressing : the settings are shown on the display. - Page 10 Residual Heat If at the end of cooking, or when the oven is switched off, the temperature inside the oven is over 50°C, the display shows the current temperature and the bar indicating cooling in progress. When the residual heat reaches 50°C, the display shows the current time.
- Page 11 The initial cooking time displayed is merely for guidance: it can be prolonged automatically during cooking. Shortly before cooking time finishes, the oven prompts you to check that the food is cooked to your satisfaction. If it is not, extra time can then be added manually by turning the “Browse”...
-
Page 12: Function Description Table
4th or 5th shelf. When grilling meat, use the drip tray to collect the cooking juices. Position GRILL it on the 3rd/4th shelf, adding approx. half a litre of water. The oven does not have to be preheated. During cooking the oven door must remain closed. - Page 13 For optimal rising of sweet or savoury dough. To safeguard the quality of proving, the function RISING will not activate if the temperature in the oven is above 40°C. Place the dough on the 2nd shelf. The oven does not have to be preheated.
-
Page 14: Cooking Table
Shelf 4: wire shelf 160-170 20-45 Biscuits / Tartlets Shelf 1: drip tray or baking tray Shelf 5: oven tray on wire shelf 1-3-5 160-170 20-45 Shelf 3: oven tray on wire shelf Shelf 1: drip tray or baking tray... - Page 15 10-15 Oven tray on wire shelf Shelf 4: oven tray on wire shelf Lasagna & Meat 50-100 Shelf 1: drip tray or oven tray on wire shelf Shelf 4: oven tray on wire shelf Meat & Potatoes 45-100 Shelf 1: drip tray or oven tray on...
- Page 16 (from bottom) (°C) (min) Shelf 4: oven tray on wire shelf Fish & Vegetables 30-50 Shelf 1: drip tray or oven tray on wire shelf Drip tray / baking tray or wire auto 10-15 shelf Shelf 4: oven tray on wire shelf...
- Page 17 “FORCED AIR” function when cooking on more than one shelf. When grilling food, leave a space of 3-4 cm at the front to facilitate removal from the oven. GB36...
-
Page 18: Recommended Use And Tips
Meat Use any kind of oven tray or pyrex dish suited to the size of the piece of meat being cooked. For roast joints, it is best to add some stock to the bottom of the dish, basting the meat during cooking for added flavour. When the roast is ready, let it rest in the oven for another 10-15 minutes, or wrap it in aluminium foil.
Need help?
Do you have a question about the Oven and is the answer not in the manual?
Questions and answers