Table of Contents
Advertisement
Available languages
Available languages
Quick Links
Download this manual
See also:
Installation Manual
Advertisement
Chapters
Table of Contents

Related Manuals for Pioneer DEH-P9300R


Summary of Contents for Pioneer DEH-P9300R
- Page 1 Multi-CD/DAB control DSP high power CD player with RDS tuner Reproductor de CD de alta potencia DSP con control de múltiples CD/DAB con sintonizador RDS Operation Manual Operation Manual DEH-P9100R DEH-P9300R Manual de Operación Manual de Operación...
-
Page 2: Table Of Contents
Contents Key Finder ........3 Built-in CD Player ...... 19 Display and indicators ........19 Before Using This Product ....4 Basic operation ..........19 Switching and scrolling the title ...... 20 About this product ..........4 Built-in CD player function menu ...... 20 About this manual .......... - Page 3 TV Tuner ........33 Initial Settings ......45 Display and indicators ........33 Initial settings menu ........45 Basic operation ..........33 Using reverse mode ........45 Storing and recalling broadcast stations ..33 Using the feature demo ........45 Changing a band ..........
-
Page 4: Key Finder
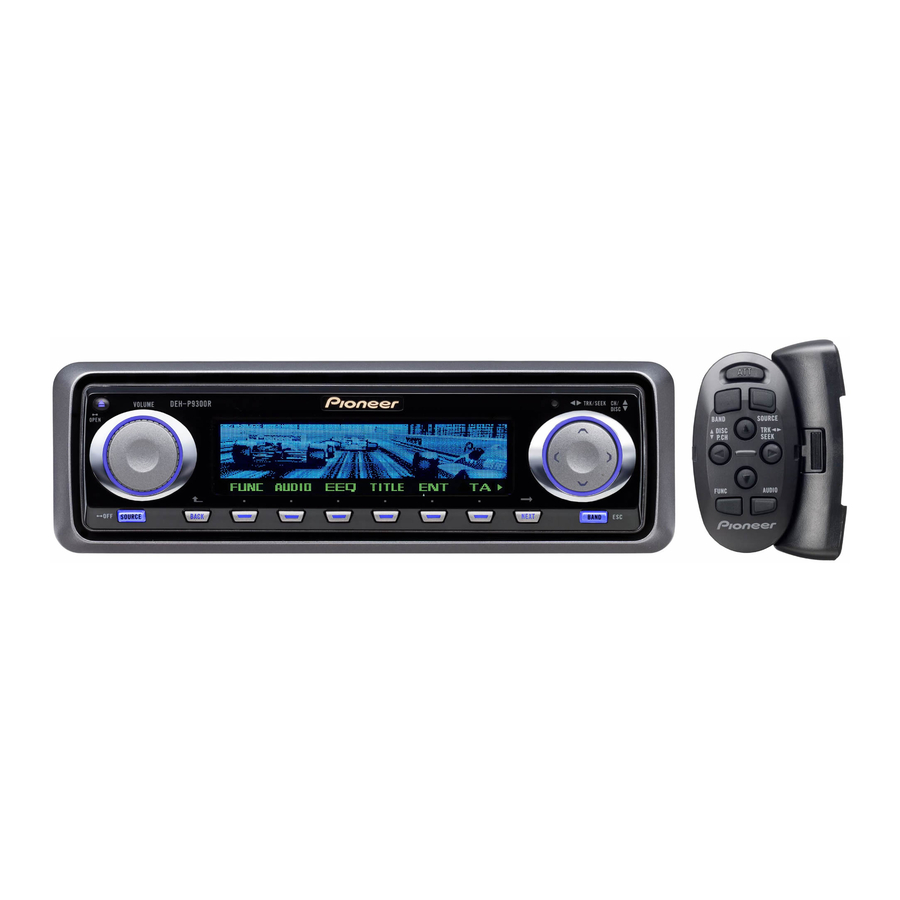
Key Finder Head unit VOLUME RESET button 5/∞/2/3 buttons EJECT button SOURCE button Multi-function buttons BAND button BACK button NEXT button Steering remote controller A steering remote controller that enables remote operation of the head unit is supplied. Operation is the same as when using buttons on the head unit. -
Page 5: Before Using This Product
The RDS function operates only in areas with FM stations broadcasting RDS signals. • The Pioneer CarStereo-Pass is for use only in Germany. • Keep this manual handy as a reference for bout this manual operating procedures and precautions. -
Page 6: Resetting The Microprocessor
Before Using This Product Note: esetting the microprocessor • The red lead (ACC) of this product should be con- nected to a terminal coupled with ignition switch ON The microprocessor must be reset under the or OFF operations. If this is not done, the vehicle following conditions: battery may be drained. -
Page 7: Remote Controller And Care
emote controller and care WARNING: • Keep the lithium battery out of the reach of Install the lithium battery children. Should the battery be swallowed, immediately consult a doctor. • Remove the cover on the back of the CAUTION: steering remote controller and insert the battery with the (+) and (–) poles pointing •... -
Page 8: Using The Steering Remote Controller
Before Using This Product FUNCTION button operation sing the steering remote con- • Press FUNCTION to select the desired troller mode (e.g., built-in CD player). Press FUNCTION repeatedly to switch Precaution: between the following modes: • Do not operate this unit while manipulating the RPT = RDM = SCAN = T.LIST = PAUSE steering wheel as this might result in a traffic acci- = TTLin... -
Page 9: Basic Operation
Note: Important • External unit refers to a Pioneer product (such as In this manual, for operations using the multi- one available in the future) that, although incompat- function buttons the function displayed is used ible as a source, enables control of basic functions as the name of the function button. - Page 10 Basic Operation Switching the function of the multi-func- 3. Press RDM to select the random mode. tion buttons The “3” indicator shows that the multi-function buttons have functions other than those current- ly displayed. When this indicator is visible, press NEXT to switch through the functions of 4.
-
Page 11: Key Guidance Indicator
Display example (e.g., built-in CD player) ey guidance indicator This product’s display features key guidance indicators. These light to indicate which of the 5/∞/2/3 buttons you can use. When you’re in the function menu, audio menu or the other menus, they also make it easy to see which 5/∞/2/3 buttons you can use to switch func- tions on/off, switch repeat selections and per- form other operations. -
Page 12: Tuner
Tuner 4. Press BAND to select the desired band. isplay and indicators Press BAND repeatedly to switch between the following bands: FORM 1 FM-1 = FM-2 = FM-3 = MW/LW 5. Press 2 2 or 3 3 to tune in to a station. The frequencies move up or down step by step. -
Page 13: Tuner Function Menu
Recalling broadcast stations toring the strongest broadcast 1. Press NEXT to display “1” – “6”. stations Press NEXT until “1” – “6” appears. BSM (best stations memory) lets you automati- 2. Press any of the buttons 1 – 6 to recall a cally store the six strongest broadcast stations station preset under that button. -
Page 14: Rds Functions
RDS Functions isplay and indicators isplaying the frequency of an RDS station FORM 1 When you tune in to an RDS station, its pro- gram service name is displayed. If you want to know the frequency, perform the following steps. •... -
Page 15: Using Alternative Frequency (Af)
PI seek sing alternative frequency (AF) If you are listening to a broadcast and the If you are listening to a broadcast and the reception becomes weak or if this product fails reception becomes weak or there are other to find a suitable alternative frequency, this problems, this product will automatically search product will automatically search for a different for a different station in the same network which... -
Page 16: Receiving Traffic Announcements
RDS Functions Canceling traffic announcements eceiving traffic announcements • Press TA while a traffic announcement is The TA (traffic announcement standby) function being received to cancel the announce- lets you receive traffic announcements auto- ment and return to the original source. matically, no matter what source you are listen- ing to. -
Page 17: Searching The Pty
Setting the news program interruption sing the PTY function When a news program is broadcast from a PTY A PTY search is performed by program type as code news station, this product can switch from indicated in the PTY list (the program types are: any station to the news broadcast station. - Page 18 RDS Functions PTY List Wide Narrow Details News&Inf News News. Affairs Current affairs. Info General information and advice. Sport Sports programs. Weather Weather reports/Meteorological information. Finance Stock market reports, commerce, trading, etc. Popular Pop Mus Popular music. Rock Mus Contemporary modern music. Easy Mus Easy listening music.
-
Page 19: Using Radio Text
Storing radio text sing radio text You can store data from up to six radio text This tuner can display radio text data transmit- transmissions under the buttons MEMO1 – ted by RDS stations, such as station informa- MEMO6. tion, the name of the currently broadcast song 1. -
Page 20: Built-In Cd Player
Built-in CD Player 3. Press VOLUME to extend the VOLUME isplay and indicators outward. • When you press VOLUME, it extends out- FORM 1 ward so that it becomes easier to turn. To retract VOLUME, press it again. 4. Turn VOLUME to adjust the volume. 5. -
Page 21: Switching And Scrolling The Title
witching and scrolling the title uilt-in CD player function menu When playing a CD TEXT disc, you can switch The built-in CD player function menu has the text display such as artist name and track title. following functions: With text longer than 32 letters, you can scroll to see the rest of the text. -
Page 22: Playing Tracks In Random Order
Built-in CD Player laying tracks in random order electing tracks from the track title list Random play lets you play back tracks on the CD in random order. The track title list lets you see the list of track 1. Press FUNC and then press RDM to titles on a CD TEXT disc and select one of select the random mode. -
Page 23: Pausing Cd Playback
ausing CD playback Pause lets you temporarily stop playback of the 1. Press FUNC and then press PAUSE to select the pause mode. 2. Press PAUSE to turn the pause on. The light illuminates. Play of the current track pauses. •... -
Page 24: Multi-Cd Player
Multi-CD Player 3. Turn VOLUME to adjust the volume. isplay and indicators 4. Press 5 5 or ∞ ∞ to select a disc. FORM 1 A disc number for which there is no disc will be skipped. • You can use the buttons 1 – 6 (or 7 – 12) to select a disc directly. -
Page 25: Switching And Scrolling The Title
witching and scrolling the title ulti-CD player function menu When playing a CD TEXT disc on a CD TEXT The multi-CD player function menu has the fol- compatible multi-CD player, you can switch text lowing functions: display such as artist name and track title. With text longer than 32 letters, you can scroll to see the rest of the text. -
Page 26: Playing Tracks In Random Order
Multi-CD Player 4. When you find the desired track (or disc), laying tracks in random order press SCAN to turn scan play off. Random play lets you play back tracks in ran- The light goes off. The track (or disc) will continue to play. -
Page 27: Selecting Discs From The Disc Title List
2. Press PAUSE to turn pause on. electing discs from the disc The light illuminates. Play of the current title list track pauses. • Press PAUSE again to turn pause off. The disc title list lets you see the list of disc •... -
Page 28: Using Compression And Dynamic Bass Emphasis
Multi-CD Player 5. Press 3 3 to move the cursor to the next Note: • If the multi-CD player does not support these func- character position. tions, “No COMP” is displayed when you attempt to • Press 2 to move backwards in the display. select it. - Page 29 Playback from ITS memory 5. Press BAND to cancel the ITS memory mode. ITS play lets you listen to the tracks that you have entered into ITS memory. When you turn Note: on ITS play, tracks from ITS memory in the •...
-
Page 30: Dab Tuner
DAB Tuner Indications that light when function is switched The following explains how to use this product to control a DAB tuner, which is sold separately. For details of DAB tuner-specific operation/fea- Indicator Function tures, see your DAB tuner’s manual. Service follow (service follow) •... -
Page 31: Storing And Recalling Services
toring and recalling services witching the display • Press DISP to select the desired display. Storing services Press DISP repeatedly to switch between the following displays: 1. Press NEXT to display “1” – “6”. Press NEXT until “1” – “6” appears. FORM 1 SERVICE (service label) = COMPONENT 2. -
Page 32: Dynamic Label Function
DAB Tuner Recalling a dynamic label ynamic label function 1. Press NEXT to display “D.TEXT”. Displaying dynamic labels Press NEXT until “D.TEXT” appears. 2. Press D.TEXT to switch to the dynamic 1. Press NEXT to display “D.TEXT”. label mode Press NEXT until “D.TEXT” appears. 3. -
Page 33: Setting The Announcement Support Interruption
1. Press FUNC and then press S.LIST to etting the announcement sup- select the available service list mode. port interruption 2. Press 2 2 or 3 3 to select the desired ser- vice. 1. Press FUNC and then press AS to select the announcement support mode. -
Page 34: Tv Tuner
TV Tuner asic operation The following explains how to use this product to control a TV tuner, which is sold separately. For details of TV tuner-specific operation/fea- 1. Press SOURCE to select the TV tuner. tures, see your TV tuner’s manual. Press SOURCE until “Television”... -
Page 35: Tv Tuner Function Menu
Recalling broadcast stations electing channels from the pre- 1. Press NEXT to display “1” – “6” (or “7” – set channel list “12”. The preset channel list lets you see the list of Press NEXT until “1” – “6” (or “7” – “12”) preset channels and select one of them to appears. -
Page 36: Audio Adjustments
Audio Adjustments djusting the audio easily ecalling equalizer curves The following functions let you easily adjust The graphic equalizer lets you adjust equaliza- your audio system to match the car interior tion to match the car interior acoustic character- acoustic characteristics which vary depending istics as desired. -
Page 37: Audio Menu
3. Press 2 2 or 3 3 to adjust left/right speaker udio menu balance. Each press of 2 or 3 moves the left/right The audio menu has the following functions: speaker balance towards the left or the right. • “BALANCE L25” – “BALANCE R25” is dis- played as the left/right speaker balance moves from left to right. - Page 38 Audio Adjustments Recalling sound field programs djusting equalizer curves 1. Press AUDIO and then press SFC to The factory supplied equalizer curves, with the select the sound field control mode. exception of “FLAT”, can be adjusted to a fine degree (nuance control). 2.
- Page 39 1. Recall the equalizer curve you want to sing position selector adjust. Refer to “Recalling equalizer curves” on One way to assure a more natural sound is to page 35. clearly position the stereo image, putting you right in the center of the sound field. 2.
- Page 40 Audio Adjustments 4. Press 5 5 or ∞ ∞ to adjust the distance sing time alignment between the selected speaker and the lis- tening position. The time alignment lets you adjust the distance Each press of 5 or ∞ increases or decreas- between each speaker and the listening posi- tion to match the type of car.
- Page 41 3. Press 2 2 or 3 3 to select a high pass filter Adjusting subwoofer settings range. When the subwoofer output is on, you can Each press of 2 or 3 selects frequencies in adjust the cut-off frequency and the output level the following order: of the subwoofer.
- Page 42 Audio Adjustments 3. Press A.EQ to turn the auto-equalizer on. djusting source levels “AUTO EQ ON” appears in the display. SLA (source level adjustment) lets you adjust • Press A.EQ again to turn auto-equalizer off. the volume level of each source to prevent radi- cal changes in volume when switching between Note: sources.
- Page 43 • Auto-equalizing changes the audio settings as PRECAUTION: below: – The fader/balance settings return to the cen- • Carrying out auto-equalizing under the follow- ter position. (Refer to page 36.) ing conditions may damage the speakers. Be – The graphic equalizer curve switches to sure to check conditions thoroughly before “FLAT”.
- Page 44 Audio Adjustments 3. Turn the ignition switch to ON or ACC. 9. Get out of the car and close the door within 10 seconds when the 10-second If the car’s air conditioner or heater is turned count-down starts. on, turn it off. Noise from the fan in the air conditioner or heater may prevent correct The measurement tone (noise) is output auto-equalizing.
-
Page 45: Detaching And Replacing The Front
Detaching and Replacing the Front Panel 3. Use the protective case provided to heft protection store/carry the detached front panel. The front panel of the head unit is detachable to discourage theft. Precaution: • Never use force or grip the display tightly when removing or replacing the front panel. -
Page 46: Initial Settings
Initial Settings 1. With the source turned off, press and nitial settings menu hold 1 to select the reverse mode. The initial settings menu has the following func- 2. Press REV to turn the reverse mode on. tions: “ON” appears in the display. •... -
Page 47: Switching The Telephone Muting/Attenuation
witching the telephone connec- witching the telephone standby tion setting setting You can switch between handsfree telephoning If you want to use the handsfree telephone unit and telephone muting in accordance with the without playing other sources of this product, connection of the cellular telephone you use. -
Page 48: Setting The Warning Tone
Initial Settings 1. With the source turned off, press and etting the warning tone hold The warning tone sounds to remind you to 2. Press NEXT and then press DAB P. to detach the front panel. (Refer to page 44.) select the DAB priority setting mode. -
Page 49: Other Functions
Other Functions Off clock display ttenuating volume When the time display is turned on, the calen- dar display appears with the time display when The attenuator lets you lower the volume level sources and the feature demo are off. quickly (by about 90%). 1. -
Page 50: Changing The Display Form
Other Functions Matching the time to a time signal witching the dimmer setting 1. Press NEXT to display “CLK”. To prevent the display from being too bright at Press NEXT until “CLK” appears. night, the display is automatically dimmed when the car’s headlights are turned on. - Page 51 1. Press ENT and then press MOVIE to Setting the background visual select the movie mode. The background visuals are only for display form 1 “FORM1”. There are five stored back- 2. Press any of the buttons MOVIE1 – ground visuals to select from. MOVIE4 or ALL to select the desired •...
-
Page 52: Using The Telephone Muting/Attenuation And Handsfree Telephoning
Other Functions sing the AUX source sing the telephone muting/ attenuation and handsfree tele- An IP-BUS-RCA interconnector such as the CD-RB20 or CD-RB10 (sold separately) lets phoning you connect this product to auxiliary equipment featuring RCA output. For more details, refer to the IP-BUS-RCA interconnector’s owner’s man- Telephone muting/attenuation ual. -
Page 53: Additional Information
Additional Information CD-R and CD-RW discs player and care • CD-R (CD-Recordable)/CD-RW (CD- • Use only CDs that carry either of the two ReWritable) discs recorded on CD recorder Compact Disc Digital Audio marks shown units other than a music CD recorder may not below. -
Page 54: Understanding Built-In Cd Player Error Messages
If the error cannot be corrected, contact your dealer or your near- est Pioneer service center. Display... -
Page 55: Specifications
CD player pecifications System ........Compact disc audio system Usable discs ..........Compact disc General Signal format ...... Sampling frequency: 44.1 kHz Number of quantization bits: 16; linear Power source ....14.4 V DC (10.8 – 15.1 V allowable) Frequency characteristics ....5 – 20,000 Hz (±1 dB) Grounding system .......... - Page 56 Contenido Guía de botones ......3 Reproductor de CD incorporado ..19 Pantalla de visualización e indicadores .... 19 Antes de utilizar este producto ..4 Operación básica ..........19 Cambio y desplazamiento de títulos ....20 Acerca de este producto ........4 Menú...
- Page 57 Sintonizador de TV ...... 33 Ajustes iniciales ......45 Pantalla de visualización e indicadores .... 33 Menú de ajustes iniciales ........ 45 Operación básica ..........33 Uso del modo de inversión ......45 Almacenamiento y llamada de emisoras Uso de la demostración de características ..45 de radiodifusión ........
-
Page 58: Guía De Botones
Guía de botones Unidad principal VOLUME Botón RESET Botones 5/∞/2/3 Botón EJECT Botones multifunción Botón SOURCE Botón BAND Botón BACK Botón NEXT Control remoto en el volante El control remoto en el volante permite la operación a distancia de la unidad principal. La operación es idéntica a la de los botones de la unidad principal. -
Page 59: Antes De Utilizar Este Producto
La función RDS opera solamente en áreas con señales RDS de radiodifusión en FM. • El Pioneer CarStereo-Pass es para uso sola- mente en Alemania. • Guarde este manual a mano para poder con- cerca de este manual sultar rápidamente los procedimientos de... -
Page 60: Reinicialización Del Microprocesador
Antes de utilizar este producto Nota: einicialización del microproce- • El conductor rojo (ACC) de este producto debe ser sador conectado al terminal enlazado con las operaciones de conexión y desconexión del interruptor de Este microprocesador debe reinicializarse en encendido. De lo contrario, se podría descargar la las condiciones siguientes: batería del vehículo. -
Page 61: Control Remoto Y Cuidados
ontrol remoto y cuidados ADVERTENCIA: • Mantenga la pila de litio fuera del alcance de Instalación de la pila de litio los niños pequeños. Si llegara a ser ingerida, acuda inmediatamente a un médico. • Retire la tapa de la parte trasera del con- PRECAUCION: trol remoto en el volante, e inserte la pila con los polos (+) y (–) orientados en la... -
Page 62: Uso Del Control Remoto En El Volante
Antes de utilizar este producto Operación del botón FUNCTION so del control remoto en el • Presione FUNCTION para seleccionar el volante modo deseado (por ejemplo, reproductor de CD incorporado). Precaución: Presione FUNCTION repetidamente para • No opere esta unidad mientras está maniobrando el conmutar entre los modos siguientes: volante, pues una distracción podría resultar en un RPT = RDM = SCAN = T.LIST = PAUSE... -
Page 63: Operación Básica
En este manual, la función visualizada será uti- Nota: lizada como nombre del botón de función para • Se entiende por unidad externa un producto Pioneer aquellas operaciones que utilicen botones mul- (disponible por ejemplo, en el futuro) que, a pesar tifunción. - Page 64 Operación básica Conmutación de la función de los botones 3. Presione RDM para seleccionar el modo aleatorio. multifunción El indicador “3” muestra que los botones multi- función disponen de otras funciones diferentes de las visualizadas. Cuando se visualice este indicador, presione NEXT para desplazarse a través de las funciones ofrecidas por los 4.
-
Page 65: Indicador De Guía De Las Teclas
Ejemplo de visualización (por ejemplo, reproductor de CD incorporado) ndicador de guía de las teclas La pantalla de este producto cuenta con las características de indicadores para guía de las teclas. Se ilumina para indicarle cuáles son los botones 5/∞/2/3 que puede utilizar. Cuando esté... -
Page 66: Sintonizador
Sintonizador 4. Presione BAND para seleccionar la antalla de visualización e indi- banda deseada. cadores Presione BAND repetidamente para conmu- tar entre las bandas siguientes: FM-1 = FM-2 = FM-3 = MW/LW FORM 1 5. Presione 2 2 o 3 3 para sintonizar una emisora. -
Page 67: Menú De Funciones Del Sintonizador
Para llamar las emisoras de radiodi- lmacenamiento de las emisoras fusión de radiodifusión más potentes 1. Presione NEXT para visualizar “1” – “6”. La BSM (memoria de las mejores emisoras) le Presione NEXT hasta que aparezca “1” – permite almacenar automáticamente las seis “6”. -
Page 68: Funciones Rds
Funciones RDS antalla de visualización e indi- isualización de la frecuencia de cadores una emisora RDS Cuando sintonice una emisora RDS, se visu- FORM 1 alizará el nombre de servicio de su programa. Si desea saber la frecuencia, realice los pasos siguientes. -
Page 69: Uso De La Frecuencia Alternativa (Af)
Búsqueda PI so de la frecuencia alternativa (AF) Si está escuchando un programa de radio y la Si está escuchando un programa de radio y la recepción se vuelve débil o si este producto no recepción se vuelve débil o se presentan prob- puede encontrar una frecuencia alternativa lemas de otro tipo, este producto realizará... -
Page 70: Recepción De Anuncios De Tráfico
Funciones RDS Cancelación de los anuncios de tráfico ecepción de anuncios de tráfico • Presione TA mientras se está recibiendo Cuando selecciona la función TA (espera de anun- un anuncio del tráfico para cancelar el cios de tráfico) podrá recibir los anuncios de tráfico anuncio y volver a la fuente original. -
Page 71: Uso De La Función Pty
Ajuste de la interrupción de un programa so de la función PTY de noticias La búsqueda PTY se realiza según el tipo de Cuando se transmita un programa de noticias programa, tal como se indica en la lista de PTY desde una emisora de noticias con código PTY, (los tipos de programa son: News&Inf, Popular, este producto puede conmutar desde cualquier... - Page 72 Funciones RDS Lista de PTY Ancho Angosto Detalles News&Inf News Noticia. Affairs Temas de actualidad. Info Información general y consejos. Sport Programas de deportes. Weather Pronósticos del tiempo/información meteorológica. Finance Informes sobre mercado de valores, comercio, operaciones de compraventa, etc. Popular Pop Mus Música Pop.
-
Page 73: Uso De Radiotexto
Almacenamiento del Radiotexto en la so de Radiotexto memoria Este sintonizador puede visualizar datos de Podrá almacenar los datos de hasta seis trans- Radiotexto transmitidos por las emisoras RDS, misiones de Radiotexto en los botones MEMO1 como información sobre la emisora, el nombre –... -
Page 74: Reproductor De Cd Incorporado
Reproductor de CD incorporado 3. Presione VOLUME para extenderlo hacia antalla de visualización e indi- afuera. cadores • Al presionar el control VOLUME, éste emerge hacia afuera para facilitar su rotación. Vuélvalo a presionar para intro- FORM 1 ducirlo. 4. Gire VOLUME para ajustar el volumen. 5. -
Page 75: Cambio Y Desplazamiento De Títulos
ambio y desplazamiento de títulos enú de funciones del reproduc- tor de CD incorporado Cuando esté reproduciendo un disco CD TEXT, es posible conmutar entre diferentes informa- El menú de funciones del reproductor de CD ciones de texto, como nombre de artistas y títu- incorporado dispone de las funciones sigu- los de pistas. -
Page 76: Reproducción De Pistas En Orden Aleatorio
Reproductor de CD incorporado eproducción de pistas en orden elección de pistas de la lista de aleatorio títulos de pistas La reproducción aleatoria le permite reproducir La lista de títulos de pistas le permite ver la lista las pistas del CD en orden aleatorio. de títulos de pistas de un disco CD TEXT y seleccionar otro título para su reproducción. -
Page 77: Para Poner La Reproducción Del Cd En Pausa
ara poner la reproducción del CD en pausa La pausa le permite detener temporalmente la reproducción del CD. 1. Presione FUNC y luego presione PAUSE para seleccionar el modo de pausa. 2. Presione PAUSE para activar la pausa. La luz se ilumina. La reproducción de la pista actual entra en pausa. -
Page 78: Reproductor De Múltiples Cd
Reproductor de múltiples CD 3. Gire VOLUME para ajustar el volumen. antalla de visualización e indi- 4. Presione 5 5 o ∞ ∞ para seleccionar un cadores disco. Si no hay disco para un número de disco, FORM 1 éste será omitido. •... -
Page 79: Cambio Y Desplazamiento De Títulos
ambio y desplazamiento de títulos enú de funciones del reproduc- tor de múltiples CD Cuando se esté reproduciendo un disco CD TEXT en un reproductor de múltiples CD compatible con El menú de funciones del reproductor de múlti- CD TEXT, es posible conmutar entre diferentes ples CD dispone de las funciones siguientes: informaciones de texto, como nombre de artis- tas y títulos de pistas. -
Page 80: Reproducción De Pistas En Orden Aleatorio
Reproductor de múltiples CD 4. Cuando encuentre la pista (o disco) eproducción de pistas en orden deseada, presione SCAN para desactivar aleatorio la reproducción con exploración. La luz se apaga. La pista (o disco) continúa La reproducción aleatoria le permite reproducir las reproduciéndose. -
Page 81: Selección De Discos De La Lista De Títulos De Discos
2. Presione PAUSE para activar la pausa. elección de discos de la lista de La luz se ilumina. La reproducción de la títulos de discos pista actual entra en pausa. • Presione PAUSE otra vez para desactivar La lista de títulos de discos le permite ver la la pausa. -
Page 82: Uso De Compresión Y Del Realce De Bajos Dinámicos
Reproductor de múltiples CD 5. Presione 3 3 para mover el cursor a la Nota: • Si el reproductor de múltiples CD no soporta estas posición del carácter siguiente. funciones, se visualizará “No COMP” cuando intente • Presione 2 para desplazarse hacia atrás seleccionarlo. - Page 83 Reproducción desde la memoria ITS 4. Presione CLEAR para borrar la pista que se está reproduciendo actualmente de la La reproducción ITS le permite escuchar las memoria ITS. pistas ingresadas por usted en la memoria ITS. La pista que se está reproduciendo actual- Al activar la reproducción ITS, se empezarán a mente desde la memoria ITS será...
-
Page 84: Sintonizador Dab
Sintonizador DAB Indicadores que se iluminan al activarse la fun- A continuación se explica cómo utilizar este ción producto para controlar un sintonizador DAB, vendido separadamente. Para los detalles Indicador Función sobre la operación/características específicas Seguimiento de servicio (ser- del sintonizador DAB, consulte el manual de su vice follow) sintonizador DAB. -
Page 85: Almacenamiento Y Llamada De Los Servicios
lmacenamiento y llamada de los onmutación de la visualización servicios • Presione DISP para seleccionar la visual- ización deseada. Almacenamiento de los servicios Presione DISP repetidamente para conmu- tar entre las visualizaciones siguientes: 1. Presione NEXT para visualizar “1” – “6”. FORM 1 Presione NEXT hasta que aparezca “1”... -
Page 86: Función De Etiqueta Dinámica
Sintonizador DAB Llamada de una etiqueta dinámica unción de etiqueta dinámica 1. Presione NEXT para visualizar “D.TEXT”. Visualización de las etiquetas dinámicas Presione NEXT hasta que aparezca “D.TEXT”. 1. Presione NEXT para visualizar “D.TEXT”. 2. Presione D.TEXT para conmutar al modo Presione NEXT hasta que aparezca de etiqueta dinámica. -
Page 87: Ajuste De La Interrupción De Soporte De Anuncio
1. Presione FUNC y luego presione S.LIST juste de la interrupción de para seleccionar el modo de lista de ser- soporte de anuncio vicios disponibles. 2. Presione 2 2 o 3 3 para seleccionar el servi- 1. Presione FUNC y luego presione AS para cio deseado. -
Page 88: Sintonizador De Tv
Sintonizador de TV peración básica A continuación se explica cómo utilizar este producto para controlar un sintonizador de TV, vendido separadamente. Para los detalles 1. Presione SOURCE para seleccionar el sobre la operación/características específicas sintonizador de TV. del sintonizador de TV, consulte el manual de Presione SOURCE hasta que aparezca su sintonizador de TV. -
Page 89: Cambio De La Banda
Para llamar las emisoras de radiodi- elección de canales de la lista fusión de canales preajustados 1. Presione NEXT para visualizar “1” – “6” La lista de canales preajustados le permite ver (o “7” – “12”). la lista de canales preajustados y seleccionar el Presione NEXT hasta que aparezca “1”... -
Page 90: Ajustes De Audio
Ajustes de audio juste fácil de audio ara llamar las curvas del ecual- izador Las siguientes funciones le permiten ajustar fácilmente su sistema de audio para que corre- El ecualizador gráfico le permite ajustar la spondan con las características acústicas del ecualización para que corresponda con las car- interior de su coche, las cuales varían dependi- acterísticas acústicas del interior de su coche,... -
Page 91: Sound
3. Presione 2 2 o 3 3 para ajustar el balance enú de audio de los altavoces izquierdo/derecho. Cada vez que presiona 2 o 3, el balance El menú de audio cuenta con las funciones siguientes: de los altavoces izquierdo/derecho se mueve hacia la izquierda o la derecha. -
Page 92: Ajuste De Las Curvas Del Ecualizador
Ajustes de audio Para llamar los programas del campo juste de las curvas del ecual- sonoro izador 1. Presione AUDIO y luego presione SFC Con excepción de “FLAT”, las curvas del ecual- para seleccionar el modo de control de izador suministradas de fábrica pueden ser campo sonoro. -
Page 93: Uso Del Nivelador Automático De Sonido
1. Llame la curva de ecualizador que usted so del selector de posición desea ajustar. Consulte “Para llamar las curvas del ecual- Una forma de asegurar un sonido más natural izador” en la página 35. es posicionar claramente la imagen estéreo, poniéndola justo en el centro del campo de 2. -
Page 94: Uso De La Alineación Del Tiempo
Ajustes de audio 4. Presione 5 5 o ∞ ∞ para ajustar la distancia so de la alineación del tiempo entre el altavoz seleccionado y la posi- La alineación del tiempo le permite ajustar la ción de escucha. distancia entre cada altavoz y la posición de Cada vez que presiona 5 o ∞, la distancia escucha para poder ajustar al tipo de coche. -
Page 95: Uso Del Filtro Pasa-Alto
3. Presione 2 2 o 3 3 para seleccionar el mar- Configuración de los ajustes del sub- gen del filtro pasa-alto. woofer Cada vez que presiona 2 o 3, las frecuen- Cuando esté activada la salida del subwoofer, cias se seleccionan en el orden siguiente: podrá... -
Page 96: Ajuste De Los Niveles De Fuente
Ajustes de audio 3. Presione A.EQ para activar el ecualizador juste de los niveles de fuente automático. El SLA (regulador de nivel de fuente) le permite Aparecerá “AUTO EQ ON” en la pantalla. • Presione A.EQ otra vez para desactivar el ajustar el nivel de volumen de cada fuente para ecualizador automático. - Page 97 • La ecualización automática cambia los PRECAUCION: ajustes de audio de la siguiente manera: – Los ajustes de fader/balance vuelven a la • Si se efectúa la ecualización automática bajo posición central. (Consulte la página 36.) las siguientes condiciones, se podrían dañar –...
- Page 98 Ajustes de audio 3. Gire el interruptor de encendido a ON o 9. Salga del coche y cierre la puerta antes ACC. de que transcurran 10 segundos, cuando se inicie la cuenta descendente de 10 Si el acondicionador de aire o el calefactor segundos.
-
Page 99: Extracción Y Colocación Del Panel Frontal
Extracción y colocación del panel frontal 3. Para guardar/transportar el panel frontal rotección anti-robo desmontado, utilice la caja de protección suministrada. El panel frontal de la unidad principal es desmontable, como medida de protección anti- robo. Precaución: • No fuerce ni sujete la pantalla con mucha fuerza cuando desmonte o reinstale el panel frontal. -
Page 100: Ajustes Iniciales
Ajustes iniciales 1. Con la fuente desactivada, presione y enú de ajustes iniciales mantenga presionado 1 para selec- cionar el modo de inversión. El menú de ajustes iniciales cuenta con las fun- ciones siguientes: 2. Presione REV para activar el modo de inversión. -
Page 101: Conmutación Del Ajuste De Conexión Del Teléfono
onmutación del ajuste de onmutación del ajuste de conexión del teléfono espera de teléfono Usted podrá conmutar entre conversación tele- Si desea utilizar la unidad de conversación tele- fónica de manos libres y enmudecimiento del fónica de manos libres sin reproducir otras teléfono, de acuerdo con la conexión del telé- fuentes de este producto, active el ajuste de fono celular que está... -
Page 102: Ajuste Del Tono De Advertencia
Ajustes iniciales 1. Con la fuente desactivada, presione y juste del tono de advertencia mantenga presionado El tono de advertencia suena para recordarle 2. Presione NEXT y luego presione DAB P. que debe extraer el panel frontal. (Consulte la para seleccionar el modo de ajuste de página 44.) prioridad DAB. -
Page 103: Otras Funciones
Otras funciones Visualización de desactivación del reloj tenuación del volumen Cuando esté activada la visualización de la hora, aparecerá la visualización del calendario El atenuador le permite bajar rápidamente el junto con la visualización de la hora cuando se nivel de volumen (en aproximadamente 90%). desactiven las fuentes y la demostración de 1. -
Page 104: Cambio Del Formato De Visualización
Otras funciones Para hacer coincidir la hora con una onmutación del ajuste del aten- señal horaria uador de iluminación 1. Presione NEXT para visualizar “CLK”. Para evitar que la pantalla sea demasiado bril- lante de la noche, la visualización se oscurece Presione NEXT hasta que aparezca “CLK”. - Page 105 1. Presione ENT y luego presione MOVIE Ajuste de la presentación visual de fondo para seleccionar el modo de película. Las presentaciones visuales de fondo son sólo para el formato de visualización 1 “FORM1”. Es 2. Presione cualquiera de los botones posible seleccionar entre cinco presentaciones MOVIE1 –...
-
Page 106: Using The Aux Source
Otras funciones so de la fuente AUX so del enmudecimiento/aten- uación de teléfono y de la conver- Un interconector IP-BUS-RCA tal como el CD- RB20 o CD-RB10 (vendido separadamente) le sación telefónica de manos libres permite conectar este producto a un equipo auxiliar provisto de salida RCA. -
Page 107: Información Adicional
Información adicional Discos CD-R y CD-RW eproductor de CD y cuidados • Puede suceder que los discos CD-R (CD • Utilice solamente discos CD que lleven una grabables)/CD-RW (CD-rescribibles) que han de las dos marcas de Compact Disc Digital sido grabados con grabadoras de CD que no Audio, mostradas a continuación. -
Page 108: Cómo Interpretar Los Mensajes De Error Del Reproductor De Cd Incorporado
Si aparece un mensaje de error, consulte la tabla de abajo para identificar el proble- ma y el método de corrección sugerido. Si el error persistiera, póngase en contacto con su conce- sionario o centro de servicio Pioneer más cercano. Visualización Causa Solución... -
Page 109: Especificaciones
A Title (English) Reproductor de CD specificaciones Sistema ....Sistema de audio de discos compactos Discos usables .......... Disco compacto General Formato de las señales ........ Frecuencia de muestreo: 44,1 kHz Fuente de alimentación ........14,4 V CC Número de cuantización de bits: 16; lineal (10,8 –... - Page 112 300 Allstate Parkway, Markham, Ontario L3R OP2, Canada Copyright © 2001 by Pioneer Corporation. TEL: (905) 479-4411 All rights reserved. PIONEER ELECTRONICS DE MEXICO, S.A. de C.V. Publication de Pioneer Corporation. San Lorenzo 1009 3er. Piso Desp. 302 Copyright © 2001 Pioneer Corporation.
Need help?
Do you have a question about the DEH-P9300R and is the answer not in the manual?
Questions and answers