Table of Contents
Advertisement
Quick Links
Rated Welding
Amperage
Output
Range
130 A @ 20.5 Volts
40 − 170
DC, 30% Duty Cycle
Solid/
Stainless
Wire Type
And Dia
And Dia
.023 − .035 in
(0.6 − 0.9 mm)
* While idling
cover_om 4/95 − ST-800 091-C
OWNER'S
MANUAL
Millermatic
230 Volt Wire Welder
Maximum
Open-Circuit
Voltage DC
33
Flux Cored/
Aluminum
.030 − .045 in
(0.8 − 1.1 mm)
1996 MILLER Electric Mfg. Co.
June 1996
Effective With Serial No. KG171523
155 And M-15 Gun
Amperes Input at
Rated Load Out-
KVA
put 115 V, 60 Hz,
Single-Phase
20.5
4.7
(0.27)*
(.05)*
Calculated Wire
Speed Range At
Max Wire Feed Speed While Welding
No Load
126 − 722 IPM
(3.2 − 18.3 m/min)
Form: OM-1314
Overall
KW
Weight
Dimensions
Length: 17 in
(432 mm)
4
Width: 10 in
80 lb
(.04)*
(254 mm)
(36.3 kg)
Height: 15-1/2 in
(394 mm)
500 IPM
(12.7 m/min)
PRINTED IN USA
Advertisement
Table of Contents
Troubleshooting

Related Manuals for Miller Electric Millermatic 155 And M-15 Gun


Summary of Contents for Miller Electric Millermatic 155 And M-15 Gun
- Page 1 .030 − .045 in 126 − 722 IPM 500 IPM (0.6 − 0.9 mm) (0.8 − 1.1 mm) (3.2 − 18.3 m/min) (12.7 m/min) * While idling cover_om 4/95 − ST-800 091-C 1996 MILLER Electric Mfg. Co. PRINTED IN USA...
-
Page 3: Section 1 − Installation
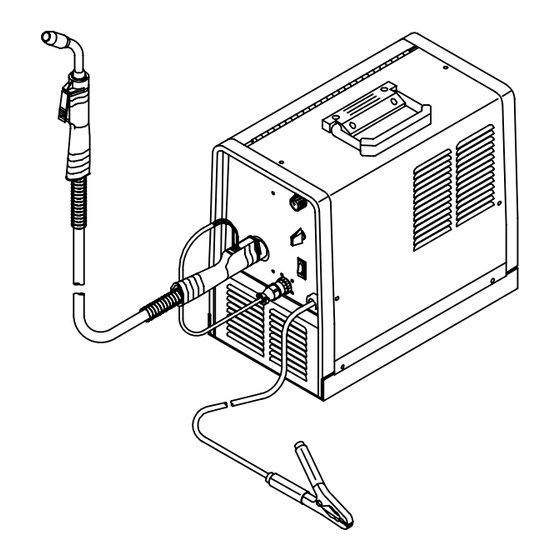
SECTION 1 − INSTALLATION 1-1. Installing Work Clamp Insulator Bolt Smaller Hole Work Clamp Tabs Bend tabs around work cable. Work Cable From Unit Tools Needed: 3/8, 7/16 in Ref. ST-025 190-D 1-2. Installing Welding Gun And Setting Gun Polarity For Wire Type Gun Opening Gun Trigger Receptacle Gun Securing Nut... -
Page 4: Selecting A Location And Connecting Input Power
1-3. Electrical Service Guide Input Voltage Input Amperes At Rated Output 20.5 Max Recommended Standard Fuse Or Circuit Breaker Rating In Amperes Min Input Conductor Size In AWG/Kcmil Max Recommended Input Conductor Length In Feet (Meters) 64 (19) Min Grounding Conductor Size In AWG/Kcmil Reference: 1996 National Electrical Code (NEC) S-0092-J 1-4. -
Page 5: Installing Wire Spool And Adjusting Hub Tension
1-5. Installing Wire Spool And Adjusting Hub Tension 1 Lb Wire Spool Standard Wire Spool When a slight force is needed to turn spool, tension is set. Tools Needed: 15/16 in S-0499 OM-1314 Page 7... -
Page 6: Installing Drive Roll And Threading Welding Wire
1-6. Installing Drive Roll And Threading Welding Wire Install drive roll onto shaft with de- sired groove in, and one set screw facing flat side of shaft. Tighten both set screws. Install drive roll. For Flux Cored Wire For Solid Wire Pull and hold wire;... -
Page 7: Section 2 − Operation
SECTION 2 − OPERATION 2-1. Controls Wire Speed Control Use control to select a wire feed speed. As Voltage switch setting in- creases, wire speed range also in- creases. Voltage Switch The higher the selected number, the thicker the material that can be welded. - Page 8 NOTES OM-1314 Page 10...
-
Page 9: Duty Cycle And Overheating
2-2. Duty Cycle And Overheating Duty Cycle is percentage of 10 min- utes that unit can weld at rated load without overheating. If unit overheats, thermostat(s) opens, output stops, and cooling fan runs. Wait fifteen minutes for unit to cool. Reduce amperage or duty cycle before welding. -
Page 10: Section 3 − Maintenance & Troubleshooting
SECTION 3 − MAINTENANCE & TROUBLESHOOTING 3-1. Maintenance Maintain more often Y Disconnect power before maintaining. during severe conditions. 3 Months Repair Or Clean And Replace Replace Tighten Cracked Damaged Or Weld Cables Unreadable Connections And Cords Labels 6 Months Blow Out Or Vacuum Inside stat_maint −... -
Page 11: Replacing Gun Contact Tip
3-4. Replacing Gun Contact Tip Y Turn power before replacing contact tip. Nozzle Contact Tip Cut off welding wire at contact tip. Remove nozzle. Remove contact tip and install new contact tip. Reinstall nozzle. Tools Needed: ST-149 326-B 3-5. Unicable Repair To repair or replace unicable, order Unicable Clamp Kit, part number 172 017. -
Page 12: Cleaning Or Replacing Gun Liner
3-6. Cleaning Or Replacing Gun Liner Tools Needed: Y Disconnect gun from unit. 3/8 in Head Tube Remove nozzle, contact tip, adapter, and wire outlet guide. 3/8 in Wire Outlet Guide Remove liner. Lay gun cable out straight before installing new liner. To Reassemble Gun: Insert new liner. -
Page 13: Replacing Switch And/Or Head Tube
3-7. Replacing Switch And/Or Head Tube Y Disconnect gun from unit. Slide handle. Remove handle Remove switch housing. Note: If installing new switch, push switch lead connectors onto terminal of locking nut. new switch (polarity is not important). Install switch back into handle, and secure with handle locking nut. -
Page 14: Cleaning Or Repairing Drive Assembly
3-8. Cleaning Or Repairing Drive Assembly Y Turn power before cleaning or repairing drive assembly. Wire Spool Nozzle Cut welding wire off at nozzle. Retract wire onto spool and secure. Pressure Roll Arm Cotter Pin Screw Bearing Remove bearing. Install new bear- ing and secure with screw. -
Page 15: Troubleshooting
3-9. Troubleshooting Welding Trouble Remedy No weld output; wire does not feed. Secure power cord plug in receptacle (see Section 1-4). Check and replace power switch if necessary. Check fuse F1, and replace if necessary (see Section 3-2). Replace building line fuse or reset circuit breaker if open (see Section 1-4). Secure gun trigger plug in receptacle or repair leads, or replace trigger switch (see Section 1-2 and/or 3-7). -
Page 16: Section 4 − Safety Precautions For Arc Welding
SECTION 4 − SAFETY PRECAUTIONS FOR ARC WELDING OM-1314 − 6/96 safety_som1 4/95 4-1. Symbol Usage Y Marks a special safety message. Means Warning! Watch Out! There are possible hazards with this procedure! The possible hazards are shown in the adjoining symbols. Means NOTE;... - Page 17 CYLINDERS can explode if damaged. 4. Never drape a welding torch over a gas cylinder. 5. Never allow a welding electrode to touch any cylinder. Shielding gas cylinders contain gas under high 6. Never weld on a pressurized cylinder − explosion will result. pressure.
-
Page 18: Principal Safety Standards
OVERUSE can cause OVERHEATED SIGNIFICANT DC VOLTAGE exists after EQUIPMENT. removal of input power on inverters. 1. Allow cooling period. 1. Turn Off inverter, disconnect input power, and 2. Reduce current or reduce duty cycle before discharge input capacitors according starting to weld again. -
Page 19: Section 5 − Electrical Diagram
SECTION 5 − ELECTRICAL DIAGRAM SB-180 784-A Figure 5-1. Circuit Diagram OM-1314 Page 4... -
Page 20: Section 6 − Welding Methods & Troubleshooting
SECTION 6 − WELDING METHODS & TROUBLESHOOTING mod4.1* 9/92 A. Welding Methods 6-1. Holding And Positioning Welding Gun Cradle gun and rest hand on workpiece. Place tip of wire on seam before lowering hel- met and pressing trigger. Welding wire is not energized until gun trigger is pressed. Wire Extension (Stickout) 1/4 −... -
Page 21: Conditions That Affect Weld Bead Shape
6-2. Conditions That Affect Weld Bead Shape Weld bead shape depends on gun angle, direction of travel, wire extension (stickout), trav- el speed, thickness of base metal, wire feed speed (weld current), and voltage. GUN ANGLES AND WELD BEAD PROFILES Push Perpendicular Drag... -
Page 22: Weld Bead Characteristics
6-4. Weld Bead Characteristics Large Spatter Deposits Poor Weld Bead Rough, Uneven Bead Slight Crater During Welding Bad Overlap Poor Penetration S-0053-A Fine Spatter Uniform Bead Good Weld Bead Moderate Crater During Welding Weld a new bead or layer for each 1/8 in (3.2 mm) thickness in metals being welded. - Page 23 Table 6-2. Porosity Porosity − small cavities or holes resulting from gas pockets in weld metal. S-0635 Possible Causes Corrective Actions Inadequate shielding gas coverage. Check for proper gas flow rate. Remove spatter from gun nozzle. Check gas hoses for leaks. Eliminate drafts near welding arc.
- Page 24 Table 6-5. Lack Of Penetration Lack Of Penetration − shallow fusion between weld metal and base metal. Lack of Penetration Good Penetration S-0638 Possible Causes Corrective Actions Improper joint preparation. Material too thick. Joint preparation and design must provide access to bottom of groove while maintain- ing proper welding wire extension and arc characteristics.
- Page 25 Table 6-8. Waviness Of Bead Waviness Of Bead − weld metal that is not parallel and does not cover joint formed by base metal. Possible Causes Corrective Actions Welding wire extends too far out of Be sure welding wire does not extend more than 1/2 in (13 mm) beyond nozzle. nozzle.
-
Page 26: Section 7 − Parts List
SECTION 7 − PARTS LIST ST-801 633 Figure 7-1. Main Assembly OM-1314 Page 11... - Page 27 Item Dia. Part Mkgs. Description Quantity Figure 7-1. Main Assembly ... . . 131 315 DRIVE ASSEMBLY, wire (Fig 7-3) ........
- Page 28 *Includes Item 17 ST-801 140 Figure 7-2. M-15 Gun OM-1314 Page 13...
- Page 29 Item Part Description Quantity 169 903 Figure 7-2. M-15 Gun (Fig 7-1 Item 43) ..169 715 NOZZLE, slip type .500 orf flush ..........
- Page 30 Item Dia. Part Description Quantity Mkgs. Figure 7-3. Drive Assembly, Wire (Fig 7-1 Item 1) . . . 173 446 . . . MOTOR, 12VDC ............
Need help?
Do you have a question about the Millermatic 155 And M-15 Gun and is the answer not in the manual?
Questions and answers