Table of Contents
Advertisement
Advertisement
Table of Contents

Related Manuals for Le Pan Tablet PC


Summary of Contents for Le Pan Tablet PC
- Page 1 Le Pan S (Wi-Fi) User Manual...
-
Page 2: Table Of Contents
Table of Contents CH1. BEFORE GETTING STARTED ..........................- 1 - Care and Maintenance ........................... - 1 - CH2. GETTING TO KNOW YOUR TABLET ........................- 2 - Your Tablet ............................- 2 - In the Box............................... - 2 - Install the Storage Card .......................... - Page 3 Protect Your Tablet and Personal Data ....................- 14 - Manage Applications ........................... - 15 - Reset to Factory Defaults ........................- 16 - CH5. MESSAGING ..............................- 17 - Email ..............................- 17 - Gmail ..............................- 18 - CH6.
-
Page 4: Ch1. Before Getting Started
CH1. BEFORE GETTING STARTED Your tablet is a highly sophisticated electronic device. Please read this manual before using your tablet, battery, charger or any accessories. Care and Maintenance Keep your tablet and all its parts out of the reach of children. ... -
Page 5: Ch2. Getting To Know Your Tablet
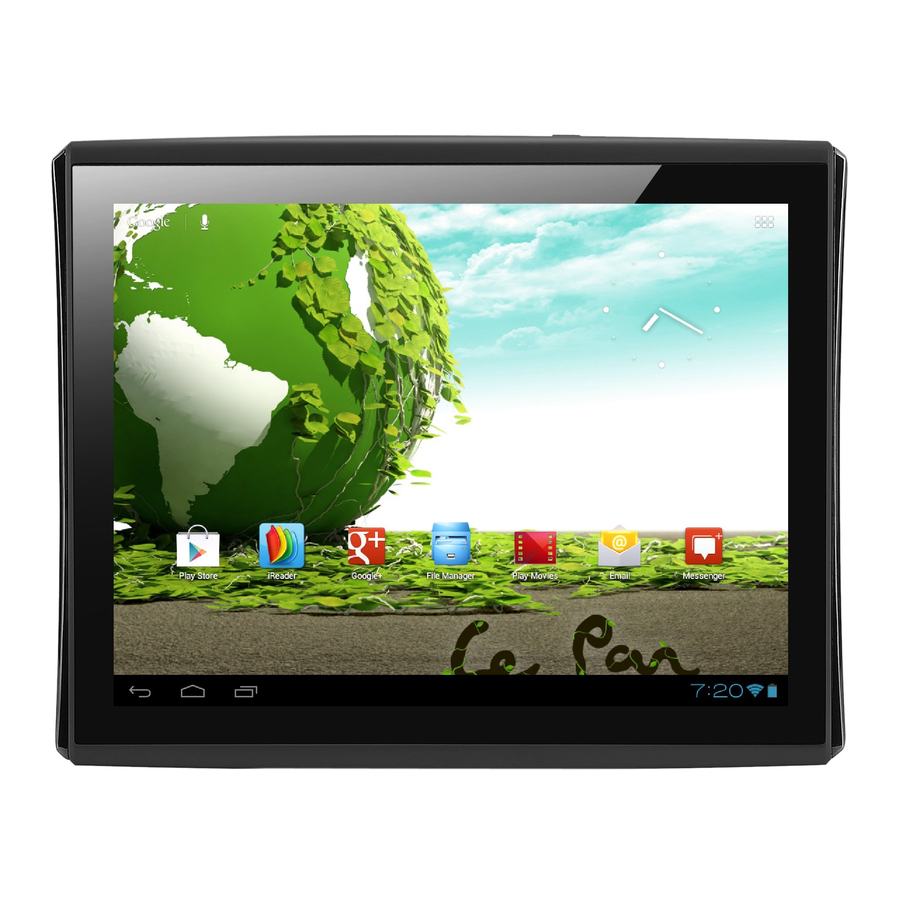
CH2. GETTING TO KNOW YOUR TABLET Your Tablet 1. Headphone Jack 7. Power On/Off Button 2. 30 Pin Connector 8. Reset Button 3. Microphone 9. Camera 4. Micro SD Card Slot 10. Ambient Light Sensor 5. Volume Up/Down Button 11. Speaker 6. -
Page 6: Battery
Before using your tablet for the first time, you must fully charge the battery for a minimum of eight hours. When battery is being charged, the icon will be displayed at the button of screen when tablet pc is on . -
Page 7: Headphone Jack
Headphone Jack For listening to music and watching videos, insert the headset into the headphone jack. Tablet Controls Headphone Jack Location Function Keys Touch the control keys on the screen to do the followings: Icon Function Text search Text search on Google. Voice search Voice search on Google. -
Page 8: Get Around Your Tablet
Get Around Your Tablet There are different ways to navigate around the home screen, menus and applications on your tablet. You can also change the screen orientation of the tablet as well. Touch Touch application or other element with your finger to open or select them. Touch and hold Touch an item with your finger and do not release it until the tablet responds. -
Page 9: Ch3. Getting Started
CH3. GETTING STARTED Turn Your Tablet On / Off Turn On the Tablet Press the POWER key on the right side of the top of the tablet. Turn Off the Tablet Press and hold the POWER key until the options menu opens. On the options menu, touch the Power Off button to turn off the tablet. -
Page 10: Customize The Home Screen
Home Screen The Home screen is your starting point for using the applications on your tablet. You can customize the Home screen to display application icons, shortcuts, folders, and widgets. Extended Home Screen The Home screen extends beyond the screen width to provide more space for adding icons, widgets, and more. Slide your finger horizontally across the screen (to the left or the right) to go to the left side or right side of the extended home screen. -
Page 11: Status And Notifications
Remove a Home Screen Item Touch and hold the item on the screen you want to remove to activate Move mode. Drag the icon to Change the Home Screen Wallpaper While on the Home screen, touch > Settings > Display > Wallpaper; or you can long press the empty area of the home screen to Choose wallpaper from Gallery/ Live Wallpapers/ Wallpapers. -
Page 12: Adjust The Volume
Adjust the Volume Adjusting the volume changes the volume level of sound notifications and music or video playback. Adjust the volume by pressing the volume key on the tablet, or adjust the volume from the screen. Use the On-Screen Keyboard When you start a program or select a field that requires text or numbers, the on-screen keyboard will be needed. -
Page 13: Connect To Computer
Take the 30 Pin to USB cable in box to connect Tablet and Computer. **Note: Please install “Windows Media Player 11” if your computer is with windows XP or lower OS. Select Disc “Le Pan S” to view files in Tablet or transfer documents in between. Disconnect cable when it is finished. -
Page 14: Create And Manage Contacts
Create and Manage Contacts View Contacts Press Home , touch Applications , and then touch People Add Contacts In the People, touch to add new contact. Enter the contact’s name and other contact information such as phone number, email address, home address, etc. Touch Add another field to input more information. -
Page 15: Ch4. Settings
CH4. SETTINGS Change Basic Settings Press Home , touch to open the Applications and then select Settings Set Date, Time Zone and Time By default, your tablet automatically uses the network-provided date, time zone, and time. Set Date Manually Adjust Date, Time Zone, and Time: Set Date Dialogue Press Home , touch to open the Applications... - Page 16 Adjust Screen Sleep Period: After a period of inactivity, the tablet screen turns off to conserve battery power. To change the default settings: Press Home , then touch to open the Applications then select Settings Touch Display then touch Sleep. Touch the period of the screen turns to sleep.
-
Page 17: Protect Your Tablet And Personal Data
Language Settings You can change the operating system language of the tablet. To change the Language: Press Home , then touch to open the Applications then select Settings Touch Language & input > Language and then select the language you want to use. Language Settings Sync Your Data Sync with Google Service via the Internet:... -
Page 18: Manage Applications
Create and Enable a Screen Unlock Pattern: You can increase the security of your tablet by creating a screen unlock methods, such as Slide (as default), Face Unlock, Pattern, Pin and Password. When enabled, you have to input the correct instruction to unlock the tablet’s control keys and touch screen. **Important! When you fail to input the correct instructions on the screen after five attempts, you will be prompted to wait for more than 30 seconds before next try. -
Page 19: Reset To Factory Defaults
**Note: Applications that pre-installed on the tablet cannot be uninstalled. Free Up Tablet Memory or Storage Card Space: If your tablet is running low on memory, you can try one or both the following to free up space: Go to Browser and clear all temporary Internet files and Browser history information. Refer to the “Browser” section for more details. ... -
Page 20: Ch5. Messaging
CH5. MESSAGING Email Your tablet comes with an email wizard that lets you add external POP3 or IMAP email accounts from popular web-based email service providers such as Hotmail, Gmail, Yahoo!® Mail Plus, AOL, and more. Set Up Email Home >... -
Page 21: Gmail
Delete an Email In the email account inbox, touch and hold the email you want to delete. On the options menu, touch Delete. Edit or Delete an External Email Account Press Home , then touch Email Do one of the followings: ... -
Page 22: Ch6. Connecting
CH6. CONNECTING Connect to the Internet Your tablet’s networking capabilities allow you to access the Internet through Wi-Fi. Wi-Fi To use the Wi-Fi function, you would need to access a wireless access point or hotspot. Turn on Wi-Fi Turn on Wi-Fi and Connect to an Access Point Press Applications , select Settings , and touch the checkbox to turn it on or turn it off. -
Page 23: View Web Pages
Check Network Status Press , and then touch Settings. Turn on the Wi-Fi to display available access points. The status of network will be displayed. View Web Pages Your tablet’s browser offers a host of features that let you view web pages just like on a desktop computer. Change the Screen Orientation to Landscape View: Turn your tablet sideways to view the web page in landscape mode. - Page 24 Go to a Web Page Open Browser. Enter a web address or touch and speak a web address. Click to go to that website. After opening the website, flick up or down to browse the webpage. . Navigate on a Web Page Slide your finger on the screen in any direction to navigate and view other areas of the web page.
-
Page 25: Browser Settings
Find Text Within a Web Page Press at the top of the screen and select Find on page. Enter the search item. As you enter characters, matching characters will be highlighted in green. Touch the left or right arrow to go to the previous or next matching item. -
Page 26: Manage Bookmarks
Manage Links, History, and Downloads Allow Download of Web Applications: Press Applications > Settings > Security . Select the Unknown sources check box. When the Attention dialog box opens, touch OK. **Tip: Before you can download web applications, you must first enable downloading from the tablet settings. **Note: All downloaded applications are saved to the Micro SD card. - Page 27 Turn on Bluetooth and Set the Tablet to Discoverable: Press Applications and then press Settings. Then select the Bluetooth check box to turn on Bluetooth. When on, the Bluetooth icon appears in the status bar. Touch the tablet name on the right to change the Bluetooth status to Visible to all nearby Bluetooth devices, and then the tablet becomes discoverable to other Bluetooth devices that are within range.
-
Page 28: Ch7. Multimedia
CH7. MULTIMEDIA Camera Your tablet has a front 2-megapixel camera which allows you to capture pictures and record videos. Turn On the Camera Press Home , then touch the Applications Select Camera . The screen automatically switches to landscape orientation when you access the Camera. **Tip: You can easily switch to the other capture mode while you are in Camera. -
Page 29: Viewing, Sharing, And Editing Pictures
Record a Video After Capturing a Photo or Video: After capturing a photo or video, the image will appear in the Preview/Zoom screen at the upper right corner. Simply touch the Preview/Zoom screen and go to the Gallery to share the picture or video. Viewing, Sharing, and Editing Pictures After you have taken a picture, you can view it, edit it, or share it with friends through email or Gmail. - Page 30 Manage Picture Gallery: While in the Gallery screen, touch and hold any album to manage folder. Close Picture Gallery: While in the Gallery screen, press Home or RETURN to close the application. **Note: If you open Gallery from the Camera application, the screen returns to the Camera screen when you press RETURN View a Picture: ...
-
Page 31: Watch And Share Video
Send a Picture via Email or Gmail: While viewing a picture in full screen, touch the screen, and then touch Share When prompted, touch Email or Gmail. The picture is automatically attached to your email or Gmail. Compose your message, and then touch Send. For more information on how to create and send emails, refer to the chapter of messaging. - Page 32 Play Music: Touch a song to play it. **Notes: Press the Volume key to adjust the playback volume. Set Playlists Use a playlist to organize your music files. You can create as many playlists as you want on your tablet. Create a Playlist: On the Music library screen, touch the icon on the left upper corner, select Songs.
-
Page 33: Limited Warranty
PARTS: If service is being performed by a Le Pan technician, the cost of parts is covered for up to one (1) year from the date of purchase. Le Pan will not repair or replace defective parts unless the work is performed by a La Pan technician. Proof of purchase in the form of a bill of sale, receipt or an invoice must be provided at the time service is requested in order to receive warranty service. -
Page 34: Fcc Statement
FCC RF Exposure Information and Statement The SAR limit of USA (FCC) is 1.6 W/kg averaged over one gram of tissue. Device types Le Pan S (FCC ID: ZDRTC978) has also been tested against this SAR limit. The highest SAR value reported under this standard during product certification for use at when properly worn on the body is 0.365W/kg. This device was tested for typical body-worn operations with the back of the handset kept 0cm from the body.
Need help?
Do you have a question about the Tablet PC and is the answer not in the manual?
Questions and answers