Table of Contents
Advertisement
Quick Links
Advertisement
Table of Contents
Troubleshooting

Related Manuals for DeLonghi ECAM 26.455


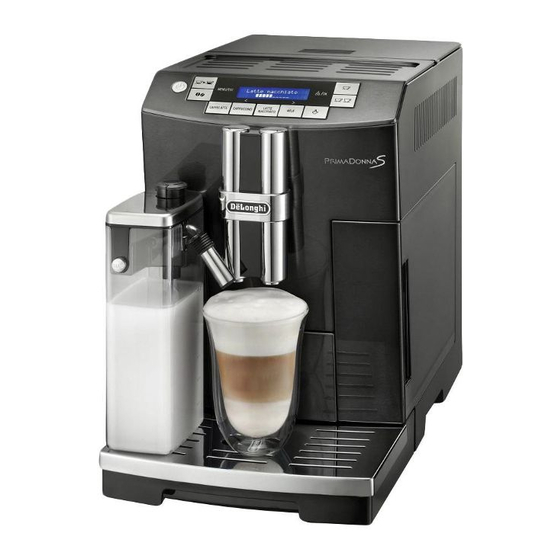
Summary of Contents for DeLonghi ECAM 26.455
- Page 1 5713215191/ 02.11...
- Page 2 bEAn to Cup EsprEsso And CAppuCCino MAChinE instruction for use ECAM26.455...
- Page 6 CLEAN...
-
Page 7: Table Of Contents
ContEnts MAKinG drinKs With MiLK........13 Filling and attaching the milk container ......... 13 introduCtion ............7 Adjusting the amount of froth ..........13 Symbols used in these instructions ........... 7 Making drinks with milk automatically ........14 Letters in brackets ..............7 Cleaning the milk frother with the CLEAN button .... -
Page 8: Introduction
Never touch the plug with damp hands. • Make sure the socket used is freely accessible at all times, Thank you for choosing the ECAM 26.455 automatic coffee and enabling the appliance to be unplugged when necessary. cappuccino maker. •... -
Page 9: Description
B10. LAttE MACChiAto button: to deliver a macchiato failure to respect these instructions. B11. MiLK button: to deliver a cup of milk (When in the settings Please note: menu, press to scroll forwards) Keep these instructions B12: button: to deliver steam If the appliance is passed to other persons, they must also be B13. -
Page 10: Using The Appliance For The First Time
Connecting the appliance If your model is not provided with a filter, you can request one from De’Longhi Customer Experience. Important! Check that the mains power supply voltage corresponds to turninG thE AppLiAnCE on the value indicated on the rating plate on the bottom of the appliance. -
Page 11: Rinsing
rinsing ready at a certain time (for example in the morning) so you can Use this function to deliver hot water from the spout to heat the internal make coffee immediately. circuit and make the coffee delivered hotter. Please note! To enable the function, proceed as follows: To enable this function, the time must already have been set 1. -
Page 12: Cup Warmer
“Enable?” if the function has been disabled);o To disable or re-enable the beep, proceed as follows: 1. Press the MEnu/EsC button to enter the menu; 4. Press the button to disable (or enable) energy 2. Press the MiLK or CAppuCCino button (fig. 8) until saving mode;... -
Page 13: Making Coffee
MAKinG CoFFEE coffee is too thin and not creamy enough or that delivery is too slow (a drop at a time), this can be corrected by adjusting the selecting the coffee taste grinding adjustment dial (fig. 12). The appliance is set by default to make coffee with a standard Please note! taste. -
Page 14: Making Coffee Using Pre-Ground Coffee
MAKinG drinKs With MiLK coffee buttons ( • At the end of delivery, to increase the quantity of coffee Please note! in the cup, just press (within 3 seconds) one of the coffee • To avoid producing milk with poor froth or large bubbles, buttons ( always clean the milk container lid and hot water nozzle Once the coffee has been made, the appliance is ready to use as described in the section “Cleaning the milk container”... -
Page 15: Making Drinks With Milk Automatically
Making drinks with milk automatically programming the quantity of coffee and milk in the cup for the CAFFELAttE, CAppuCCino, MACChiAto and The CAFFELATTE, CAPPUCCINO, MACCHIATO and MILK buttons MiLK buttons. on the control panel enable these drinks to be prepared automatically. -
Page 16: Delivering Steam
To modify these quantities, proceed as follows: sponge and warm water. 1. Position a container under the spout. 6. Reinsert the nozzle and replace the cappuccino maker on 2. Press the button again until “Hot water Program the nozzle, turning it and pushing it upwards until it is quantity”... -
Page 17: Cleaning The Inside Of The Coffee Maker
To remove the drip tray: 4. Press the two red release buttons inwards and at the same 1. Remove the drip tray and the grounds container (fig. 26); time pull the infuser outwards (fig. 31). 2. Empty the drip tray and grounds container and wash 5. -
Page 18: Cleaning The Hot Water/Steam Nozzle
dEsCALE 2. Remove the milk spout and intake tube. Descale the machine when the message “DESCALE” flashes on 3. Turn the froth adjustment the display. dial to the “INSERT” position Important! (see figure) and pull it off • Descaler contains acids which may irritate the skin and upwards. -
Page 19: Setting The Water Hardness
Remove the water tank, empty, rinse under running 5. Press the button to confirm the setting. water, fill with clean water and replace. 6. Press the MEnu/EsC button to exit the menu. “Rinsing... Confirm?” is displayed. The machine is now reprogrammed with the new water 8. -
Page 20: Replacing The Filter
3. Press the MiLK or CAppuCCino button (fig. 8) until 10. The message “Enable?” is displayed. 11. Press the button to confirm the selection. “Hot “Install filter Enabled” is displayed; water Confirm?” is displayed. 4. Press the button 12. Position a container with a minimum capacity of 100 ml 5. -
Page 21: Displayed Messages
dispLAYEd MEssAGEs dispLAYEd MEssAGE possibLE CAusE rEMEdY FILL TANK Insufficient water in the tank. Fill the tank with water and/or insert it correctly, pushing it as far as it will go until it clicks into place. EMPTY GROUNDS CONTAINER The grounds container (A22) is full. Empty the grounds container and drip tray, clean and replace (fig. -
Page 22: Troubleshooting
troubLEshootinG Below is a list of some of the possible malfunctions. If the problem cannot be resolved as described, contact De’Longhi Customer Experience. probLEM possibLE CAusE rEMEdY The coffee is not hot The cups were not preheated. • Enable the cup warmer, leave the cups at least 20 minutes to warm up. •...
Need help?
Do you have a question about the ECAM 26.455 and is the answer not in the manual?
Questions and answers