DURKOPP ADLER 745-34 Speedpocket User Manual
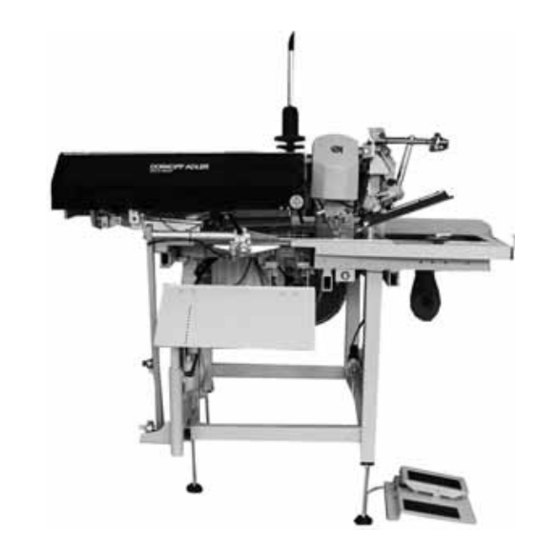
Sewing unit for runstitching of rectangular piped pockets
Hide thumbs
Also See for 745-34 Speedpocket:
- Manual (96 pages) ,
- Parts list (87 pages) ,
- Service instructions manual (86 pages)
Table of Contents
Advertisement
Postfach 17 03 51, D-33703 Bielefeld • Potsdamer Straße 190, D-33719 Bielefeld
Telefon + 49 (0) 5 21 / 9 25-00 • Telefax + 49 (0) 5 21 / 9 25 24 35 • www.duerkopp-adler.com
Ausgabe / Edition: 08/2005
Manual, complete
745 - 34 Speedpocket
Sewing unit for runstitching
of rectangular piped pockets
Instructions for programming DAC
Printed in Federal Republic of Germany
Operating Instructions
Installation Instructions
Service Instructions
Teile-Nr./Part.-No.: 0791 745171
1
2
3
4
Advertisement
Table of Contents

Related Manuals for DURKOPP ADLER 745-34 Speedpocket


Summary of Contents for DURKOPP ADLER 745-34 Speedpocket
- Page 1 Manual, complete 745 - 34 Speedpocket Sewing unit for runstitching of rectangular piped pockets Operating Instructions Installation Instructions Service Instructions Instructions for programming DAC Postfach 17 03 51, D-33703 Bielefeld • Potsdamer Straße 190, D-33719 Bielefeld Telefon + 49 (0) 5 21 / 9 25-00 • Telefax + 49 (0) 5 21 / 9 25 24 35 • www.duerkopp-adler.com Ausgabe / Edition: 08/2005 Printed in Federal Republic of Germany Teile-Nr./Part.-No.: 0791 745171...
- Page 2 745 - 34 Speedpocket Manual, complete Summary Operating Instructions Installation Instructions Service Instructions Instructions for programming DAC Interconnection diagram 9870 745131 B 9890 745001 B Pneumatic circuit plan 9770 745002...
-
Page 3: Table Of Contents
Index Page: Part 4: Programming Instructions DAC Cl. 745-34 Speedpocket Program version A 01.0 Structure of menu .......... -
Page 5: Structure Of Menu
Structure of menu Switch-on Multitest 901 Output elements “P” and “ç” 902 Input elements, manual 903 Input elements, automatic 904 Testing the ROM 905 Testing the RAM 906 Testing the sewing motor 950 Testing the corner knives 951 Testing the center knife 952 Setting the light-barrier for the flap “P”... -
Page 6: Operation
Operation If neither the key ( “P” and “è ) nor the key ( “P” and “ç ” ” is pressed within 2 seconds after switching on, the program starts the sewing mode. First the machine has to carry out the reference run initiated by the pedal. -
Page 7: Editing The Pocket Program
2.1 Editing the pocket program When the machine is in basic position and in the sewing mode and the key “P” is actuated, you get into the level for editing the current pocket program. In case the feeding process has started already, this is not possible. For this purpose the feeding operation would have to be cancelled so that the machine is in its basic position again. -
Page 8: Editing The Sequence
2.2 Editing the sequence When in the sewing mode key “F” is pressed longer than 2 seconds, you get into the level for editing the sequence. With a short actuation of “F” the sequence is switched on or off. At the beginning of editing the sequence the current sequence is cancelled and the first digit after the “S”... -
Page 9: Setting Programs Of The Machine
Setting programs of the machine The setting programs can be reached from the sewing mode by actuating “P” and “F” simultaneously List of setting programs: Indicating the counter for the bobbin thread quantity / Deleting Setting the counter for the bobbin thread quantity Testing the feeding process Step-by-step mode The various setting programs can be selected with the keys ““... -
Page 10: Step-By-Step Mode
3.4 Step-by-step mode 3 0 4 S t E P With a long actuation of “OK” the program changes to the sewing process. At the stops at the seam beginning and seam end the following display appears: P E d After stepping on the pedal the sewing process continues up to the next stop. -
Page 11: Dongle Menu
3.5 Dongle Menu Important: To save the parameters you will need an empty dongle. It can be bought at the sales point of Dürkopp Adler AG under the following part number 9835 901005. 3 0 5 After actuating the “OK” key, the display display changes to a lower level. - Page 12 Menu item load pocket program and sequence 9 P S Confirmation I n F o 4 3 2 4 After actuating the “OK” key, the pocket parameter and the sequence will be loaded from the dongle to the control. Exit and go back to the Menu item load pocket program and sequence by actuating the “ESC“...
- Page 13 During the format process the display flashes d 7 4 5 F o r When the format process ends, the Menu item format dongle is displayed again. Important: The data on the dongle will be erased through the formatting. A formatting of the dongle is necessary, if in the Menu item display dongle content does not display, the following.
-
Page 14: Multitest
Multitest The Multitest programs can be reached by switching on and actuating “P”and “ç” simultaneously. List of programs: Testing the output elements Testing the input elements manually Testing the input elements automatically Testing the ROM Testing the RAM Testing the sewing motor Testing the corner knives Testing the center knife Setting the light-barrier for the flap... -
Page 15: Testing The Rom
4.3 Testing the input elements automatically 9 0 3 _ _ _ _ After “OK” the display changes to In the right half the state of the input element is indicated which changed last. 4.4 Testing the ROM 9 0 4 _ _ _ _ b u S Y Display during the test... -
Page 16: Testing The Corner Knives
4.7 Testing the corner knives 9 5 0 1 2 3 In the right LED field the current seam length of L1 flashes. With key “P” the corner knives are moved up and down. 4.8 Checking the center knife activation 9 5 1 The center knife is switched on and off with key “F”. - Page 17 Orange LED on = reflection available Orange LED off = no reflection Green LED on = stable switching signal If the green LED does not shine, the light-barrier should be cleaned, readjusted, replaced or a new reflecting foil should be fitted.
-
Page 18: Table Seam Parameters
Table Seam Parameters Press key “P” in the main level. In the programming level initialize key “F” -> current program and “F-Long” all seam programs. Number Description Minimum Maximum Standard Menu item value value value Seam length mm Stacker on / off Center knife on / off Center knife correction seam beginning 1/10 mm -9,9... - Page 19 Number Description Minimum Maximum Standard Menu item value value value Type of waiting position 0 = Feeding clamp runs to the waiting position 1 = Feeding clamp remains in stacking position Material feed to the stacking position Loading speed % Return speed % Downholder on / off Sewing mode...
-
Page 20: Machine Parameters
Machine parameters When starting the machine hold the keys “P” and “è” pressed. Enter code : 2548 Number Description Minimum Maximum Standard Menu item value value value Submenu machine configuration Stacker available 1=available Downholder available 1=available Thread monitor on / off 1=on Needle distance (10, 12) Max. -
Page 21: Error Messages/ Functional Indications
Error messages / Functional indications Error/ Info Meaning Remedy Control Sewing motor Timeout · Exchange the cable 1051 · Faulty cable to the sewing motor reference switch · Faulty reference switch · Exchange the reference switch 1052 Sewing motor excess current ·... - Page 22 Error/ Info Meaning Remedy 3100 Machine Control voltage Check the mains voltage Temporary mains voltage dip 3101 Machine Power voltage Check the mains voltage Temporary mains voltage dip 3102 Machine Voltage Sewing motor Check the mains voltage Temporary mains voltage dip 3103 Machine Voltage Step motors Temporary mains voltage dip...
- Page 23 Error/ Info Meaning Remedy Dongle 4326 The loading of the pocket parameter from the donlge to the control is not possible because there is no pocket parameter stored. 6551 6554 Error Machine head position/ AD · Switch machine off and on again 6651 Converter/ ·...
- Page 24 Error/ Info Meaning Remedy 8351 Error Testpins/ Signals / Event · Switch the machine off and on again 8801 processing/ Memory Wrapper/ List · Software update of functions · Information to the DA-Service 8805 Internal fault 8806 8890 8891 System Info 9001 Corner knife station is swung out Swing corner knife station in...
- Page 25 Error/ Info Meaning Remedy 9730 Corner knife at the seam beginning Alter L1 (adjust corner knife distance) or cannot be driven to change positioning point of the current seam 9800 Hardware error DC motor control Check DC motor, DC controller and cable; check voltage supply 9900 Defective machine parameters...
-
Page 26: Input Elements
Input elements Folding device swung in Folder in low position Knife support swung in Light-barrier workpiece removed / Hood monitoring Pedal forward Pedal back Needle thread monitor right needle Needle thread monitor left needle Light-barrier for flap scanning S100 Reference switch sewing motor S101 Reference switch feeding clamp Output elements...
Need help?
Do you have a question about the 745-34 Speedpocket and is the answer not in the manual?
Questions and answers