Advertisement
Table of Contents
- 1 Table of Contents
- 2 Important Precautions
- 3 Before You Begin
- 4 Assembly
- 5 To Plug in the Power Cord
- 6 Operation and Adjustment
- 7 Troubleshooting and Maintenance
- 8 Storage
- 9 Conditioning Guidelines
- 10 Part List
- 11 Exploded Drawing
- 12 Customer Record
- 13 Ordering Replacement Parts
- 14 Limited Warranty
- Download this manual
Model No. WCTL84091
Serial No.
QUESTIONS?
As a manufacturer, we are com-
mitted to providing complete
customer satisfaction. If you
have questions, or if there are
missing parts, please call:
1-888-936-4266
Mon.–Fri. 8h00 until 18h30 EST
(excluding holidays).
CAUTION
Read all precautions and instruc-
tions in this manual before using
this equipment. Save this manual
for future reference.
®
Serial
Number
Decal
USER'S MANUAL
Visit our website at
www.weslo.com
Advertisement
Table of Contents

Related Manuals for Weslo Cadence 840 Treadmill


Summary of Contents for Weslo Cadence 840 Treadmill
- Page 1 1-888-936-4266 Mon.–Fri. 8h00 until 18h30 EST (excluding holidays). CAUTION Read all precautions and instruc- tions in this manual before using Visit our website at this equipment. Save this manual for future reference. www.weslo.com...
-
Page 2: Table Of Contents
LIMITED WARRANTY ..............20 WESLO is a registered trademark of ICON Health & Fitness, Inc. -
Page 3: Important Precautions
IMPORTANT PRECAUTIONS WARNING: To reduce the risk of burns, fire, electric shock or injury to persons, read the following important precautions and information before operating the treadmill. 1. It is the responsibility of the owner to ensure that all users of this treadmill are adequately 11. - Page 4 20. Inspect and properly tighten all parts of the do so by an authorized service representa- treadmill every three months. tive. Servicing other than the procedures in this manual should be performed by an 21. Never drop or insert any object into any authorized service representative only.
-
Page 5: Before You Begin
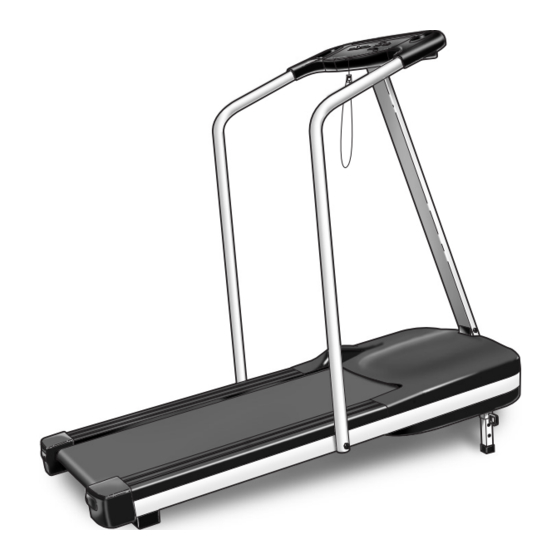
CADENCE 840 18h00 Eastern Time (excluding holidays). To help us ® treadmill. The CADENCE 840 treadmill blends assist you, please note the product model number and advanced technology with innovative design to offer serial number before calling. The model number of the you an excellent form of cardiovascular exercise, in the treadmill is WCTL84091. -
Page 6: Assembly
ASSEMBLY Set the treadmill in a cleared area and remove all packing materials. Do not dispose of the packing materials until assembly is completed. Refer to the drawings below to identify the small parts used in assembly. Assembly requires a standard screwdriver and an adjustable wrench (not included). - Page 7 4. Remove the paper backing from the Adhesive Clip (16). Press the Adhesive Clip onto the Right Endcap (45) in the indicated location. Press the Allen Wrench (41) into the Adhesive Clip. 5. The Console (5) requires three "AA" batteries (not included);...
-
Page 8: Operation And Adjustment
OPERATION AND ADJUSTMENT THE PERFORMANT LUBE WALKING BELT plug. Plug the power cord into a surge suppressor, and plug the surge suppressor into an appropriate Your treadmill features a walking belt coated with outlet that is properly installed and grounded in PERFORMANT LUBE , a high-performance lubricant. - Page 9 DIAGRAM OF THE CONSOLE Display Display Speed Control Pulse Sensor On/Reset Button Note: If there is a thin sheet of clear plastic Clip on the face of the console, remove it. Insert the key fully into the power switch. CAUTION: Before operating the Note: The displays will not be activated when the console, read the following important precau-...
- Page 10 If an “H” (high) or an “L” (low) is displayed after 10 Monitor your progress with the two displays. seconds, or if your heart rate is not displayed, lift your thumb off the sensor and allow the display to Time/Distance dis- reset.
-
Page 11: Troubleshooting And Maintenance
TROUBLESHOOTING AND MAINTENANCE Most treadmill problems can be solved by following the simple steps below. Find the symptom that applies to your treadmill and follow the steps listed. If further assistance is needed, please call our Customer Service Department at 1-888-936-4266, Monday through Friday, 8 a.m. until 6:30 p.m. Eastern Standard Time (excluding holidays). - Page 12 5. SYMPTOM: THE WALKING BELT IS OFF-CENTER OR SLIPS WHEN WALKED ON a. If the walking belt has shifted to the left, first remove the key and UNPLUG THE POWER CORD. Using the allen wrench, turn the left rear roller adjustment bolt clockwise, and the right bolt counterclockwise, 1/4 of a turn each.
-
Page 13: Storage
STORAGE Unplug the power cord when the treadmill is not in use. Remove the bolt and nut from the lower end of each handrail. Remove Remove the bolt from the upper end of each handrail. Slide the handrails out of the console housing. Remove Remove the bolt and washer from the lower end of the upright. -
Page 14: Conditioning Guidelines
CONDITIONING GUIDELINES gy. Only after the first few minutes does your body WARNING: begin to use stored fat calories for energy. If your goal Before beginning this is to burn fat, adjust the speed and incline of the tread- or any exercise program, consult your physi- mill until your heart rate is near the lowest number in cian. - Page 15 SUGGESTED STRETCHES The correct form for several basic stretches is shown in the draw- ings below. Move slowly as you stretch—never bounce. 1. Toe Touch Stretch Stand with your knees bent slightly and slowly bend forward from your hips. Allow your back and shoulders to relax as you reach down toward your toes as far as possible.
-
Page 16: Part List
PART LIST—Model No. WCTL84091 R1003A Qty. Description Qty. Description Handrail Rear Roller Potentiometer Rear Roller Adjustment Bolt Cage Nut Ground Wire Console Housing Right Endcap Console Frame Screw Motor Pivot Bolt 3/8” x 1” Bolt Roller Guard Screw 6” Cable Loom Motor Tension Nut Key/Clip Motor Tension Star Washer... -
Page 17: Exploded Drawing
EXPLODED DRAWING—Model No. WCTL84091 R1003A... -
Page 18: Customer Record
CUSTOMER RECORD Model No.: Serial No.: Retailer Name: Purchase Date: Retailer Address:... -
Page 19: Ordering Replacement Parts
To order replacement parts, call toll-free 1-888-936-4266, Monday through Friday 8h00 until 18h30 Eastern Time (excluding holidays). When ordering parts, please be prepared to give the following information: • The MODEL NUMBER of the product (WCTL84091) • The NAME of the product (WESLO ® CADENCE 840 treadmill) •... -
Page 20: Limited Warranty
LIMITED WARRANTY ICON OF CANADA, INC., (ICON), warrants this product to be free from defects in workmanship and material, under normal use and service conditions, for a period of one (1) year from the date of pur- chase. This warranty extends only to the original purchaser. ICON's obligation under this warranty is lim- ited to replacing or repairing, at ICON's option, the product through one of its authorized service centers.
Need help?
Do you have a question about the Cadence 840 Treadmill and is the answer not in the manual?
Questions and answers