Weslo Cadence 1020 User Manual
English manual
Hide thumbs
Also See for Cadence 1020:
- Livret d'instructions manual (19 pages) ,
- User manual (19 pages)
Table of Contents
Advertisement
Model No. WLTL28081
Serial No.
Write the serial number in the
space above for future reference.
Serial Number Decal
QUESTIONS?
As a manufacturer, we are
committed to providing complete
customer satisfaction. If you
have questions, or if there are
missing or damaged parts, we
will guarantee complete satisfac-
tion through direct assistance
from our factory.
TO AVOID UNNECESSARY
DELAYS, PLEASE CALL DIRECT
TO OUR TOLL-FREE CUSTOMER
HOT LINE. The trained techni-
cians on our customer hot line
will provide immediate assis-
tance, free of charge to you.
CUSTOMER HOT LINE:
1-800-999-3756
Mon.ÐFri., 6 a.m.Ð6 p.m. MST
CAUTION
Read all precautions and instruc-
tions in this manual before using
this equipment. Save this manual
for future reference.
USER'S MANUAL
¨
Advertisement
Table of Contents

Subscribe to Our Youtube Channel
Related Manuals for Weslo Cadence 1020


Summary of Contents for Weslo Cadence 1020
- Page 1 Model No. WLTL28081 Serial No. Write the serial number in the space above for future reference. Serial Number Decal ¨ QUESTIONS? As a manufacturer, we are committed to providing complete customer satisfaction. If you have questions, or if there are missing or damaged parts, we will guarantee complete satisfac- tion through direct assistance...
-
Page 2: Table Of Contents
TABLE OF CONTENTS IMPORTANT PRECAUTIONS ............. 2 BEFORE YOU BEGIN . - Page 3 15. The treadmill is capable of high speeds. THE TREADMILL on page 10.) You must be Adjust the speed in small increments to able to safely lift 45 pounds (20 kg) in order avoid sudden jumps in speed. to raise, lower, or move the treadmill. 16.
-
Page 4: Before You Begin
And when number of the treadmill is WLTL28081. The serial youÕre not exercising, the unique CADENCE 1020 can number can be found on a decal attached to the tread- be folded up, requiring less than half the floor space of mill (see the front cover of this manual for the location). -
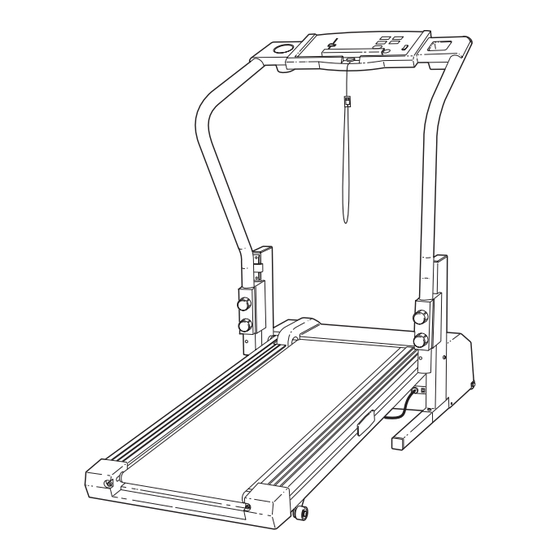
Page 5: Assembly
ASSEMBLY Assembly requires two people. Set the treadmill in a cleared area and remove all packing materials. Do not dispose of the packing materials until assembly is completed. Assembly requires the included allen wrench and your own phillips screwdriver , and scissors 1. - Page 6 4. Remove the plastic ties connecting the Handrail Spacers (3) to the Left and Right Handrails (4, 32). Next, remove the Long Screws (2) from the left and right Uprights (38). Attach a Handrail Spacer (3) to each Upright (38) with two Long Screws (2). Make sure that the Long Screws are in the highest and lowest holes in the Handrail Spacers (see drawing 4a), and that Ramps...
-
Page 7: Operation And Adjustment
OPERATION AND ADJUSTMENT THE PERFORMANT LUBE WALKING BELT risk of electric shock. This product is equipped with a cord having an equipment-grounding conductor and a Your treadmill features a walking belt coated with grounding plug. Plug the power cord into a surge PERFORMANT LUBE , a high-performance lubricant. - Page 8 DIAGRAM OF THE CONSOLE Displays Incline Control Pulse Sensor Speed Control Clip Follow the steps below to operate the console. CAUTION: Before operating the Insert the key fully into the power switch. console, read the following precautions. ¥ Do not stand on the walking belt when turn- Note: Inserting the key will not turn on the dis- ing on the power.
- Page 9 the sensor for another 15 seconds for the most Follow your progress with the four displays. accurate reading. TIME displayÑThis If the displayed pulse appears to be too high or too display shows the low, or if your pulse is not displayed, lift your thumb elapsed time.
-
Page 10: How To Fold And Move The Treadmill
HOW TO FOLD AND MOVE THE TREADMILL HOW TO FOLD THE TREADMILL FOR STORAGE Before folding the treadmill, unplug the power cord. Caution: You must be able to safely lift 45 pounds (20 kg) in order to raise, lower, or move the treadmill. 1. - Page 11 HOW TO LOWER THE TREADMILL FOR USE 1. Hold the upper end of the treadmill with your right hand as shown. Using your left thumb, slide open the storage latch and hold it open. Pivot the treadmill until the frame is past the storage latch.
-
Page 12: Maintenance And Trouble-Shooting
MAINTENANCE AND TROUBLE-SHOOTING Most treadmill problems can be solved by following the steps below. Find the symptom that applies, and follow the steps listed. If further assistance is needed, please call our Customer Service Department toll- free at 1-800-999-3756, Monday through Friday, 6 a.m. until 6 p.m. Mountain Time (excluding holidays). PROBLEM: The power does not turn on SOLUTION: a. - Page 13 PROBLEM: The walking belt is off-center or slips when walked on SOLUTION: a. If the walking belt has shifted to the left, first remove the key and UNPLUG THE POWER CORD. Using the allen wrench, turn the left rear roller adjust- ment bolt clockwise, and the right bolt counterclock- wise, 1/4 of a turn each.
-
Page 14: Conditioning Guidelines
CONDITIONING GUIDELINES is activity that requires large amounts of oxygen for WARNING: prolonged periods of time. This increases the demand Before beginning on the heart to pump blood to the muscles, and on the this or any exercise program, consult your lungs to oxygenate the blood. - Page 15 SUGGESTED STRETCHES The correct form for several basic stretches is shown in the drawings at the right. Move slowly as you stretchÑnever bounce. 1. Toe Touch Stretch Stand with your knees bent slightly and slowly bend forward from your hips. Allow your back and shoulders to relax as you reach down toward your toes as far as possible.
- Page 16 PART LISTÑModel No. WLTL28081 R0798A Key No. Qty. Description Key No. Qty. Description Handrail Knob Belly Pan Fastener Long Screw Choke Handrail Spacer Belt Guide Left handrail Belly Pan Handrail Screw Isolator Key/Clip Incline Control Console Plug Frame Pivot Spacer (Right) Console Screw/Latch Screw Handrail Cover Speed Potentiometer...
-
Page 18: Ordering Replacement Parts
¥ The KEY NUMBER and DESCRIPTION of the desired part(s) (see the PART LIST and the EXPLODED DRAWING at the center of this manual). WESLO is a registered trademark of ICON Health & Fitness, Inc. LIMITED WARRANTY ICON Health & Fitness, Inc. (ICON), warrants this product to be free from defects in workmanship and material, under normal use and service conditions, for a period of ninety (90) days from the date of pur- chase.
Need help?
Do you have a question about the Cadence 1020 and is the answer not in the manual?
Questions and answers