Table of Contents
Advertisement
Available languages
Available languages
Safety Instructions
. . . . . . . . 2-5
Operating Instructions
Control Panels . . . . . . . . . . . . . . . . 6-8
Cycle Options . . . . . . . . . . . . . . . .9, 10
Dryer Features . . . . . . . . . . . . . . . . .10
Loading and Using
the Dryer . . . . . . . . . . . . . . . . . . . .16, 17
Reversing the Door Swing . . . .11-15
Stacking . . . . . . . . . . . . . . . . . . .19-22
Venting the Dryer . . . . . . . . . . . . . .18
Consumer Support
Consumer Support . . . . . . . . . . . . . 28
Warranty . . . . . . . . . . . . . . . . . . . . . 27
Write the model and serial
numbers here:
Model # ______________
Serial # ______________
They are on the label on
the front of the dryer behind
the door.
ge.com
. . . .23-25
175D1807P584 49-90316 12-06 JR
Owner's Manual
DBVH510
DBVH512
DCVH515
DCVH660
DHDVH52
DHDVH66
Advertisement
Chapters
Table of Contents

Related Manuals for GE DBVH510


Summary of Contents for GE DBVH510
-
Page 1: Table Of Contents
Warranty ..... 27 Write the model and serial numbers here: Model # ______________ Serial # ______________ They are on the label on the front of the dryer behind the door. Owner’s Manual DBVH510 DBVH512 DCVH515 DCVH660 DHDVH52 DHDVH66 175D1807P584 49-90316 12-06 JR... -
Page 2: Important Safety Information
IMPORTANT SAFETY INFORMATION. READ ALL INSTRUCTIONS BEFORE USING. WARNING! For your safety, the information in this manual must be followed to minimize the risk of fire or explosion, electric shock, or to prevent property damage, personal injury, or death. Do not store or use gasoline or other flammable vapors and liquids in the vicinity of this or any other appliance. -
Page 3: Proper Installation
This dryer must be properly installed and located in accordance with the Installation Instructions before it is used. If you did not receive an Installation Instructions sheet, you can receive one by visiting ge.com, or by calling 800.GE.CARES (800.432.2737). I Properly ground dryer to conform with all governing codes and ordinances. - Page 4 IMPORTANT SAFETY INFORMATION. READ ALL INSTRUCTIONS BEFORE USING. WARNING! YOUR LAUNDRY AREA I Keep the area underneath and around your appliances free of combustible materials (lint, paper, rags, etc.), gasoline, chemicals and other flammable vapors and liquids. I Keep the floor around your appliances clean and dry to reduce the possibility of slipping.
-
Page 5: Save These Instructions
I Before discarding a dryer, or removing it from service, remove the dryer door to prevent children from hiding inside. I Do not tamper with controls. ge.com... -
Page 6: About The Dryer Control Panel
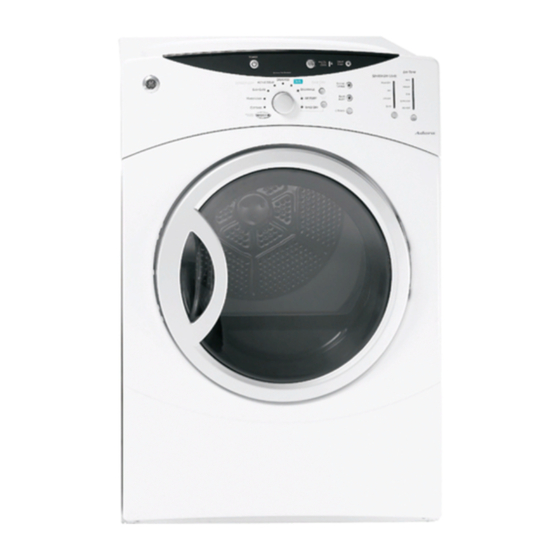
About the dryer control panel. You can locate your model number at the top inside of the door opening. Model DHDVH52, DHDVH66 Model DCVH515, DCVH660 Model DBVH512 Model DBVH510... -
Page 7: Dry Cycles
Use for normal dryness level suitable for most loads. This is the preferred cycle for energy saving. LESS DRY Use for lighter fabric (ideal for ironing). DAMP For leaving items partially damp. ™ “dry clean only” fabric care system. See product package for directions. , see the Website at: www.dryel.com. ™ ge.com... - Page 8 About the dryer control panel. Dry Temp You can change the temperature of your dry cycle. ANTI-BACTERIAL (on some models) HIGH MEDIUM EXTRA LOW NO HEAT (on some models) START Press to start a dry cycle. If the dryer is running, press it once and it will pause the dryer. Press it again to restart the dry cycle.
- Page 9 START has been pressed again. I You can delay the start of a dry cycle up to 18 hours for models DCVH515, DHDVH52, DBVH512, DCVH660, DHDVH66 and up to 10 hours for model DBVH510. ge.com...
- Page 10 About cycle options. NOTE: Not all features are available on all dryer models. Lock You can lock the controls to prevent any selections from being made. Or you can lock the controls after you have started a cycle. Children cannot accidentally start the dryer by touching pads with this option selected.
-
Page 11: Reversing The Door Swing
Nut (#8) – 2 Washer – 2 Before You Start 1. Unplug the dryer from its electrical outlet. ge.com IMPORTANT: Once you begin, do not move the cabinet until door-swing reversal is completed. These instructions are for changing the hinges from the right side to the left side—if you ever want to switch them... - Page 12 Reversing the door swing. STEP-BY-STEP INSTRUCTIONS (cont.) Remove the four screws 2 #8 Machine Screws 6 #10 Large Screws 2 #8 Machine Screws Remove Door Assembly 2. Open the door to approximately 90 degrees. Remove the 4 screws starting from the bottom to the top. Make sure the door is supported while removing the screws.
- Page 13 12. Loosely fasten the hinge assembly to the edge using 2 machine screws (#8). 13. Hold the door on its side with one hand and fasten the remaining 2 screws as shown. Then tighten the 2 screws (#8) holding the hinge assembly. ge.com...
- Page 14 Reversing the door swing. STEP-BY-STEP INSTRUCTIONS (cont.) Outer Door Inner Door Top of Door Reinstall Nuts and Hinge Cover 14. Place the door on its edge. Assemble the 2 machine screws (#8), washers and nuts. Tighten using a wrench and screwdriver. 15.
- Page 15 Partially fasten a screw to the uppermost screw hole. Hook the door on the partially fastened screw. Fasten the hinge by installing the other 4 screws and tightening the partially fastened screw above. ge.com...
-
Page 16: Loading And Using The Dryer
Do not add fabric softener sheets once the load has become warm. They may cause fabric softener stains. Bounce Fabric Conditioner Dryer Sheets have been ® approved for use in all GE Dryers when used in accordance with the manufacturer’s instructions. Permanent Press/ Gentle/ Do not wash... -
Page 17: Care And Cleaning Of The Dryer
Vacuum the duct with the hose attachment and reconnect the duct. The Exhaust Hood: Check with a mirror that the inside flaps of the hood move freely when operating. Make sure that there is no wildlife (birds, insects, etc.) nesting inside the duct or hood. ge.com... -
Page 18: Venting The Dryer
Venting the dryer. For the best drying performance, the dryer needs to be properly vented. The dryer will use more energy and run longer if it is not vented to the below specifications. Carefully follow the details on Exhausting in the Installation Instructions. I Use only rigid metal or flexible metal 4″... -
Page 19: Before You Begin
60 square inches of open area equally distributed. If the closet contains both a washer and a dryer, doors must contain a minimum of 120 square inches of open area equally distributed. ge.com... - Page 20 Stacking. KIT CONTENTS Right Hand Bracket Left Hand Bracket TOOLS YOU WILL NEED Phillips Screwdriver Open-Ended Wrench INSTALLATION PREPARATION Remove the packaging. Flatten the product carton to use as a pad to lay the dryer down on its side. Continue using the carton to protect the finished floor in front of the installation location.
-
Page 21: Installing The Stack Bracket Kit
B. Repeat the above step with the right bracket on the bottom right corner of the dryer. C. Set the dryer upright. ge.com NOTE: Make sure to set the dryer on a piece of packing material so the brackets that are attached to the bottom of the dryer do not damage the floor. - Page 22 Stacking. INSTALLING THE STACK BRACKET KIT (cont.) Place hands here Place hands here 4. Prepare the Washer and Dryer A. Place the washer in the approximate location. B. Make sure the washer is level. Refer to washer Installation Instructions for details. C.
-
Page 23: Troubleshooting Tips
Before you call for service… Troubleshooting Tips Save time and money! Review the charts on the following pages, or visit ge.com. You may not need to call for service. PROBLEM Possible Causes Dryer shakes or Some shaking/noise is normal. makes noise... - Page 24 Before you call for service… PROBLEM Possible Causes Time Remaining The estimated time may change jumped to a when a smaller load than usual lower number is drying Cannot make a The DRYNESS LEVEL, TEMP selection and the or OPTION that you are dryer beeps twice trying to select is incompatible with the chosen dry cycle...
- Page 25 • Try a fabric softener. • Bounce ® Fabric Conditioner Dryer Sheets have been approved for use in all GE Dryers when used in accordance with the manufacturer’s instructions. • Try a fabric softener. • Adjust setting to LESS DRY or DAMP.
- Page 26 Notes.
- Page 27 This warranty is extended to the original purchaser and any succeeding owner for products purchased for home use within the USA. If the product is located in an area where service by a GE Authorized Servicer is not available, you may be responsible for a trip charge or you may be required to bring the product to an Authorized GE Service location for service.
-
Page 28: Consumer Support
Caution must be exercised, since improper servicing may cause unsafe operation. Contact Us If you are not satisfied with the service you receive from GE, contact us on our Website with all the details including your phone number, or write to: General Manager, Customer Relations Register Your Appliance Register your new appliance on-line—at your convenience! Timely product registration will allow for... - Page 29 No. de modelo ____________ No. de serie________________ Estos números se encuentran en una etiqueta en la parte delantera de la secadora, detrás de la puerta. Manual del propietario DBVH510 DBVH512 DCVH515 DCVH660 DHDVH52 DHDVH66 175D1807P584 49-90316 12-06 JR...
- Page 30 INFORMACIÓN DE SEGURIDAD IMPORTANTE. LEA TODAS LAS INSTRUCCIONES ANTES DE USAR. ¡ADVERTENCIA! Por su seguridad, debe seguir las indicaciones de este manual para minimizar el riesgo de incendio o explosión, descarga eléctrica, o para evitar daños a la propiedad, lesiones personales o muerte.
- Page 31 Antes de usarse, la secadora se debe instalar apropiadamente de acuerdo con las Instrucciones de instalación. Si no recibió una Hoja de instrucciones de instalación, puede obtener una visitando ge.com o llamando al 800.GE.CARES (800.432.2737). I Conecte la secadora a tierra de manera apropiada que cumpla con todos los códigos y...
- Page 32 INFORMACIÓN DE SEGURIDAD IMPORTANTE. LEA TODAS LAS INSTRUCCIONES ANTES DE USAR. ¡ADVERTENCIA! SU ÁREA DE SECADO I Mantenga el área debajo y alrededor de sus electrodomésticos libre de materiales combustibles (pelusas, papel, trapos, etc.), gasolina, productos químicos y otros líquidos y vapores inflamables.
- Page 33 éste electrodoméstico. I Antes de desechar una secadora o de removerla para darle servicio, remueva la puerta de la secadora para evitar que algún niño se esconda en su interior. I No intente alterar los controles. ge.com...
- Page 34 Panel de control de la secadora. Puede ubicar el número de modelo en la parte superior del interior de la apertura de la puerta. Modelos DHDVH52, DHDVH66 Modelos DCVH515, DCVH660 Modelo DBVH512 Modelo DBVH510...
- Page 35 Utilícelo para un nivel de secado normal que sea adecuado para la mayoría de las cargas. Este es el ciclo preferido para ahorrar energía. LESS DRY (MENOS SECO) Utilícelo en telas más livianas (ideal para planchado). DAMP (HÚMEDO) Para dejar las prendas parcialmente húmedas. ge.com ™ . Vea el...
- Page 36 Panel de control de la secadora. Dry Temp (Temperatura de secado) Puede cambiar la temperatura de su ciclo de secado. ANTI-BACTERIAL (en algunos modelos) HIGH (ALTO) MEDIUM (MEDIO) LOW (BAJO) EXTRA LOW (EXTRA BAJO) NO HEAT (SIN CALOR) (en algunos modelos) START (Iniciar) Presione para iniciar un ciclo de secado.
- Page 37 START de nuevo. I Puede demorar el inicio de un ciclo de secado hasta por 18 horas en los modelos DCVH515, DHDVH52, DBVH512, DCVH660, DHDVH66 y hasta por 10 horas en el modelo DBVH510.
- Page 38 Opciones de ciclo. NOTA: No todas las funciones están disponibles en todos los modelos de secadoras. Bloquear Puede bloquear los controles para evitar que se realice cualquier selección. O puede bloquear los controles después de haber iniciado un ciclo. Cuando se selecciona esta opción los niños no podrán iniciar accidentalmente la secadora al tocar los botones.
-
Page 39: Cómo Cambiar El Sentido De Apertura De La Puerta
Tuerca (#8) – 2 Arandela – 2 Antes de empezar 1. Desconecte la secadora del enchufe eléctrico. ge.com IMPORTANTE: Una vez que comience, no mueva el gabinete hasta que haya completado el cambio de la puerta. Estas instrucciones indican cómo cambiar las bisagras del lado derecho al lado izquierdo. - Page 40 Cómo cambiar el sentido de apertura de la puerta. INSTRUCCIONES PASO A PASO (cont.) Quite los cuatro tornillos 2 tornillos mecanizados #8 6 tornillos grandes 2 tornillos mecanizados #8 Retire el conjunto de la puerta 2. Abra la puerta 90 grados aproximadamente. Quite los 4 tornillos empezando con los de abajo y siguiendo hacia arriba.
- Page 41 12. Asegure sin apretar el conjunto de bisagras al borde utilizando 2 tornillos mecanizados (#8). 13. Sostenga con una mano la puerta en su sitio y asegure los 2 tornillos restantes como se muestra. Luego ajuste los 2 tornillos (#8) sosteniendo el conjunto de bisagras. ge.com...
- Page 42 Cómo cambiar el sentido de apertura de la puerta. INSTRUCCIONES PASO A PASO (cont.) Puerta exterior Puerta interior Parte superior de la puerta Reinstale las tuercas y la cubierta de bisagra 14. Coloque la puerta apoyada en su borde. Coloque los 2 tornillos mecanizados (#8), arandelas y tuercas.
- Page 43 Apriete parcialmente un tornillo en el agujero para tornillo más alto. Enganche la puerta en el tornillo parcialmente apretado. Ajuste la bisagra instalando los 4 tornillos adicionales y apretando el tornillo que está parcialmente apretado y que se ubica más arriba. ge.com (cont.)
-
Page 44: Cómo Cargar Y Usar La Secadora
No agregue toallitas suavizantes una vez la ropa se haya calentado. Esto podría causar que la ropa se manche. Las toallitas suavizantes acondicionadoras Bounce se han aprobado para usarse con todas las secadoras GE de acuerdo con las instrucciones del fabricante. Suave/... - Page 45 La salida de escape: Verifique, utilizando un espejo, que las aletas interiores de la salida de escape se mueven libremente durante la operación. Asegúrese de que ningún animal (pájaros, insectos, etc.) haya hecho su nido en el interior del conducto o en la salida de escape. ge.com...
-
Page 46: Ventilación De La Secadora
Ventilación de la secadora. Para obtener el mejor desempeño, la secadora debe estar ventilada adecuadamente. La secadora utilizará más energía y funcionará más tiempo si no se ventila siguiendo las especificaciones indicadas más abajo. Siga cuidadosamente los detalles en la sección de Escape en las Instrucciones de instalación. -
Page 47: Antes De Comenzar
60 pulgadas cuadradas de superficie abierta distribuida de manera uniforme. Si el armario contiene una lavadora y una secadora, las puertas deben tener un mínimo de 120 pulgadas cuadradas de superficie abierta distribuida de manera uniforme. ge.com... - Page 48 Apilado. CONTENIDO DEL JUEGO Abrazadera derecha Abrazadera izquierda HERRAMIENTAS QUE NECESITARÁ Destornillador Phillips Llave española PREPARACIÓN PARA LA INSTALACIÓN Retire el embalaje. Aplaste el cartón del producto para utilizarlo como almohadilla para apoyar la secadora sobre uno de sus costados. Continúe usando el cartón para proteger el piso terminado que se encuentra delante del lugar de instalación.
- Page 49 B. Repita el paso anterior con la abrazadera derecha en la esquina inferior derecha de la secadora. C. Coloque la secadora en posición vertical. ge.com NOTA: Asegúrese de colocar la secadora sobre el material de embalaje de manera tal que las abrazaderas que estén adosadas a la parte inferior de la secadora no dañen el piso.
- Page 50 Apilado. INSTALACIÓN DEL JUEGO DE ABRAZADERAS DE APILADO (cont.) Coloque manos Coloque aquí manos aquí 4. Prepare la lavadora y la secadora A. Coloque la lavadora en la ubicación aproximada. B. Asegúrese de que la lavadora se encuentre nivelada. Consulte las Instrucciones de instalación de la lavadora para obtener más detalles.
-
Page 51: Consejos Para La Solucíon De Problemas
Antes de llamar para solicitar servicio… Consejos para la solución de problemas ¡Ahorre tiempo y dinero! Consulte primero las tablas de las páginas siguientes o visite ge.com y quizás no necesite llamar al servicio. Problema Causas posibles La secadora tiembla... -
Page 52: Antes De Llamar Para Solicitar Servicio
Antes de llamar para solicitar servicio… Problema Causas posibles No aparecen números en La secadora monitorea la pantalla durante el ciclo, constantemente la cantidad sólo luces de humedad en la ropa El tiempo restante El tiempo estimado podría ha saltado a un número cambiar si seca una carga inferior menor a la normal... - Page 53 • Intente utilizar un suavizador de telas. • Bounce ® Fabric Conditioner Dryer Sheets ha sido aprobado para ser usado con todas las Secadoras GE y cuando se usen de acuerdo con las instrucciones del fabricante. • Intente utilizar un suavizador de telas.
- Page 54 Notas.
- Page 55 Estados Unidos. Si el producto está situado en un área que no dispone de servicio por parte de un proveedor de servicio autorizado de GE, podría tener que hacerse cargo de los costes de envío o bien podría solicitársele que lleve el producto a un centro de servicio de GE autorizado para realizar la reparación.
-
Page 56: Soporte Al Consumidor
Solicite una reparación El servicio de expertos GE está a tan sólo un paso de su puerta. ¡Entre en línea y solicite su reparación cuando le venga bien 24 horas al día cualquier día del año! O llame al 800.GE.CARES (800.432.2737) durante horas normales de oficina.