Sign In
Upload
Download
Table of Contents
Contents
Add to my manuals
Delete from my manuals
Share
URL of this page:
HTML Link:
Bookmark this page
Add
Manual will be automatically added to "My Manuals"
Print this page
×
Bookmark added
×
Added to my manuals
Manuals
Brands
B & G Manuals
Marine Radio
V50 VHF
User manual
B & G V50 VHF User Manual
Hide thumbs
1
2
Table Of Contents
3
4
5
6
7
8
9
10
11
12
13
14
15
16
17
18
19
20
21
22
23
24
25
26
27
28
29
30
31
32
33
34
35
36
37
38
39
40
41
42
43
44
45
46
47
48
49
50
51
52
53
54
55
56
57
58
59
60
61
62
63
64
65
66
67
68
69
70
71
72
73
74
75
76
77
78
79
80
81
82
83
84
85
86
87
88
89
90
91
92
page
of
92
Go
/
92
Contents
Table of Contents
Troubleshooting
Bookmarks
Table of Contents
Important Safety Information
Table of Contents
Section 1 - General Information
Features
Customizing Your B&G VHF Radio
How to Display and Navigate Menus
How to Enter Alphanumeric Data
LCD Symbols and Meanings
Beep Tones & Call Alerts
Section 2 - Basic Operation and Key Functions
Section 3 - Radio MENU SELECT Options
Manage Your Waypoints List (WAYPOINT)
Add a New Waypoint
Edit or Delete a Waypoint
Go to a New Waypoint
Go to Nearest Waypoint (NEAREST WP)
Go to Temporary Waypoint
Edit or Delete a Temporary Waypoint
Send Waypoint Data to a Chartplotter
Set the Backlighting Level (BACKLIGHT)
Maintain Your Buddy List (BUDDY LIST)
Add an Entry
Edit or Delete an Entry
Local or Distance Sensitivity (LOCAL/DIST)
Set Distance Sensitivity
Set Local Sensitivity
Set the Contrast Level (CONTRAST)
GPS Data and Time (GPS/DATA)
Manually Enter Position and UTC Time (MANUAL)
Local Time (TIME OFFSET)
Time Format Options (TIME FORMAT)
Time Display Options (TIME DISPLY)
Position Display Options (LL DISPLY)
Course & Speed Display Options (COG/SOG)
GPS Alert (GPS ALERT)
GPS Simulator (GPS SIM)
Reset to Factory Defaults (RESET)
Section 4 - Radio Setup Menu (RADIO SETUP)
Channel (UIC)
Channel Names (CH NAME)
Ring Volume (RING VOLUME)
Key Beep Volume (KEY BEEP)
Select Units (UNITS)
Internal Speaker Connections (INT SPEAKER)
Set the Priority Channel (WATCH MODE)
Weather Alerts (WX ALERT)
Tone Alert
Same Alert
Receiving a same ALERT
Receiving same TEST Messages
Enter a same CODE (County ID)
Select a Working same Code
NMEA Protocol (COM PORT)
Select the GPS Source (GPS SOURCE)
Favorite Channel Setup - Wx Key (FAV CH SETU)
Section 5 - DSC Setup Menu (DSC SETUP)
Enter or View Your USER MMSI (USER MMSI)
Maintain Your Groups
Create a Group (GROUP SETUP)
Edit or Delete a Group Name or Group MMSI (GROUP SETUP)
Enter or Check Your ATIS MMSI (ATIS MMSI)
Enable ATIS Functionality (ATIS SELECT)
Response to Individual Calls (INDIV REPLY)
Enable DSC Functionality (DSC FUNC)
Response Type to LL Polling Calls (LL REPLY)
Automatic Channel Switching (AUTO SWITCH)
DSC Test Reply (TEST REPLY)
Set the Inactivity Timer (TIMEOUT)
Section 6 - AIS Setup Menu (AIS SETUP)
Enable AIS Functionality (AIS FUNC)
AIS Data Display Format (AIS DISPLAY)
AIS Baud Rate (BAUD RATE)
GPS Redirection (GPS REDIR)
Closest Point of Approach Alarm (CPA ALARM)
Closest Point of Approach Settings (CPA)
Time to Closest Point of Approach (TCPA)
Section 7 - Wireless Handset Setup Menu (HS SETTING)
Register a Wireless Handset (SUBSCRIBE)
Delete a Registered Wireless Handset (REGISTERED HS)
Section 8 - Sending and Receiving DSC Calls
What Is DSC
Sending DSC Calls
Send an Individual Call (INDIVIDUAL)
Call to a Buddy
Call to Others
Acknowledgement of an Individual Incoming Call (INDIV)
Reply to the Last Call (LAST CALL)
Send a Group Call (GROUP)
Send an All Ships Call (ALL SHIPS)
Send Using the Call Log (CALL LOG)
Send Using the Distress Log (DIST LOG)
View Sent Call Log (SENT CALL)
Request the LL Position of a Buddy (LL REQUEST)
Track Your Buddy (TRACK BUDDY)
Start or Stop Tracking a Buddy (START TRACK)
Select a Buddy to Track (SET BUDDY)
Add or Delete a Buddy on Your Track List (TRACKLIST)
Set the Track Your Buddy Update Interval (INTERVAL)
Make a DSC Test Call (DSC TEST)
Send a DSC TEST Call
Receiving an Incoming DSC TEST Call Reply (DSC TEST ACK)
Acknowledging an Incoming DSC TEST Call
View User MMSI and GPS Information
Receiving DSC Calls
Receiving an All Ships Call (ALL SHIPS)
Receiving an Individual Call (INDIV)
Receiving a Group Call (GROUP)
Receiving a Geographic Area Call (GEOGRAPH)
Receiving a Polled Position Call (POSITION)
Section 9 - DISTRESS Calls
Sending a Distress Call
Receiving a Distress Call (DISTRESS!)
Distress Acknowledgement (DISTRESS ACK) or Distress Relay All Ships (DISTRESS REL)
Distress Relay Individual (INDIV DISTR RELAY)
Section 10 - AIS Functionality
About AIS
AIS - Static and Dynamic Information
Using the AIS Receiver
AIS Information and Display
T/CPA Approach Screen
Plotter Symbols and Meanings
Section 11 - General Functionality
Using the Fog Horn
Using the PA (Public Address) Hailer
Section 12 - Wireless Handset Functionality
Using the Wireless Handset
Using the Intercom / Conference Facility
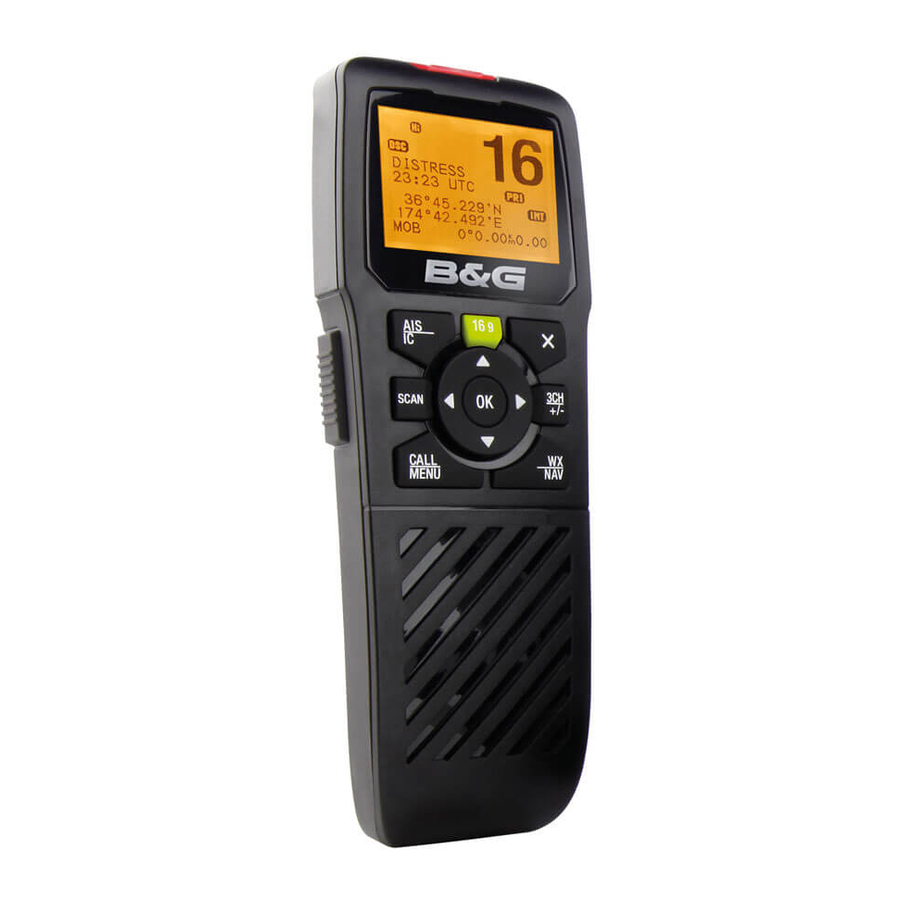
Wireless Handset Key Functions
Appendix A - Technical Specifications
B&G V50
B&G H50
V50 Nmea 2000 Pgns
Appendix B - Troubleshooting
Appendix C - US & ROW VHF Marine Channel Charts
International Channel Chart
Special Notes on International Channel Usage
USA Channel Chart
Special Notes on Usa Channel Usage
CANADA Channel Chart
Special Notes on Canada Channel Usage
US & Canada WEATHER Channels
EAS (Emergency Alert Systems) Alerts
Appendix D - EU VHF Marine Channel Charts
EU International Channel Chart
Special Notes on Eu International Channel Usage
Inland Waterways Country Specific Table - ATIS on
Special Channels
Appendix E - MMSI and License Information
Countries of Intended Use in the EU
Advertisement
Quick Links
1
Features
2
Section 2 - Basic Operation and Key Functions
3
Gps Data and Time (Gps/Data)
Download this manual
V50 VHF
H50 Handset
User Guide
ENGLISH
bandg.com
Table of
Contents
Previous
Page
Next
Page
1
2
3
4
5
Advertisement
Table of Contents
Need help?
Do you have a question about the V50 VHF and is the answer not in the manual?
Ask a question
Questions and answers
This manual is also suitable for:
H50 handset
Table of Contents
Save PDF
Print
Rename the bookmark
Delete bookmark?
Delete from my manuals?
Login
Sign In
OR
Sign in with Facebook
Sign in with Google
Upload manual
Upload from disk
Upload from URL

Need help?
Do you have a question about the V50 VHF and is the answer not in the manual?
Questions and answers