Table of Contents
Advertisement
Quick Links
Advertisement
Table of Contents

Related Manuals for Lenovo ThinkVision L150


Summary of Contents for Lenovo ThinkVision L150
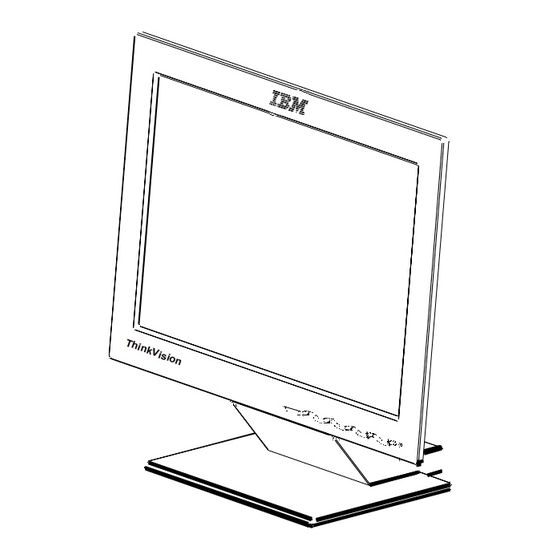
- Page 1 ThinkVision Flat Panel Monitor L150 English User's Guide...
- Page 2 English...
- Page 3 First Edition (June/2004) Note: For important information, refer to the Monitor Safety and Warranty manual that comes with this monitor.
-
Page 4: Table Of Contents
Contents Safety (Read first) ............2 Setting up the Monitor . -
Page 5: Safety (Read First)
í í í... -
Page 6: Setting Up The Monitor
Setting up the Monitor Product Description The IBM ThinkVision L150 Monitor works with a computer with a suitable on- board sub-system or Video Adapter card that can support XGA 1024 x 768, SVGA 800 x 600, or VGA 640 x 480 at 75 Hz. -
Page 7: Workplace Preparation
Workplace Preparation Height This section gives advice on what you should consider Position the monitor so that the top of the screen is slightly below your eye before you set up your monitor. level when you sit at your workstation. Orientation Choose a position that gives the least reflection from lights and windows, usually at a right angle to any windows. -
Page 8: Caring For Your Monitor
Back Sit back in your chair and use the backrest. Hands Adjust the seat height so that your forearms are approximately horizontal and your wrists are straight when using the keyboard. Your upper arms should be relaxed with your elbows near your body. Use a light touch on the keyboard, keeping your hands and fingers relaxed. -
Page 9: Connecting Your Monitor
Connecting your Monitor Turn off your computer and all attached devices. Be sure to read the 'Safety' Information located in the Connect the signal cable to the video port on the back of your computer. Monitor Safety and Warranty This port might be directly attached to your computer (figure A), or it Information Manual before carrying out this procedure. -
Page 10: Turning On Your Monitor
d. Connect the power cord to the power port on the back of your monitor as shown in the illustration below. e. Put the stand cover (e) back then put the cable cover (f) back. forward tilt Insert the plug into a properly grounded electrical outlet. Turning on your Monitor Turn on the power source and your computer. -
Page 11: Installing The Device Driver
Ensure that the CD drive letter is selected, and then select the DRIVERS folder. 10. Select IBM ThinkVision LCD L150 monitor and click OK. The files will be copied from the CD to your hard disk drive. 11. Close all open windows and remove the CD. -
Page 12: Windows 2000 Or Windows Me
14. Ensure that the CD drive letter is selected, and then select the DRIVERS folder. 15. Select IBM ThinkVision LCD L150 monitor and click OK. The files will be copied from the CD to your hard disk drive. 16. Close all open windows and remove the CD. -
Page 13: Windows Xp
14. Ensure that the CD drive letter is selected, and then select the DRIVERS folder. 15. Select IBM ThinkVision LCD L150 monitor and click OK. The files will be copied from the CD to your hard disk drive. 16. Close all open windows and remove the CD. -
Page 14: Automatic Image Setup
Automatic Image Setup Image Setup ( When you first use your monitor you must perform Image Setup ( ). This The Setup Utility procedure sets up your monitor to process the video signals from your included on the installation computer without image discoloration or smearing. After you perform Image CD is for displaying dot patterns. -
Page 15: Image Setup For Dos
Image Setup for DOS To set up the monitor automatically in DOS, do the following: Turn on the monitor first; then turn on the computer. If the monitor is in sleep mode, it may automatically If the message CHECK SIGNAL CABLE is displayed, or if nothing is turn off while you are waiting for it to warm up. -
Page 16: Setup For Windows 95, Windows 98, Windows Nt, Windows 2000, Windows Me Or Windows Xp
Setup for Windows 95, Windows 98, Windows NT, Windows 2000, Windows Me or Windows XP To set up the monitor automatically in Windows 95, Windows 98, Windows NT, Windows 2000, Windows Me, or Windows XP, do the following: Turn on the monitor and then the computer. If the monitor is in sleep mode, it may automatically If the message CHECK SIGNAL CABLE is displayed, or if nothing is... -
Page 17: Manual Image Setup
Manual Image Setup Normally, you can complete the setup procedure using MAGE ETUP however, if your screen image is still distorted after you perform MAGE ETUP ) or the User’s Guide and Installation CD does not run on your system, perform ANUAL ETUP... -
Page 18: Adjusting Your Lcd Monitor
Adjusting your LCD Monitor User Controls Accessible Via On Screen Display (OSD) User control features • Direct access controls Icon Control Description Image Setup Activates automatic image adjustment. Directly accesses the Brightness setting on Brightness the OSD main menu. OSD Enter Displays the OSD main menu. - Page 19 Operation • Press the OSD Enter button to display the main OSD menu. The image is already optimized for many display • Use the Arrow buttons to move among the icons. Select an icon and press modes; however, the user controls can be used to adjust the OSD Enter to access a function.
-
Page 20: On-Screen Display (Osd) Controls
On-Screen Display (OSD) Controls The settings can be adjusted with the user controls on the On-Screen Display (OSD). Press the OSD Enter button ( ) to activate the OSD. Initial appearance of OSD The LCD monitor needs time to become thermally stable the first time you turn it on each day. - Page 21 OSD Icon on Submenu Description Controls and Adjustments Main Menu Activates automatic image adjustment. Image Setup Automatic Use the button to adjust the interference. If satisfactory results are not obtained using the Phase adjustment, use the Clock adjustment and then Manual use Phase again.
- Page 22 OSD Icon on Main Menu Submenu Description Controls and Adjustments (Continued) Adjusts menu location on the screen. Options Menu Position 1. Default Returns the menu position to the default settings. 2. Custom • Horizontal Changes the horizontal position of OSD. •...
-
Page 23: Further Information
Further Information Display Modes Your computer controls the monitor’s display mode. Refer to your computer documentation for details on how to change display modes. The image size, position and shape might change when the display mode changes. This is normal and the image can be readjusted using MAGE ETUP ) and the monitor controls. -
Page 24: Power Management
Power Management The power management feature is invoked when the computer recognizes If your computer has previously been used that you have not used your mouse or keyboard for a user-definable period. with a CRT monitor and is There are several states as described in the table below. currently configured to a display mode outside the ®... -
Page 25: Troubleshooting
Troubleshooting If you have a problem setting up or using your monitor, you might be able to solve it yourself. Before calling your retailer or IBM, try the suggested actions that are appropriate to your problem. Possible Problem Suggested Action Reference Cause Remove the other... - Page 26 Possible Problem Suggested Action Reference Cause User Controls Accessible Screen is blank Brightness Via On and power and Contrast Adjust brightness and indicator is may be too Screen contrast. steady green Display (OSD) section on page 15 Press any key on the keyboard or move the Power The monitor is...
- Page 27 Possible Problem Suggested Action Reference Cause A few dots are A small number of missing, discolored, or missing, lighted dots may be present on the screen, discolored, or which is an intrinsic characteristic of the TFT inappropriately LCD technology and is not an LCD defect. lighted.
-
Page 28: Help And Service Information
Help and Service Information If you are unable to correct the problem yourself, you may seek further help as follows: Call the IBM Support Center. In the US call 1-800-426-7378 In Canada (Toronto Only) call 416-383-3344 In Canada (all others) call 1-800-565-3344 If possible, stay by your In other countries contact your dealer, retailer, or other IBM authorized computer. -
Page 29: Specifications
Specifications This color monitor (Type-model 6636-xx2) uses a 15-inch TFT LCD Dimensions Height: 370 mm (14.57 in.) Depth: 214 mm (8.43 in.) Width: 363.6 mm (14.32 in.) Weight Unpackaged: 4.202 Kg (8.85 lb) Packaged: 5.620 Kg (12.379 lb) Tilt Tilt: –... -
Page 30: Service Information
Service Information The following parts are for use by IBM service or IBM authorized dealers to support the customer warranty. Parts are for service use only Model Type 6636-XX2 Description 73P4360 6636-AC2 Monitor - Business Black 73P4361 6636-AC2 Stand - Business Black 31P9965 6636-XX2 Analog Video Cable... -
Page 31: Notices And Trademarks
Notices and Trademarks This section contains information on notices and trademarks. Notices IBM may not offer the products, services, or features discussed in this document in all countries. Consult your local IBM representative for information on the products and services currently available in your area. - Page 32 Trademarks The following terms, used in this publication, are trademarks or service marks of the IBM Corporation in the United States, other countries, or both: IBM Logo ThinkVision TAR ® TAR ® and the E logo are U.S. Govt. registered NERGY NERGY trademarks.
Need help?
Do you have a question about the ThinkVision L150 and is the answer not in the manual?
Questions and answers