Table of Contents
Advertisement
Quick Links
Advertisement
Table of Contents

Summary of Contents for ORANGE OR100
- Page 1 OR100 (Tw i n Cha nne l , Pi cs Onl y)
-
Page 2: Thank You
To maintain this level of excellence, each Orange amplifier is put through many rigorous test procedures before leaving the factory. -
Page 3: Table Of Contents
OR100 (Tw i n Cha nne l , Pi cs Onl y) CONTENTS CONTENTS ........................... 3 CONTACT DETAILS ........................4 IMPORTANT SAFETY INFORMATION ....................5 USING YOUR AMPLIFIER........................ 8 FRONT PANEL FEATURES ......................10 REAR PANEL FEATURES ....................... 12 VALVES AND FUSES CAN FAIL AT ANY TIME! ................. 14... -
Page 4: Contact Details
OR100 (Tw i n Cha nne l , Pi cs Onl y) CONTACT DETAILS Orange Amplification OMEC House 108 Ripon Way Borehamwood Hertfordshire WD6 2JA ENGLAND Tel: +44 20 8905 2828 Fax: +44 20 8905 2868 info@omec.com Orange USA 2065 Peachtree Industrial Ct. -
Page 5: Important Safety Information
OR100 (Tw i n Cha nne l , Pi cs Onl y) IMPORTANT SAFETY INFORMATION The lightning flash with arrowhead symbol, within an equilateral triangle, is intended to alert the user to the presence of un-insulated ‘dangerous voltage’ within the product’s enclosure that may be of sufficient magnitude to constitute a risk of electric shock to persons. - Page 6 OR100 (Tw i n Cha nne l , Pi cs Onl y) • Do not block any ventilation openings. Install in accordance with the manufacturer’s instructions. • Do not install near any heat sources such as radiators, heat registers, stoves, or other apparatus (including amplifiers) that produce heat.
- Page 7 OR100 (Tw i n Cha nne l , Pi cs Onl y) This Orange Amplifier conforms to UL Standard 60065 for Audio, Video and Similar Electronic Apparatus - Safety Requirements; Certified to CAN/CSA-C22.2 No. 60065-03; IEC 60065 2001 + A1:2005 This device complies with part 15 of the FCC Rules.
-
Page 8: Using Your Amplifier
OR100 (Tw i n Cha nne l , Pi cs Onl y) USING YOUR AMPLIFIER IMPORTANT! For countries or regions with a mains voltage of 115v or 120v, please switch the small, red mains selector to 115v or 120v and replace the fuse in the black pull out fuse tray, below the mains inlet, with the 120v version supplied. - Page 9 OR100 (Tw i n Cha nne l , Pi cs Onl y) Make sure the correct speaker load is connected: 1 x 16 ohm cabinet – Use the 16 ohm speaker jack socket (Rear of chassis) 2 x 16 ohm cabinets – Use both of the 8 ohm speaker jack sockets (Rear of chassis) 1 x 8 ohm cabinet –...
-
Page 10: Front Panel Features
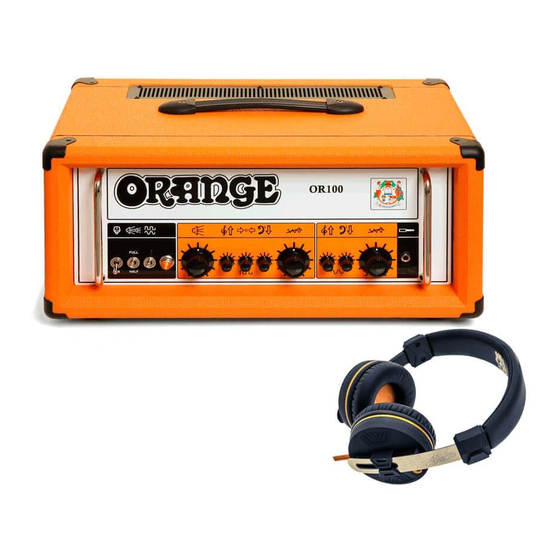
OR100 (Tw i n Cha nne l , Pi cs Onl y) FRONT PANEL FEATURES Input Jack Socket Plug your instrument into this jack socket. Gain Control (Clean Channel) This controls the volume of the clean channel. Bass Control (Clean Channel) This controls the bass response of the clean channel. - Page 11 OR100 (Tw i n Cha nne l , Pi cs Onl y) Treble Control (Dirty Channel) This controls the treble response of the dirty channel. Volume Control (Dirty Channel) This controls the output volume of the dirty channel. Channel Switch This toggle switch switches between the clean and dirty channel.
-
Page 12: Rear Panel Features
Use any latching footswitch to add an overall volume boost to either channel. (Note – This works well for louder lead solos where extra gain is not required. An Orange footswitch will be lit up when the boost is not engaged) Gain Boost (Dirty Channel only) footswitch jack socket Use any latching footswitch to add a subtle gain boost to just the dirty channel. - Page 13 OR100 (Tw i n Cha nne l , Pi cs Onl y) Valve Effects Loop (Send and Return) Use the “Send” jack socket to go to the input of time based effects pedals or rack equipment such as delay, chorus, etc. Use the “Return” jack socket to return from the output of the effects being used.
-
Page 14: Valves And Fuses Can Fail At Any Time
90 days from the date of purchase. The warranty status of any Orange product is subject to its being used for its intended purpose in suitable conditions. As the manufacturer we reserve the right to refuse to warranty any Orange product which has been misused in any way whatsoever.


