
Related Manuals for Garmin Nuvi 2x5


Summary of Contents for Garmin Nuvi 2x5
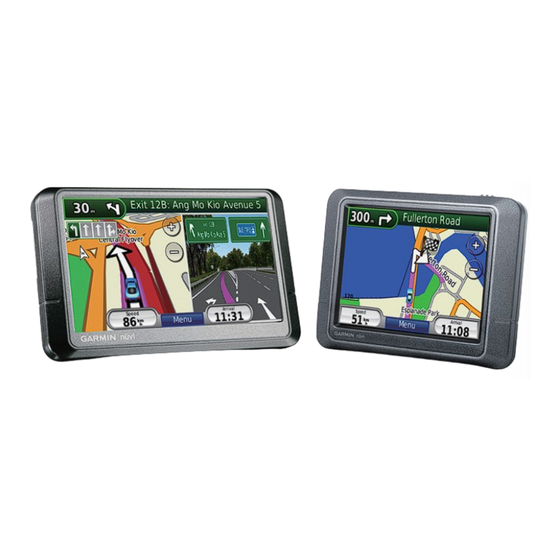
- Page 1 nüvi 2x5 Series ® personal travel assistant for use with these nüvi models: 205, 205W, and 255W...
-
Page 2: Your Nüvi Unit
Your nüvi Unit Power and USB connector Speaker SD card slot (205W/255W) microSD card slot (205) Power key: Slide to the left to turn the nüvi on/off; slide to the right to lock the screen nüvi 2x5 series quick start manual... - Page 3 Step 1: Mount Your nüvi Select a suitable location to mount your nüvi on your windshield. Clean and dry the suction cup and the selected area of your windshield. 1. Plug the power cable into the back of your nüvi. 2.
-
Page 4: Help When You Need It
from tall buildings and trees. 2. Turn the nüvi on. Acquiring satellite signals can take a few minutes. bars indicate satellite strength. When at least one of the bars is green, your nüvi has acquired satellite signals. Now you can select a destination and navigate to it. -
Page 5: Finding A Destination
Finding a Restaurant 1. On the Menu page, touch Points of Interest > Food. 2. Select a category. Touch to see more choices. 3. Select a destination. The Go! page displays. 4. Touch Go!. Using the Phone Number to Search 1. -
Page 6: Changing The Search Area
Note: postal code search is only available in Singapore. Using the Go! Page After you have found a location, your nüvi displays the Go! page. ➊ ➌ Route Info ➊ Touch to view a turn-by-turn map to this location. ➋ Touch to create a turn-by-turn route to this location. -
Page 7: Taking A Detour
Changing Your Home Location To set a different home location: 1. Touch Tools > My Data Location. 2. Select an option: • Enter your address. • Use your current location. • Choose from a list of recently found locations. To edit information about your home location: 1. -
Page 8: Using Photo Navigation
Visit http://connect.garmin.com/photos for more information. To load geotagged photos to your nüvi: 1. Connect your nüvi to your computer. 2. Go to http://connect.garmin.com /photos, and select a photo. 3. Select Send to Garmin Device save the photo to your nüvi. -
Page 9: Using The Map Page
➐ The MSM icon shows when there is only MalSing map activated. (The option is currently available on nüvi 255W. Please check www.garmin.com.sg for future support on other models.) vehicle icon shows your current location. Touch to zoom out. ➊... -
Page 10: Junction View
Junction View Junction view displays road signs and junctions on your route along with arrows that indicate the proper lane, making unfamiliar intersections and exits easy to navigate. ➊ ➊ Click to view the full screen image. nüvi 2x5 series quick start manual Lane Info Lane info guides you to the proper lane for approaching turns or exits. -
Page 11: Customizing Your Nüvi
Locking the Screen To prevent accidental screen taps, slide unlock the screen, slide the key to the center position. myGarmin Go to http://my.garmin.com to access the > Security. latest services for your Garmin products Garmin Lock. and to register your nüvi. -
Page 12: Clearing User Data
(ii) a newer version of the map data was or becomes available on Garmin’s website at any time up to one year after the date of your unit’s first satellite acquisition. nüvi 2x5 series quick start manual Clearing User Data... -
Page 13: Changing The Fuse
Mounting on Your Dashboard Use the enclosed mounting disk to mount your nüvi on the dashboard and to comply with certain state regulations. IMPORTANT: The permanent mounting adhesive is extremely diffi cult to remove after it is installed. 1. Clean and dry the dashboard where you are placing the disk. -
Page 14: Avoiding Theft
(DoC) Hereby, Garmin declares that this nüvi product is in compliance with the essential requirements and other relevant provisions of Directive 1999/5/EC. To view the full Declaration of Conformity, see the Garmin Web site for your Garmin product: www.garmin.com. page... -
Page 15: Specifications
Data storage: Internal memory and optional removable microSD card. Data stored indefinitely. Computer interface: USB 2.0 full speed mass storage Operating system: Garmin Charge time: Approximately 4 hours Power input: Vehicle power using included vehicle power cable or AC power using an optional accessory usage: 5 W max. - Page 16 32°F–113°F (0°C–45°C) Data storage: Internal memory and optional removable SD card. Data stored indefinitely. Computer interface: USB 2.0 full speed mass storage Operating system: Garmin Charge time: Approximately 4 hours Power input: Vehicle power using included vehicle power cable or AC power using an optional accessory usage: 5 W max.
-
Page 17: Software License Agreement
Software remain in Garmin. You acknowledge that the Software is the property of Garmin and is protected under the United States of America copyright laws and international copyright treaties. You further acknowledge that the structure, organization, and code of the Software are valuable trade secrets of Garmin and that the Software in source code form remains a valuable trade secret of Garmin. - Page 18 ™ ™ Garmin Ltd. or its subsidiaries and may not be used without the express permission of Garmin. © 2009 Garmin Ltd. or its subsidiaries Garmin International, Inc. 1200 East 151st Street, Olathe, Kansas 66062, USA Garmin (Europe) Ltd.
Need help?
Do you have a question about the Nuvi 2x5 and is the answer not in the manual?
Questions and answers