Advertisement
Quick Links
Download this manual
See also:
Owner's Manual
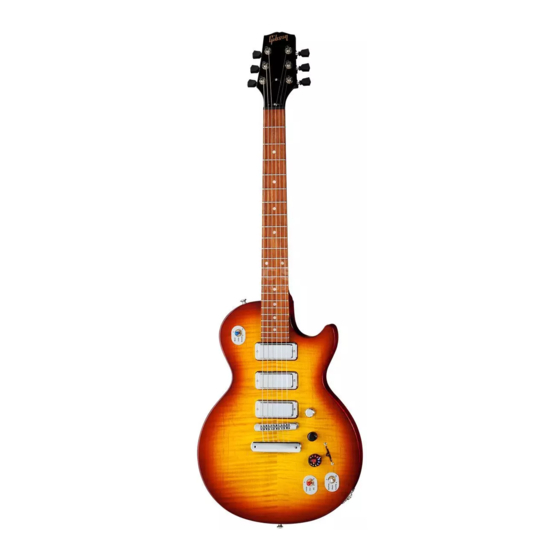
Gibson LPX
Gibson LPX
Quickstart Manual
Quickstart Manual
copyright 2011 Gibson Guitar Corp.
quickstart manual version 1.2b
Page 1
Advertisement

Subscribe to Our Youtube Channel
Related Manuals for Gibson LPX


Summary of Contents for Gibson LPX
- Page 1 Gibson LPX Gibson LPX Quickstart Manual Quickstart Manual copyright 2011 Gibson Guitar Corp. quickstart manual version 1.2b Page 1...
- Page 2 For optimum Robo-Tuner tuning speed and reliability, please use the correct gauge strings. LPX ships with the recommended string gauge set: High E = .010, B = .013, G = .017 (wound), D = .026, A = .036, low E = .046.
-
Page 3: Important Safety And Warranty Information
Both you and your LPX will be much happier if you store and operate this product under safe conditions. - Page 4 Warranty Protection It is extremely important to us that you are satisfied with LPX. Register it and activate your warranty protection by mailing the warranty card included with LPX to Gibson USA, Department W, P.O. Box 100087, Nashville, TN 37210-0087. If you encounter any kind of problem, contact us as soon as possible so we can make things right.
- Page 5 Email - service@gibson.com Never send a unit in for repair before contacting Gibson. You will be advised of the proper procedure for a quick and efficient repair, as well as provide information on where and how to send your LPX.
- Page 6 LPX combines revolutionary features with Gibson’s traditional construction quality and superior sound. It’s the most technologically-advanced guitar in the world—yet remains familiar and playable. You don’t have to adapt to LPX; it adapts to you. Tune your guitar strings automatically, including alternate tunings, in seconds ...
- Page 7 Preparation Accessories Checklist Your LPX is a complete system with all needed accessories. After removing the guitar case from the shipping box, take out the Accessory Pack in the bottom of the box. Check that between the Accessory Pack and guitar case pocket, the following are all included.
- Page 8 The Battery LPX must be turned on, with a charged battery, to work. Batteries can lose charge over time, so please check the batteries when you receive LPX. Pull up on the Gear Shift Knob to turn on LPX. Within five seconds, a green circle should appear momentarily in the middle of the knob to indicate the battery is charged.
- Page 9 For optimum Robo-Tuner tuning speed, please use the correct gauge strings. LPX ships with the recommended string gauge set: High E = .009, B = .011, G = .016 (wound), D = .026, A = .036, low E = .046...
- Page 10 4. When tuning is finished, LPX automatically exits tuning mode, unmutes the audio, and returns to the previous patch. A Gear Shift Knob light flashes green to confirm the guitar is tuned.
- Page 11 DblDrop D Select Sound Banks LPX has 11 banks (1-9, A, and B) you select with the Gear Shift Knob. Each bank has five patches (1-5) you select with the 5-way Pickup Selector/Patch Selector. You can freely save, load, and edit patches with the included LPX Editor software. For example, LPX could have 55 basic pickup patches, 55 patches with effects, some patches with effects and some without, etc.
- Page 12 Silver tog-pot clockwise for more piezo signal, and counter-clockwise for less. Alter Volume and Tone The silver volume knob controls volume, and the black Digital Varitone knob controls tone. The volume taper and Digital Varitone response are both customizable with the LPX Editor software. Page 12...
- Page 13 Patch Play Mode and Edit Mode LPX has two playing modes. Patch Play Mode is LPX’s default mode. It provides “foolproof” playing on stage by locking out the sliders and most blue and red tog-pot functions—even if you hit them accidentally, your sound won’t change.
- Page 14 Note: The Pedalboard and Switchboard provide visual indications of the slider settings, effect types, and more. For now, just play with the sliders to get an idea of what’s possible; you’ll find that editing is easy and unambiguous when the pedals are set up, as described starting on page 17.
- Page 15 The onboard computer will look for four big peaks, and use them to calculate the delay time. 5. Play LPX and determine that the delay time is correct. If not, repeat steps 1-4 and make you you strike the strings with sufficient force to create strong peaks.
- Page 16 AC adapter. They can operate a minimum of 30 feet (10 meters) from LPX to a maximum of 100 feet. These devices need to recognize each other—a process called “pairing”—which is done at the factory.
- Page 17 9V battery occurs automatically. However, switching on the pedal with only a 9V battery is not supported. Setting Up the Pedals for LPX 1. Remove the Pedal Power/Data Connector, which carries power from the Pedalboard to the Switchboard, from the bottom of the Pedalboard.
- Page 18 Bone Link Up. The confirms that all devices are communicating. Note: If you turn off LPX (e.g., to save battery power or change batteries) this will stop communications to the pedals. However, turning LPX back on will re-establish the link automatically after several seconds.
- Page 19 Pedalboard Display When you rotate the Gear Shift Knob to change Banks or the Pickup Selector/Patch Selector switch to change patches, the display shows the Bank and Patch in large type for about two seconds, then reverts to the default display. The default shows the following (numbers in the descriptions are keyed to the display image).
- Page 20 Note: The section on using the Switchboard with the Echoplex Looper starts on page 23. Switchboard Display The default display shows the following. Note: The effects chain settings change only when LPX is in Edit mode, not Patch Play mode. Page 20...
- Page 21 Top Line (1) Tuning number (2) Modulation wet/dry mix (00-99) as selected by the blue tog-pot when switched to the Mod position (3) Compressor wet/dry mix (00-99) as selected by the red tog-pot when switched to the Comp position Middle Line (4) Tuning name (5) Delay wet/dry mix (00-99) as selected by the blue tog-pot when switched to the Echo position...
- Page 22 (sound on sound recording) on two of the tracks. Activate the Echoplex Looper 1. Verify that LPX, Pedalboard, and Switchboard are turned on and connected. 2. Press the Upper Right footswitch. If the display shows Looper, proceed to the next step.
- Page 23 Overdub on Tracks 2 and 3 You can record new sounds into what you’ve already recorded onto Tracks 2 or 3; this mixes the new sounds with the previously-recorded ones (“sound-on-sound” recording). 1. To overdub, start playing the loop. 2. To overdub on Track 2, double-click footswitch 5--B. 3.
-
Page 24: Pairing Bluetooth Devices
1. Set up the Pedalboard and Switchboard as described previously in steps 1-5 of Setting Up the Pedals for LPX on pages 18 and 19 (linked, AC power connected, and antennas up). However, they should not be powered-on. - Page 25 USB 2.0 Interface and LPX Editor Software G-Node USB 2.0 Interface and LPX Editor Software The latest software and documentation for these components is available from the LPX Visionaries Club web site. Please register as described previously on page 2, and download the software and documentation.
Need help?
Do you have a question about the LPX and is the answer not in the manual?
Questions and answers