Table of Contents
Advertisement
Advertisement
Table of Contents

Subscribe to Our Youtube Channel
Related Manuals for Citizen IF1-ET01

Summary of Contents for Citizen IF1-ET01
- Page 1 Print Server IF1-ET01 User's Manual...
-
Page 2: Table Of Contents
Contents Read before using ! ....................3 Safety Instructions ....................4 Introduction ....................5 Checking the Package .......................... 5 Part Names and Functions ........................6 Preparing the Print Server ................7 Connecting to the Printer ........................7 Connecting to the Network ........................ 9 Preparing the Computer................10 Installing the Software ........................10 Changing Settings ..........................13 Basic Operations of the Print Server ............14... -
Page 3: Read Before Using
Read before using ! Be sure to read this manual carefully before using the product. After you read it, store it in a safe place so that you can reread it when necessary. Contents of this manual may be changed without notice. ... -
Page 4: Safety Instructions
Be sure to use the device inserted in the interface board slot of the printer. Do not use the device when it is not inserted in the interface board slot. CITIZEN is a registered trademark of CITIZEN HOLDINGS CO., Japan. CITIZEN es una marca registrada de CITIZEN HOLDINGS CO., Japón. -
Page 5: Introduction
Please check to see if the print server itself and the accessories mentioned below are all included. If anything is missing, contact your Citizen Systems dealer. When the printer comes with the main unit of the print server already installed, the package contains only the Quick-start Guide and CD-ROM. -
Page 6: Part Names And Functions
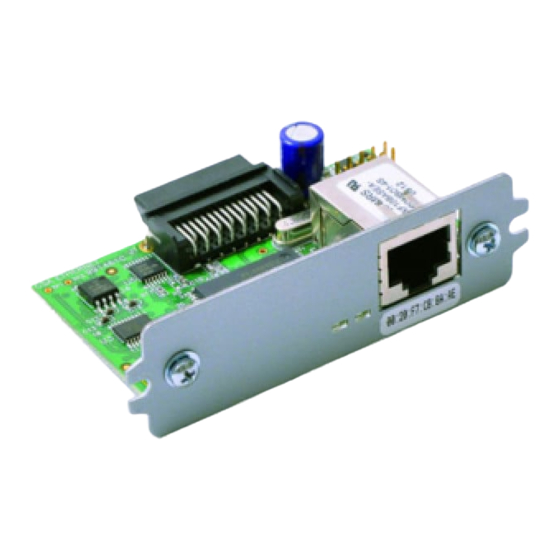
1 Introduction 1-2 Part Names and Functions Printer interface connector Operation panel Operation panel 10/100BASE 2 3 4 1 RJ45 connector (compatible with 10Base-T/100Base-TX) Connects network cable to device. 2 Network transmission speed indicator Shows network communication speed with steady / blinking green light. 3 Network status indicator Shows network connection status (“disconnected,”... -
Page 7: Preparing The Print Server
Preparing the Print Server 2-1 Connecting to the Printer If the main unit of the print server is already installed in the printer, proceed to 2-2, Connecting to the Network (p.9). CAUTION • To install the print server, please contact your Citizen Systems dealer or service person. • Do not pull the print server out of the printer and re-install it. This could cause malfunctioning. Preparing the printer <... - Page 8 2 Preparing the Print Server Connecting the device to the printer Insert the device into the interface slot of Interface slot the printer. / 1 0 Connect the device's interface connector to the interface connector inside the printer. / 1 0 Fix the device in place with screws. / 1 0...
-
Page 9: Connecting To The Network
2 Preparing the Print Server 2-2 Connecting to the Network Connecting the network cable RJ45 connector Connect the network cable to the device's RJ45 connector. / 1 0 Network cable Connect the power cord to the printer. Power connector Cable connector AC adapter AC power cord [DC power supply type]... -
Page 10: Preparing The Computer
Preparing the Computer 3-1 Installing the Software The TCP/IP port driver (CITIZEN TCP/IP Port) can be easily installed using the installer. The installer is included in the same CD-ROM as this manual. CAUTION To use this software, a compatible printer driver needs to be installed. Before or after installing this software, install the printer driver (Version 2.00 or later) for line thermal printers. The printer driver for line thermal printers is included in the CD-ROM that comes with a line thermal printer, or obtained from our website. When installing in Windows Vista The following describes the procedure for installing the TCP/IP port driver (CITIZEN TCP/IP Port) in the computer in which the printer driver for the line thermal printer CT-S801 has been installed. - Page 11 After thoroughly reviewing the License Agreement, select “I accept the terms of the license agreement” and click “Next.” The software installation will start. The “CITIZEN TCP/IP Port” screen will appear. Enter the “Port Name,” “IP address,” and “Communication Timeout.” 1 Port Name 2 Host Name or IP When you enter the IP address (e.g.,...
- Page 12 Windows 7 by using almost the same procedure as installing in Windows Vista. Click the “CITIZEN TCP/IP Port Installer” on the menu screen in the CD-ROM to start installation. To install manually, double click the software installer, "CSPortTcpMonSetup.exe" to start installation.
-
Page 13: Changing Settings
After you install the TCP/IP port driver, changing the IP address or other settings are to be done on the “CITIZEN TCP/IP Port” screen. To get to the “CITIZEN TCP/IP Port” screen, go to the “printer properties” screen or access it from the “start” menu. -
Page 14: Basic Operations Of The Print Server
Basic Operations of the Print Server 4-1 Using the Panel Button The panel button on the operation panel is used to operate the device. You can use it to print settings information and restore factory default settings. Panel button 10/100BASE ... -
Page 15: Led Functions
4 Basic Operations of the Print Server 4-2 LED Functions The following charts show what each LED indicator indicates. 10/100BASE 1 Network transmission speed indicator Transmission speed LED (green) 100Mbps Steady light 10Mbps/disconnected No light 2 Network status indicator Display content LED (yellow) Connected Steady light... -
Page 16: Using The Print Server Home Page
Using the Print Server Home Page Using a Web browser, you can go to the print server homepage to check or change the settings of the device, or to check the operational status of the printer. Accessing the print server homepage Launch your browser and go to the URL of the print server homepage. For the URL, enter the IP address assigned to the printer. -
Page 17: Checking Or Changing Print Server Configuration
5 Using the Print Server Home Page 5-1 Checking or Changing Print Server Configuration You can check or change the settings of the device under “Print server configuration” page on the print server homepage. Checking the print server configuration On the menu page of the print server homepage, click “Print server configuration.” The “Print server configuration”... - Page 18 5 Using the Print Server Home Page Print server setting items Classification Items Description Change Printer Manufacturer Obtains information from the printer about the manufacturer information of the printer to which the device is connected Model Obtains information from the printer about the model of the printer to which the device is connected Network Line speed...
- Page 19 5 Using the Print Server Home Page Changing the print server configuration On the menu page of the print server homepage, click “Print server configuration.” The “Print server configuration” page will appear. Click “Edit.” The editing page will appear.
- Page 20 5 Using the Print Server Home Page After changing the settings, click “Register.” The “Please wait” page will appear and the changes will be saved. CAUTION When the operation is complete, the device will restart automatically. When the device is set to automatically obtain the IP address through the DHCP server, the IP address assigned may be different from the previous one.
-
Page 21: Checking Operational Status Of Printer
5 Using the Print Server Home Page 5-2 Checking Operational Status of Printer On the menu page of the print server homepage, click “Printer status.” The “Printer status” page will appear. The operational status of the printer can be checked on “Printer status” of the “Printer status” page. -
Page 22: Print Server Configuration
Print Server Configuration 6-1 Printing Print Server Configuration Press the panel button to print out the print server configuration. Configuration items that will be printed I/F Board 1 Title of the printout. Information 2 Firmware version of the device. Same as Print Server:DQ00-01XX noted on the print server homepage. -
Page 23: Setting Ip Address
Setting IP Address The IP address that is used to connect the printer to the network can be automatically obtained by the DHCP server or It can be manually set. When it leaves the factory, the device is programmed to have the DHCP server automatically obtain the IP address. To change the IP address, enter it manually. -
Page 24: Specifications
TCP 9100 (initially) Configuration changes from the print server homepage Interactive communication YES (only when CITIZEN TCP/IP port driver is used) Firmware upgrade YES (use print server homepage) External dimensions 80mm (W) × 70mm (D) × 25mm (H) (including protruding connector) Weight Approx. - Page 26 363 Van Ness Way, Suite 404 Torrance, CA 90501. USA Tel: (310) 781-1460 Fax: (310) 781-9152 http://www.citizen-systems.com Mettinger Strasse 11 Park House, 643-651 Staines Road D-73728, Esslingen Feltham, Middlesex, TW14 8PA Germany United Kingdom Tel: +49 (0) 711 3906 420...
Need help?
Do you have a question about the IF1-ET01 and is the answer not in the manual?
Questions and answers