Advertisement
Table of Contents
- 1 Important Safety Instructions
- 2 Limited Warranty
- 3 Front/Back View
- 4 To Assemble Body to Nozzle
- 5 Tool Caddy
- 6 Handle to Body
- 7 To Operate
- 8 Hose Assembly
- 9 On/Off Pedal
- 10 Carry Handle
- 11 Dirt Container/Filtration
- 12 Belt/Brush Removal/Replacement
- 13 Troubleshooting
- 14 Customer Service
- Download this manual
OWNER'S
MANUAL
Operating
and Servicing
Instructions
Please
read these
instructions
carefully
before using your cleaner.
Let us help you put your
vacuum
together
or
answer any questions,
call:
1-800-321-1134
(USA
& Canada)
www.dirtdevil.com
z WARNING:
Cleaner
assembly
may
include
small parts,
Small parts can present
a choking
hazard.
For quick reference, please record your
vacuum information below.
Model #:
Mfg. Code:
(Mfg code located on tbe lower backside of cleaner)
@2002All rights reserved # 1-113119-000
5/03
Advertisement
Table of Contents

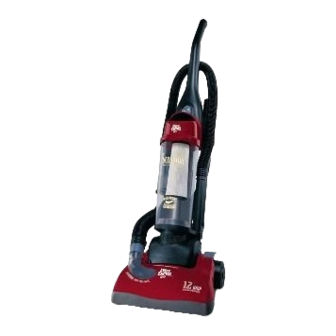
Summary of Contents for Dirt Devil BREEZE M088150
- Page 1 OWNER'S MANUAL Operating and Servicing Instructions Please read these instructions carefully before using your cleaner. Let us help you put your vacuum together answer any questions, call: 1-800-321-1134 (USA & Canada) www.dirtdevil.com z WARNING: For quick reference, please record your Cleaner assembly vacuum information below.
-
Page 2: Important Safety Instructions
THIS CLEANERIS INTENDED FOR HOUSEHOLD USE ONLY. IMPORTANT SAFETY INSTRUCTIONS When you use an appliance, basic precautions should be followed, including the following: • READALLINSTRUCTIONS BEFORE USINGTHEAPPLIANCE. • ALWAYSFOLLOWTHESESAFETYINSTRUCTIONS. • BRINGCLEANER TO UPRIGHTPOSITION WHENUSINGTHEHOSEAND ATTACHMENTS. • DO NOT LEAVE CLEANER UNATTENDED W HENPLUGGED IN. •... - Page 3 Keep hair, loose clothing, fingers, and all parts of body away from openings and moving parts, Do not pick up anything that is burning or smoking, such as cigarettes, matches, or hot ashes, Do not use without dirt container and filters in place. Turn off all controls before unplugging.
-
Page 4: Limited Warranty
CONGRATULATIONS You are now the proud owner of a Dirt Devil% We trust your new pur- chase will bring you many years of satisfaction. Our company designed and developed this product with you in mind. We are very proud of our products and hope that you are equally sat- isfied with their quality and performance. -
Page 5: Front/Back View
FRONT VIEW BACKVIEW FRONT VIEW BACK VIEW 1. Handle CordGuide Dirt Container Release Latch 10, Hose 11. 2-in-1 Tool-Dust Brush / Dirt Cup Lid See Through Dirt Container Upholstery Tool lZ. Crevice Tool Dirt Cup Filter Bumper 13. Carrying Handle/UpperCordWrap Clear Dirt Window 14. -
Page 6: To Assemble Body To Nozzle
TOOL REQUIRED: PHILLIPS OR FLAT HEAD SCREWDRIVER Assemble the body to the To secure, insert one (1) Push back dirt window flap. base so that the lower hose screw into the back of the Align tabs on clear dirt pas- is on the right side. -
Page 7: To Operate
HOSE ASSEMBLY il;i!!ii!i!i!iiii iiii:!:!iii!! ii,iiiiiiiii !!!i i iiiii!!!ii:iiiiiiiiiiii !l :!:i, iiii i! i i::iil, : iii!i:!iii:: ¸: Insert the short end of the Insert hose handle into the Assembledirt cup lid to the leftside of the cleane_ Press hose onto the tool caddy dirt cup. -
Page 8: Carry Handle
CAUTION: B rushagitatorcontinuestorotate while hoseis removed or in use andat all times while cleaneris on, Keephair, loose clothing, fingers,andall parts of bodyaway frombrusharea while clean- er is on. Cleanerraustbe in theuprightposition to lilt the rotation brush off thecarpetwhencleaningabovethe floor. ABOVEFLOORCLEANING Remove the hose from the Cleaner m ust be in its upright Slide the tool hose into the... -
Page 9: Dirt Container/Filtration
WARNING:TO REDUCE THERISKOF INJURYFROMMOVINGPARTS- UNPLUGBEFORE SERVICING. Forfilter replacement (Part # 2-J00280-000) pleasecall 1-800-321-1134or visit www.dirtdevil.com to locate a dealer nearestyou, NOTE:Unplug cleaner before changing filter. NOTE:For.best performance, replace filter yearly, EMPTY AND CLEAN DIRT CONTAINER Remove lid by grasping Hold the dirt container and Depress latch to remove dirt container from cleaner, both handlesandturning lid... -
Page 10: Belt/Brush Removal/Replacement
TOOLREQUIRED: P HILLIPSSCREWDRIVER WARNING: TO REDUCE THERISK OFINJURYFROMMOVINGPARTS- UNPLUGCLEANERBEFORE CHANGING BELTORBRUSHROLL, I BELT TO REMOVEBELT STYLE 5 1 Laycleanerfiatandflipclean- Slide belt off motor shaft. Lift nozzle guard off. er to expose nozzle base.Base shouldlay fiatandfaceup.To remove nozzle guard, use Phillipsscrewdriver t o remove the four (4) screws. -
Page 11: Troubleshooting
WARNING: TO REDUCE RISK OF PERSONAL INJURY - UNPLUG CLEANER BEFORE SERVICING Pn_RUR__ _no nmnkn _ R#ARNIkl PRNRI p,qRRIRI Cleaner won't 1. Power cord not firmly 1. Plug unit in firmly, plugged into outlet. 2. Blown fuse or tripped breaker. 2.


Need help?
Do you have a question about the BREEZE M088150 and is the answer not in the manual?
Questions and answers