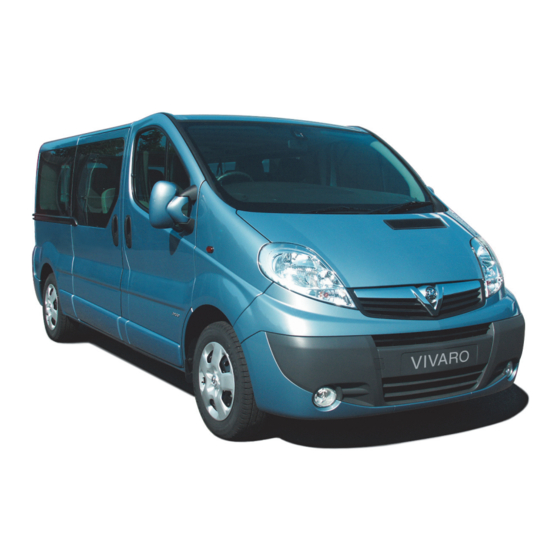
Vauxhall Vivaro Owner's Manual
Hide thumbs
Also See for Vivaro:
- Owner's manual (231 pages) ,
- Quick reference manual (2 pages) ,
- Conversion manual (2 pages)
Advertisement
Quick Links
Vehicle features
Manual transmission:
Manual transmission automated
Starting the engine:
Reverse: With vehicle stationary,
(MTA):
Turn key to position A
wait 3 seconds after depressing
N
= Neutral
Move steering wheel slightly to
clutch pedal, pull up collar on
o
= Centre position
release steering wheel lock
-
selector lever and engage gear.
= Shift to a lower gear
Manual transmission:
+
= Shift to a higher gear
operate clutch
If gear does not engage, set lever
A/M = Switch between Automatic
Manual transmission automated
to neutral, release clutch pedal and
and Manual mode
(MTA): operate brake;
depress again; then repeat gear
transmission automatically
R
= Reverse
selection.
shifts to N
Move the selector lever to the
Do not grind the clutch
Do not accelerate
appropriate position as far as it will
unnecessarily.
go and release. Selector lever
Diesel engines: turn key to
position M for preheating and
When operating, depress clutch
returns to centre position.
wait for ! to extinguish
pedal completely. Do not use the
The current gear/mode is shown in
pedal as a foot rest.
Turn key to D and release
the transmission display.
Parking brake:
Tailgate opening and closing:
Side doors:
Always apply firmly without
After unlocking with remote control
Ensure the side door is fully closed
c
operating release button and
button
, press tailgate button and
and secure before driving the
apply as firmly as possible on uphill
lift tailgate to the fully open
vehicle.
or downhill slopes.
position.
The door can be locked from inside
To release, pull lever up slightly,
The tailgate can be also opened
the vehicle with the interior lock
press release button and lower
from inside the vehicle by pushing
switch.
lever fully.
down the tailgate interior release.
To reduce the operating forces,
Close tailgate using the interior
depress the foot brake at the same
strap.
time.
Ensure tailgate is fully closed.
Vehicle features
Rear doors:
Opening the bonnet:
Pull the safety catch to open the
To open the left-hand rear door,
Pull release lever below the
bonnet.
pull the outside handle.
instrument panel and return it to its
original position.
The door is opened from inside the
vehicle by pulling the interior
handle.
The right-hand rear door is
released using the lever.
The doors are retained in the 90º
position by locking stays. To open
the doors to 180º or further, pull
the door release handles and
swing open to the desired position.
Important:
Ensure extended opening doors
are secured when fully opened.
Opened doors may slam closed
due to the force of the wind!
Always close the right-hand door
before the left-hand door.
When refuelling is complete,
replace the filler cap and turn key
clockwise as far as it will go.
Wipe off any overflowing fuel
immediately.
Note:
To ensure the fuel level is displayed
correctly, the ignition must be
switched off before refuelling.
Avoid minor fuel top-ups (e.g. less
than 5 litres) to ensure accurate
Secure the bonnet in the upright
Refuelling:
readings.
position using the support rod
Before refuelling, switch off engine
located at the front of the engine
and any external heaters with
Petrol engines - use unleaded
compartment.
combustion chambers (identified
petrol fuel meeting specifications
by a sticker on the fuel filler flap).
Before closing bonnet, press
of
Switch off any mobile phones.
support rod into its holder. Lower
DIN EN 228.
bonnet and allow it to drop into its
The fuel tank filler neck with
Diesel engines - use diesel fuel
catch. Check bonnet is engaged.
bayonet cap is located on the
left-hand side of the vehicle.
meeting specifications of
DIN EN 590.
The fuel filler flap can only be
opened if the vehicle is unlocked.
Fuel tank capacity - 92 litres.
To unlock and open the fuel filler
cap, insert key and turn
anticlockwise.
Vehicle features
Engine oil:
Check the engine oil level manually on a regular basis to prevent damage to the engine.
Ensure that the correct specification of oil is used.
Check with the vehicle on a level surface. Engine must be at operating temperature and switched off for at
least 10 minutes.
Pull out the dipstick, wipe it clean, insert it to the stop on the handle, pull out and read the engine oil level.
Important:
It is the owner's responsibility to maintain the correct level of an appropriate quality oil in the engine.
Do not allow the engine oil level to drop below the minimum level!
Engine oil quality:
For engine lubrication, use engine oil which meets the following specification:
All petrol and diesel engines
= dexos 2
Dexos 2 is the newest engine oil quality that provides optimum protection for petrol and diesel engines. If it is
unavailable, engines oils of other listed qualities must be used.
Alternative qualities if dexos 2 is not available:
Petrol engines
= GM-LL-A-025
Diesel engines
= GM-LL-B-025
Alternative qualities if GM-LL-A-025 / GM-LL-B-025 are not available:
Petrol engines
= ACEA A3 / B3
Diesel engines without diesel particle filter
= ACEA A3 / B4
Diesel engines with diesel particle filter
= ACEA C3
Tyre pressure:
Check tyre pressures, including the spare, every 14 days and prior to any long journey; tyres should be
checked when cold. The tyre pressures shown below apply for summer and winter tyres.
The tyre pressure data refers to cold tyres. It applies to summer and winter tyres.
Always inflate the spare tyre to the value specified for full load.
Incorrect tyre pressures will impair safety, vehicle handling, comfort and fuel economy and increase tyre wear.
Warning:
If the pressure is too low, this can result in considerable tyre warm-up and internal damage, leading to tread
separation and even to tyre blow-out at high speeds.
Tyre pressure (psi / bar / kPa)
For full load
Engine
Tyres
Front
Rear
All
195/65 R16 C
49 / 3.4 / 340
54 / 3.7 / 370
195/75 R16 C
55 / 3.8 / 380
61 / 4.2 / 420
205/65 R16 C
55 / 3.8 / 380
61 / 4.2 / 420
215/65 R16 C
45 / 3.1 / 310
49 / 3.4 / 340
*KTA-2709-3*
Vivaro
Quick Reference Guide
Refer to Owner's Manual for detailed information.
Depending on the model variant, special equipment
Illustrations may depict left-hand drive vehicles.
and accessories, the scope of equipment on your
Operation is similar for right-hand drive vehicles.
vehicle may differ from the descriptions in this guide.
11. Tachograph
21. Gear selector lever
1. Ashtray, cupholders, fuse box
22. Power outlet / cigarette lighter
2. Fixed air vents
12. Front passenger airbag
13. Storage compartment
23. Ignition switch with steering
3. Side air vents
14. Coin tray
wheel lock
4. High and low beam,
15. Storage tray
24. Steering wheel adjustment
headlight flash, sidelights,
25. Cruise control
16. Glovebox
turn signals, fog lights
17. Utility hook
26. Parking assist,
5. Instruments, Driver Info Centre
18. Climate control system
headlight range adjustment,
6. Horn, driver airbag
Electronic Stability Programme
7. Steering column controls
19. Hazard warning flashers
27. Auxiliary heater
20. Cruise control / speed limiter,
8. Front and rear wiper / washer,
central locking system,
28. Bonnet release lever
trip computer
MTA Winter and Laden mode,
9. Centre air vents
Heated rear window / mirrors
10. Information display
Vehicle security
Anti-theft alarm system:
Pressing button
vehicle and also activates the
anti-theft alarm system.
Deadlocking the vehicle:
Pressing button
front doors, sliding side doors and
the load compartment.
All doors and the load
compartment must be closed or the
systems cannot be activated. The
systems are deactivated when the
Unlocking and locking the vehicle:
With 3-button remote control, load
vehicle is unlocked with button
c
Press button
(or press and hold)
compartment (and sliding side
Electronic immobiliser:
to unlock entire vehicle.
doors) are locked and unlocked
e
Press button
to lock vehicle.
independently of the front doors by
Activated when key is left in
pressing buttonG.
ignition switch with engine turned
Alternatively, turn key in driver's
off and when key is removed.
door lock to lock/unlock.
TS 1691-A-13 / KTA 2709-3
e
once locks the
e
twice deadlocks
c
.
July 2012
Advertisement

Subscribe to Our Youtube Channel
Related Manuals for Vauxhall Vivaro


Summary of Contents for Vauxhall Vivaro
- Page 1 Vivaro Vehicle features Vehicle features Vehicle features Engine oil: Quick Reference Guide Check the engine oil level manually on a regular basis to prevent damage to the engine. Ensure that the correct specification of oil is used. Refer to Owner’s Manual for detailed information.
-
Page 2: Vehicle Features
Vehicle features Vehicle features Vehicle features Vehicle features Manual exterior mirrors: Electric exterior mirrors: Front and rear fog lights: Windscreen washer: Rear window wiper and washer: Longitudinal seat adjustment: Seat backrests: Seat height: Interior mirror: Lighting: Automatic light control: Windscreen wiper: Pull handle, slide seat, release Pull lever, adjust inclination and Lift lever and adjust body weight...
Need help?
Do you have a question about the Vivaro and is the answer not in the manual?
Questions and answers