Table of Contents
Advertisement
Advertisement
Table of Contents

Related Manuals for Canon Rebel T5i EOS 700D


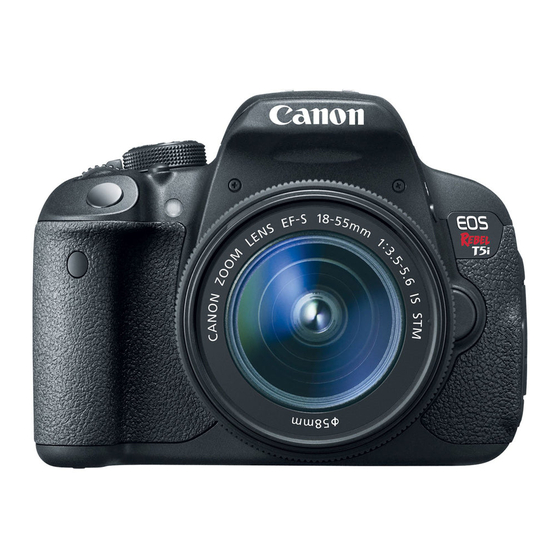
Summary of Contents for Canon Rebel T5i EOS 700D
-
Page 2: Introduction
After shooting, play images back and check whether they have been properly recorded. If the camera or memory card is faulty and the images cannot be recorded or downloaded to a computer, Canon cannot be held liable for any loss or inconvenience caused. -
Page 3: Item Check List
item Check List Before starting, check that all the following items have been included with your camera. If anything is missing, contact your dealer. Battery Pack Battery Charger Camera LP=E8 LC=ES/LC=ESE* (with eyecup and body cap) (with protective cover) _,========__ Interface Cable Wide Strap... -
Page 4: Conventions Used In This Manual
Conventions Used in this Manual icons in this Manual <_> indicates the Main Dial. <AT> <4_ > indicates the < ,;, > Cross keys. <_> indicates the Setting button. ¢4, ¢6, (_10, ¢16 indicates that the corresponding function remains active for 4 sec., 6 sec., 10 sec., or 16 sec. -
Page 5: Chapters
Chapters For first-time DSLR users, Chapters 1 and 2 explain the camera's basic operations and shooting procedures. introduction Ge.ing S_ed 27 E Basic S hooting and image P laybac. Creative Shooting Advanced Shooting Shooting with the LCD Monitor (Live View Shooting) 6 Shooting Movies 173 M .andy F eatures... -
Page 6: Contents At A Glance
Contents at a Glance ® Shoot automatically ,,_,,p.57 - 75 (BasicZone modes) ® Shoot continuously _ p.104 (O Continuous shooting) ® Take a pictureof yourself in a group ,,,_ p.106 (® Self-timer) _ Freeze the action ,,_,,p.ll 0 (Tv Shutter-priority AE) ®... - Page 7 M ake a large=size print of the picture _ po88 (JL, _IL, I_) ® Take many pictures _J_p.88 (iS1, ilS1, S2, S3) <_ Change the point of focus _,_,, p .100 ([] AF point selection) _ View the images on the camera _, p.84 (1_ Playback) ®...
-
Page 8: Index To Features
index to Features ® Battery ®image=recording quality _, p.88 • Charging ,,_#p.28 ® Picture Style _ p.95 • Installing/Removing _ p.30 ®White balance _ p.137 • Battery check _ p.35 ® Color space _ p.14f ® Power outmet _ p.306 ®... - Page 9 Index to Features ®Exposure compensation _ p.119 _z_ Image review time ,_;_p.204 ®AEB ,,,_ p.12! _# Single-image display ,_ p.84 _AE lock _,i_p.123 ®Shooting information display ,_ p.270 ®index display p.242 ®Built-in flash _ p.107 ®image browsing (Jump display) ,_o p.243 •...
-
Page 10: Table Of Contents
Contents Item Check List ................. Conventions Used in this Manual ............. Chapters ................... Contents at a Glance ................ Index to Features ................Handling Precautions ..............Quick Start Guide ................Nomenclature ................. Charging the Battery ..............Installing and Removing the Battery ..........Installing and Removing the Card .......... - Page 11 Contents ___ Fully Automatic Shooting (Scene Intelligent Auto) ....___ Full Auto Techniques (Scene Intelligent Auto) ......Disabling Flash ................. Creative Auto Shooting ............. _'_ Shooting Portraits ..............Shooting Landscapes ............... _ Shooting Close-ups .............._L, Shooting Moving Subjects ............SCN: Special Scene Mode .............
- Page 12 Contents Conveying the Subject's Movement ........Av : Changing the Depth of Field ..........Depth of Field Preview ..............Manual Exposure ..............[-_3 Changing the Metering Mode ..........Setting Exposure Compensation ........... Auto Exposure Bracketing (AEB) ..........-X- Locking the Exposure (AE Lock) ..........
- Page 13 Contents Shooting Movies ..............Autoexposure Shooting .............. Manual Exposure Shooting ............Shooting Still Photos ..............Shooting Function Settings ............Setting the Movie-recording Size ..........Shooting Video Snapshots ............Movie Menu Function Settings ............Handy Features ................Disabling the Beeper ..............Card Reminder ................
- Page 14 Contents Using Wireless Flash ..............Easy Wireless Flash Shooting ............Custom Wireless Flash Shooting ..........Other Settings ................Searching for Images Quickly ..........Magnified View .............._j Playing Back with the Touch Screen ........Rotating the Image ..............Setting Ratings ................
- Page 15 Contents Setting Custom Functions ............. Custom Function Settings ............. C.Fn I: Exposure ................ C.Fn I1: Image ................C.Fn II1: Autofocus/Drive ............C.Fn IV: Operation/Others ............Registering My Menu ..............Using a Household Power Outlet ..........Remote Control Shooting .............. External Speedlites ...............
- Page 16 If you have not used the camera for some time or if there is an important shoot such as a foreign trip coming up, have the camera checked by your Canon dealer or check the camera yourself and make sure it is working properly.
-
Page 17: Handling Precautions
Besides dust entering the camera from outside, in rare cases lubricant from the camera's internal parts may adhere to the front of the sensor. If visible spots still remain after the automatic sensor cleaning, having the sensor cleaned by a Canon Service Center is recommended. -
Page 18: Quick Start Guide
Quick Start Guide nsert the battery (p 30L To charge the battery, see page 28. insert a card (p.31). With the card's label facing toward the back of the camera, insert it into the card slot. Attach the lens (p.39). _Align the lens' white or red index with the camera's index in the matching color. - Page 19 Quick Start Guide Flip out the LCD monitor (p.33). When the LCD monitor displays the time zone and date/time setting screens, see page 36 Focus the subject (p.43). Look through the viewfinder and aim the viewfinder center over the subject. Press the shutter button halfway, and the camera will focus the subject.
-
Page 20: Nomenclature
Nomenclature The names in bold indicate the parts mentioned up until the "Basic Shooting and Image Playback" section. BuiItoin flash/AF-; irrdex (p,39) (p,107/101) Mode Dial Microphone (p. 174) Power switch Ftash-sync contacts <ISO> setting button (p92) <_> Main (p.39) _f-_°- _IoFt) ash button (p.43) -
Page 21: Product View And Buttons
Nomenclature Display off sensor (p.50, 217) -- Dioptric adjustment knob (p.42) <_> Live View shooting/ Movie shooting button (p. 146/174) Vie_inder eyepiece FE tock button/ Eyecup (p.308) Index/Reduce button (p. 123/124/242/244, 287) <INFO,> Info button -------------- <-)(-/ [] Q > A E lock/ (p.50, 84, 148, 179, 213 I/®,>... - Page 22 Nomenclature Shooting Settings (in Creative Zone modes, p.24) Shutter speed. Exposure level indicator. Main Dial pointer Exposure compensation Optimizer (p. 125) amount (p.119) Aperture AEB range (p 121) Picture Style (p.95) (p.299) exposure ONE SHOT compensation (p 120) One-Shot -=_ External flash AI FOCUS exposure compensation...
- Page 23 Nomenclature Viewfinder information Spot metering circte,_ Focusinc -'ISO> ISO speed White balance correction <-x t> Focaa AEB improgress confirmation light <_> Monochrome Improper FE lock warning shooting ISO speed <Ca > (FP flash) Highlight tone priority <€_> FEtock/FEBimprogress Exposure compensation amount <_>...
- Page 24 Nomenclature Mode Dial The Mode Dial includes the Basic Zone modes and Creative Zone modes. Creative Zone subject or scene. • Scene intelligent Auto (p.58) • Flash Off (p.63) • Creative Auto (p.64) _t_ • Portrait (p.67) • Landscape (p.68) •...
- Page 25 Nomenclature Lens Lens without a distance scale Focusing ring (p=103, 170) Hood ..Zoom position index (p.40) Focus mode switch (p.39) Filter thread (front of tens) (p.344) Zoom ring (p.40) ...._ Image Stabilizer switch (p.41) ntacts (p. 17) Lens mount index (p.39) Lens with a distance scale...
- Page 26 Nomenclature Battery Charger LC-E8 Charger for Battery Pack LP-E8 (p.28). Power plug Battery pack slot "°°°°°°° Charge lamp Full-charge lamp IMPORTANT SAFETY INSTRUCTIONS=SAVE THESE iNSTRUCTiONS. DANGER=TO REDUCE THE RISK OF FiRE OR ELECTRIC SHOCK, CAREFULLY FOLLOW THESE INSTRUCTIONS. For connection to a supply not in tile U.S.A., use an attachment plug adapter of the proper configuration for the power outlet, if needed.
- Page 27 Getting Started This chapter explains preparatory steps before you start shooting and basic camera operations. Attaching the Strap Pass the end of the strap through the camera's strap mount eyelet from the bottom. Then pass it through the strap's buckle as shown in the illustration.
-
Page 28: Charging
Charging the Battery Remove the protective cover. _ Detach the protective cover provided with the battery. Attach the battery. _ As shown in the illustration, attach the battery securely to the charger. _ To detach the battery, follow the above procedure in reverse. LC-E8 _;_ Recharge the battery. -
Page 29: Charging The Battery
®_ After disConneCting the charger,s power plug, de not tOUch the prongs for at ieast 3 Sec. Do not charge any battery other than a Battery Pack LP:E8. Battery Pack LP:E8 iS dedicated to Canon products only. Using !t wit h an incompatible battery charger or product may result !n rna!function or... -
Page 30: Installing And Removing The Battery
Installing and Removing the Battery Load a fully charged Battery Pack LP-E8 into the camera. instalJing the Battery Open the cover. @ Slide the lever as shown by the arrows and open the cover. insert the battery. @ Insert the end with the battery contacts. - Page 31 installing and Removing the Card The card (sold separately) can be an SD, SDHC, or SDXC memory card. SDHC and SDXC memory cards with UHSq can also be used. The captured images are recorded onto the card. Make sure the card's write-protect switch is set upward to enable writing/erasing.
-
Page 32: Installing And Removing The Card
Installing and Removing the Card Removing the Card Open the cover. ® Set the power switch to <OFF >. ® Make sure the access lamp is off, then open the cover. ® If [Recording...] is displayed, close the cover. Access lamp Remove the card. -
Page 33: Using The Lcd Monitor
Using the LCD Monitor After you flip out the LCD monitor, you can set menu functions, use Live View shooting, shoot movies, and play back images and movies. can change the direction and angle of the LCD monitor. Flip out the LCD monitor. Rotate the LCD monitor. -
Page 34: Turning On The Power
Turning on the Power if you turn on the power switch and the time zone and date/time setting screens appear, see page 36 to set the time zone and date/ time. <P_> : The camera turns on. You can shoot movies (p.173). <ON>... - Page 35 Turning on the Power Checking the Battery Level When the power is turned on, the battery level will be indicated in one of four levels. : Battery level is sufficient. : Battery level is low, but the camera can still be used. : Battery wiii be exhausted soon.
-
Page 36: Setting The Time Zone, Date And Time
Setting the Time Zone, Date and Time _ When you turn on the power for the first time or if the time zone and date/time have been reset, the Time zone and Date/Time setting screens will appear. Follow the steps below to set the time zone first. You can also set the time zone of your current address. - Page 37 Setting the Time Zone, Date and Time i_/_ Set the date and time. ® Press the <4_> key to select the date or time number. ® Press <_)> so <Q> is displayed. ® Press the <AT> key to set the number, then press <_)>.
-
Page 38: Selecting The Interface Language
Selecting the Interface Language isplay the menu screen. _ Press the <MENU> button to display the menu screen. Under the [_'2] tab, select [Language_]. _ Press the <_ > key to select the [_2] tab. _ Press the <AT> key to select [Language@'_] (the sixth item from the top), then press <_)>. -
Page 39: Attaching And Detaching A Lens
Attaching and Detaching a Lens The camera is compatible with all Canon EF lenses and EF-S lenses. The camera cannot be used with EF-M lenses. Remove the caps. ® Remove the rear lens cap and the body cap by turning them as shown by the arrows. -
Page 40: Format
Attaching and Detaching a Lens About Zooming To zoom, turn the zoom ring on the lens with your fingers. If you want to zoom, do it before focusing. Turning the zoom ring after achieving focus may throw off the focus. Detaching the Lens While pressing... -
Page 41: About The Lens Image Stabilizer
About the Lens image Stabilizer When you use the IS lens' built-in Image Stabilizer, camera shake corrected to obtain a sharper shot. The procedure explained here is based on the EF-S18-55mm f/3.5-5.6 IS STM lens as an example. * Is stands for Image Stabilizer. Set the iS switch to <ON>. -
Page 42: Basic Operation
Basic Operation Adjusting the Viewfinder Clarity Turn the dioptric adjustment knob. ® Turn the knob left or right until the nine AF points in the viewfinder look sharp. If the Camera's di0ptric adjustment Still Canno t proyide a Sharp viewfinder image, using E-sedes Dieptric Adjustment Lenses (10 types, so!d separate!y) is recommended. - Page 43 Basic Operation Shutter Button The shutter button has two steps. You can press the shutter button halfway. Then you can further press the shutter button completely. Pressing halfway This activates autofocusing and the automatic exposure system that sets the shutter speed and aperture. The exposure setting (shutter speed and aperture) is displayed in the viewfinder (¢4).
-
Page 44: Touch Screen
[_ Quick Control for Shooting Functions You can directly select and set the shooting functions displayed on the LCD monitor. This is called the Quick Control screen. Press the <[_> button. _y,, T he Quick Control screen will appear (61o). Set the desired function. -
Page 45: [] Quick Control For Shooting Functions
[] Quick Control for Shooting Functions Sarnple Quick Control Screen White balance correction (p.139) ........Aperture (p.112) Shutter speed (p.110) .._..- Highlight tone priority* (p.299) Shooting mode* (p.24) ..speed (p.92) AEB setting (p.119, 121) Picture compensation (p. 120) White balance (p. -
Page 46: Menu Operations
Menu Operations You can set various settings with the menus such as the image- recording quality, date/time, etc. While looking at the LCD monitor, use the <MENU> button, <,;_> cross keys, and <G> button on the back of the camera to operate the menus. <... - Page 47 Menu Operations MenuSettingProcedure Display the menu screen. _ Press the <MENU> button to display the menu screen. Select a tab. _ Press the <41_> key to select a menu tab. _ For example, the [_3] tab refers to the screen displayed when the (Shooting) tab's third dot [l_"'] from the lelt is selected.
-
Page 48: Formatting The Card
Formatting the Card if the card is new or was previously formatted by another camera or computer, format the card with the camera. When the card is formatted, all images and data in the card will be erased. Even protected images will be erased, so make sure there is nothing you need to keep. - Page 49 ITY_r_f8 Formatting the Card _.'-Execute [Format card] in the following cases: ® The card is new. ® The card was formatted by a different camera or a computer. ® The card is full with images or data. ® A card-related error is displayed (p.337).
- Page 50 Switching the LCD Monitor Display The LCD monitor can display the shooting settings screen, menu screen, captured images, etc. ShOoting Settings _ When you turn on the power, the shooting settings will be displayed. _ When your eye is near the viewfinder eyepiece, the display off sensor (p.21,217) will turn off the LCD...
-
Page 51: Switching The Lcd Monitor Display
Switching the LCD Monitor Display With [_2: LCD auto off], you can prevent the LCD monitor from turning off automatically (p.217). Even when the menu screen or captured image is displayed, pressing the shutter button will enable you to shoot immediately. rill If you wear sunglasses and look through the viewfinder eyepiece,... -
Page 52: Feature Guide
Feature Guide The Feature guide is a simple description of the respective function or option. It is displayed when you change the shooting mode or use the Quick Control screen to set a shooting function, in Live View shooting, movie shooting, or during playback. When you select a function or option on the Quick Control screen, the Feature guide description is displayed. - Page 53 Touch Screen Operations The LCD monitor is a touch-sensitive panel that you can operate with your fingers. Quick Control (Sample display) ® Use your finger to tap (touch and let go) the LCD monitor. ® By tapping, you can select menus, icons, etc., displayed on the LCD monitor.
- Page 54 Touch Screen Operations Drag Menu screen (Sample display) ® Slide your finger while touching the LCD monitor. Scale display (Sample display) Operations possible by dragging your finger on the screen ® Selecting a menu tab or item after pressing the <MENU> button ®...
-
Page 55: Touch Screen Operations
Touch Screen Operations Touch Control Settings Select [Touch control]. ® Under the [_3] tab, select [Touch control], then press <_)>. Set the Touch control. ® Select [Enable]. ® Setting it to [Disable] will disable touch operations. Cautions for Touch Screen Operations Since the LCD monitor is not pressure sensitive, do not use any sharp objects such as your fingernail,... - Page 57 Basic Shooting and image Playback This chapter explains how to use the Basic Zone modes on the Mode Dial for best results and how to play back images. With Basic Zone modes, all you do is point and shoot wNe the camera sets everything automatically (p.76,314).
- Page 58 FullyAutomaticShooting (SceneIntelligent Auto) _ <____>is a fully automatic mode. The camera analyzes the scene and sets the optimum settings automatically. It also adjusts focus automatically by detecting whether the subject is still or moving (p.61). Set the Mode Dial to <__3>........
- Page 59 Fully Automatic Shooting (Scene Intelligent Auto) Take the picture. _ Press the shutter button completely to take the picture. ;5*, T he captured image will be displayed for 2 sec. on the LCD monitor. _ After taking the picture, retract the built-in flash by pushing it down with your fingers.
- Page 60 Fully Automatic Shooting (Scene Intelligent Auto) ® The flash was raised even though it was daylight. For a backlit subject, the flash may pop up to help lighten the subject's dark areas. If you do not want the flash to fire, set it to Flash Off (p.63).
- Page 61 Full Auto Techniques (Scene Intelligent Auto) _ Recornposing the Shot Depending on the scene, position the subject toward the left or right to create a balanced background and good perspective. In the <____>mode, while you press the shutter button halfway to focus a still subject, the focus will be locked.
- Page 62 Full Auto Techniques (Scene Intelligent Auto) Live ViewShooting You can shoot while viewing the image on the LCD monitor. This is called "Live View shooting". For details, see page 145. Display the Live View image _ the LCD monitor. ® Press the <1_11>button. _y,, T he Live View image will appear on the LCD monitor.
-
Page 63: Disabling Flash
I_D Disabling Flash The camera analyzes the scene and sets the optimum settings automatically. In places where flash photography is prohibited, use the <_> (Flash Off) mode. This mode is also effective for capturing the particular ambience of a scene, such as candlelight scenes. "_.'-Shooting Tips ®_ Prevent camera shake if the numeric... -
Page 64: Creative Auto Shooting
Creative Auto Shooting in the <_> mode, you can easily change the depth of field, drive mode, and flash firing. You can also choose the ambience you want to convey in your images. The default settings are the same as the <____> mode. - Page 65 1_ Creative Auto Shooting Shutter Aperture ISO speed Battery check ....Possible shots Image-recording quality ......Pressing the <[_]> button enables you to set the following: (1) Ambience-based shots You can choose the ambience you want to convey in your images. Press the <...
- Page 66 I_ Creative Auto Shooting (3) Drive mode: Turn the <_> dial to set it as desired. You can also select it from a list by pressing < _)>. <El> Single shooting: Shoot one image at a time. <Djj> Continuous shooting: While you hold down the shutter button completely, shots will be taken continuously.
-
Page 67: '_ Shooting Portraits
_ Shooting Portraits The <_t_> (Portrait) mode blurs the background to make the human subject stand out. It also makes skin tones and the hair look softer. _.'- Shooting Tips ®_The further the distance between the subject and background, the better. The further the distance between the subject and background, more blurred the background will look. -
Page 68: Shooting Landscapes
Shooting Landscapes Use the <_ > (Landscape) mode for wide scenery or to have everything in focus from near to far. For vivid blues and greens, and very sharp and crisp images. ;;_ Shooting Tips ®_ With a zoom lens, use the wide-angle end. -
Page 69: Shooting Close-Ups
_ Shooting Close=ups When you want to photograph flowers or small things up close, use the <_> (Close-up) mode. To make small things appear much larger, use a macro lens (sold separately). Shooting Tips _ Use a simple background. A simple background makes the flower, etc., stand out better. -
Page 70: L, Shooting Moving Subjects
Shooting Moving Subjects To photograph a moving subject, whether it is a child running or a moving vehicle, use the <&_,> (Sports) mode. Shooting Tips _ Use a telephoto lens. Using a telephoto lens is recommended so you can shoot from afar. _ Use the center AF point to focus. -
Page 71: Scn: Special Scene Mode
SCN" Special Scene Mode Select "Night Portrait", "Handheld Night Scene", or "HDR Backlight Control" shooting mode. The camera sets everything to suit the selected shooting mode. Set the Mode Dial to <SCN>. Press the <[_> button. ((_10) _y,, The Quick Control screen will appear. Select the shooting mode. -
Page 72: [] Shooting Night Portraits (With A Tripod)
I_ Shooting Night Portraits (With a Tripod) To shoot people at night and obtain a natural-looking night scene in the background, use the <_> (Night Portrait) mode. Shooting Tips _ Use a wide-angle lens and a tripod. When using a zoom lens, use the wide-angle end to obtain a wide night view. -
Page 73: Shooting Night Scenes Handheld
g_ Shooting Night Scenes Handheld Normally, a tripod is necessary to steady your camera when shooting a night scene. However, with the <g_> (Handheld Night Scene) mode, you can shoot night scenes while handholding the camera. Four shots are taken continuously for each picture, and the resulting image with reduced camera shake is recorded. -
Page 74: :- Shooting Backlit Scenes
,_:- Shooting Backtit Scenes When shooting a scene having both bright and dark areas, use the <,_:- > (HDR Backlight Control) mode. When you take one picture in this mode, three continuous shots are taken at different exposures. This results in one image, with a wide tonal range, that has minimized the blocked-up shadows caused by backlighting. - Page 75 Caution for <_> (Night Portrait) and <[]> (Handheld Night Scene) During Live View shooting, it may be difficult to focus dots of light such as in a night scene. In such a case. you should set the AF method to [Quick mode] and shoot.
-
Page 76: [] Quick Control
_J Quick Control Example: Portrait mode In Basic Zone modes when the shooting settings screen is displayed, you can press the <[_] > button to display the Quick Control screen. The table below indicates the functions that can be set with the Quick Control screen in each Basic Zone mode. -
Page 77: Shoot By Ambience Selection
Shoot by Ambience Selection Except in the <____>,<[_[3>, and <,_:-> Basic Zone modes, you can select the ambience for shooting. _TD Standard setting setting Vivid Low/Standard / Strong ,TS Soft Low/Standard / Strong VW Warm Low/Standard / Strong Intense Low/Standard / Strong •"_C Cool Low/Standard... - Page 78 Shoot by Ambience Selection ® Press the <411_> key or turn the <_ > dial to select the desired ambience. S_.The LCD monitor will display how the image will look with the selected ambience. Set the ambience effect. ® Press the <AT > key to select the effect bar so that [Effect] appears at the bottom.
- Page 79 Shoot by Ambience Selection Ambience Settings r_tDStandard setting Standard image characteristics for the respective shooting mode. Note that <_t_> has image characteristics geared for portraits and <_,A> is geared for landscapes. Each ambience is a modification the respective shooting mode's image characteristics. V_/ Vivid The subject will look sharp and vivid.
- Page 80 Shoot by Ambience Selection ff'B Brighter The picture wiii look brighter. P'_) Darker The picture will look darker. Monochrome The picture will be monochrome. You can select the monochrome color to be black and white, sepia, or blue. When [Monochrome] selected, <B/W >...
-
Page 81: Display
Shoot by Lighting or Scene Type In the < _t_>, <_>, <_>, and <_,> Basic Zone modes, you can shoot wMe the settings match the lighting or scene type. Normally, E[_ Default setting] is adequate, but if the settings match the lighting condition or scene, the picture will look more accurate to your eye. - Page 82 Shoot by Lighting or Scene Type On the Quick Control screen, select the lighting or scene type. ® Press the <[_> button (GIO). ® Press the <AT> key to select [_ Default setting]. [Light/scene- based shots] will appear on the screen.
-
Page 83: Shoot By Lighting Or Scene Type
Shoot by Lighting or Scene Type Lighting or Scene Type Settings Default setting Default setting suited for most subjects. Daylight For subjects under sunlight. Gives more naturaMooking blue skies and greenery, and reproduces light-colored flowers better. Shade For subjects in the shade. Suitable for skin tones, which may look too bluish, and for light-colored flowers. -
Page 84: [] Image Playback
image Playback The easiest way to play back images is explained below. For more details on the playback procedure, see page 241. Play back the image. ® Press the <1_> button. _y,, T he last captured image or last image viewed wiii appear. - Page 85 Creative Shooting In Basic Zone modes, to prevent spoiled shots, advanced function settings cannot be changed. However, in the <P> (Program AE) mode, you can set various functions and be more creative. _ In the <P> mode, the camera sets the shutter speed and aperture automatically to obtain a standard exposure.
-
Page 86: P" Program Ae
P" Program The camera automatically sets the shutter speed and aperture to suit the subject's brightness. This is called Program AE. Set the Mode Dial to <P>. Focus the subject. _ Look through the viewfinder and aim the selected AF point over the subject. - Page 87 P: Program AE Shooting Tips _ Change the ISO speed or use the built-in flash. To match the subject and ambient lighting level, you can change the ISO speed (p.92) or use the built-in flash (p.107). In the <P> mode, the built-in flash will not fire automatically.
-
Page 88: Setting The Image-Recording Quality
Setting the image=Recording Quality You can select the pixel count and the image quality. Ten image- recording quality settings are provided: d L, _ L, d M, _ M, d £1, _$1, $2, $3, _+IL, Select [Image quality]. _ Under the [_1] tab, select [Image quality], then press <_)>. - Page 89 * Figures for the file size, number of possible shots, and maximum burst are based on Canon's 8 GB test card and testing standards (3:2 aspect ratio, ISO 100, and Standard Picture Style). These figures will vary depending on the subject, card brand, aspect ratio, ISO speed, Picture Style, Custom Functions, and other settings.
- Page 90 Setting the Image-Recording Quality _" ®_ i want to select the image-recording quality matching the paper size for printing. Refer to the diagram on the left when Paper size choosing the image-recording quality. If A2 (59.4x42cm/23.4x 16.5in.)1 you want to crop the image, selecting a higher quality (more pixels) such as a L, A3(42x29.7cm, _+dL,...
- Page 91 Setting the Image-Recording Quality About is the raw image data before it is made into 4 L or other images. Although images require software such as Digital Photo Professional (provided, p.364) so that they can be displayed on the computer, they also offer flexibility for image adjustments possible only with _.
-
Page 92: Changing Iso Speed
Changing the ISO Speed _ ISO: Set the ISO speed (image sensor's sensitivity to light) to suit the ambient light level. In Basic Zone modes, ISO speed is set automatically (p.93). Press the <ISO> button. (4_6) _y,, [ ISO speed] will appear. Set the ISO speed. -
Page 93: Iso: Changing The Iso Speed
ISO: Changing the ISO Speed* When you shoot at high ISO speeds, noise (such as dots of light and banding) may become noticeable. If you use a high ISO speed and flash to shoot a close subject, overexposure may result. With ISO 12800 or "H"... - Page 94 ISO: Changing the ISO Speed* ___/_/I]_/,_,/_/'_&! _/_:" iAutomatically set within ISO I00 - ISO 6400 _so loo i Automatica!ly set within ISO 100 - ISO 12800 P! Tv/Av/M i Automatically set within ISO 100 - ISO 6400 *2 With flash ISO 400 *3*4*5 "1 : Fixed at ISO 400 for bulb exposures.
- Page 95 _,_- Optimalimage Characteristicsfor the Subject_ By selecting a Picture Style, you can obtain image characteristics matching your photographic expression or the subject. In Basic Zone modes, you cannot select the Picture Style. Press the < _' ,_._ > button. _y,, [Picture Style] will appear. Select a Picture Style.
- Page 96 _;,_ Optimal ImageCharacteristicsfor the Subject_ Landscape For vivid blues and greens, and very sharp and crisp images. Effective for impressive landscapes. Neutral This Picture Style is for users who prefer to process images with their computer. For natural colors and subdued images. Faithful This Picture Style is for users who prefer to process images with their computer.
- Page 97 Changing the Autofocus Operation You can select the AF (autofocus) operation characteristics suiting the shooting conditions or subject. In Basic Zone modes, the optimum AF operation is set automatically for the respective shooting mode. On the lens, set the focus mode switch to <AF>.
-
Page 98: Af: Changing The Autofocus Operation (Af Operation)
AF: Changing the Autofocus Operation* One-Shot AF for Still Subjects Suited for still subjects. When you press the shutter button halfway, the camera will focus only once. ® When focus is achieved, the dot inside the AF point achieving focus lights up briefly in red, and the focus confirmation light <O>... - Page 99 AF: Changing the Autofocus Operation* AI Focus AF for Automatic Switching of AF Operation AI Focus AF switches the AF operation from One-Shot AF to AI Servo AF automatically if a still subject starts moving. @ After the subject is focused in One-Shot AF operation, if the subject starts moving, the camera wHI detect the movement, change the AF operation automatically...
-
Page 100: E_ Selecting The Af Point
Selecting the AF Point _ In Basic Zone modes, the camera wiii normally focus the closest subject automatically. Therefore, it may not always focus your target subject. in the <P>, <Tv>, <Av>, and <M> modes, you can select the AF point and use it to focus the target subject. - Page 101 Selecting the AF Point* Shooting Tips ®_When shooting a portrait up close, use One-Shot AF and focus the eyes. If you focus the eyes first, you can then recompose and the face will remain sharp. ®; If it is difficult to focus, select and use the center AF point.
- Page 102 Selecting the AF Point* AF operation and Maximum Lens Apertures With maximum apertures up to f/5.6: Cross-type focusing (vertical and horizontal lines detected simultaneously) is possible with all AF points. With certain lenses (see below), the off-center AF points will detect only vertical or horizontal lines (no cross-type focusing).
-
Page 103: Subjects Difficult To Focus
Subjects Difficult to Focus Autofocus can fail to achieve focus (viewfinder's focus confirmation light <O> blinks) with certain subjects such as the following: ® Very low-contrast subjects (Example: Blue sky, solid-color walls, etc.) ® Subjects in very low light ® Extremely backlit or reflective subjects (Example: Car with a highly reflective body, etc.) ®... -
Page 104: D_J Continuous Shooting
Continuous Shooting You can shoot up to approx. 5 shots per second. This is effective for shooting a child running toward you or capturing different facial expressions. Press the < 4 _ _® > button. Select <-_>. _ Press the <_> key or turn the <_>... - Page 105 @JContinuous Shooting The maximum continuous shooting speed 3f approx. 5 shots per second is achieved* with a shutter speed of 1/500 sec. or faster and at the maximum aperture (differs depending on the lens). The continuous shooting speed may decrease due to shutter speed, aperture, subject conditions, brightness,...
-
Page 106: Using The Self-Timer
Using the Self=timer Press the <_Dj_ _®> button. elect the self=timer. _ Press the <_> key or turn the <_ > dial to select the self-timer, then press <_)>. _®: lO-sec, self-timer Theremote c ontroller canalsobeused(p.307). _.32: 2-sec. self4imer (p.142) lO-sec, self-timer plus continuous... - Page 107 Using the Built=in Flash In indoors, low light, or backlit conditions in daylight, just raise the built- in flash and press the shutter button to take flash pictures. In the <P> mode, the shutter speed (1/60 sec. - 1/200 sec.) will be set automatically to prevent camera shake.
- Page 108 Using the Built-in Flash -_;_ Shooting Tips ® If the subject is far away, increase the ISO speed (p.92). By increasing the ISO speed, you can extend the flash range. ® In bright light, decrease the ISO speed. If the exposure setting in the viewfinder blinks, decrease the ISO speed. ®...
- Page 109 Advanced Shooting This chapter builds on Chapter 3 and introduces more ways to shoot creatively. _ The first half of this chapter explains how to use the <Tv >, <Av>, and <M> modes on the Mode Dial. _ All the functions explained in Chapter 3 can also be used in the <Tv>, <Av>, and <M>...
- Page 110 Tv" Conveying the Subject's Movement You can either freeze the action or create motion blur with the <Tv> (Shutter-priority AE) mode on the Mode Dial. * < Tv> stands for Time value. Blurred motion Frozen action (Slow shutter speed: 1/30 sec.) (Fast shutter speed: 1/2000 sec.) Set the Mode Dial to <Tv>.
-
Page 111: . Using The Built-In Flash
Conveying the Subject's Movement shooting Tips ®_To freeze the motion of a fast-moving subject Use a fast shutter speed such as 1/4000 sec. to 1/500 sec. _ To blur a running child or animal and convey an impression motion Use a medium shutter speed such as 1/250 sec. to 1/30 sec. Follow the moving subject through the viewfinder and press the shutter button to take the picture. - Page 112 Av" Changing the Depth of Field To blur the background or to make everything near and far look sharp, set the Mode Dial to <Av> (Aperture-priority AE) to adjust the depth of field (range of acceptable focus). * < Av > standsfor Aperturevalue,whichis the sizeof thediaphragmhole insidethe tens. Blurred background Sharp foreground and background...
- Page 113 Changing the Depth of Field Shooting Tips ®_When using an aperture with a high f/number or shooting in low light scenes, note that camera shake can occur. A higher aperture f/number will make the shutter speed slower. Under low light, the shutter speed can be as long as 30 sec. In such cases, increase the ISO speed and hold the camera steady or use a tripod.
- Page 114 AM : Changing the Depth of Field Using the Built'in Flash To obtain a correct flash exposure, the flash output will be set automatically to match the set aperture (autoflash exposure). The shutter speed wiii be set automatically between 1/200 sec. - 30 sec. to suit the scene's brightness.
- Page 115 M" Manual Exposure You can set both the shutter speed and aperture manually as desired. While referring to the exposure level indicator in the viewfinder, you can set the exposure as desired. This method is called manual exposure. * <M> stands for Manual. Set the Mode Dial to <M>.
- Page 116 M: Manual Exposure In [1_!2: Auto Lighting Optimizer], if the CheCkmark <_/> fo[ [Disable during man expo] is removed, it can be set in the <M> mode (p.125)_ _ When IS0 Auto is set, YOUcan press the < _ > button to lock the ISO speed, _ After recompos ng the p cturel you Can see the exposure eve d fference on the exposure leve! indicator (p.22, 23) compared to when you pressed...
-
Page 117: Changing Metering Mode
E_3Changing the Metering Mode _ Four methods (metering modes) to measure the subject's brightness are provided. Normally, evaluative metering is recommended. In Basic Zone modes, evaluative metering is set automatically. Select [Metering mode]. _ Under the [It'_2] tab, select [Metering mode], then press <_)>. - Page 118 E_3Changing the Metering Mode* C_] Center-weighted average metering The brightness is metered at the image center and then averaged for the entire scene. This metering mode is for advanced users. Metering Range During Live View Shooting ®_ With E_3(evaluative metering) and E3 (center-weighted average metering), the metering range is almost the same as with viewfinder shooting.
-
Page 119: Setting Exposure Compensation
Setting Exposure Compensation AvP_ Setting Exposure Compensation Set exposure compensation if the exposure (without flash) does not come out as desired. This feature can be used in Creative Zone modes (except <M>). You can set the exposure compensation up to +5 stops in 1/3-stop increments. Making it brighter: Hold down the <Av[]>... - Page 120 Setting Exposure Compensation* Flash Exposure Compensation Set flash exposure compensation if the flash exposure of the subject does not come out as desired. You can set the exposure compensation up to _+2stops in 1/3-stop increments. Press the <[_}> button. (GIO) _y,, T he Quick Control screen will appear (p.44).
-
Page 121: Auto Exposure Bracketing
Auto Exposure Bracketing This feature takes exposure compensation a step further by varying the exposure automatically (up to _+2stops in 1/3-stop increments) with three shots as shown below. You can then choose the best exposure. This is ca[led AEB (Auto Exposure Bracketing). Standard exposure Darker exposure Brighter exposure... - Page 122 Auto Exposure Bracketing* Canceling ® Follow steps 1 and 2 to turn off the AEB level display. ® The AEB setting will also be canceled automatically if the power switch is set to <OFF>, flash recycling is completed, etc. _;_ Shooting Tips ®...
- Page 123 =X = Locking the Exposure You can lock the exposure when the area of focus is to be different from the exposure metering area or when you want to take multiple shots at the same exposure setting. Press the <--X= > button to lock the exposure, then recompose and take the shot.
-
Page 124: Settings
FE lock. After setting the proper flash exposure for the subject, you can recompose (put the subject toward the side) and shoot. This feature can also be used with a Canon EX-series Speedlite. * FE stands for Flash Exposure. -
Page 125: Settings
Auto Correctionof Brightness and Contrast_ _ if the image comes out dark or the contrast is low, the brightness contrast can be corrected automatically. This function is called Auto Lighting Optimizer. default setting is [Standard]. With JPEG images, the correction is done when the image... -
Page 126: Settings
Noise Reduction Settings _ High ISO Speed Noise Reduction This function reduces the noise generated in the image. Although noise reduction is applied at all ISO speeds, it is particularly effective at high ISO speeds. At low ISO speeds, the noise in the darker parts of the image (shadow areas) is further reduced. -
Page 127: Shooting
Noise Reduction Settings "_ About [MuJti Shot Noise Reduction] The following functions cannot be set: AEB. WB bracketing, [11_3: Long exp. noise reduction], Ift_ + d L/IT_/_. if any of these has already been set, [Multi Shot Noise Reduction] cannot be set. Flash shooting is not possible. -
Page 128: Settings
Noise Reduction Settings* Set the setting. ++ Select the desired setting, then press <(_>. _y,,The setting screen closes and the menu will reappear. ®+ [Auto] For 1 sec. or longer exposures, noise reduction is performed automatically if noise typical of long exposures is detected. This [Auto] setting is effective in most cases. - Page 129 Lens P eripheral llluminati0n / Chromatic Aberration Correction _ Peripheral light faIFoff is a phenomenon that makes the image corners look darker due to the lens characteristics. Color fringing along subject outlines is another chromatic aberration. Both lens aberrations can be corrected.
- Page 130 Lens Peripheral Illumination / Chromatic Aberration Correction Chromatic Aberration Correction elect the setting. ® Check that [Correction data available] is displayed for the attached lens. ® Select [Chromatic aberration], then press <0>. ® Select [Enable], then press <_)>. ® If [Correction data not available] displayed, see "About the Lens Correction Data"...
-
Page 131: Size
Aberration Correction Peripheral illumination correction and chromatic aberration correction cannot be applied to JPEG images already taken When using a non-Canon lens, setting the corrections to [Disable] recommended, even if [Correction data avaikabme] is displayed, If you use the magnified view during Live View shooting, the peripheral... -
Page 132: Images
The lenses and accessories mentioned in this Instruction Manual are current as of I January 2013. For information on the camera's compatibility with any lenses and [accessories introduced after this date, contact any Canon Service Center. CPH-E063-000 © CANON INC. 2013...
Need help?
Do you have a question about the Rebel T5i EOS 700D and is the answer not in the manual?
Questions and answers