Table of Contents
Advertisement
Quick Links
PLEASE READ
This manual is provided as a free service
by Projector.com.
We are in no way responsible for the
contents of the manual. We do not guarantee
its accuracy and we do not make any claim
of copyright. The copyright remains the
property of their respective owners.
ABOUT PROJECTOR.COM
Projector.com (http://www.projector.com) is
your review and buying guide resource for
DLP and LCD video projectors.
Visit the site to read the latest projector
news and reviews, read and comment on
projector specifications, download user
manuals and much more.
Advertisement
Table of Contents

Related Manuals for 3M Multimedia Projector MP8650


Summary of Contents for 3M Multimedia Projector MP8650
- Page 1 PLEASE READ This manual is provided as a free service by Projector.com. We are in no way responsible for the contents of the manual. We do not guarantee its accuracy and we do not make any claim of copyright. The copyright remains the property of their respective owners.
- Page 2 MP8650 Multimedia Projector Operator’s Guide MP8650 Appareil de projection multimédia Guide de l’opérateur MP8650 Multimedia-Projektor Bedienerhandbuch Portatil Multimedia MP8650 Manual del usuario MP8650 Projettore multimedia Manuale dell’operatore MP8650 Multimediaprojektor Brukerhåndbok MP8650 Multimedia Projector Gebruiksaanwÿzing...
- Page 3 United States and Canada, 7:30 a.m. to 5:30 p.m. (CST). Or visit our Internet Web site. 3M Austin Center 3M Canada 3M Mexico, S.A. de C.V. 3M Europe Building A145-5N-01 P.O. Box 5757 Apartado Postal 14-139 Boulevard de l’Oise...
-
Page 4: Table Of Contents
..............3M 1997 3M Multimedia Projector MP8650... - Page 5 ..........A–1 3M 1997 3M Multimedia Projector MP8650...
-
Page 6: Intended Use
14. Keep ventilation openings free of any obstructions. 15. Always remove the lens cap when the projection lamp is on. SAVE THESE INSTRUCTIONS The information contained in this manual will help you operate and maintain your 3M MP8650 Multimedia Projector. 3M 1997... -
Page 7: Thank You For Choosing 3M
Proof of purchase date will be required with any warranty claim. In the event this product is found to be defective within the warranty period, 3M’s only obligation and your exclusive remedy shall be replacement of any defective parts (labor included). -
Page 8: Section 1: Unpack
Section 10 to order. 1-3. Keep Your Packing Materials Save the shipping box and packing materials in the event the MP8650 should require shipping to a 3M Service Center for repair. The zoom lens should be completely retracted before shipping this product. -
Page 9: Section 2: Product Description
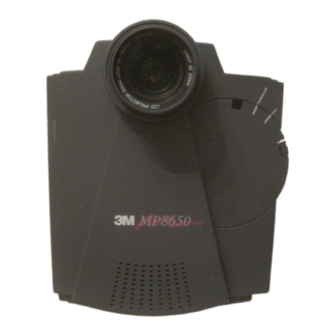
Section 2: Product Description 2-1. Machine Characteristics The 3M Multimedia Projector MP8650 integrates metal halide lamp and dichroic optics display technology into a single unit. It accepts input from two different computer sources and two video/audio sources and projects a bright super crisp image. -
Page 10: Section 3: Set Up
Section 3: Set Up 3-1. Cable Connections It only takes a few minutes to connect the 3M Multimedia Projector MP8650 to your computer, VCR or other video device (Figure 3-1). Desktop or Laptop Sound System Laptop or Desktop Laserdisc or VCR... - Page 11 Connect other end of adapter to the projector color) adapator. monitor out port or connect VGA cable to Connect monitor cable to the gender changer. adapter and the RGB out port on projector. Turn power on. 3M 1997 3M Multimedia Projector MP8650...
- Page 12 Figure 3-7. 3-Conductor Video/Audio Input Cable If you are giving a multimedia presentation with stereo sound, you may want to consider connecting the MP8650 audio-out L/R jacks to a high-quality stereo system. 3M 1997 3M Multimedia Projector MP8650...
- Page 13 MP8650 remote control transmitter to operate the computer mouse button functions. After the mouse receiver is connected to the mouse port, connect the mouse cable to the mouse receiver plug. Mouse Port Mouse Cable Figure 3-9. Apple Macintosh Mouse Receiver 3M 1997 3M Multimedia Projector MP8650...
-
Page 14: Projector Set Up
MP8650 from the ceiling. For this type of installation, the image must be inverted. Refer to section 4-6 Inverting the Image for more details. See section 10-1 to order the ceiling mount kit. Figure 3-11. Optional Ceiling Bracket 3M 1997 3M Multimedia Projector MP8650... -
Page 15: Now What
20% below the Side center of the lens. Figure 3-13. Rear Projection Viewing 3-3. Now What? Your MP8650 is now connected and ready to power on. Turn to Section 4 for details on operating the projector. 3M 1997 3M Multimedia Projector MP8650... -
Page 16: Section 4: Operating The Projector
(RGB1, RGB2, Video1 or Video2) will display in the upper right corner. Figure 4-2. Indicator Lamps Press INPUT again or press the arrow (remote control) to select the next input source. 3M 1997 3M Multimedia Projector MP8650... -
Page 17: Adjusting Image Size And Focus
MENU three times to display Memory 3. (See Figure 4-3). If STANDARD displays instead of the Memory 1 screen, press the MENU button again. Memory 1 Memory 2 Memory 3 Figure 4-3. Memory Screen Figure 4-4. Picture Adjustments 3M 1997 3M Multimedia Projector MP8650... -
Page 18: Memory Function
Note For video input, only the horizontal position can be adjusted. 4-8. Video System The MP8650 has an automatic video detection function that will select the correct video system for NTSC, PAL or SECAM. 3M 1997 3M Multimedia Projector MP8650... -
Page 19: Setting Apple Macintosh Monitor Mode (Windowed Or Compressed)
Wait until the cooling fan motor cycles off before you press the Power Off switch (Figure 3-2). Note Switching the power off before the fan has cycled off, will decrease the life of the projection lamp. 3M 1997 3M Multimedia Projector MP8650... -
Page 20: Section 5: Remote Control
Press ZOOM and the LED will begin to flash. Press to increase Figure 5-1. Remote Control ZOOM to decrease the size of the screen image. Press to display the focus pattern. Press to increase or FOCUS decrease the sharpness of the screen image. 3M 1997 3M Multimedia Projector MP8650... - Page 21 (Figure 5-4). Slide the door open to access the batteries. Make sure the polarity (+/–) on each battery matches the decal in the battery compartment. Figure 5-4. Replacing the Batteries 3M 1997 3M Multimedia Projector MP8650...
-
Page 22: Section 6: Lamp Information
Appendix for instructions) technician. Contact your nearest Service Repair Center or the Technical Assistance Center at: In U.S. or Canada: 1-800-328-1371 In other locations, contact your local 3M Sales office. 3M 1997 3M Multimedia Projector MP8650... -
Page 23: Section 7: Maintenance
Daily Cleaning Use a soft cloth to remove dust from the projector housing. Cleaning the Projection Lens Use 3M Overhead Cleaner 676 to remove surface dirt and smudges from the projection lens (Figure 7-1) . Cleaning the Air Filter Figure 7-1. Cleaning the Lens For best performance, clean the air filter every 50 hours of operations. -
Page 24: Section 8: Troubleshooting
8-1. Service Information For product information, product assistance, service information, or to order accessories, please call: In U.S. or Canada: 1-800-328-1371 In other locations, contact your local 3M Sales office. 3M 1997 3M Multimedia Projector MP8650... -
Page 25: Section 9: Technical Specifications
Chrominance Luminance Signal Signal Ground Ground Figure 9-1. S-Video Input (Mini DIN4-pin) Video input signal terminals are detected by the MP8650 in the following order of priority: S-video input terminal RCA jack input terminal 3M 1997 3M Multimedia Projector MP8650... -
Page 26: Projector-To-Screen Distances
(11.06 in.) 35.6 cm (13.33 in.) 25.6 cm 4.9 cm (10.08 in.) (1.9 in.) 11 cm 13.2 cm (4.29 in.) (5.1 in.) 65.5 cm 54.5 cm (25.8 in.) (21.46 in.) Figure 9-2. Physical Dimensions 3M 1997 3M Multimedia Projector MP8650... -
Page 27: Computer Video (Rgb) Input Terminal
6/– VESA 60Hz 1024 x 768 56.476 70.069 75.000 136/– 6/– VESA 70Hz * The synchronization signal widths represent the number of dots (horizontal) and the number of lines (vertical). ** Compressed mode only. 3M 1997 3M Multimedia Projector MP8650... -
Page 28: Appendix: Technical Information
Appendix: Technical Information A–1. MP8650 Lamp Replacement (110V machines only) To replace the lamp on the 3M MP8650 Multimedia Projector, you will need the following: 2.5 mm hex wrench (shipped with lamp module) Metal halide lamp 78-6969-8306-9 or 78-6969-8422-4 WARNING There are high voltage parts inside the cabinet that could cause an electric shock. - Page 29 D00W00 Power On D00W01 Power Off Read Codes Returns: D00R 00 – Standby 01 – Power on but no lamp 02 – Power on and lamp 03 – Power off but fan running 3M 1997 A–2 3M Multimedia Projector MP8650...
- Page 30 00 to 14 hex Contrast Write Codes D12W00 to D12W14 Set contrast level to a value between 00 and 14 hex. This corresponds to 20 possible settings. Read Codes Returns: D12R 00 to 14 hex 3M 1997 A–3 3M Multimedia Projector MP8650...
- Page 31 Reset phase to default Read Codes Returns: D34R 00 to 7F Timer Reset Write Codes D60W00 Reset the accumulated operating time to 0 Read Codes Returns: D60R 0000 to 9999 decimal value of operating hours 3M 1997 A–4 3M Multimedia Projector MP8650...
- Page 32 01 – on–screen display is enabled DIN 8 (Projector ) DSUB 9 (Computer) DIN8 Connector 1 RTS 2 CTS 2 RD 3 TD 3 TD 4 GND 5 RD 5 GND 7 RTS 8 CTS 3M 1997 A–5 3M Multimedia Projector MP8650...
- Page 33 (Blank Page) 3M 1997 A–6 3M Multimedia Projector MP8650...
- Page 34 PLEASE READ This manual is provided as a free service by Projector.com. We are in no way responsible for the contents of the manual. We do not guarantee its accuracy and we do not make any claim of copyright. The copyright remains the property of their respective owners.
Need help?
Do you have a question about the Multimedia Projector MP8650 and is the answer not in the manual?
Questions and answers