Table of Contents
Advertisement
Advertisement
Table of Contents

Related Manuals for Samsung MC17F808KDT/AA


Summary of Contents for Samsung MC17F808KDT/AA
-
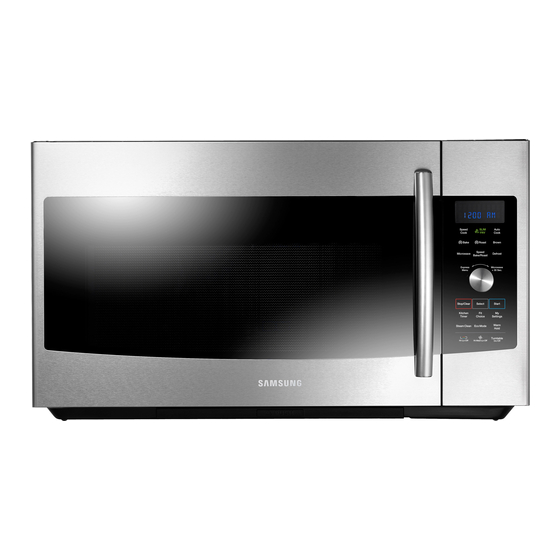
Page 1: Microwave Oven
MC17F808KDT Microwave Oven user manual This manual is made with 100 % recycled paper. imagine the possibilities Thank you for purchasing this Samsung product. Please register your product at www.samsung.com/register 1-800-SAMSUNG (726-7864) MC17F808KDT_AA_DE68-04224A_EN.indd 1 2013-07-11 11:04:46... -
Page 2: Safety Information
Congratulations on your new Samsung microwave oven. This manual contains important information on the installation, use and care of your appliance. Please take time to read this manual to take full advantage of your microwave oven’s many benefits and features. -
Page 3: Important Safety Instructions
IMPORTANT SAFETY SYMBOLS AND PRECAUTIONS What the icons and signs in this user manual mean: Hazards or unsafe practices that may result in severe personal injury or death. WARNING Hazards or unsafe practices that may result in minor personal injury or property damage. - Page 4 7. As with any appliance, close supervision is necessary when it is used by children. Keep children away from the door when opening or closing it as they may bump themselves on the door or catch their fingers in the door. 8.
-
Page 5: Grounding Instructions
CAUTION CAUTION 1. Clean Ventilating Hoods Frequently - Grease should not be allowed to accumulate on the hood of the filter. 2. When flaming foods under the hood, turn the fan on. 3. Use care when cleaning the vent-hood filter. Corrosive cleaning agents, such as lye- based oven cleaner, may damage the filter. - Page 6 any damage such as dents on the interior or exterior of the oven, broken door latches, cracks in the door, or a door that is not lined up correctly. If there is any damage, do not operate the oven and notify your dealer immediately. Make sure to install your oven in a location with adequate space.
- Page 7 - This may result in electric shock or fire. Do not pull the power cord when you unplug the oven. - Unplug the oven by pulling the plug only. - Failing to do so may result in electric shock or fire. When the power plug or power cord is damaged, contact your nearest service center for a replacement or repair.
- Page 8 - Always observe Safety Precautions when using your oven. Never try to repair the oven on your own. There is dangerous voltage inside. If the oven needs to be repaired, contact an authorized service center near you. Do not attempt to repair, disassemble, or modify the appliance yourself. - Because a high voltage current enters the product chassis during operation, opening the chassis can result in electric shock or fire.
- Page 9 USAGE CAUTIONS CAUTION If the surface of the microwave is cracked, turn it off. - Failing to do so may result in electric shock. Dishes and containers can become hot. Handle with care. Hot foods and steam can cause burns. Carefully remove container coverings, directing steam away from your hands and face.
- Page 10 Do not cook without the glass tray in place on the oven floor. Food will not cook properly without the tray. Do not defrost frozen beverages in narrow-necked bottles. The containers can break. Do not scratch the glass of the oven door with a sharp object. - This may result in the glass being damaged or broken.
-
Page 11: Table Of Contents
Using the defrost button . . . . . . . . . . . . . . . . 19 Samsung over-the-range (OTR) microwave Accessory usage . -
Page 12: Setting Up Your New Microwave Oven
Carefully unpack your microwave oven, and make sure you’ve received all the parts shown below. If your microwave oven was damaged during shipping, or if you do not have all the parts, contact Samsung Customer Service. (Refer to the “WARRANTY AND SERVICE INFORMATION” on page 45.) -
Page 13: Setting Up Your Microwave Oven
SETTING UP YOUR MICROWAVE OVEN 1. Open the door by pulling the handle on the right side of the door. 2. Wipe the inside of the oven with a damp cloth. damp cloth 3. Install the pre-assembled ring into the indentation at the center of the microwave oven. -
Page 14: Checking The Control Panel
CHECKING THE CONTROL PANEL Slim Fry (page 20) Speed Cook (page 24) Auto Cook (page 28) Roast (page 35) Bake (page 35) Brown (page 35) Speed Bake/Roast (page 35 Microwave (page 34) Defrost (page 19) Express Menu Microwave +30 Sec. (page 17) (page 33) Knob Dial... -
Page 15: Turning On The Power And Setting The Clock
TURNING ON THE POWER AND SETTING THE CLOCK 1. The first time you plug in the power chord, the display shows : SET HOUR 2. Using the knob dial, dial the hour, and then press the Select button. The display shows : SET MIN 3. -
Page 16: Selecting The Sound
SELECTING THE SOUND 1. Press the My Settings button, dial 3-SOUND, and then press the Select button. The display shows : SOUND 2. Dial On or Off. 3. Press the Select button. SETTING THE WORD SPEED 1. Press the My Settings button, dial 4-SCROLL, and then press the Select button. The display shows : SCROLL 2. -
Page 17: Using Your Microwave Oven
using your microwave oven USING THE KITCHEN TIMER 1. Press the Kitchen Timer button. (max. time 90 min.) The display shows: SET MIN 2. Use the dial to set the number of minutes you want the timer to run. 3. Press the Select button. The display shows: SET SEC 4. -
Page 18: Eco Mode
ECO MODE Eco Mode reduces standby power usage. When you press the ECO MODE button once, the display will go out and the microwave shifts to the mode which minimizes power usage. To cancel the ECO MODE, press the ECO MODE button once again, or press any other button. WARM HOLD You can keep cooked food warm in your microwave oven for up to 90 minutes. -
Page 19: Using The Defrost Button
USING THE DEFROST BUTTON Remove all packaging material before defrosting. Place meat, poultry, fish, bread, etc. on a ceramic plate. General defrosting instructions: 1. Place the food on the turntable (glass tray). 2. Press the Defrost button. 3. Dial the Food you want to defrost, and then press the Select button. 4. -
Page 20: Using The Slim Fry Button
USING THE SLIM FRY BUTTON The Slim Fry menu contains pre-set cooking programs for 9 different items. 1. Place the food on the tray or the rack. (See Accessory Usage on page 19 and 20) 2. Press the Slim Fry button. 3. -
Page 21: Using The Fit Choice Button
USING THE FIT CHOICE BUTTON The Fit Choice menu contains pre-set cooking programs for 30 different items. 1. Place the food on the tray or the rack. (See Accessory Usage on page 19 and 20) 2. Press the Fit Choice button. 3. - Page 22 Cook Accessory CATEGORY FOOD Amount Directions Type 1 serving Place the green beans in a 2 servings microwave safe bowl. Add 1-4 GREEN 3 servings tablespoons of water (1 Tbsp per BEANS 4 servings serving). Cover during cooking and (1 serving = ½ cup) stir afterwards.
- Page 23 Cook Accessory CATEGORY FOOD Amount Directions Type Follow the package directions for 2 servings the recommended amount of water BULGUR 4 servings needed. Stir well before and fluff with (1 serving = ½ cup) a fork afterwards. Follow the package directions for WHOLE 2 servings the recommended amount of water...
-
Page 24: Using The Speed Cook Button
Cook Accessory CATEGORY FOOD Amount Directions Type 1 serving (2 pieces, 4 oz.) Spray the high rack with a non-stick TILAPIA 2 servings spray. Place the tilapia fillets on the FILLET (4 pieces, 8 oz.) high rack, then place the rack on the (1 servings = 2 pcs, ceramic enamel tray. - Page 25 Cook Accessory CATEGORY FOOD Amount Directions Type Place the toaster item on the high 2 servings rack, then place the rack on the TOASTER 4 servings ceramic enamel tray. Turn over the ITEMS (1 serving = 1 Toast) items when the microwave beeps and restart the microwave.
- Page 26 Cook Accessory CATEGORY FOOD Amount Directions Type Place the roast on the low rack, then place the rack on the ceramic BEEF 2 lbs (0.91kg) enamel tray. When the microwave ROAST 3 lbs (1.36kg) beeps, turn over the roast and restart the microwave.
- Page 27 Cook Accessory CATEGORY FOOD Amount Directions Type Place the pork chops on the high 1 Servings BONE-IN rack, then place the rack on the 2 servings PORK ceramic enamel tray. When the (1 serving = 6-8oz. CHOPS microwave beeps, turn over the pork each) chops and restart the microwave.
-
Page 28: Using The Auto Cook Button
Cook Accessory CATEGORY FOOD Amount Directions Type 2 servings (10 ea.) Place the chicken wings on the low CHICKEN 4 servings (20 ea.) rack, then place the rack on the WINGS (5 wings per ceramic enamel tray. serving) 2 servings Place the chicken on the ceramic FRIED 4 servings... - Page 29 Cook Accessory CATEGORY FOOD Amount Directions Type Place the refrigerated pasta on a 1 to 4 servings microwave safe plate or bowl. Cover PASTA (8 oz./serving) with a lid or vented plastic wrap. Stir well before serving. Place the refrigerated casserole on a 1 to 4 servings microwave safe plate or bowl.
- Page 30 Cook Accessory CATEGORY FOOD Amount Directions Type Arrange the nuggets in an evenly 1 serving spaced circle on top of a paper towel CHICKEN 2 servings. on a microwave safe plate. Do not NUGGETS (1 serving = 5 ea.) cover. Let stand 1 minute before serving.
- Page 31 Cook Accessory CATEGORY FOOD Amount Directions Type Preheat the microwave to 350 °F. Pour A + D the batter into 2- 8 inch microwave (Except safe round cake pans. Place one filled 1 package Ceramic CAKE MIX pan on the middle rack then place the enamel second batter filled pan on the low tray)
- Page 32 Cook Accessory CATEGORY FOOD Amount Directions Type Preheat the microwave to 425 2 serving (10 ea.) POTATO °F. Place the potato bites on the 4 servings (20 ea.) BITES ceramic enamel tray, then place the (1 serving = 5 ea.) tray on the low rack.
-
Page 33: Using The Express Menu Feature
USING THE EXPRESS MENU FEATURE This feature offers a convenient way to heat food that you cook frequently. 1. Place the food on the turntable (glass tray). 2. Dial in the Express Menu direction (counterclockwise). 3. Dial to the food you want to cook. 4. -
Page 34: Power Levels
USING THE MICROWAVE SETTING COOKING TIMES & POWER LEVELS Your microwave allows you to set up to two different cooking stages, each with its own time length and power level. The power level lets you control the heating intensity from Warm to High. Power Levels The 10 power levels allow you to choose the optimal power level for your cooking needs. -
Page 35: Brown
BROWN Browning adds texture and taste to your recipe. When browning, use the middle or high rack accessories. Use the middle rack when the height of food is so high that the food could touch the upper heater. 1. Press the Brown button. The display shows SET TIME. 2. -
Page 36: Speed Bake/Roast Guide
SPEED BAKE/ROAST GUIDE Use the cooking mode, power levels and times in this table as guide lines for speed cooking. Use oven gloves when taking the food out of the microwave. Type Food Quanity Mode Time Instructions Place the pizza on the medium Frozen Pizza, 6 inch Speed Bake 30%... -
Page 37: Cookware Guide
cookware guide To cook food in the microwave oven, the microwaves must be able to penetrate the food without being reflected or absorbed by the dish. It is important to choose the correct cookware, therefore look for cookware that is marked microwave-safe. -
Page 38: Cooking Guide
cooking guide Microwave energy actually penetrates food, attracted and absorbed by the water, fat and sugar content. The microwaves cause the molecules in the food to move rapidly. The rapid movement of these molecules creates friction and the resulting heat cooks the food. COOKING TECHNIQUES Stirring Stir foods such as casseroles and vegetables while cooking to distribute heat evenly. -
Page 39: Guide For Cooking Eggs In Your Microwave
• Home canning in the microwave oven is not recommended because all harmful bacteria may not be destroyed by the microwave heating process. • Although microwaves do not heat the cookware, the heat from the food is often transferred to the cookware. -
Page 40: Cleaning And Maintaining Your Microwave Oven
cleaning and maintaining your microwave oven Keeping your microwave oven clean improves its performance, wards off unnecessary repairs, and lengthens its life. CLEANING THE EXTERIOR It’s best to clean spills on the outside of your microwave oven as they occur. Use a soft cloth and warm, soapy water. -
Page 41: Storing And Repairing Your Microwave Oven
3. Disconnect the wire connector. 4. Remove the screw securing the LED lamp board. 5. Replace the LED lamp board. To purchase a new LED lamp board, visit an authorized service center or call Samsung Customer Care at 1-800-SAMSUNG (726- 7864). LAMP Lamp... -
Page 42: Cleaning The Grease Filter
Your microwave oven has reusable grease filter. The grease filters should be removed and cleaned at least once a month, or as required. To order a new grease filter, contact SamsungParts at 1-800-627-4368 or your Samsung dealer. You can also order online at www.samsungparts.com To avoid risk of personal injury or property damage, do not operate the oven hood without the filters in place. -
Page 43: Replacing The Charcoal Filter
If your oven is vented to the inside, the charcoal filter should be replaced every 6 to 12 months and more often if necessary. The charcoal filter cannot be cleaned. To order a new charcoal filter, contact the Parts Department at 1-800-627-4368 or your Samsung dealer. You can also order online at www.samsungparts.com 1. -
Page 44: Troubleshooting
troubleshooting CHECK THESE POINTS IF YOUR MICROWAVE OVEN PROBLEM SOLUTION The display and/or the oven is Make sure the plug is properly connected to a grounded outlet. not working. If the wall outlet is controlled by a wall switch, make sure the wall switch is turned on. -
Page 45: Appendix
SERIAL NUMBER DATE PURCHASED PURCHASED FROM Warranty service can only be performed by a Samsung Authorized Service Center. If you should require warranty service, provide the above information with a copy of your sales receipt to the Samsung Authorized Service Center. -
Page 46: Oven
SAMSUNG or SAMSUNG’s authorized service center. SAMSUNG will repair this product or replace it if cannot repair it, at our option and at no charge as stipulated herein, with new or reconditioned parts or products if found to be defective during the limited warranty period specified above. - Page 47 memo English - 47 MC17F808KDT_AA_DE68-04224A_EN.indd 47 2013-07-11 11:05:26...
- Page 48 Please be advised that the Samsung warranty does NOT cover service calls to explain product operation, correct improper installation, or perform normal cleaning or maintenance. www.samsung.com/ca (English) CANADA 1-800-SAMSUNG(726-7864) www.samsung.com/ca_fr (French) U.S.A 1-800-SAMSUNG(726-7864) Consumer Electronics www.samsung.com U.S.A 1-800-SAMSUNG(726-7864) Mobile Phones DE68-04224A MC17F808KDT_AA_DE68-04224A_EN.indd 48...
Need help?
Do you have a question about the MC17F808KDT/AA and is the answer not in the manual?
Questions and answers