Table of Contents
Advertisement
Quick Links
Advertisement
Table of Contents

Related Manuals for Asus PIKE 2308


Summary of Contents for Asus PIKE 2308
- Page 1 PIKE 2308 LSISAS RAID card User Guide...
- Page 2 Product warranty or service will not be extended if: (1) the product is repaired, modified or altered, unless such repair, modification of alteration is authorized in writing by ASUS; or (2) the serial number of the product is defaced or missing.
-
Page 3: Table Of Contents
Contents About this guide ......................iv PIKE 2308 specifications summary ................vi Chapter 1: Product introduction Welcome! ....................1-2 Package contents..................1-2 Card layout ....................1-3 System requirements................. 1-3 Card installation ..................1-4 Chapter 2: RAID configuration Setting up RAID ..................2-2 2.1.1... -
Page 4: About This Guide
How this guide is organized This guide contains the following parts: • Chapter 1: Product introduction This chapter offers the PIKE 2308 SAS RAID card features and the new technologies it supports. • Chapter 2: RAID configuration This chapter provides instructions on setting up, creating, and configuring RAID sets using the available utilities. -
Page 5: Conventions Used In This Guide
Conventions used in this guide To make sure that you perform certain tasks properly, take note of the following symbols used throughout this manual. DANGER/WARNING: Information to prevent injury to yourself when trying to complete a task. CAUTION: Information to prevent damage to the components when trying to complete a task. -
Page 6: Pike 2308 Specifications Summary
PIKE 2308 specifications summary Controller LSISAS2308 Interface ASUS PIKE interface Ports 8 ports Support device SAS/SAS II devices SATA/SATA II/SATA III devices Data transfer rate SATA III and SAS II 6Gb/s per PHY RAID level RAID 0/RAID 1/RAID 1E/RAID 10... -
Page 7: Chapter 1: Product
This chapter offers the PIKE 2308 SAS RAID card features and the new technologies it supports. Chapter 1: Product introduction... -
Page 8: Welcome
PIKE 2308 SAS RAID card! ® The ASUS PIKE 2308 allows you to create RAID 0, RAID 1, RAID 1E, and RAID 10 sets from SATA/SATA II/SATA III/SAS/SAS II hard disk drives connected to the SAS connectors on the motherboard. -
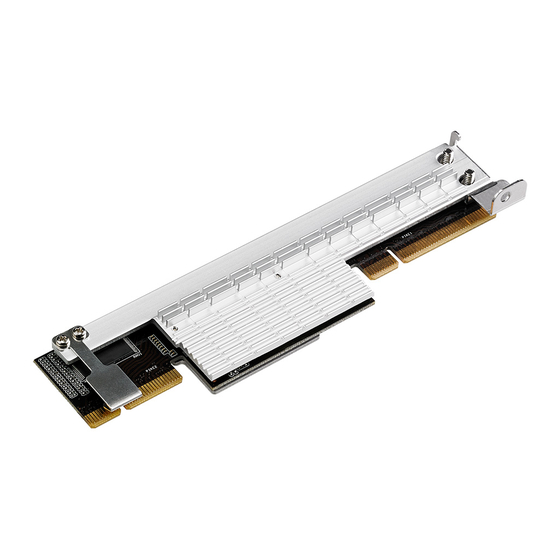
Page 9: Card Layout
SGPIO connectors on the motherboard. System requirements Before you install the PIKE 2308 SAS RAID card, check if the system meets the following requirements: • Workstation or server motherboard with a PIKE RAID card slot •... -
Page 10: Card Installation
Follow the below instructions to install the RAID card on your motherboard. For 2U, 5U, or pedestal server To install ASUS PIKE 2308 SAS RAID card on a 2U, 5U, or pedestal server Locate the PIKE RAID card slot on the motherboard. - Page 11 Connect the hard disk drives to the SAS connectors on the motherboard. To uninstall ASUS PIKE 2308 SAS RAID card from a 2U, 5U, or pedestal server Disconnect all SAS hard disk drives from the motherboard. Remove the screw that secures the RAID card to the motherboard.
- Page 12 Chapter 1: Product introduction...
- Page 13 This chapter provides instructions on setting up, creating, and configuring RAID sets using the available utilities. Chapter 2: RAID configuration...
-
Page 14: Chapter 2: Raid Configuration
Setting up RAID The RAID card supports RAID 0, RAID 1, RAID 1E, and RAID 10. 2.1.1 RAID definitions RAID 0 (Data striping) optimizes two identical hard disk drives to read and write data in parallel, interleaved stacks. Two hard disks perform the same work as a single drive but at a sustained data transfer rate, double that of a single disk alone, thus improving data access and storage. -
Page 15: Lsi Corporation Mpt Setup Utility
The adapter name shown on the setup screens differs according to the installed SAS RAID card. • Before requesting support from the ASUS Technical Support team, you Before requesting support from the ASUS Technical Support team, you have to take note of the MPTFW and MPTBIOS version for the SAS RAID card. -
Page 16: Raid 1 Volume
Adapter List Global Properties Adapter FW Revision Status Boot Slot Order Asus SAS2308 5.00.00.00-IR Enabled Esc = Exit Menu F1/Shift+1 = Help Alt+N = Global Properties -/+ = Alter Boot Order Ins/Del = Alter Boot List The numbers of the channel depend on the controller. - Page 17 Create RAID 0 Volume Create a RAID 0 volume consisting of 2 to 10 disks. ALL DATA on volume disks will be DELETED! Esc = Exit Menu F1/Shift+1 = Help Enter = Choose volume type to create ASUS PIKE 2308...
- Page 18 The Create New Volume screen shows the disks you can add to make up the RAID 1 volume. Use the arrow key to select a disk, then move the cursor to the RAID Disk column. To include this disk in the array, press <+>, <->, or <Space>. LSI Corp Config Utility v7.05.01.00 (2010.02.09) Create New Volume -- SAS2308...
- Page 19 Discard changes then exit this menu Exit the Configuration Utility and Reboot The utility creates the volume. LSI Corp Config Utility v7.05.01.00 (2010.02.09) Create New Volume -- SAS2308 Processing...may take up to 1 minute Creating RAID Volume... ASUS PIKE 2308...
-
Page 20: Raid 1E/10 Volume
2.2.2 RAID 1E/10 volume The RAID 1E/10 supports three to ten disks, or seven mirrored disks plus two hot spare disks. Use odd numbers of hard disk drives to create a RAID 1E volume; use even numbers of hard disk drives to create a RAID 10 volume. To create a RAID 1E/10 volume: Follow steps 1–4 of the section RAID 1E/10 volume. - Page 21 Discard changes then exit this menu Exit the Configuration Utility and Reboot The utility creates the volume. LSI Corp Config Utility v7.05.01.00 (2010.02.09) Create New Volume -- SAS2308 Processing...may take up to 1 minute Creating RAID Volume... ASUS PIKE 2308...
-
Page 22: Raid 0 Volume
2.2.3 RAID 0 volume The RAID 0 feature supports volumes with two to ten disks. You may combine an RAID 0 volume with an RAID 1 or RAID 1E/10 volume. To create a RAID 0 volume: Follow steps 1–4 of the section RAID 1 volume. The Select New Volume Type screen appears. - Page 23 Discard changes then exit this menu Exit the Configuration Utility and Reboot The utility creates the volume. LSI Corp Config Utility v7.05.01.00 (2010.02.09) Create New Volume -- SAS2308 Processing...may take up to 1 minute Creating RAID Volume... ASUS PIKE 2308 2-11...
-
Page 24: Managing Arrays
Viewing volume properties To view volume properties: On the main menu, select RAID Properties. LSI Corp Config Utility v7.05.01.00 (2010.02.09) Adapter Properties -- SAS2308 Adapter PIKE 2308 PCI Slot PCI Address(Bus/Dev) 04:00 MPT Firmware Revision 5.00.00.00-IR SAS Address 500E0180:1280E000 NVDATA Version 05.02... - Page 25 Size(GB) Status Optimal Task None Manage Volume Slot Device Identifier RAID Drive Pred Size Disk Status Fail (GB) WDC WD800JD-22LS1D06 Primary WDC WD800JD-22LS1D06 Secondary No Esc = Exit Menu F1/Shift+1 = Help Enter=Select Item Alt+N=Next Volume ASUS PIKE 2308 2-13...
-
Page 26: Managing Hot Spares
Managing hot spares You may configure one disk as a global hot spare to protect critical data on the RAID 1/1E/10 volume(s). You may create the hot spare disk at the same time you create the RAID 1/1E/10 volume. Refer to this section when adding a hot spare disk on an existing volume. -
Page 27: Running A Consistency Check
- The volume is a RAID 0 - The volume is not optimal - The volume is already running a consistency check - The volume has a consistency check pending Esc = Exit Menu F1/Shift+1 = Help Enter = Select Item ASUS PIKE 2308 2-15... - Page 28 Activating a volume If a volume is removed from one controller/computer or moved to another, the volume is considered inactive. When you add the volume back to the system, you may reactivate the volume. To activate the volume: From the Manage Volume screen, select Activate Volume, then press <Enter>. LSI Corp Config Utility v7.05.01.00 (2010.02.09) Manage Volume -- SAS2308...
-
Page 29: Deleting A Volume
WARNING! All data will be lost when the volume is deleted! Delete volume and exit to Adapter Properties Abandon volume deletion and exit this menu Esc = Exit Menu F1/Shift+1 = Help Enter = Select Item ASUS PIKE 2308 2-17... - Page 30 Expanding the volume capacity You may use two new hard disk drives to replace the existing one, and expand the capacity of the RAID volume. • The capactiy of th new hard disk drives should be 50GB larger than the existing one. •...
-
Page 31: Viewing Sas Topology
Alt+A = Select or deselect a device as the alternate boot device Enter = On a SAS Enclosure or Expander - Expand or Collapse Item Enter = On a Disk Drive - Turn on the Locate LED (next key press turns off) ASUS PIKE 2308 2-19... -
Page 32: Global Properties
Adapter List Global Properties Adapter FW Revision Status Boot Slot Order PIKE 2308 5.00.00.00-IR Enabled Esc = Exit Menu F1/Shift+1 = Help Alt+N = Global Properties -/+ = Alter Boot Order Ins/Del = Alter Boot List Pause When Boot Alert Displayed Sets whether to pause or not when the boot alert displays. - Page 33 Pause When Boot Alert Displayed [No] Boot Information Display Mode [Display minimal information] Support Interrupt [Hook interrupt, the Default] Restore Defaults Esc = Exit Menu F1/Shift+1 = Help Alt+N = Adapter List -/+ = Change Item ASUS PIKE 2308 2-21...
-
Page 34: Restore Defaults
Restore Defaults This option allows you to discard the selections you made and restore the system defaults. LSI Corp Config Utility v7.05.01.00 (2010.02.09) Adapter List Global Properties Pause When Boot Alert Displayed [No] Boot Information Display Mode [Display minimal information] Support Interrupt [Hook interrupt, the Default] Restore Defaults... -
Page 35: Megaraid Storage Manager
Program Maintenance screen appears. Read the screen text and select Modify, Repair, or Remove. When the next screen appears, read and accept the user license, and click Next. The Customer Information screen appears, as shown in the following figure. ASUS PIKE 2308 2-23... - Page 36 Enter your user name and organization name. In the bottom part of the screen, select an installation option: If you select All users, any user with administrative privileges can use this – version of MegaRAID Storage Manager software to view or change storage configurations.
- Page 37 Select StandAlone if you will use MegaRAID Storage Manager software to – create and manage storage configurations on a standalone workstation. To begin installation, click on Install on the next screen that appears. Select Custom if you want to specify individual program features to install. – ASUS PIKE 2308 2-25...
- Page 38 If you select Custom, a window listing the installation features appears, as shown in the following figure. Select the features you want on this screen. Click Next to proceed. Click Install to install the program. When the final Configuration Wizard screen appears, click Finish. If you select Client installation for a PC used to monitor servers, and if there are no available servers with a registered framework on the local subnet (that is, servers with a complete installation of MegaRAID Storage Manager software), the server screen will...
-
Page 39: Installing Megaraid Storage Manager Sofware For Linux
(that is, servers with a complete installation of MegaRAID Storage Manager software), the server screen appears. The server screen does not list any servers. You can use this screen to manage systems remotely. ASUS PIKE 2308 2-27... -
Page 40: Linux Error Messages
2.3.4 Linux Error Messages The following messages may appear while you are installing MegaRAID Storage Manager software on a Linux system: • More than one copy of MegaRAID Storage Manager software has been installed. This message indicates that the user has installed more than one copy of MegaRAID Storage Manager software. -
Page 41: Starting Megaraid Storage Manager Software
If the circle in the server icon is yellow instead of green, it means that the server is running in a degraded state—for example, because a disk drive used in a virtual disk has failed. If the circle is red, the storage configuration in the server has failed. ASUS PIKE 2308 2-29... - Page 42 To access servers on a different subnet, type in the box at the bottom of the screen the IP address of a server in the desired subnet where the MegaRAID Storage Manager software is running, and click Update. If you check the Connect to remote server at: IP address box, you can also access a standalone (remote) installation of MegaRAID Storage Manager software, if it has a network connection.
-
Page 43: Megaraid Storage Manager Window
The Physical view shows the hierarchy of physical devices in the system. At the top of the hierarchy is the system itself. One or more controllers are installed in the system. The controller label identifies the MegaRAID controller, such as the ASUS PIKE 2308 controller, so that you can easily differentiate between multiple controllers. Each controller has one or more ports. -
Page 44: Event Log Panel
• Physical drive A red circle to the right of an icon indicates that the device has failed. For example, this icon indicates that a physical drive has failed: A yellow circle to the right of an icon indicates that a device is running in a degraded state. For example, this icon indicates that a virtual disk is running in a degraded state because a disk drive has failed: Properties View Panel... - Page 45 • If you are using the Linux operating system, you must install Firefox or Mozilla ® ® the MegaRAID Storage Manager online help to display. ASUS PIKE 2308 2-33...
- Page 46 Chapter 2: RAID configuration 2-34...
- Page 47 This chapter provides instructions for installing the RAID drivers on different operating systems. Chapter 3: Driver installation...
-
Page 48: Chapter 3: Driver Installation
Select the optical drive as the first boot priority to boot from the support CD. Save your changes, then exit the BIOS Setup. Restart the computer. The Makedisk menu appears. Select PIKE 2308 SASs card Driver, and press <Enter> The Makedisk menu appears. Select to enter the sub-menu. - Page 49 Use the arrow keys to select the type of RAID driver disk you want to create. PIKE 2308 SAS2 card Driver Windows XP x86 Windows XP x64 Windows Server 2003 x86 Windows Server 2003 x64 Windows Vista x86 Windows Vista x64...
-
Page 50: Windows ® Server 2003 Os
3.1.2 Windows Server 2003 OS ® During Windows Server 2003 OS installation ® To install the RAID card driver when installing Windows Server 2003 OS: ® Server 2003 OS installation CD. The Window Boot the computer using the Windows ® ®... - Page 51 ENTER=Select F3=Exit The Windows Setup loads the RAID card drivers from the RAID driver disk. When ® next screen appears, press <Enter> to continue installation. Setup then proceeds with the OS installation. Follow screen instructions to continue. ASUS PIKE 2308...
- Page 52 After Windows Server 2003 OS installation ® To update the RAID card driver after installing Windows Server 2003 OS: ® Right-click the My Computer icon on the desktop and select Properties from the menu. Click the Hardware tab on the top, then click the Device Manager button. Double-click the LSI Adapter, SAS2 2308 Falcon -StorPort item.
- Page 53 Toggle Don’t search. I will choose the driver to install, then click Next to continue. Insert the RAID driver disk you created earlier to the floppy disk drive. Highlight LSI Adapter, SAS2 2308 Falcon -StorPort, then click Have Disk. LSI Adapter, SAS2 2308 Falcon -StorPort ASUS PIKE 2308...
- Page 54 Select from the drop-down menu and locate the driver. Click Next to start updating the driver. LSI Adapter, SAS2 2308 Falcon -StorPort After completing driver update, click Finish to close the wizard. LSI Adapter, SAS2 2308 Falcon -StorPort Chapter 3: Driver installation...
- Page 55 Enterprise RAID driver disk to the floppy disk drive, select OK, then Insert the Red Hat ® press <Enter>. Insert Driver Disk Insert your driver disk into /dev/sda and press “OK” to continue. Back The drivers for the RAID card are installed to the system. ASUS PIKE 2308...
- Page 56 When asked if you will load additional RAID controller drivers, select No, then press <Enter>. More Driver Disks? Do you wish to load any more driver disks? Follow the screen instructions to continue the OS installation. Chapter 3: Driver installation 3-10...
-
Page 57: Suse Linux Os 11
When below screen appears, select the floppy disk drive (fd0) as the driver update medium. Select OK, then press <Enter>. Please choose the Driver Update medium. sda: USB Floppy sr0: CD-ROM, ASUS DRW-2014S1T Other device Back The drivers for the RAID controller are installed to the system. -
Page 58: Asus Contact Information
ASUS contact information ASUSTeK COMPUTER INC. Address 15 Li-Te Road, Peitou, Taipei, Taiwan 11259 Telephone +886-2-2894-3447 +886-2-2890-7798 E-mail info@asus.com.tw Web site http://www.asus.com.tw Technical Support Telephone +86-21-38429911 +86-21-58668722 ext: 9101 Online Support http://support.asus.com/techserv/techserv.aspx ASUSTeK COMPUTER INC. (Taiwan) Address 15 Li-Te Road, Peitou, Taipei, Taiwan 11259... -
Page 59: Technical Support
+1-510-608-4555 Web site http://usa.asus.com Technical Support Support fax +1-812-284-0883 General support +1-812-282-2787 Online support http://support.asus.com/techserv/techserv.aspx ASUS COMPUTER GmbH (Germany and Austria) Address Harkort Str. 21-23, D-40880 Ratingen, Germany +49-2102-959911 Web site http://www.asus.de Online contact http://www.asus.de/sales Technical Support Telephone +49-1805-010923 Support Fax +49-2102-959911 Online support http://support.asus.com/techserv/techserv.aspx... - Page 60 Web site http://www.asus.com Technical Support Telephone +31-(0)591-5-70292 +31-(0)591-666853 E-mail advance.rma.eu@asus.com Online Support http://support.asus.com/techserv/techserv.aspx ASUS Polska Sp. z o.o. (Poland) Address Ul. Postępu 6, 02-676 Warszawa, Poland Web site http://pl.asus.com Technical Support Telephone +48-225718033 Online Support http://support.asus.com/techserv/techserv.aspx ASK-Service (Russia and CIS) Address г.Москва, ул.
-
Page 61: Declaration Of Conformity
800 Corporate Way, Fremont Phone/Fax No: (510)739-3777/(510)608-4555 hereby declares that the product Product Name : RAID CARD Model Number : PIKE 2308 Conforms to the following specifications: FCC Part 15, Subpart B, Unintentional Radiators Supplementary Information: This device complies with part 15 of the FCC Rules. Operation is subject to... -
Page 62: Ec Declaration Of Conformity
Manufacturer: ASUSTeK COMPUTER INC. Address, City: 4F, No. 150, LI-TE Rd., PEITOU, TAIPEI 112, TAIWAN Country: TAIWAN Authorized representative in Europe: ASUS COMPUTER GmbH Address, City: HARKORT STR. 21-23, 40880 RATINGEN Country: GERMANY declare the following apparatus: Product name :...
Need help?
Do you have a question about the PIKE 2308 and is the answer not in the manual?
Questions and answers