Table of Contents
Advertisement
Quick Links
OWNER'S MANUAL
This manual will show you how to use
your FUJIFILM DIGITAL CAMERA
FinePix F31fd correctly.
Please follow the instructions carefully.
Getting Ready
Using the Camera
Advanced Features
• Photography
• Playback
• Movie
Camera Connection
Installation
Appendices
Troubleshooting
BL00580-200(1)
Settings
Software
Advertisement
Table of Contents

Related Manuals for FujiFilm FinePix F31fd


Summary of Contents for FujiFilm FinePix F31fd
- Page 1 OWNER’S MANUAL This manual will show you how to use your FUJIFILM DIGITAL CAMERA FinePix F31fd correctly. Please follow the instructions carefully. Getting Ready Using the Camera Advanced Features • Photography • Playback • Movie Settings Camera Connection Software Installation...
-
Page 2: Warning
Notes on the Grant: To comply with Part 15 of the FCC rules, this product must be used with a Fujifilm-specified ferrite-core A/V cable, USB cable, and DC supply cord. For customers in Canada CAUTION This Class B digital apparatus complies with Canadian ICES-003. -
Page 3: Important
4. Ownership. All copyrights and other proprietary rights to Software and Documentation are owned and retained by FUJIFILM or the third party suppliers as indicated on or in Software or Documentation. Nothing contained herein shall be construed, expressly or implicitly, as transferring or granting any right, license, or title to you other than those explicitly granted under this Agreement. -
Page 4: Ec Declaration Of Conformity
Fuji Photo Film (Europe) GmbH Address: Heesenstrasse 31 40549 Dusseldorf, Germany declare that the product Product Name: FUJIFILM DIGITAL CAMERA FinePix F31fd Manufacturer’s Name: FUJIFILM Corporation Manufacturer’s Address: 26-30, Nishiazabu 2-chome, Minato-ku, Tokyo 106-8620, Japan conforms to the following Standards:... -
Page 5: Disposal Of Electric And Electronic Equipment In Private Households
Disposal of Electric and Electronic Equipment in Private Households Disposal of used Electrical & Electronic Equipment (Applicable in the European Union and other European countries with separate collection systems) This symbol on the product, or in the manual and in the warranty, and/or on its packaging indicates that this product shall not be treated as household waste. -
Page 6: Table Of Contents
Contents Warning... 2 IMPORTANT ... 3 EC Declaration of Conformity... 4 Disposal of Electric and Electronic Equipment in Private Households... 5 Contents... 6 Preface... 9 About this Manual ... 11 Accessories Included ... 12 Camera Parts and Features... 13 Example of LCD Monitor Text Display ... 14 Getting Ready Loading the Battery ... - Page 7 Using p-MODE MENU (Photography)/ SHOOTING MENU ... 72 Setting the p-MODE MENU (Photography) ... 72 Setting the SHOOTING MENU ... 72 p-MODE MENU (Photography) ... 75 Changing the sensitivity setting (S ISO) ... 75 Changing the quality setting QUALITY) ... 76 Changing the FinePix COLOR setting FinePix COLOR) ...
- Page 8 Power Supply and Battery ... 142 Notes on the xD-Picture Card™ and the Internal Memory... 145 Warning Displays ... 147 Troubleshooting Troubleshooting ... 151 Specifications ... 160 Explanation of Terms ... 166 FUJIFILM Digital Camera Worldwide Network ... 167 Safety Notes ... 174...
-
Page 9: Preface
Z Damaged by Water or Sand FinePix F31fd can be damaged on the inside and outside by water and sand. When you are at the beach or close to water, make sure that the camera is not damaged by water or sand. - Page 10 ® Windows XP” logo refers Z Exif Print (Exif ver. 2.2) Exif Print Format is a newly revised digital camera file format that contains a variety of shooting information for optimal printing. See “Using Your Camera Correctly” (➝p.141) for more...
-
Page 11: About This Manual
About this Manual e Macro (Close-up) Use this mode to take close-up shots. Available Photography modes: q, s, </M, /? ( ) ( p.48) Press e (p) to select Macro mode. Press e (p) again to cancel Macro mode. e appears on the LCD AUTO AUTO monitor indicating that you... -
Page 12: Accessories Included
Accessories Included • Rechargeable Battery NP-95 (1) • Strap (1) • AC Power Adapter AC-5VC (1 set) • A/V cable for FinePix F31fd (1) Including plug to pin-plug ×2 • USB cable for FinePix F31fd (1) • CD-ROM (1) Software for FinePix CX •... -
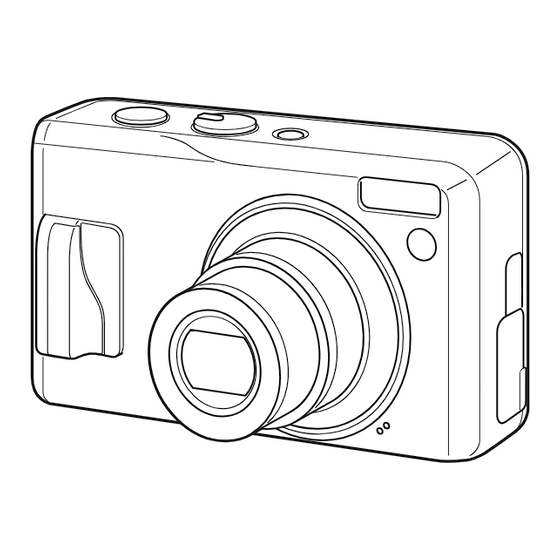
Page 13: Camera Parts And Features
Camera Parts and Features • Refer to the pages in parentheses for information on using the camera parts or features. A Shutter button B Mode dial C Lens (lens cover) D POWER button E Flash (p.62) F AF-assist illuminator (p.35)/Self-timer lamp (p.66) G Infrared port (p.87) H Terminal cover I Microphone... -
Page 14: Example Of Lcd Monitor Text Display
Example of LCD Monitor Text Display Z Photography mode Z Playback mode FinePix F31fd has internal memory that can store images without xD-Picture Card. Y appears on the LCD monitor when the internal memory is active. A ( Self-timer (p.65) L ) Photometry (p.78) - Page 15 Memo...
-
Page 16: Loading The Battery
Loading the Battery Battery is required to operate the digital camera. At first, load the battery in the camera. Z Compatible battery Rechargeable Battery NP-95 (1) Terminals CAUTION • The battery is not fully charged at shipment and must be fully charged before being used. -
Page 17: Load The Battery
Load the battery. Make sure that the indicators are aligned. Push the battery release catch aside while loading the battery. Check that the battery is firmly held in place. Battery release catch CAUTION Load the battery in the correct direction. Close the battery cover. -
Page 18: Charging The Battery
AC power adapter. CAUTION • Always use the FUJIFILM products listed above. • See p.144 for notes on using the AC power adapter. • Only connect and disconnect the AC power adapter • The power outlet should be nearby the equipment and •... -
Page 19: Checking The Battery Charge
Camera operation during charging When connection is completed, battery charging begins. Charging ends after about 4 hours. CHECK Indicator lamp [During charging] Lit red [Charging completed] Off [Charging error] Blinking red (➝p.152) Battery protection function When you try to charge the battery immediately after the camera has been used continuously for a long period, charging may not begin soon (the indicator lamp does not turn red). -
Page 20: Loading The Xd-Picture Card
Loading the xD-Picture Card Although you can store pictures in the camera’s internal memory, you can store many more images on the xD- Picture Card (sold separately). There is a slot for the xD- Picture Card inside the battery compartment. Open the battery cover. - Page 21 • Operation of this camera is only guaranteed when it is used with FUJIFILM xD-Picture Card. • See p.145 for information on the xD-Picture Card. MEMO • The size of an image file varies depending on the subject.
-
Page 22: Turning On And Off
Turning On and Off Turning the camera on in Photography mode Press POWER down fully to turn the camera on. Press POWER again to turn the camera off. MEMO Changes between Photography mode and Playback mode Press w during shooting to change to Playback mode. Press the shutter button down halfway to return to Photography mode. -
Page 23: Setting The Language, Date, And Time
Setting the language, date, and time When using the camera for the first time after purchasing, the language, date, and time are cleared. Set the language, date, and time. screen appears when turning the camera on. START MENU START MENU / LANG. -
Page 24: Auto Power Off Function
Turning On and Off Change the date format. DATE / TIME NOT SET DATE / TIME NOT SET DD . MM . YY DD . MM . YY MM / MM / DD / DD / YY YY 10 / 24 / 2006 10 / 24 / 2006 YY . -
Page 25: Correcting The Date And Time
Correcting the Date and Time Open the SET-UP menu. SHOOTING MENU SHOOTING MENU HIGH-SPEED SHOOTING HIGH-SPEED SHOOTING CONTINUOUS CONTINUOUS SET-UP SET-UP A Press MENU/OK to open the menu. B Press n or o to select U SET-UP. C Press q. Display the DATE/TIME screen. -
Page 26: Selecting The Language
Selecting the Language Open the SET-UP menu. SHOOTING MENU SHOOTING MENU HIGH-SPEED SHOOTING HIGH-SPEED SHOOTING CONTINUOUS CONTINUOUS SET-UP SET-UP A Press MENU/OK to open the menu. B Press n or o to select U SET-UP. C Press q. Display the screen. - Page 27 Memo...
-
Page 28: Taking Pictures (Q Auto Mode)
Taking Pictures (q AUTO Mode) This section describes the basic operations. Turn the camera on. A Press POWER to turn the camera on. B Set the Mode dial to q. Holding the camera correctly Brace your elbows against your sides and hold the camera with both hands. - Page 29 Check the composition on the LCD monitor. To adjust zoom scale using the Zoom button: W button T button (Zoom out) (Zoom in) AUTO AUTO AUTO AUTO 25 25 25 25 Zoom bar • Focal range Approx. 60 cm (2.0 ft.) to infinity •...
- Page 30 Taking Pictures (q AUTO Mode) Press the shutter button fully. Double beep Halfway pressed CAUTION When taking a picture using the flash, the image may disappear and go dark briefly due to flash charging. The indicator lamp blinks orange during charging. MEMO •...
- Page 31 Z Indicator lamp display The indicator lamp lights or blinks when pressing the shutter button, etc. The indicator lamp shows the camera status. Indicator lamp Display Status Lit green Locking the focus Blinking green Camera shake warning, AF warning, or AE warning (ready to shoot) Blinking green and Recording to xD-Picture Card or orange alternately...
-
Page 32: Using Intelligent Face Detection When Taking Pictures
Taking Pictures (q AUTO Mode) Using Intelligent Face Detection when taking pictures Intelligent Face Detection allows you to focus on and adjust the brightness of people’s faces. Intelligent Face Detection is effective with the camera held horizontally or vertically. Available Photography modes: q, , H, A To activate Intelligent Face Detection press To turn Intelligent Face Detection off, press... -
Page 33: Taking Pictures With The Focus And Exposure Locked
CAUTION • If the camera or subject move as the picture is taken, the subject’s face may move out of the Intelligent Face Detection frame. • When the camera is detecting multiple faces, the green frame is set around the face near the center. If you want to focus on another subject, move the camera so that the new subject is in the center of the screen. -
Page 34: Using Af/Ae Lock
• AF/AE lock can be applied repeatedly before the shutter is released. • Use AF/AE lock in all Photography modes to guarantee excellent results. • On FinePix F31fd, pressing the shutter button down halfway locks the focus and exposure settings (AF and AE lock). Click... -
Page 35: Af-Assist Illuminator
Subjects not suitable for autofocus FinePix F31fd uses a high-precision autofocusing mechanism. However, it may have difficulty focusing on the following: Very shiny subjects such Fast moving subjects as a mirror or car body • Subjects photographed through glass • Subjects that do not reflect well, such as hair or fur •... -
Page 36: Adjusting The Shot Composition
Taking Pictures (q AUTO Mode) Adjusting the shot composition Select the LCD monitor display. Press DISP/BACK to change the LCD monitor display. AUTO AUTO N 25 25 N N 25 25 Text displayed AUTO AUTO Framing guideline displayed Best framing Position the main subject at the intersection of two lines in this frame or align one of... -
Page 37: Viewing The Images
FinePix F31fd, a present icon appears on the screen. CAUTION Still images viewable on FinePix F31fd This camera will display still images recorded on FinePix F31fd or still images (excluding some uncompressed images) recorded on any FUJIFILM digital camera that supports xD-Picture Cards. -
Page 38: Playback Zoom
(Intelligent Face Detection). A frame appears around the face that detected by FinePix F31fd. Press Intelligent Face Detection to alternate the detected face. The images shot with a camera other than FinePix F31fd, the frame does not appear. Selecting images... -
Page 39: Multi-Frame Playback
Z Zoom scales Quality mode Max. zoom scale 5 (2848 × 2136 pixels) Approx. 4.5× % (3024 × 2016 pixels) Approx. 4.7× 3 (2048 × 1536 pixels) Approx. 3.2× 2 (1600 × 1200 pixels) Approx. 2.5× Intelligent Face Detection The image taken using Intelligent Face Detection (➝p.32) ( the screen). -
Page 40: Sorting By Date
Viewing the Images Sorting by date In sorting by date mode, you can view all images taken on the same day. 2006 2006 10 10 / 22 22 10 10 / 23 23 10 10 / 24 24 1 / 14 14 A Press n, o, p, or q to move the cursor (colored frame) to the selecting frame. -
Page 41: Erasing The Images/Movies
Erasing the Images/Movies Use this mode to erase unnecessary images or movies to have ample free space on the xD-Picture Card or internal memory. Your camera calls images “frames”. Using the erase button ( Pressing (n) erases images easily. ERASE OK? ERASE OK? CANCEL CANCEL... - Page 42 Erasing the Images/Movies Erasing the Images/Movies PLAYBACK MENU PLAYBACK MENU ERASE ERASE IMAGE ROTATE IMAGE ROTATE PROTECT PROTECT COPY COPY VOICE MEMO VOICE MEMO TRIMMING TRIMMING D Press n or o to select FRAME or ALL FRAMES. E Press MENU/OK to confirm the setting. FRAME FRAME ALL FRAMES...
- Page 43 Erasing all frames (ALL FRAMES) ERASE ALL OK? ERASE ALL OK? IT MAY TAKE A WHILE IT MAY TAKE A WHILE CANCEL CANCEL Press MENU/OK to erase all the frames (files). MEMO Press DISP/BACK to cancel erasing of all the frames (files).
- Page 44 Memo...
-
Page 45: Using The Photography Functions - Procedure Of Setting
Using the Photography Functions — Procedure of Setting Specify the camera settings for taking pictures to get the best result. A general guide is given below. Select the Photography mode. Turn the Mode dial to select the Photography mode. The camera settings are tailored to the scene being shot. - Page 46 Using the Photography Functions — Procedure of Setting Specify the photography settings. Pressing buttons or selecting menu allows you to specify photography functions. You can obtain the best result for shooting. e (p) Macro button d (q) Flash button * (o) Self-timer button Z Specifying functions using buttons Intelligent Face Detection button...
-
Page 47: Finepix Color
Z Specifying functions using p-MODE MENU (p button) Use to specify required sensitivity S ISO setting (➝p.75). Use to specify required image size QUALITY (➝p.76). Use to specify required color tone FinePix COLOR (➝p.77). MODE MENU MODE MENU AUTO AUTO QUALITY QUALITY COLOR... -
Page 48: Setting The Shooting Mode
Setting the Shooting Mode You can select the most suitable setting according to the subject by selecting one of the Shooting modes. q AUTO This is the easiest mode for providing crisp and clear shots. Use this mode for ordinary photography. Camera specifies all settings other than p-MODE (Quality and FinePix COLOR) automatically. -
Page 49: Natural Light
Z Selecting Scene position setting SHOOTING MENU SHOOTING MENU SCENE POS SCENE POS NATURAL LIGHT NATURAL LIGHT HIGH - - SPEED SHOOTING HIGH SPEED SHOOTING NATURAL & NATURAL & CONTINU CONTINU PORTRAIT PORTRAIT SET - - UP UP LANDSCAPE LANDSCAPE SPORT SPORT NIGHT... -
Page 50: Natural & D
Setting the Shooting Mode NATURAL & d This mode shoots 2 images continuously without flash and with flash. Shooting with flash allows you to take a picture of a main subject brightly. Shooting without flash produces beautiful images that retain the natural ambience. -
Page 51: Sport
. SPORT Use this mode to take pictures of a moving subject. It gives priority to faster shutter speeds. CHECK When setting . Sport mode, the camera sets to High-speed shooting mode (➝p.80) automatically. / NIGHT ( LONG EXPOSURE) Use this mode for shooting evening and night scenes. -
Page 52: Fireworks
Setting the Shooting Mode Select the exposure time. EXPOSURE TIME EXPOSURE TIME 1.0" 1.0" A Press D. B Press p or q to select the exposure time. C Press D to confirm the setting. Use this mode to shoot 25 25 fireworks. -
Page 53: Sunset
Z Selecting the exposure time setting EXPOSURE TIME EXPOSURE TIME 25 25 2.0" 2.0" A Press D. B Press p or q to select the exposure time. C Press D to confirm the setting. SUNSET Use this mode to shoot sunset, making the colors more vivid. -
Page 54: Beach
Setting the Shooting Mode BEACH Use this mode to prevent darkening images and provide crisp, clear shots, when shooting at beach under strong sunlight. UNDERWATER Use this mode for shooting with a waterproof case. It is effective for taking more vivid shots of ocean blue. -
Page 55: Flower
FLOWER Use this mode to take clear close-up shots when zooming up a flower. It is effective for taking more vivid shots of flower petal. CHECK • Flash cannot be used in the Flower mode. • Focal range Wide angle: Approx. -
Page 56: Picture Stabilization
Setting the Shooting Mode Picture Stabilization Use this mode to select a fast shutter speed that reduces camera shake and moving-subject blurring. Set the Mode dial to CHECK • Available flash modes: AUTO, b, d, C • Only AUTO can be selected for the setting. -
Page 57: Aperture Priority Ae
Z Selecting the Shooting mode setting SHOOTING MENU SHOOTING MENU SHOOTING MODE SHOOTING MODE PHOTOMETRY PHOTOMETRY WHITE BALANCE WHITE BALANCE AUTO AUTO HIGH - SPEED SHOOTING HIGH SPEED SHOOTING CONTINUOUS CONTINUOUS AF MODE AF MODE A Press MENU/OK to open the menu. B Press n or o to select MODE. - Page 58 Setting the Shooting Mode CAUTION When the correct exposure 25 25 cannot be obtained with ISO 200 ISO 200 selected aperture setting, the shutter speed appears in red. When this occurs, adjust the aperture setting again. F 8 F 8 Lit red When the brightness of the 25 25...
-
Page 59: M Shutter Priority Ae
M SHUTTER PRIORITY AE This is an automatic mode to set the shutter speed. Use this mode to freeze a moving subject (fast shutter speed) or convey the impression of movement (slow shutter speed). 25 25 ISO 200 ISO 200 SETTING SHUTTER SPEED SETTING SHUTTER SPEED F2.8... -
Page 60: Manual
Setting the Shooting Mode Shutter speed When shooting a moving subject, you can either “freeze the motion” or “capture the sense of movement” by adjusting the shutter speed. Freezes the motion of the Fast subject. Photographs the traces left Slow by the subject’s movement. -
Page 61: Macro (Close-Up)
e Macro (Close-up) Use this mode to take close-up shots. Available Photography modes: q, s, </M, /? ( ) (➝p.48) Press e (p) to select Macro mode. Press e (p) again to cancel Macro mode. e appears on the LCD AUTO AUTO 25 25... -
Page 62: Setting The Flash (Intelligent Flash)
d Setting the Flash (Intelligent Flash) Flash photography is useful for taking pictures at night or indoor dark locations. Choose from 6 flash modes according to the type of shot. See p.63 for information on the available Photography modes. MEMO By calculating subject distance and brightness, the camera automatically adjusts the flash amount and sensitivity to suit shooting conditions. - Page 63 c SLOW SYNCHRO, n RED EYE & SLOW This mode allows you to take pictures of people at night that clearly show both your subjects and the night time backdrop. To prevent camera shake, always use a tripod. Using n synchronizes Red-eye reduction mode. Using / selects slow shutter speeds of up to 3 seconds.
- Page 64 d Setting the Flash (Intelligent Flash) CHECK Effective flash range (S : AUTO) Wide-angle: Approx. 60 cm to 6.5 m (2.0 ft. to 21.3 ft.) Telephoto: Approx. 60 cm to 3.5 m (2.0 ft. to 11.5 ft.) If you take pictures outside of the effective flash range, the image may appear dark even if the flash is used.
-
Page 65: Self-Timer
* Self-Timer The self-timer is used in situations where the photographer is included in the shot. Available Photography modes: All Setting self-timer The self-timer setting changes each time you press * (o). The last displayed setting is AUTO AUTO 25 25 the selected mode. - Page 66 * Self-Timer Take pictures in selected time. A picture is taken after the self-timer lamp changes from lit to blinking (only blinks with the 2-second self- timer). A countdown appears on the LCD monitor indicating the time remaining until the picture is taken.
- Page 67 Taking pictures with the self- timer and Intelligent Face Detection function Available Photography modes: q, , H, Intelligent Face Detection The Intelligent Face Detection function is especially useful when using the self timer since it ensures that faces will appear in focus automatically. Set the self-timer.
- Page 68 * Self-Timer Take pictures in selected time. During the timer countdown, the camera detects people’s faces. Just as the picture is taken, the camera focuses on and adjusts the brightness of people’s faces. A picture is taken after the self-timer lamp changes from lit to blinking (only blinks with the 2-second self- timer).
-
Page 69: Adjusting Exposure Compensation
Adjusting the Image Brightness (D Exposure Compensation) Use this menu for shots to get the correct brightness (exposure), such as shots with extremely high contrast between the subject and the background. Available Photography modes: s, </M Adjusting exposure compensation Press D to set the exposure compensation. 25 25 25 25 25 25... - Page 70 Adjusting the Image Brightness (D Exposure Compensation) positive (+) compensation negative (–) compensation CHECK • Compensation range: –2 EV to +2 EV (13 steps in 1/3 EV increments) • Explanation of Terms “EV” (➝p.166) Guide to compensation • Backlit portraits: +2/3 EV to +1 2/3 EV •...
-
Page 71: Increasing Monitor Brightness
j Increasing Monitor Brightness Use this function to increase the brightness of the LCD monitor temporarily when you have difficulty seeing the monitor in low-light conditions or in daylight. Increasing the LCD monitor brightness Press j (n) to display the LCD monitor brightly. Press j (n) again to return to normal LCD monitor brightness. -
Page 72: Using P-Mode Menu (Photography)/Shooting Menu
Using p-MODE MENU (Photography)/SHOOTING MENU Use these menus to adjust image quality or focus. You can take pictures in a wide range of conditions. Setting the p-MODE MENU (Photography) MODE MENU MODE MENU QUALITY QUALITY A Press p to open the p-MODE MENU. B Press n or o to select the menu. - Page 73 Z List of p-MODE MENU options Menu Specifies required sensitivity setting of the ambient light around the subject. The larger value of the sensitivity, the higher sensitivity is obtained. The S ISO higher sensitivity settings will allow you to take pictures in darker locations. (➝p.75) Specifies the image size.
-
Page 74: T White Balance
Using p-MODE MENU (Photography)/SHOOTING MENU Z List of SHOOTING MENU options Menu This setting can be used when the Mode dial is set to SCENE POSITION Use this setting to provide the best photography menu setting for the scene (➝p.48) being shot. -
Page 75: P-Mode Menu (Photography)
p-MODE MENU (Photography) Changing the sensitivity setting (S ISO) Use this menu to specify required sensitivity setting of the ambient light around the subject. The larger value of the sensitivity, the higher sensitivity is obtained. The higher sensitivity settings will allow you to take pictures in darker locations. -
Page 76: Changing The Quality Setting ( Quality)
p-MODE MENU (Photography) Changing the quality setting QUALITY) Use this menu to specify the image size (number of recorded pixels). Select the quality setting for the scene being shot. Z Quality settings in Photography mode Quality mode 5 F (2848 × 2136) Printing at up to 10R (25.4 ×... -
Page 77: Changing The Finepix Color Setting ( Finepix Color)
Changing the FinePix COLOR setting ( FinePix COLOR) Use this menu to specify required color tone. It is effective for taking vivid shots or black and white shots. CHECK FinePix COLOR settings The contrast and color saturation are set to standard. p-STANDARD Use this mode for normal photography. -
Page 78: Shooting Menu
SHOOTING MENU Selecting light metering method PHOTOMETRY) Available Photography modes: s, </M Use this setting when the correct exposure cannot be obtained by the shooting conditions. SHOOTING MENU SHOOTING MENU SHOOTING MODE SHOOTING MODE PHOTOMETRY PHOTOMETRY MULTI MULTI WHITE BALANCE WHITE BALANCE SPOT SPOT... -
Page 79: Custom White Balance
Adjusting color balance (T WHITE BALANCE) Available Photography modes: s, </M Adjust the color balance based on white to suit the color of the ambient light around the subject. WHITE BALANCE WHITE BALANCE AUTO AUTO AUTO: Automatic adjustment : Select the white balance be using white paper to suit the shooting conditions. -
Page 80: Focusing The Shot Quickly ( High-Speed Shooting)
SHOOTING MENU 25 25 25 25 AUTO(1600) AUTO (1600) OVER OVER OVER or UNDER Example You can change the white balance for a photographed image by using colored paper instead of white paper. MEMO • In AUTO mode, the correct white balance may not be achieved for subjects such as close-ups of people’s faces and pictures taken under a special light source. -
Page 81: Taking Pictures Continuously ( Continuous)
Taking pictures continuously CONTINUOUS) Use this mode to take pictures of a moving subject. SHOOTING MENU SHOOTING MENU SHOOTING MODE SHOOTING MODE PHOTOMETRY PHOTOMETRY WHITE BALANCE WHITE BALANCE LONG PERIOD LONG PERIOD HIGH HIGH - SPEED SHOOTING SPEED SHOOTING FINAL 3 FINAL 3 CONTINUOUS CONTINUOUS... - Page 82 SHOOTING MENU f TOP 3 continuous shooting Available Photography modes: q, s, </M, /? (except for Shooting continues as long as STORING STORING holding the shutter button down. This mode shoots up to 3 frames (max. 2.2 frames/ sec.). MEMO The file recording time using the continuous shooting may increase when recording in the xD-Picture Card or internal memory.
-
Page 83: Specifying Focusing Mode (H Af Mode)
h LONG PERIOD continuous shooting Available Photography modes: q, s, </M, /? (except for Shooting continues as long as holding the shutter button down. This mode shoots up to xD-Picture Card or internal memory end. Press shutter button. Release shutter button. All frames Setting the menu (➝p.72) Specifying focusing mode... - Page 84 SHOOTING MENU MULTI When pressing the shutter button down halfway, the camera recognizes any strongly contrasting subject near the center of the LCD monitor and displays the AF frame over subject in focus. 25 25 25 25 AUTO AUTO(1600) AUTO AUTO(1600) (1600) (1600)
- Page 85 Memo...
-
Page 86: Using P-Mode Menu (Playback)
Using p-MODE MENU (Playback)/PLAYBACK MENU Use these menus to play back photographed images. Setting the p-MODE MENU (Playback) A Set the camera to Playback mode (➝p.37). MODE MENU MODE MENU IR COMMUNICATION IR COMMUNICATION SLIDE SHOW SLIDE SHOW PRINT ORDER (DPOF) PRINT ORDER (DPOF) B Press p to open the p-MODE MENU. -
Page 87: P-Mode Menu (Playback)
C Press n or o to select COMMUNICATION. D Press p. Sending image data Sending image data to a FUJIFILM digital camera is shown as an example here. You can send the data to another device in the same way. A Turn the camera on. - Page 88 You can send the image data by simply pressing p three times. Setting the menu (➝p.86) Receiving the image data Receiving the image data from a FUJIFILM digital camera is shown as an example here. You can receive data from another device in the same way. IR COMMUNICATION...
- Page 89 IR COMMUNICATION IR COMMUNICATION CONNECTING CONNECTING CANCEL CANCEL D Press MENU/OK to begin transmission. When transmission is completed, “DATA RECEIVED” will appear on the LCD monitor. CHECK You can receive image data by simply pressing buttons as the order below. p ➝...
-
Page 90: Setting Automatic Playback ( Slide Show)
p-MODE MENU (Playback) Setting automatic playback SLIDE SHOW) Use this mode to play back photographed images continuously. You can select playback interval and type of image transition. MODE MENU MODE MENU IR COMMUNICATION IR COMMUNICATION NORMAL NORMAL SLIDE SHOW SLIDE SHOW NORMAL NORMAL PRINT ORDER (DPOF) - Page 91 Card. The recorded specifications include information on which frames are to be printed. This section gives a detailed description of how to order your prints with FinePix F31fd. Some printers do not support date and time imprinting or specification of the number of prints.
-
Page 92: With Date / Without Date
p-MODE MENU (Playback) WITH DATE / WITHOUT DATE Selecting WITH DATEE, E appears on the LCD monitor and the date will be imprinted on your prints. PRINT ORDER ( DPOF DPOF ) PRINT ORDER DPOF : 00009 DPOF 00009 Total number of prints Setting for that frame SHEETS SHEETS... - Page 93 MEMO • When DPOF settings were specified on another camera. RESET DPOF OK? RESET DPOF OK? When the data includes a frame (file) with DPOF settings that were specified on another camera, “RESET DPOF OK?” appears. Pressing MENU/OK erases all of the DPOF settings already specified for each frame (file).
-
Page 94: Reset All
p-MODE MENU (Playback) RESET ALL To cancel all DPOF settings: RESET DPOF OK? RESET DPOF OK? CANCEL CANCEL Select RESET ALL in the p-MODE MENU (➝p.90). Press MENU/OK. MEMO 5 / 24 / 2006 5 / 24 / 2006 5 / 24 / 2006 5 / 24 / 2006 10:00 AM 10:00 AM... -
Page 95: Playback Menu
An image can be rotated only when playing back using FinePix F31fd. You may not be able to rotate images that were shot with a camera other than the FinePix F31fd. A Press p or q to select the rotating frame (file). -
Page 96: Protecting The Images ( Protect)
PLAYBACK MENU Intelligent Face Detection When shooting a person in a vertical position, press (Intelligent Face Detection) to rotate to display the correct direction. Setting the menu (➝p.86) Protecting the images PROTECT) Use this mode to prevent frames (files) from being accidentally erased. -
Page 97: Reset All
SET ALL SET ALL OK? SET ALL OK? IT MAY TAKE A WHILE IT MAY TAKE A WHILE CANCEL CANCEL Press MENU/OK to protect all the frames (files). RESET ALL RESET ALL OK? RESET ALL OK? IT MAY TAKE A WHILE IT MAY TAKE A WHILE CANCEL CANCEL... -
Page 98: Copying The Images (V Copy)
PLAYBACK MENU Copying the images (V COPY) It is possible to transfer saved images between the internal memory and an xD-Picture Card. Your camera calls images “frames”. Z Selecting COPY COPY COPY INTERNAL MEMORY INTERNAL MEMORY CARD CARD INTERNAL MEMORY INTERNAL MEMORY NEXT NEXT... -
Page 99: Recording Voice Memos
Copying all frames (ALL FRAMES) COPY COPY INTERNAL MEMORY INTERNAL MEMORY CARD CARD FRAME FRAME CARD CARD INTERNAL MEMORY INTERNAL MEMORY ALL FRAMES ALL FRAMES CANCEL CANCEL A Press n or o to select ALL FRAMES. B Press MENU/OK. C Press MENU/OK to copy all the frames (files). - Page 100 PLAYBACK MENU REC STANDBY REC STANDBY START START E Press MENU/OK to start recording. The remaining recording time appears during recording. RECORDING RECORDING RE - REC MEMO Hold the camera about 20 cm (7.9 in.) away for the best results. CANCEL CANCEL Remaining...
-
Page 101: Playing Back Voice Memo
Playing back voice memo A Press p or q to select an image file with a voice memo. # appears on the LCD monitor. B Press o to start playing back the voice memo. The playback time appears on the LCD monitor along with a progress bar. -
Page 102: Adjusting Volume Of Voice Memos
PLAYBACK MENU Adjusting volume of voice memos Volume can be adjusted while playing back voice memos. VOLUME VOLUME CANCEL CANCEL A Press MENU/OK while playing back voice memo. The voice memo is paused during playback. B Press n or o to adjust the volume. C Press MENU/OK to confirm your selection. - Page 103 To use for e-mail or web site • When % quality setting is selected, the image is trimmed to normal size (4:3 aspect ratio). CAUTION You may not be able to trim images that were shot with a camera other than FinePix F31fd. Continued Q...
- Page 104 PLAYBACK MENU Intelligent Face Detection TRIMMING TRIMMING TRIMMING TRIMMING CANCEL CANCEL Images taken with the Intelligent Face Detection (➝p.32) ( appears on the screen). Press (Intelligent Face Detection), the face that is focused on is zoomed in to help crop the main subject.
-
Page 105: Recording Movies
r Recording Movies Use this mode to record movies with sound. Set the camera to r Movie mode. Set the Mode dial to r. The available recording time STANDBY STANDBY appears on the LCD monitor. Z Zooming the image You must zoom beforehand as you cannot zoom during recording. - Page 106 (if the battery runs out or the AC power adapter is disconnected). • A movie file taken by FinePix F31fd may not be playable on other cameras. • Because sound is recorded concurrently with the images, make sure that you do not cover the microphone with a finger, etc.
-
Page 107: Changing Movie Size
Changing movie size Press p to open the p-MODE MENU. MODE MENU MODE MENU QUALITY QUALITY A Press q. B Press n or o to change the setting. C Press MENU/OK to confirm the setting. Z Quality settings in Movie mode % (640 ×... -
Page 108: Playing Back Movies
w Playing Back Movies 10 / 24 / 2006 10 / 24 / 2006 100 / 24 / 2006 100 / 24 / 2006 10:00 AM 10:00 AM 11:00 AM 11:00 AM PLAY PLAY A Press p or q to select the movie file. r appears on the LCD monitor. -
Page 109: Adjusting Volume Of Movies
MEMO If the subject of the shot is very bright, white vertical streaks or black horizontal streaks may appear in the image during playback. This is normal. CAUTION • You may not be able to play back some movie files recorded on other cameras. -
Page 110: U Set-Up
U SET-UP Using the SET-UP menu Open the SET-UP menu. A Press MENU/OK to open the menu. B Press n or o to select U SET-UP. C Press q. Change the page. SET - UP UP AUTO POWER OFF AUTO POWER OFF TIME DIFFERENCE TIME DIFFERENCE BACKGROUND COLOR... -
Page 111: Set-Up Menu Option
SET-UP menu option Setting Display 3 SEC/1.5 SEC/ IMAGE DISP. ZOOM (CONTINUOUS) FRAME NO. CONT./RENEW AF ILLUMINATOR ON/OFF DIGITAL ZOOM ON/OFF LCD MODE LONG EXPOSURE ON/OFF DATE/TIME – BEEP VOLUME SHUTTER VOLUME PLAYBACK – VOLUME LCD BRIGHTNESS – FORMAT – Factory default Sets the way for displaying the check image screen (photograph result) after taking a picture. -
Page 112: Video System
U SET-UP Setting AUTO POWER TIME DIFFERENCE BACKGROUND COLOR VIDEO SYSTEM RESET Display Factory default ENGLISH OFF/2 MIN/ 5MIN 2 MIN – – NTSC/PAL – – – How to use the SET-UP menu (➝p.110) Explanation Specifies the language used for LCD monitor display. -
Page 113: Image Disp
IMAGE DISP. Use this setting to set the way for displaying the check image screen (photograph result) after taking a picture. 3 SEC/1.5 SEC: The image appears for about 3 or 1.5 seconds and is then recorded. ZOOM (CONTINUOUS): The image appears enlarged. Use this mode to check details of image. - Page 114 U SET-UP FRAME NO. Use this function to specify whether frame numbers are assigned consecutively from previous numbers or begin again. <CONT.> Formatted xD-Picture Card or internal memory used for both A and B. CONT. : Pictures are stored beginning from the highest file number stored on the last xD-Picture Card or internal memory used.
-
Page 115: Digital Zoom
DIGITAL ZOOM Use this function to shoot enlarged images than maximum optical zoom scale. AUTO AUTO Zoom bar Z Zoom bar display Optical zoom: 3× Optical zoom: 3× Digital zoom: approx. 6.2× CHECK • Optical zoom focal length Approx. 36 mm to 108 mm •... -
Page 116: Playback Volume
U SET-UP LCD MODE Use this function to set the LCD monitor display to the fine mode or power save mode. Z POWER SAVE The LCD monitor darkens when camera is not used for 10 seconds. When this function is active, you can save power and get the maximum possible running time from your battery. -
Page 117: Lcd Brightness
LCD BRIGHTNESS Use this function to adjust the LCD monitor brightness. BRIGHTNESS BRIGHTNESS CANCEL CANCEL A Press n or o to adjust the LCD monitor brightness. The indicator moves to the + to display the LCD monitor brightly or to the – to darken the LCD monitor. -
Page 118: Time Difference
U SET-UP AUTO POWER OFF When this function is active and the camera remains unused for 2 or 5 minutes, it turns camera off. Use this function when you want to get the maximum possible running time from your battery. CAUTION The Auto power off function is disabled during slide show (➝p.90), and when a USB connection (➝p.121, 132) is... - Page 119 Move to TIME DIFFERENCE screen. SET - UP UP ENGLISH ENGLISH AUTO POWER OFF AUTO POWER OFF 2 MIN 2 MIN TIME DIFFERENCE TIME DIFFERENCE HOME HOME BACKGROUND COLOR BACKGROUND COLOR LOCAL LOCAL VIDEO SYSTEM VIDEO SYSTEM RESET RESET Press q. Set time difference.
-
Page 120: Connecting To A Tv
Connecting to a TV When connecting to a TV, images can be displayed on wider screen. Using slide show function (➝p.90) together, you can have fun with folks. Plug the A/V cable (included) into the A/V OUT (Audio/Visual output) socket of the camera. Video (yellow) To terminals Audio (white) -
Page 121: Connecting Camera Directly To Printer - Pictbridge Function
Connecting Camera Directly to Printer — PictBridge Function When a printer that supports PictBridge is available, images can be printed by connecting the camera directly to the PictBridge-compatible printer without a PC. Connecting to a printer A Connect the camera to your printer using the USB cable (included). - Page 122 Connecting Camera Directly to Printer — PictBridge Function Specifying images for printing (PRINT WITH DATE / PRINT WITHOUT DATE) PICTBRIDGE PICTBRIDGE TOTAL : 00002 TOTAL : 00002 SHEETS SHEETS 02 02 FRAME FRAME A Press p or q to display the frame (file) for specifying PRINT setting.
-
Page 123: Printing With Dpof Setting (U Print Dpof)
(files) continuously. CHECK To select uPRINT DPOF, the DPOF settings must be specified on FinePix F31fd beforehand (➝p.90). CAUTION Even when WITH DATEE is specified in the DPOF settings (➝p.90), the date is not inserted on printers that do not support date printing. - Page 124 • The camera cannot be used to specify printer settings such as the paper size and print quality. • Use internal memory or an xD-Picture Card that was formatted on FinePix F31fd. • Movies cannot be printed. • Images photographed with a camera other than FinePix...
- Page 125 Memo...
-
Page 126: Installation On A Windows Pc
Installation on a Windows PC Pre-installation checklist Z Hardware and software requirements To run this software, you must have the hardware and software described below. Check your system before you begin the installation. Operating System Hard disk space Display Internet connection Models with one of the above operating systems pre-installed. - Page 127 Z Recommended system Operating System Hard disk space Display Internet connection CAUTION • Connect the camera directly to the PC using the USB cable (included). The software may not operate correctly when you use an extension cable or connect the camera via a USB hub. •...
- Page 128 Installation on a Windows PC Do not connect the camera to your PC until the software installation is completed. Install FinePixViewer as instructed in the Quick start guide. Launching the installer manually A Double-click the “My Computer” icon. Windows XP users should click “My Computer” in the “Start” menu.
-
Page 129: Installation On A Mac Os X
Installation on a Mac OS X Pre-installation checklist Z Hardware and software requirements To run this software, you must have the hardware and software described below. Check your system before you begin the installation. Compatible Mac Operating System Hard disk space Display Internet connection PowerPC, Intel processor loaded... - Page 130 Installation on a Mac OS X Turn your Macintosh on and start up Mac OS X. Do not launch any other applications. When the bundled CD-ROM is loaded into the CD-ROM drive, the “FinePix” icon appears. Double-click the “FinePix” icon to open the “FinePix”...
- Page 131 The ImageMixer VCD2 LE for FinePix installer automatically starts up and a window showing the installation progress appears (Installation may take several minutes). The “FinePixViewer installation completed” message dialog appears. Then click exit button and close it. CAUTION When Safari is used as the Web browser, a message may be displayed and the CD-ROM may not be removed.
-
Page 132: Connecting To A Pc
• Do not format the xD-Picture Card in the camera on the PC. • Use the xD-Picture Card with images taken by a FUJIFILM Digital camera. • When connecting to a PC, if the xD-Picture Card contains large image or movie files, connection or transmission may take time or images may not be stored. - Page 133 CAUTION • FinePix F31fd is compatible with PTP (Picture Transfer Protocol). A PTP-compatible camera is a camera which can recognize the PC and printer automatically when connected. • Always use the FUJIFILM AC Power Adapter AC-5VC. If the camera suddenly loses power during data exchange, the xD-Picture Card or internal memory could be damaged.
-
Page 134: Disconnecting The Camera
Connecting to a PC Windows XP A The “Found New Hardware” help message appears in the bottom-right corner of your screen. This message will close when the settings are completed. No action is required. CAUTION This step is not required for subsequent connections. B FinePixViewer automatically starts up and the Save Image Wizard window (Save Image dialog box) appears. -
Page 135: Using Finepixviewer
A Press POWER to turn the camera off. B Unplug the USB cable (included) from the camera. ; USB socket AC-5VC Using FinePixViewer Mastering FinePixViewer For all information on FinePixViewer functions, refer to “How to Use FinePixViewer” in the Help menu for details. •... -
Page 136: Uninstalling The Software
Connecting to a PC Uninstalling the software Only perform this operation when you no longer require the installed software or when the software was not installed correctly. Windows A Check that the camera is not connected to the PC. B Quit all currently running applications. C Open the “My Computer”... - Page 137 Memo...
-
Page 138: System Expansion Option
System Expansion Option By using FinePix F31fd together with other optional FUJIFILM products, your system can be expanded to fill a wide range of uses. Accessory availability may vary by country. Please check with your local Fujifilm representative to confirm product availability. -
Page 139: Accessories Guide
There are two types of xD-Picture Card: standard type and Type M (containing “M” in the model number, such as DPC-M1GB). FinePix F31fd is compatible with Type M, however they may no be compatible depending on the device used (Image Memory Card Reader, etc.). - Page 140 Loading an xD-Picture Card into this adapter allows you to use the card as a CompactFlash card (Type • Waterproof Case WP-FXF30 This waterproof case protects your FinePix F31fd from water damage yet allows you to make camera adjustments and use the flash.
-
Page 141: Using Your Camera Correctly
• Next to rubber or vinyl products Z Damaged by Water or Sand FinePix F31fd can be damaged on the inside and outside by water and sand. When you are at the beach or close to water, make sure that the camera is not damaged by water or sand. -
Page 142: Power Supply And Battery
When shipped, the NP-95 is not fully charged. Always charge the NP-95 before using it. • When carrying the NP-95, install it in a digital camera. Z Battery Features • The NP-95 gradually loses its charge even when not used. - Page 143 Z Battery Life At normal temperatures, the NP-95 can be used at least 300 times. If the time for which the NP-95 provides power shortens markedly, this indicates that the NP-95 has reached the end of its effective life and should be replaced. Notes on storage The Rechargeable Lithium-ion Battery NP-95 is both compact and capable of storing large quantities of power.
- Page 144 • Plug the connection cord plug securely into the DC input terminal of the FUJIFILM Digital camera. • Turn off the FUJIFILM Digital camera before disconnecting the cord from the FUJIFILM Digital camera’s DC input terminal. To disconnect, pull out the plug gently.
-
Page 145: Notes On The Xd-Picture Card™ And The Internal Memory
Z Protecting Your Data • Images and movies may be lost or destroyed in the following situations. Please note that FUJIFILM assumes no responsibility for data that is lost or destroyed. 1.Removal of the memory card or turning the power off while the memory card or internal memory is being accessed (i.e., during record, erase, initialization, and... -
Page 146: Specifications
• There are two types of xD-Picture Card: standard type and Type M (containing “M” in the model number, such as DPC-M1GB). FinePix F31fd is compatible with Type M, however they may not be compatible depending on the device used (Image Memory Card Reader, etc.). -
Page 147: Warning Displays
• Turn the camera on again, taking care not to touch the lens. • Turn the camera off and on again. If the message still appears, contact your FUJIFILM dealer. Insert an xD-Picture Card. • Format the xD-Picture Card or internal memory on the camera (➝p.117). -
Page 148: Write Error
It may be necessary to format the xD-Picture Card (➝p.117). If the message still appears, replace the xD-Picture Card. • Contact your FUJIFILM dealer. Erase some images in internal memory or xD- Picture Card (➝p.41), or use an xD-Picture Card that has ample free space. - Page 149 CAN NOT SET DPOF CAN NOT ROTATE An attempt was made to rotate a movie or an image shot using a camera other than FinePix F31fd. r CAN NOT ROTATE Explanation No more than 4,999 images can be shown by date sorting.
- Page 150 Warning Displays Warning Displayed The camera is not connected to a PC or printer. COMMUNICATION ERROR • An attempt was made to send a movie by IR CANNOT BE communication. TRANSMITTED • Transmission was disconnected during IR communication. Transmission was disconnected during IR CANNOT BE RECEIVED communication.
-
Page 151: Troubleshooting
Troubleshooting Z Getting ready Matters Problems The battery has run out. Nothing happens The battery is loaded backward. when pressing POWER. The battery cover is not closed securely. The camera and AC power adapter are not connected correctly. Camera is used in extremely cold conditions. - Page 152 Take the battery out briefly and wipe the battery terminals with a clean, dry cloth before reloading it. Load a new battery. If the battery still fails to charge, contact your FUJIFILM dealer. Solutions Select ENGLISH. Page –...
- Page 153 Z Shooting Matters Problems The xD-Picture Card or internal memory is full. The xD-Picture Card or internal memory is not formatted. The xD-Picture Card contact area is No photograph is soiled. taken when pressing the The xD-Picture Card is damaged. shutter button.
- Page 154 Troubleshooting Matters Problems Cannot use the flash. Flash The flash settings are restricted and cannot be selected. The playback image is dark even though the flash was used. The image is blurred. Photographed images There is speckling on the image. Possible causes The shutter button was pressed while the flash was charging.
- Page 155 Matters Problems AC power adapter was connected or Photographed disconnected during turning the camera Recording images images or movies are not recorded. Only 1 frame can A picture is taken using self-timer when be shot even setting FINAL 3 or LONG PERIOD Continuous though continuous continuous shooting mode.
- Page 156 Troubleshooting Z Playing back Matters Problems Playing back The camera does movie / voice not emit any memo sound. Erasing FRAME does not erase the frame. Erasing Erasing ALL FRAMES does not erase all the frames. CONT. in the frame number Frame No.
- Page 157 Z Connecting Matters Problems The camera is not connected to the TV correctly. The included A/V cable was connected There is no image during movie playback. or sound on the “TV” is selected as the TV input. Connecting to TV The video output setting is incorrect.
- Page 158 Charge the battery or load fully charged battery. Briefly remove the battery or disconnect the AC power adapter. Then reload the battery or reconnect the AC power adapter and try again. If you think the camera is faulty, contact your FUJIFILM dealer. Page...
- Page 159 Memo...
-
Page 160: Specifications
Specifications System Model Digital camera FinePix F31fd Effective pixels 6.3 million pixels 1/1.7-inch Super CCD HR Storage media Internal memory (approx. 26 MB)/xD-Picture Card (16/32/64/128/256/512 MB/1 GB/2 GB) File format Still image: DCF-compliant Movie: AVI format, Motion JPEG Audio: WAVE format, Monaural sound Number of recorded pixels Still image: 2848 ×... - Page 161 System Sensitivity AUTO/AUTO(400)/AUTO(800)/AUTO(1600)/Equivalent to ISO 100/200/400/800/1600/3200 Photometry TTL 256-zones metering Multi, Spot, Average Exposure control Program AE/Aperture priority AE/Shutter priority AE Scene position (NATURAL LIGHT), (NIGHT), (MUSEUM), Picture Stabilization Available Intelligent Face Detection Available –2 EV to +2 EV in 1/3 EV-step increments (s, </M) Exposure compensation Shutter speed 3 sec.
- Page 162 Specifications System White balance Automatic scene recognition/Preset (Fine, Shade, Fluorescent (Daylight), Fluorescent (Warm White), Fluorescent (Cool White), Incandescent) /Custom Self-timer Approx. 2 sec./10 sec. Flash type Auto flash Effective range: (S: AUTO): Wide-angle: approx. 60 cm-6.5 m (2.0 ft.-21.3 ft.) Flash mode Auto, Red-eye Reduction, Forced Flash, Suppressed Flash, Slow Synchro, Red-eye Reduction + Slow Synchro LCD monitor...
- Page 163 Input/Output Terminal A/V OUT (Audio/Visual NTSC/PAL-type (with monaural sound) output) Digital input/output USB 2.0 High-Speed/PTP (Picture Transfer Protocol) DC input socket AC Power Adapter AC-5VC (included)/AC-5VX (sold separately) Power Supply and Others Power supply Rechargeable Battery NP-95 Guide to the number of available frames for battery operation NP-95 (1800 mAh)
- Page 164 Specifications Z Standard number of available frames/recording time per xD-Picture Card and internal memory The number of available frames, recording time or file size varies slightly depending on the subjects photographed. Note also that the divergence between standard number of frames and the actual number of frames is greater for xD-Picture Cards with higher capacities.
- Page 165 (frame erase) image files. In such a case, erase all frames or format the xD-Picture Card before use. Back up important frames (files) onto your PC or another media. These specifications are subject to change without notice. FUJIFILM shall not be held liable for damages resulting from errors in this Owner’s Manual.
-
Page 166: Explanation Of Terms
CCD. The number is larger for bright subjects and smaller for dark subjects. As the brightness of the subject changes, a digital camera maintains the amount of light hitting the CCD at a constant level by adjusting the aperture and shutter speed. -
Page 167: Fujifilm Digital Camera Worldwide Network
TEL +591 33 44 1129 FAX +591 33 45 2919 gciagral@bibosi.scz.entelnet.bo Av. Vereador José Diniz, 3400 - Campo Belo, Sào Paulo/SP TEL 0800-12-8600 FAX +55 11 5091-4150 camarasdigitais@fujifilm.com.br Av. El Conquistador del Monte 5024, Huechuraba, Santiago, Chile TEL 02-4431500 FAX 02-4431596 ceciliacalvo@reifschneider.cl Calle 44 N.°... - Page 168 TEL +595 21 444256 FAX +595 21 444651 jmarbulo@fujifilm.com.py Pablo Bermudez 111 Apartado 3794 - Esq. Arequipa - Lima 11 TEL +51 14 33 5563 FAX +51 14 33 7177 jalvarado@fujifilm.com.pe Cuareim 1439, montevideo, Uruguay TEL +598-2-9002004 FAX +598-2-9008430 fotocam@adinet.com.uy Maldonado 1787 Montevideo- Uruguay TEL (05982) 419 4542 FAX (05982) 412 0046 kiel@fujifilm.com.uy...
- Page 169 TEL 35722314719 FAX 35722515562 dorosn@logosnet.cy.net U nakladoveho nadrazi 2/1949, 130 00 Praha 3 TEL 00420 234 703 411 FAX 00420 234 703 489 fricman@fujifilm.cz Milesovska 1, 130 00 Praha 3, Czech republic TEL 00420 222 721 525 FAX 00420 222 720 122 awh@awh.cz Stubbeled 2, 2950 Vedbæk Denmark...
- Page 170 TEL +7-095-797-3434 FAX +7-095-797-3434 Pribylinska 2, 831 04 Bratislava, Slovakia TEL 00421 2 44 888 077 FAX 00421 2 44 889 300 fujifilm@fujifilm.sk FIS Tatracentrum, Hodzovo nam. 4 - Tatracentrum, 811 06 Bratislava, Slovakia TEL 00421 2 54 647 347 fis.tatracentrum@stonline.sk...
- Page 171 TEL 934511515 FAX 934515900 / 933230330 tallersat@fujifilm.es Sveavägen 167 104 35 Stockholm TEL 46 8 506 141 70 FAX 46 8 506 142 09 kamera@fujifilm.se Sveavägen 167 104 35 Stockholm TEL 46 8 506 513 54 FAX 46 8 506513 54 kameraverkstaden@fujifilm.se Niederhaslistrasse 12, 8157 Dietlikon, Switzerland TEL +41 44 855 5154 FAX +41 44 855 5329 RepairCenter@fujifilm.ch...
- Page 172 P.O.Box 41669-00100, Fuji Plaza, Chiromo Road, Nairobi, Kenya. TEL (254-20)4446265-8 FAX (254-20)4448515 / 7 info@fujifilm.co.ke 114 Old Pittwater Road, Brookvale, NSW, 2100, Australia TEL 1800 226 355 FAX +61 (2) 9938 1975 digital@fujifilm.com.au 70-72 Cumming Street,Suva,Fiji TEL (679)3304133 FAX (679)3302777 kapadia@connect.com.fj 58, rue Higginson - B.P.661 - 98845...
- Page 173 TEL 632-7436601~06 FAX 632-7324661 digital@yklcolor.com 24 Sto. Domingo St., Quezon City 1100, Philippines TEL 632-7436601~06 FAX 632-7324661 tech_services@yklcolor.com 10 New Industrial Road Fujifilm Building Singapore 536201 TEL 65-6380 5557 FAX 65-6281 3594 service@fujifilm.com.sg 30-1, Mukjeung-dong, Jung-gu, Seoul, Korea TEL +82-2-3282-7363 FAX +82-2-2269-7435 photo@fujifilm.co.kr #301, 3F, Jeonjaland, 16-9, Hangangro3-ga, Yongsan-gu, Seoul, Korea TEL +82-2-701-1472 FAX +82-2-718-1331 1bowl@hanmail.net...
-
Page 174: Safety Notes
Safety Notes • Make sure that you use your FinePix F31fd camera correctly. Read these Safety Notes and your Owner’s Manual carefully before use. • After reading these Safety Notes, store them in a safe place. About the Icons • The icons shown below are used in this document to... - Page 175 These actions could damage the cord and cause a fire or electric shock. • If the cord is damaged, contact your FUJIFILM dealer. Do not place the camera on an unstable surface. This can cause the camera to fall or tip over and cause injury.
- Page 176 Safety Notes WARNING When carrying the NP-95, install it in a digital camera or keep it in the hard case. When storing the NP-95, keep it in the hard case. When discarding, cover the battery terminals with insulation tape. Contact with other metallic objects or battery could cause the battery to ignite or burst.
- Page 177 Build-up of dust in your camera can cause a fire or electric shock. • Contact your FUJIFILM dealer to request internal cleaning every 2 years. • Please note this is not a free of charge service.
- Page 178 Memo...
- Page 179 Memo...
- Page 180 26 - 30, Nishiazabu 2 - chome, Minato - ku, Tokyo 106 - 8620, Japan http://www.fujifilm.com/products/digital/ Printed in China FPT/Y-608110-PY...
Need help?
Do you have a question about the FinePix F31fd and is the answer not in the manual?
Questions and answers