Table of Contents
Advertisement
CERTIFIED PHOTOFINISHING SERVICE
Have your film processed by a Photo Finisher which displays the above sign.
Different Photo Finishers may provide different services.
Consult them for details of their services.
23-69
The "CE" mark certifies that this product satisfies the require-
ments of the EU (European Union) regarding safety, public
health, environment and consumer protection. ("CE" is the
abbreviation of Conformite Euroeepnne.)
This product conforms with Directive 89/336/EEC.
Owner's Manual
Advertisement
Table of Contents

Subscribe to Our Youtube Channel
Related Manuals for FujiFilm 320 IXZ


Summary of Contents for FujiFilm 320 IXZ
- Page 1 CERTIFIED PHOTOFINISHING SERVICE Have your film processed by a Photo Finisher which displays the above sign. Different Photo Finishers may provide different services. Consult them for details of their services. 23-69 Owner’s Manual The “CE” mark certifies that this product satisfies the require- ments of the EU (European Union) regarding safety, public health, environment and consumer protection.
-
Page 2: Table Of Contents
CONTENTS FEATURES ....... PART NAMES ......ATTACHING THE STRAP . -
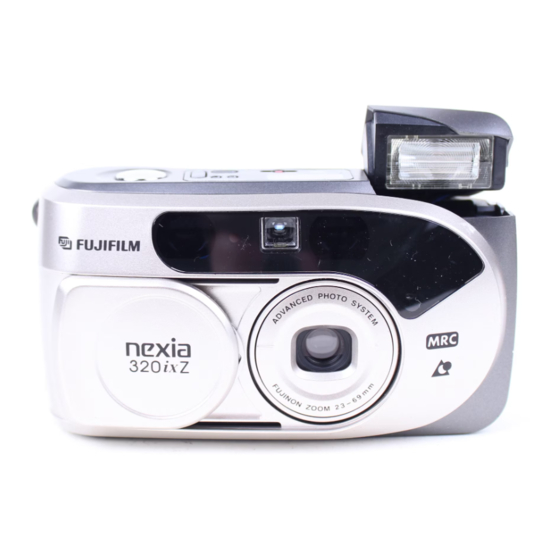
Page 3: Part Names
PART NAMES Liquid Crystal Display !9 Self-timer Mode Sign @0 Landscape Mode Sign @1 Back Light Compensation/Flash Off Mode Sign @2 Red-eye Reduction Flash Mode Sign @3 Date Display (Type of Film Cartridge/Camera ISO Display) @4 Liquid Crystal Display (LCD) @5 MRC Button (Mid-Roll Change Button) @6 Film Cartridge Mark @7 Battery Capacity Sign... -
Page 4: Attaching The Strap
ATTACHING THE STRAP Attach the strap as illustrated. Fig. 1 When using a commercial strap, check the strength and other properties of the strap. Because straps for cellular telephones, PHS, etc. are for light devices, be especially careful when using them. LOADING THE BATTERY Lithium battery to be used: CR123A/DL 123A or Fig. - Page 5 When inserting battery, lens may move if camera is in the on position. This is a normal occurrence, not a problem. Once the power is on, you can check the battery Fig. 3 capacity display on the LCD. on : Battery capacity is insufficient; provide a new battery.
-
Page 6: Setting The Date
SETTING THE DATE (YEAR : MONTH : DAY/HOUR : MINUTE) Press the DATE Button for more than 2 seconds, until the year number blinks. Fig. 4 Press the SET Button and adjust the numbers that blink. Press the SEL. Button to select the position of the blinking sign year hour minute order, and adjust each figure using the SET Button. -
Page 7: Selecting The Date Mode
SELECTING THE DATE MODE Fig. 5 With the Advanced Photo System The date (year:month:day / hour:minute) can be printed on the front and back of the print. Front printing can be seen when inserted in an album and back printing is convenient for cataloging. Changes, such as eliminating the date, are possi- ble when reprinting (Some photo-finishers may not support this feature). - Page 8 Each time the DATE Button is pressed, the date for- Fig. 6 mat changes in sequence. A Year-Month-Day B Month-Day-Year C Day-Month-Year D Hour-Minute E No print The indicated mode is recorded when the picture is taken, and printed on the front and back of the print when printed.
-
Page 9: Turning The Power On/Off
TURNING THE POWER ON/OFF When the slide cover is opened by sliding it fully in Fig. 7 the arrow direction, the power is turned on, the flash lamp pops up, the lens advances, and the camera enters the "Ready-to-Shoot" state. When the slide cover is closed, the power is turned off. -
Page 10: Loading The Film Cartridge
LOADING THE FILM CARTRIDGE Fig. 8 Fig. 9 With the Advanced Photo System IX240 Cartridge film is used. Do not load the cartridge before inserting the bat- tery. Confirm that the tridge are white. Cartridges in which the signs are white cannot be used. (Optical Double Exposure Prevention.) (1 unexposed 2 partial 3 exposed 4 processed) After closing the slide cover, (... - Page 11 (w) Turn the camera over and drop in the film car- Fig. 10 tridge. (e) Close the Film Cartridge Compartment Cover. Do not apply unnecessary force to the Film Cartridge Compartment Cover. When the Film Cartridge Compartment Cover is Fig. 11 closed, the film is automatically advanced and “...
-
Page 12: Selecting The Print Format
SELECTING THE PRINT FORMAT Fig. 12 With the Advanced Photo System The style of print required can be selected from amongst C, H and P. Use the Format Selector to select the required print style. The print format can also be changed when mak- ing reprints, however the field of view remains the same. - Page 13 H&P H&C A: Viewfinder Fig. 14 B: Print finishing With taking close-up picture When pictures are taken at distances closer than about 1.5m, the information within the shown above is not printed. When taking close ups, the area seen through the viewfinder and the area actually photographed will be different.
-
Page 14: Taking Pictures
TAKING PICTURES Hold the camera firmly with both hands. Fig. 16 When holding vertically, keep the flash lamp upward. Be careful not to block the camera lens, flash and AE and AF Windows with your finger or strap. The subject will not be focused correctly. If you want to increase the size of the subject, slide Fig. - Page 15 Aim at the subject so that it fills the whole AF frame. Fig. 18 ( A : AF (Autofocus) frame) When the shutter release button is pressed halfway Fig. 19 and the AF lamp (green) turns on, focusing is com- plete.
- Page 16 In dark places, photos should be taken within the follow- ing flash lamp ranges. Effective Flash Lamp Ranges Film speed Wide angle (23mm) Telephoto (69mm) ISO 100 ISO 200 ISO 400 (Using color negative film; units; m) In the following cases, the camera may not be able to focus on the subject.
-
Page 17: Using The Auto-Focus Lock
USING THE AUTO-FOCUS LOCK In the composition shown above, the AF frame is off Fig. 20 the subject (in this case, the people). In this state, the Lens will not focus on the subject. Move the camera slightly so that the subject is inside Fig. -
Page 18: Unloading The Film Cartridge
Press the Shutter Release Button halfway down (AF Fig. 22 lock) without moving the camera and confirm that the AF lamp (Green) lights. While holding the Shutter Release Button halfway down to keep the Auto-Focus lock on, move the camera back to the original position to recompose your picture, then press the Shutter Release Button all the way down to take picture. - Page 19 After “ ” sign appears in the Exposure Counter and Fig. 24 the motor stops, move the Film Cartridge Compartment Cover Release Knob in the arrow direction, open the Film Cartridge Compartment Cover, and take out the cartridge. Confirm the “ before opening the Film Cartridge Compartment Cover.
-
Page 20: Film Cartridge Mid-Roll Change Function
FILM CARTRIDGE MID-ROLL CHANGE FUNCTION When taking out the cartridge in mid-roll, turn on the Fig. 25 power, by opening the Slide Cover, and then rewind the film by pressing the MRC (Mid-Roll Change) Button. When “ Counter and the motor stops, take out the cartridge. Confirm that If the MRC button is pressed when the power is off, the film may not be rewound. - Page 21 Load a new film cartridge (with a white Fig. 26 status mark). The film will be advanced to the first frame, and the number of exposures specified on the film cartridge will appear on the LCD. When the film cartridge unloaded in a mid-roll (with cartridge status mark) is loaded again, the film will be advanced automatically to the first unexposed frame allowing you to use the film continuously.
- Page 22 Cautions Concerning the Mid-roll Change Function When a cartridge that has been removed in mid-roll ( is dis- played) is reloaded into the camera, if “ ” blinks in the Exposure Counter, reload the cartridge once more, avoiding the following locations. •...
-
Page 23: Selecting The Exposure Mode
SELECTING THE EXPOSURE MODE Display the desired Exposure Mode or Self-timer Fig. 27 Mode by pressing the Mode Button. Back Light Compensation Flash Mode, Flash Off Mode, Landscape Mode and Self-timer Mode are cancelled automatically when the power is turned. The Landscape Mode and Self-timer Mode are canceled each time a picture is taken. - Page 24 :no display) Automatic Flash at low Fig. 28 Brightness Mode Used when taking ordinary pictures The flash lamp fires automatically when the bright- ness of the subject is lower than the predetermined level. When the Power Switch is turned on, the camera is automatically set to this mode.
- Page 25 A word on red-eye When you photograph a person’s face in dim light with flash, the eye will sometimes turn out red in the picture. This happens as the light from the flash enters the eyes and is reflected back into the camera lens.
- Page 26 ) Flash Off Mode Fig. 31 Used when taking pictures with the room illumina- tion being utilized, or taking pictures of a remote subject to which the flash light does not reach, for example, in a theater or a stadium The flash stops firing.
-
Page 27: Selecting Self-Timer Mode
SELECTING SELF-TIMER MODE Press the Mode Button to display the self-timer sym- Fig. 33 bol “ ” on the LCD. In self-timer shooting, the “Automatic Flash at low Brightness Mode” or “Back Light Compensation Flash Mode” can be selected. Press the Shutter Release Button, and the Self-timer Fig. -
Page 28: Errors, Possible Causes, And Remedies
ERRORS, POSSIBLE CAUSES, AND REMEDIES During operation Error Exposure counter shows blinking “B G” sign though film cartridge has been loaded and film cartridge compartment cover has been closed. A cartridge has been inserted, but the counter is not displayed on the LCD. - Page 29 Printed pictures Error Picture is not sharp. Picture is dark. Printed date (time) is incorrect. The date is not printed on the front. Possible Causes Was your finger on the AF win- dows when shooting? Did you focus on the subject cor- rectly ? Is the lens dirty ? Was the camera shaking ?
-
Page 30: Specifications
SPECIFICATIONS Film IX240 cartridge film Picture Size 16.7 x 30.2 mm Print Format C/H/P switchable Lens Fujinon Lens, 5 components, 5 elements, f=23 – 69 mm / 1:6.7 – 1:12.5 Viewfinder Real image zoom finder, 0.33 – 0.87 x magnification, with AF frame (C, H, and P formats switchable), parallax correction mark, AF lamp Active infrared auto focus 1m –... -
Page 31: Camera Care And Cautions
CAMERA CARE AND CAUTIONS 1. Your camera is a precision instrument which requires care- ful handling. Do not expose it to shock, liquid, or drop it on the floor. 1) If you use the camera at the seaside or in light rain, be careful not to get it wet. - Page 32 26-30, Nishiazabu 2-chome, Minato- ku, Tokyo 106-8620, Japan. <FUJIFILM ABROAD> In North America FUJI PHOTO FILM U.S.A., INC. 555 Taxter Road, Elmsford, N.Y. 10523, U.S.A. FUJI PHOTO FILM CANADA INC. 275 Britannia Road East, Mississauga, Ontario , L4Z 2E7, Canada FUJI PHOTO FILM HAWAII, INC.
Need help?
Do you have a question about the 320 IXZ and is the answer not in the manual?
Questions and answers