Precision Power PC2100 Owner's Manual

Precision Power PC2100 Owner's Manual

Precision power amplifier owners manual

Advertisement

POWERCLASS
CONGRATULATIONS
WIRING (continued)
END PLATE DIAGRAM
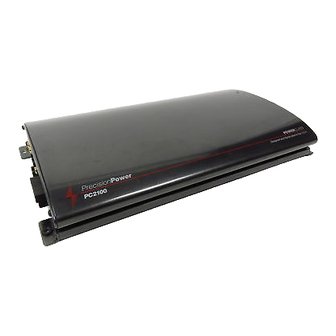
PC2100 / PC2200 / PC2300 OWNER'S MANUAL
C O N T E N T S
(click on a topic to view)
SYSTEM DIAGRAM TWO
SYSTEM DIAGRAM THREE
SYSTEM DIAGRAM FOUR
WARRANTY
QBASS / CROSSOVER

Advertisement

Table of Contents
loading
Need help?

Need help?

Do you have a question about the PC2100 and is the answer not in the manual?

Questions and answers

Summary of Contents for Precision Power PC2100

  • Page 1 POWERCLASS ™ PC2100 / PC2200 / PC2300 OWNER’S MANUAL C O N T E N T S (click on a topic to view) CONGRATULATIONS QBASS / CROSSOVER FEATURES / SPECIFICATIONS AMPLIFIER ADJUSTMENTS TROUBLE SHOOTING INSTALLATION WIRING SYSTEM DIAGRAM ONE WIRING (continued)
  • Page 2 Congratulations and thank you..for choosing PrecisionPower audio epuipment. At PrecisionPower we proudly design, engineer and manufacture audio products at our facility in Phoenix, Arizona. Our award winning engineering team utilizes innovative technology to consistently deliver Absolutely State of the Art performance, sound quality, reliability, and value.
  • Page 3 Choice of High Pass or Low Pass at RCA outputs while opposite is available at the Speaker Outputs. PC2100 - Third Order (18 dB/octave), Butterworth alignment fixed at 90 Hz. PC2200/PC2300 - Fourth Order (24 dB/octave), Linkwitz-Riley alignment fixed at 90 Hz.
  • Page 4 Grommets (sized to work with the power wire you plan to use in your installation) Tube of silicone sealant F u s e r e q u i r e m e n t s Amplifier Maximum Fuse Rating PC2100 20 Amp PC2200 30 Amp PC2300 35 Amp You will need to install an in-line fuse or circuit breaker in the power wire within 18"...
  • Page 5 WIRING The following is a basic formula to be used as a guide to determine amperage draw. A 50% amplifier efficiency rating is used as an average. Your new POWERCLASS ™ amplifier is more efficient, other amplifiers will probably be less. This formula is to be used as a guideline. Using wire of a larger gauge can only improve the current transfer of your system.
  • Page 6 WIRING Before beginning, disconnect the negative (-) terminal of the battery prior to working on the positive (+) terminal to prevent a short to ground. This is important, unless you want to spend the rest of your life with a nickname like "Sparky," or "Smokey." Reconnect the negative terminal only after all connections have been made.
  • Page 7 POWER / GROUND Locate an area near the amplifier(s) that is metal and clean an area about the size of a quarter to bare metal. Inspect the area around and underneath to be sure you won't drill into wires, brake or fuel lines, etc. Drill a pilot hole into the middle of this area.
  • Page 8 SPEAKER WIRING Using 16 gauge or larger, run the speaker wires from the amplifier location through the vehicle to the speakers. Observe the same precautions for routing these wires that you followed for running the power and remote turn-on wires. Cut off excess and, using wire strippers, strip 1/4 inch of insulation.
  • Page 9 ENDPLATE DIAGRAM HP/LP Switch This switch u s e d GAIN C o n t r o l select whether Use this control to the amplifier match the output will provide a level of the head highpass (in) or unit to the input of lowpass (out) t h e a m p l i f i e r...
  • Page 10 INPUTS There are two sets of RCA jacks on the front end of your amplifier. The RCA cables from your head unit go in the set labeled INPUTS. If your head unit doesn't have RCA outputs don't worry. Simply add a set of RCA plugs (available at your dealer) to your front or rear set of speaker leads (see drawing below), plug them into the input jacks, and push in the INPUT ATTENUATION button.
  • Page 11 90Hz crossover built in to provide system flexibility without the added expense and installation of an outboard crossover. The PC2100 has a third-order Butterworth type 18dB per octave crossover, and the PC2200 and PC2300 house a fourth-order Linkwitz-Riley type, 24dB per octave phase correlated crossover for a tighter sound.
  • Page 12 AMPLIFIER ADJUSTMENT A d j u s t i n g T h e A m p l i f i e r I n p u t G a i n 1. Adjust all amplifier input gain controls to just above minimum sensitivity (fully counterclockwise).
  • Page 13 TROUBLE SHOOTING NO SOUND Is the LED lit? Check Power and Remote turn-on wire for voltage. Make sure Ground wire is secure. STILL NO SOUND - See your Authorized PrecisionPower Dealer or Call 1-800-62POWER . SOUND IN ONE CHANNEL ONLY Reverse left and right speakers by unplugging the speaker connector, turning it over and plugging it back in.
  • Page 14: Mixed Mono Output

    SYSTEM DIAGRAM Source Unit eject Trk 1 BASS TREBLE BALANCE TRACK VOLUME LEFT RIGHT FOWARD REVERSE Passive Passive Tweeter Tweeter Crossover Crossover MidRange MidRange POWER CLASS Amplifier ™ Crossover Off Passive Crossover Subwoofer Mixed Mono Output The ability to run stereo speakers while simultaneously running a mono output from the same amplifier is accomplished by running the stereo speakers normally and tapping into the appropriate wires for the "mixed mono"...
  • Page 15 SYSTEM DIAGRAM Source Unit eject Trk 1 BASS TREBLE BALANCE TRACK VOLUME LEFT RIGHT FOWARD REVERSE Passive Passive Tweeter Tweeter Crossover Crossover MidRange MidRange POWER CLASS Amplifier ™ Crossover Low Pass Output Subwooofer Subwoofer POWER CLASS ™ Amplifier Crossover off or Low Pass BACK TO CONTENTS...
  • Page 16 SYSTEM DIAGRAM THREE Source Unit eject Trk 1 BASS TREBLE BALANCE TRACK VOLUME LEFT RIGHT FOWARD REVERSE Vo lu Po we In- Cl Fa de De fe Su b Lo w Lo w- M id Hi gh -M id Tr eb PAR-245 Preamp/Equalizer Front Output Rear Output...
  • Page 17 SYSTEM DIAGRAM FOUR Source Unit eject Trk 1 BASS TREBLE BALANCE TRACK VOLUME LEFT RIGHT FOWARD REVERSE V ol Po we In -C Fa de D ef ea t Su b Lo w Lo w -M id H ig h- M id Tr eb PAR-245 Preamp/Equalizer...
  • Page 18 BLOCK DIAGRAM - 12dB INPUT ATTENUATION BACK TO CONTENTS...
  • Page 19 WA R R A N T Y Three-Year Limited U.S.A. Warranty This warranty gives you specific legal rights, and you may also have other rights which vary from state to state. PrecisionPower warrants its products to be free from defects in materials and workmanship under normal use and service for a period of three (3) years from the date of original purchase when the unit is installed by an Authorized Dealer.

This manual is also suitable for:

Pc2200Pc2300

Table of Contents

Save PDF