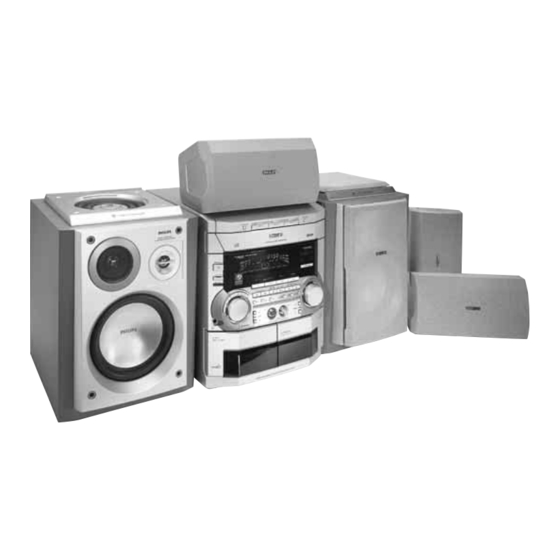
Philips FW-C870 User Manual
Hide thumbs
Also See for FW-C870:
- Service manual (108 pages) ,
- User manual (30 pages) ,
- Owner's manual (30 pages)

Related Manuals for Philips FW-C870


Summary of Contents for Philips FW-C870
- Page 1 C870 C870 Mini Hi-Fi System 3139 115 20404 pg 001-028/C870/21-Eng 6/8/01, 8:32 AM...
- Page 2 Descripción: Modelo : FW-C870/21 Alimentación: 110–127 / 220–240V~; 50–60 Hz Consumo: 190 W Philips Mexicana, S.A. de C.V. Importador: Norte 45, # 669, Domicilio: Col. Industrial Vallejo Localidad y Tel: C.P. 02300 México D.F., Tel. 5728-4200 Philips Electronics HK, Ltd.
- Page 3 DISC CHANGE OPEN•CLOSE DISC 1 DISC 2 DISC 3 C H A N G E R MINI HIFI SYSTEM STANDBY ON LEFT CENTER RIGHT SURR SURR ECO POWER PRO LOGIC IR SENSOR CD 1•2•3 BAND TAPE 1•2 CDR/DVD & C 1 • 2 • 3 BAND TUNER TAPE...
- Page 4 3139 115 20404 pg 001-028/C870/21-Eng 6/8/01, 8:32 AM...
- Page 5 Index English ------------------------------------------------ 6 Français -------------------------------------------- 29 Español --------------------------------------------- 53 -------------------------------------------------------- 77 3139 115 20401 pg 001-028/C870/21-Eng 6/8/01, 8:32 AM...
-
Page 6: Table Of Contents
Contents General Information Tape Operation/Recording Environmental Information ........ 7 Tape Playback ..........21–22 Acknowledgement ..........7 General Information on Recording ....22 Supplied Accessories ........... 7 Preparation for Recording ....... 22 Safety Information ..........7 One Touch Recording/Recording the mixed sound ............22 CD Synchro Recording ...... -
Page 7: General Information
Energy Star lubricating bearings and must not be oiled or As an ENERGY STAR lubricated. Partner; Philips has When the system is switched to Standby determined that this product mode, it is still consuming some power. meets the ENERGY STAR... -
Page 8: Preparations
Preparations AM loop FM wire antenna antenna speaker speaker DIGITAL SURROUND SUB- WOOFER (right) (left) AUX/CDR IN LINE OUT FM ANTENNA 75 AM ANTENNA VOLTAGE SELECTOR FRONT 110V- 127V 220V- 240V – – MAINS AC power cord Rear Connections Antennas Connection Connect the supplied AM loop antenna and FM The type plate is located at the rear of the antenna to the respective terminals. -
Page 9: Optional Connections
Preparations FM Antenna Connecting other equipment to your system Connect the audio left and right OUT terminals of a TV, VCR, Laser Disc player, DVD player or CD Recorder to the AUX/CDR IN terminals. Notes: – Do not connect equipment to both the LINE OUT and AUX/CDR IN terminals at the same time. -
Page 10: Controls
Controls (main system’s illustration on page 3) DISC CHANGE Controls on the system and – to change disc(s). remote control OPEN•CLOSE STANDBY ON y – to open or close the disc tray. DISC 1 / DISC 2 / DISC 3 (CD DIRECT) –... - Page 11 Controls £ AUTO REVERSE – to select the desired playback modes in tape deck 2 only. ≤ › wOOx ON•OFF MUTE ≥ – to select enhanced or normal wOOx sound CD 123 TUNER TAPE 1/2 AUX/CDR effect. wOOx LEVEL – to select desired wOOx level : WOOX 1, ‹...
-
Page 12: Basic Functions
Basic Functions MUTE MINI HIFI SYSTEM CD 123 TUNER TAPE 1/2 AUX/CDR STANDBY-ON LEFT CENTER RIGHT SURR SURR ECO POWER PRO LOGIC CLOCK AUTO REV. IR SENSOR VOLUME CD 1•2•3 BAND TAPE 1•2 CDR/DVD É Å C1 • 2 • 3 BAND TUNER TAPE... -
Page 13: Switching The System On
Basic Functions Switching the system on Power Saving Automatic Standby As a power-saving feature, the system will In Standby mode automatically switch to Standby mode if you do Press STANDBY ON or CD/TUNER/ not press any buttons within 30 minutes after a TAPE/AUX on the system. -
Page 14: Volume Control
Basic Functions Adjust the JOG CONTROL to select the Volume Control desired Spectrum Analyser band level for low Adjust VOLUME to increase (turn knob frequency. clockwise or press VOLUME +) or decrease The level will increase or decrease (turn knob anti-clockwise or press VOLUME -) between+3 and -3. - Page 15 Basic Functions Note: Digital Sound Control (DSC) – "X" denotes the sound level. The DSC feature enables you to adjust the system to suit your type of music. Automatic DSC-wOOx / VEC-wOOx Press DSC. selection Adjust the JOG The best wOOx setting is generated CONTROL (or press automatically for each DSC or VEC selection.
-
Page 16: Cd Operation
CD Operation DISC CHANGE OPEN•CLOSE MUTE DISC 1 DISC 2 DISC 3 CD 123 TUNER TAPE 1/2 AUX/CDR C H A N G E R MINI HIFI SYSTEM CLOCK AUTO REV. STANDBY-ON LEFT CENTER RIGHT VOLUME SURR SURR É Å ECO POWER PRO LOGIC í... -
Page 17: Disc Playback
CD Operation Replace discs during playback Disc Playback Press DISC CHANGE. To playback all discs on the disc tray To change the inner disc, press DISC Press PLAYÉ Å . CHANGE again. All the available discs will playback once, then "DISC CHANGE"... -
Page 18: Repeat
CD Operation To review the programme Shuffle Stop playback and press í or ë repeatedly. All the available discs and their tracks or all the To exit review mode, press Ç. programmed tracks can be played in random order. To erase the entire programme Press SHUFFLE on the remote control. -
Page 19: Radio Reception
Radio Reception MINI HIFI SYSTEM MUTE STANDBY-ON LEFT CENTER RIGHT CD 123 TUNER TAPE 1/2 AUX/CDR SURR SURR ECO POWER PRO LOGIC IR SENSOR CD 1•2•3 BAND TAPE 1•2 CDR/DVD CLOCK AUTO REV. C1 • 2 • 3 BAND TUNER TAPE DEMO STOP PRESET... -
Page 20: Tuning To Preset Radio Stations
Radio Reception Notes: Changing Tuning Grid (not available for – If you attempt to store more than 40 preset all versions) radio stations, "PROGRAM FULL" will be In North and South America, the frequency step displayed. between adjacent channels in the MW band is –... -
Page 21: Tape Operation/Recording
Tape Operation/Recording MINI HIFI SYSTEM MUTE STANDBY-ON LEFT CENTER RIGHT CD 123 TUNER TAPE 1/2 AUX/CDR SURR SURR ECO POWER PRO LOGIC IR SENSOR CD 1•2•3 BAND TAPE 1•2 CDR/DVD C 1 • 2 • 3 BAND TUNER TAPE DEMO STOP PRESET SEARCH•TUNING STOP•CLEAR... -
Page 22: General Information On Recording
Tape Operation/Recording To rewind or fast forward when playback Preparation for Recording is stopped Press TAPE (TAPE 1•2) to select TAPE 2. Press à or á. Load a recordable tape into tape deck 2. Press Ç when you reached the desired passage. Press í... -
Page 23: Dubbing Tapes
Tape Operation/Recording To select another track during recording Dubbing of tapes is possible on one side of the Press PAUSEÉ Å to interrupt recording. tape only. To continue record on the reverse Pressí or ë (or Digits 0–9 on the remote side, at the end of side A, flip the tapes to side B control) to select the desired track. -
Page 24: Clock/Timer
Clock/Timer MUTE MINI HIFI SYSTEM CD 123 TUNER TAPE 1/2 AUX/CDR STANDBY-ON LEFT CENTER RIGHT SURR SURR ECO POWER PRO LOGIC CLOCK AUTO REV. IR SENSOR VOLUME CD 1•2•3 BAND TAPE 1•2 CDR/DVD É Å C1 • 2 • 3 BAND TUNER TAPE... -
Page 25: Sleep Timer Setting
Clock/Timer Press CD, TUNER or TAPE to select the Sleep Timer Setting desired source. The sleep timer enables the system to switch to Make sure the music source has been prepared. Standby mode automatically at a preset time. CD – Load the disc(s). To start from a specific Set the clock (refer to “Clock Setting”). -
Page 26: Specifications
Specifications AMPLIFIER SPEAKERS Front left/right Output power 3600 W PMPO/ ..........System ..... 3-way; Bass reflex system with ..............2 x 150 W RMS top firing wOOx Signal-to-noise ratio ......75 dBA (IEC) Impedance ................ 6 Frequency response ..60 – 16000 Hz, ± 3 dB wOOx .... -
Page 27: Maintenance
Demagnetising the heads accumulate at the disc lens. To ensure good Use a demagnetising tape available at your playback quality, clean the disc lens with Philips dealer. CD Lens Cleaner or any commercially available cleaner. Follow the instructions supplied with cleaner. -
Page 28: Troubleshooting
Troubleshooting RADIO RECEPTION Radio reception is poor. – If the signal is too weak, adjust the antenna or connect an external antenna for better reception. – Increase the distance between the Mini HiFi System and your TV or VCR. TAPE OPERATION/RECORDING Recording or playback cannot be made.
Need help?
Do you have a question about the FW-C870 and is the answer not in the manual?
Questions and answers