Bosch Tassimo TAS 65xx User Manual
Bosch coffee maker user manual
Hide thumbs
Also See for Tassimo TAS 65xx:
- Instruction manual (198 pages) ,
- User manual (70 pages) ,
- Instruction manual (190 pages)
Advertisement
Available languages
Available languages
Quick Links
Download this manual
See also:
Instruction Manual
Advertisement

Subscribe to Our Youtube Channel
Related Manuals for Bosch Tassimo TAS 65xx


Summary of Contents for Bosch Tassimo TAS 65xx
- Page 2 Plege und tägliche Reinigung Decalciicare Descalciicación Eléments de commande et d’afichage...
- Page 4 ! B i tte le s e n S i e d i e G e b r auc h s anle i tung und K u rzanle i tung sorg f ä ltig d u rc h , h a nd e l n d a nac h und b e w ah r e n d i e Anle i tung e n auf .
- Page 5 b Automatik c M a nue l l N d W a sse r tank f ü lle n P e E n tkalke n Q ► ► Sie ihn gründlich unter l ießendem ► ►...
- Page 6 ► a S t and b y . W ä h l e n S i e e i ne g r oße Tasse ► ( m ind e s te n s 2 0 0 ml) und ste l le n d i e s e auf d a s Tasse n pod e s t.
- Page 7 Wasseri ltersystem In Geräten mit Wasseri ltersystem Wasseri lterkartuschen benutzt werden. ► ► ►...
- Page 8 ► ► ► Wasser i lter system“ und setzen Sie die...
- Page 9 a Z u stand sc h a lte n od e r komple t t aussc h a lte n . B e i m E i nsc h a lte n le u c h t e n alle 5 Anze i g e - e l e m e n te kurz auf .
- Page 10 beinden und betriebsbereit sein (gelbes ► ► ► ► 7a Standby a S t and b y le u c h t e t g e l b , sob a ld S i e d e n E i n/ A us S c h a lte r auf I g e s c h a lte t h a b e n . S i e könne n d a s B r üh s yste m je t zt öf f n e n und e i ne T D I S C e i nle g e n .
- Page 11 N M a nue l l le u c h t e t g r ün, sob a ld d e r B r üh vor g a ng b e e n d e t wurd e . I h r G e t ränk ist f e r tig .
- Page 12 ► ! Anme r kung : D i e S p rac h e i nste l lung f ü r d a s L C - D i splay lässt sic h b e q ue m änd e r n. V e r f a h r e n S i e b i tte g e m äß...
- Page 13 O Auto matik b l inkt. Nac h automa- tisc h e m B r üh e n d e le u c h t e t ► ► a S t and b y le u c h t e t . D i e T D I S C kann e n tnomme n we r d e n .
- Page 14 Pfl ege und in Betrieb nehmen“). Bitte verwenden Sie ► ► ► ► ► ► und einfach per Hand unter l ießendem ► nehmen“ beschrieben. ! I n f o : W e n n S i e e i n milc h h a ltig e s G e t ränk od e r e i ne K a kao- S p e z ialität zub e r e i te t h a b e n , e m pf e h l e n wir I h n e n , zue r st d i e S t anz vorric h t ung und ansc h l ie ß...
- Page 15 E n tkalke n , d a nn sollte n S i e unve r züg l ic h i H i nwe i s: U n te r b r e c h e n S i e ke i ne s f a lls d a s E n tkalkung s prog r amm d u rc h f ü...
- Page 16 a S t and b y le u c h t e t nac h e t wa 2 0 M i nute n ► B e t rie b d e s E n tkalkung s pro g r amms. E n tle e r e n S i e b i tte d a s G e f ä...
- Page 17 In der folgenden Tabelle inden Sie Problem inden, kontaktieren Sie bitte ! H i nwe i s: S o llte d i e S t anzvorric h t ung f e h l e n , könne n S i e d i e s e b e i d e r T A S S I M O I n f o line ( s ie h e R u f n umme r n auf d e r H e f t rüc k se i te ) od e r auf www.
- Page 18 Anzeigeelemente“. men oder im System beindet „Automatik“ D e r S t ric h c o d e - L e s e r R e i nig e n S i e d a s S t ric h c o d e - „Automatik“...
- Page 19 bezogen werden.“ P W a sse r f ü lle n wird ang e z e i g t ob w oh l sic h g e n ug W a sse r im Tank beindet. Weitere Kundendienstinformationen inden Sie online unter www.tassimo.com.
- Page 20 Te c h n isc h e S t örung im D a s G e r ät mit d e m E I N / A U S - P 7 d und Q 7 e b l inke n G e r ät.
-
Page 21: Safety Instructions
Safety instructions ! Ple a se re a d th i s instruc t ion manual and the short instructions carefully and in accordance with the speciications on ... - Page 22 (For i rst use, cleaning and descaling) b Automatic c M a nual N d F i ll tank e D e s c a le Q First use of your TASSIMO for the i rst time, please remove the i lter ► ► thoroughly under running water, and i ll it ►...
- Page 23 ► All display items will light up briel y and a S t and - b y stays lit. S e l e c t a larg e c u p ( m in. 2 0 0 ml) and ► plac e it on th e c u p sh e l f .
- Page 24 i ltration system Only BRITA Maxtra water i ltration system cartridges may be used in without a i lter cartridge. Simply remove machines with a water i ltration system. the i lter holder and i lter cartridge from the i nd contact details on page i lter cartridge ► ► ►...
- Page 25 ► ► ► your Bosch Service Center (please i nd con- section “BRITA Maxtra water filtration sys- Your TASSIMO machine is now ready...
-
Page 26: Controls And Displays
Controls and displays a S t and - b y and of f . W h e n it is switc h e d on, all 5 d i splay ite m s lig h t up briely. The stand-by light will then remain i Note : To save e n e r g y , th e applianc e sh o uld b e switc h e d of f af t e r e a c h use . - Page 27 ► ► ► ► 7a Stand-by a S t and - b y ic o n lig h t s up ( y e l low) wh e n th e powe r switc h is switc h e d on. Now you c a n ope n th e b r e w ing unit and inse r t a T D I S C .
- Page 28 N M a nual ic o n lig h t s up ( g r e e n ) wh e n th e b r e w ing proc e s s is almost c o mple t e . I f you pre s s and h o ld th e start/ s top b u tton with i n 2 0 se c o nd s of th e manual ic o n lig h t ing up, you c a n e x te n d th e b r e w ing proc e s s in...
- Page 29 How to use your TASSIMO Plac e a suitab l e c u p on th e stand ► ac c o rd i ng to th e type of d r ink re q uire d . Ad j ust th e h e i g h t of th e stand if ne c e s sary, exclusively or re m ove it altog e t h e r f o r larg e c u ps or g l asse s .
- Page 30 milder fl avour Automatic icon l ashes. When the N M a nual ic o n lig h t s up. I f you pre s s and h o ld th e start / s top b u tton with i n 2 0 se c o nd s , you c a n e x te n d th e b r e w ing proc e s s to g e t your d e s ire d d r ink stre n g t h .
-
Page 31: Maintenance And Day To Day Care
Maintenance and day to day care “First use of your TASSIMO machine“). Do ► ► Rinse out the water tank and i lter ► ► ► ► ► T DISC as described under “First use of your TASSIMO machine“. ! Note : Af t e r d i spe n sing a milky d r ink or h o t c h o c o late d r ink, we re c o mme n d th a t you i rst clean the piercing unit and then... - Page 32 Q D e s c a le your retailer. ic o n lig h t s up wh i le th e applianc e is on, th e d e s c a ling prog r amme must b e run imme d i ate l y.
- Page 33 a S t and - b y ic o n lig h t s up af t e r approx. ► 2 0 minute s of running d e s c a ling prog r amme . E m pty th e c o ntaine r and re p lac e it und e r ►...
- Page 34 ind a solution for your speciic problem, or the problem persists ! Note : in the section “Controls and The loat in the water tank is ensure the loat can move. No T D I S C inse r te d . C h e c k if T D I S C h a s b e e n O Automatic mod e inse r te d .
- Page 35 Push the clamp down irmly The loat in the water tank is P F i ll tank lig h t s up ensure that the loat can e v e n th o ug h th e r e is suficient water in the...
- Page 36 P 7 d and Q 7 e are lashing simulta- P 7 d and Q 7 e are still lashing, please contact the E v e n sof t wate r c o ntains small D e s c a le th e applianc e . Q D e s c a le f l ash e s amounts of d i ssolve d lime .
- Page 37 ! L i se z atte n tive m e n t le M o d e d ’ e m ploi e t le M é me n to, re s pe c t e z le s instruc t ions y igurant et conservez ces documents tions igurant sur la plaque signalétique spéciiquement conçues pour lui, les...
-
Page 38: Présentation De Votre Système Tassimo
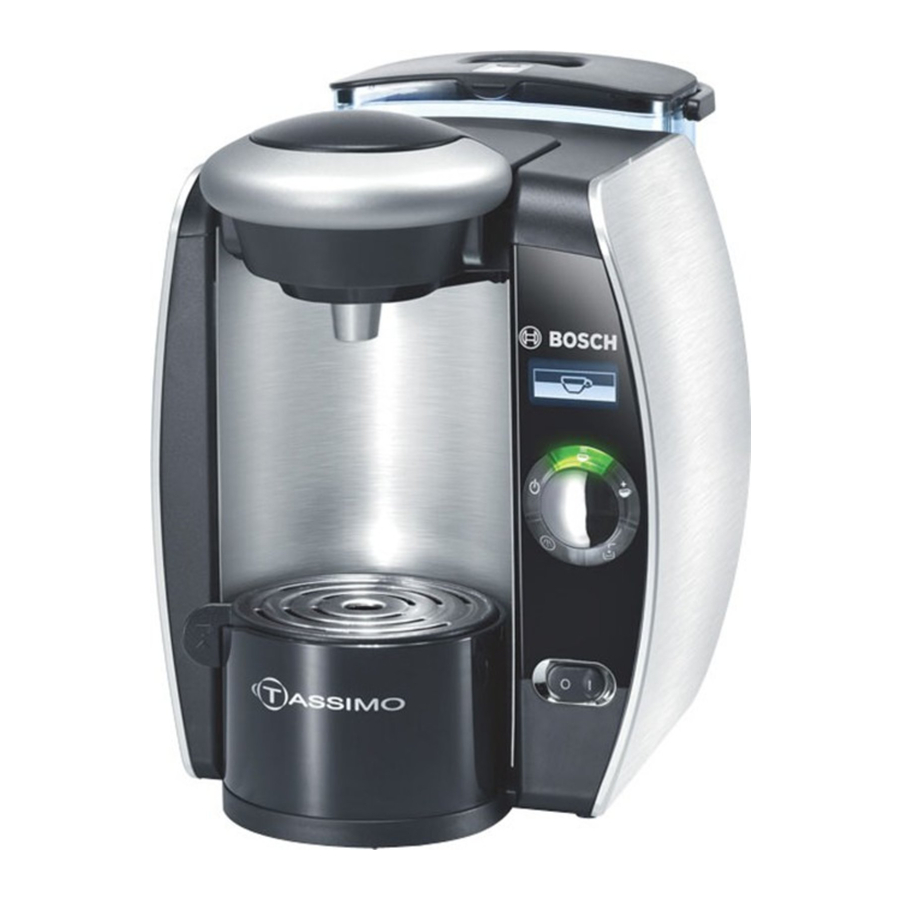
Présentation de votre système TASSIMO Couronne de perçage Ecran d’afi chage Support pour cartouche i ltrante Eléments d’afi chage Cartouche i ltrante BRITA Maxtra cartouche i ltrante b Automatique c M a nue l N d R e m plir le rése r voir d ’ e a u e D é... - Page 39 ► Tous les éléments d’afi chage s’allument ► a V e i lle re s te allumé. Pre n e z une g r and e tasse ( a u moins ► 2 0 0 ml) e t plac e z - l a sur le support d e tasse .
- Page 40 Système de i ltration Seules les cartouches du système de i ltration d’eau BRITA Maxtra doivent être sans cartouche de i ltration. Il vous sufi t de retirer le support de i ltre et la cartouche d’un système de i ltration d’eau. de i ltration du réservoir d’eau si vous ne cartouche de i ltration dans la machine, i ltration BRITA Maxtra Sortez la cartouche de i ltration de son ►...
- Page 41 Placez le support de i ltre au-dessous ► laissez écouler l’eau à travers le i ltre. ► Replacez maintenant le support de i ltre ► avec sa cartouche de i ltration dans le ment de la cartouche i ltrante BRITA Ai n de garantir des performances de i ltration et une protection contre cartouche de i ltration BRITA Maxtra toutes cartouche i ltrante BRITA intégré.
- Page 42 et d’afichage Interrupteur Marche/Arrêt a V e i lle ou d e l’arrête r c o mplète m e n t. L o rs d e la mise e n marc h e le s 5 éléme n ts d’afichage s’allument brièvement. Le a V e i lle re s te allumé...
- Page 43 Paramètres de langue Vériiez que le T DISC a bien été ► ► d’afichage indique ENGLISH comme Pour modiier la langue, appuyez ► que la langue souhaitée s’afiche. ► L e voyant a V e i lle s’allume e n jaune d è s que vous plac e z l’inte r rupte u r M a rc h e / Arrêt sur I .
- Page 44 N M a nue l s’allume e n ve r t d è s que la pe r c o lation e s t te r minée . V o tre b o isson e s t prête . V o us pouve z aussi, d a ns un d é...
- Page 45 tasses ou les grands verres. Ai n d’éviter ! R e m arque : Si vous souhaitez modii er la langue de ► l’écran d’afi chage, procédez de la manière et d’afi chage ». ► placez-le, i lm imprimé vers le bas, dans a V e i lle e s t allumé.
- Page 46 O Automatique c l ig n ote . A la i n de la préparation, le voyant N M a nue l s’allume . D a ns un d é lai d e 2 0 se c o nd e s , vous pouve z prolong e r le te m ps d e pe r c o lation e n mainte n ant appuyé...
-
Page 47: Entretien Et Nettoyage
Entretien et nettoyage ai n d’obtenir des boissons de la qualité ► TASSIMO ai n de garantir la qualité de vos identii er correctement le code-barres du ► ► de la cartouche de i ltration à l’eau claire ► ► ► (10a), la couronne de perçage (10b) couronne de perçage entre chaque ►... - Page 48 V o us trouve r e z un prod u it d e d é tartrag e adapté auprès du Service Clientèle Bosch Q D é tartre r s’allume lorsque i R e m arque : Ne jamais inte r rompre un l’appare i l e s t e n marc h e , vous d e v e z...
- Page 49 a V e i lle s’allume une f o is le ► prog r amme d e d é tartrag e te r miné, c ’ e s t- à- d i re au b o ut d e 2 0 minute s e n viron. V i d e z le réc i pie n t e t re p lac e z - l e sous le ►...
- Page 50 si vous avez perdu la couronne de perçage, ! R e m arque : Problème Vériiez que l’appareil est bien dre l‘écran d‘afichage modiier le paramétrage de de commande et d’afichage». Vériiez que le réservoir d’eau Lancez un cycle de rinçage à Le lotteur du réservoir assurez-vous que le lotteur Vériiez si un T DISC a bien été...
- Page 51 Problème Ne t toye z la f e n être d e le c t ure L e T D I S C inséré e s t O Automatique d u c o d e - b a rre s . e n d o mmag é...
- Page 52 Problème P R e m plir Le lotteur du réservoir débloquez le lotteur. le rése r voir d ’ e a u s’allume , b i e n qu’il y ait sufisamment d’eau dans P 7 d e t Q 7 e c l ig n ote n t toujours, c o ntac t e z le S e r vic e C l ie n tèle T A S S I M O au 0 9 6 9 3 9 2 9 3 9 .
- Page 53 ! L e g g e r e c o n atte n zione , osse r vare e c o nse r vare le istruzioni pe r l’uso e le istruzioni rapid e . Questo apparecchio è destinato G r azie pe r ave r ac q uistato il nostro appare c c h i o T A S S I M O .
- Page 54 decalcii cazione decalcii cazione) decalcii cazione Supporto cartuccia i ltro Cartuccia i ltro BRITA Maxtra b Automatic o c M a nuale N cartuccia i ltro d R i e m pire se r b a toio ac q ua Decalcii care del i ltro e osservare i seguenti punti: ►...
- Page 55 ► d i stand b y . Posizionare una tazza g r and e ( a lme n o ► 2 0 0 ml) sul portatazza. 1 . Aprire ora il siste m a d i b o llitura ► se m plic e m e n te tirand o la manig l ia ve r so l’altro.
- Page 56 Sistema BRITA Maxtra per il i ltraggio dell’acqua di i ltraggio dell’acqua, utilizzare cartuccia i ltrante. Se non si desidera solo cartucce per sistemi di i ltraggio utilizzare la cartuccia i ltrante basta togliere il supporto per il i ltro e la cartuccia dal Le cartucce i ltranti BRITA Maxtra sono Quando si utilizza una cartuccia i ltrante cartuccia i ltrante BRITA Maxtra Togliere la cartuccia i ltrante dal suo ►...
- Page 57 ► supporto del i ltro con acqua fredda pulita e lasciarla i ltrare. ► Ora riposizionare il supporto del i ltro ► con la cartuccia i ltrante nel serbatoio della cartuccia i ltrante BRITA Per la massima prestazione del i ltro e sostituire la cartuccia i ltrante BRITA ogni 8 cartuccia i ltrante, il coperchio del serbatoio i ltrante BRITA che segnala, tramite le della cartuccia i ltrante BRITA, premere e...
- Page 58 ino a quando l’apparecchio è in funzione. ! Nota: pe r rag i oni d i risparmio e n e r g e t ic o , si c o nsig l ia d i spe g n e r e c o mple t ame n te l’appare c c h i o T A S S I M O d o po og n i utilizzo.
- Page 59 Veriicare che il T DISC sia stato ► ► Per modiicare la lingua tenere premuto il ► pulsante ino a quando si trova la lingua ► 7a Standby a L ’ ind i c a tore d i S t and b y si ac c e n d e in g i allo non appe n a l’inte r ruttore on / of f vie n e inse r ito su I .
- Page 60 N L ’ ind i c a tore M a nuale si ac c e n d e in ve r d e non appe n a il proc e s so d i b o llitura è te r minato. L a b e v and a è pronta. T u ttavia e n tro 2 0 se c o nd i e s iste la possib i lità...
- Page 61 ► ! Nota: potrebbe essere necessario modii care ► ► “Elementi di comando e indicatori”. a S t and b y lampe g g i ante . ► maniglia in modo così i sso da farla in- a stand b y lampe g - g i a, me n tre il c o d i c e a b a rre vie n e le t to.
- Page 62 Auto matico lampeggia. Dopo la i ne N M a nuale . E n tro 2 0 se c o nd i e s iste la possib i lità d i prolung a re il proc e s so d i b o llitura pre m e n d o a lung o il tasto S t art/ S t op pe r otte n e r e un aroma più...
- Page 63 vande (ved. capitolo “Mettere in funzione Pulire regolarmente la i nestra di lettura ► morbido e umido, afi nché il codice del ► ► della cartuccia i ltrante. Non mettere in ► ► ► ► descritto nel capitolo “Mettere in funzione ! Nota: se è...
- Page 64 Decalcii care I decalcii canti adatti si possono reperire gramma automatico di decalcii cazione. Se, Decalcii care, si dovrebbe eseguire immediatamente la decalcii cazione. Se la ! Nota : non inte r rompe r e mai il prog r amma sequenza di decalcii cazione non avviene di decalcifi...
- Page 65 a si ac c e n d e pe r ► c i rc a 2 0 minuti d o po l’e s e c u zione d e l programma di decalcii cazione. ► ► e riempirlo i no al segno MAX con acqua ►...
- Page 66 ! Note : se manc a , la pre s sa può e s se r e ac q uistata pre s so il se r vizio d i assiste n za c l ie n ti T A S S I M O oppure all’ind i ri www.
- Page 67 Pulire la inestra di lettura del Si possono veriicare dei sulla supericie sotto il...
- Page 68 P R i e m pire c o n ac q ua, anc h e se il se r - b a toio c o ntie n e ac q ua. P 7 d G u asto te c n ic o Q 7 e lampe g g i ano d e l l’appare c c h i o.
- Page 69 Lea este manual y las breves descalciicación con atención y únicamente las especiicaciones de la sivamente con discos especíicamente elegida. Los T DISCS están especíicamen cíicamente para la máquina TASSIMO. oicial. durante la limpieza o descalciicación de...
- Page 70 Descripción general de la b Automátic o c M a nual N d L l e n ar re c i pie n te d e ag u a P Descalcii car programa de limpieza/descalcii cación (Para primer uso, limpieza y descalcii - de limpieza/descalcii cación Portacartuchos para i ltros Cartucho para i ltros...
- Page 71 ► presiónelo hasta que encaje i rmemente. ► a L i sta para usar. S e l e c c i one una taza g r and e ( m in. 2 0 0 ml) ► y c o lóque l a e n e l soporte para la taza. 1 .
- Page 72 Sistema de i ltrado de Sólo los cartuchos del sistema de i ltra- utilizar sin cartucho de i ltro. Para ello basta con retirar el portai ltros y el cartucho de i ltrado de agua. i ltro del depósito de agua. i ltro en la máquina: Preparación e inserción del cartucho de i ltro Retire el cartucho de i ltro del envoltorio ►...
- Page 73 En el fregadero, llene el portai ltros con ► agua fría y deje que se i ltre. ► Vuelva a colocar el portai ltros y el car- ► tucho de i ltro en el depósito de agua y Activación del indicador de memoria i ltro y la mejor protección contra la calcii - cación, el cartucho de i ltro BRITA MAXTRA reemplazarse el cartucho de i ltro mediante Recomendación:...
- Page 74 i Nota: para ah o rrar e n e r g í a, le re c o me n - d a mos apag a r la máquina d e s pués d e c a d a uso. Botón Start/Stop ►...
- Page 75 ► ► Para modiicar el idioma mantenga ► ► a L i sta para usar E l ind i c a d o r luminoso a L i sta para usar ( a marillo) se e n c i e n d e al ac t ivar e l inte r rup- tor princ i pal.
- Page 76 N M a nual E l ind i c a d o r luminoso N M a nual se e n c i e n - d e ( v e r d e ) c u and o e l proc e s o d e e l ab o rac i ón d e b e b i d a s e s tá...
- Page 77 Cómo utilizar la máquina a L i sta para usar. sólo C o loque una taza c o n un tamaño ad e - ► c u ad o e n e l soporte d e ac u e r d o c o n e l tipo d e b e b i d a d e s e a d o .
- Page 78 Automátic o parpad e a rá. Pulse e l b o tón S t art/ S t op e n c u alquie r mome n to d e l proc e s o d e e l ab o rac i ón para d e t e n e r lo y ajustar la b e b i d a a su g u sto.
- Page 79 ! Nota: Pue d e n prod u c i rse pausas c o rtas d u rante ► e l proc e s o d e e l ab o rac i ón. E l ob j e t ivo e s optimizar e l sab o r d e la b e b i d a .
-
Page 80: Mantenimiento Y Cuidado
Mantenimiento y cuidado calidad de las bebidas (ver “Primer uso de la máquina TASSIMO“). No utilice limpiado- ► ► ► porte del cartucho de i ltro a mano y sólo ► ► ► ► describe en el apartado “Primer uso de la Atención: ! Nota: tras se r vir una b e b i d a d e le c h e o c h o c o late c a lie n te , le re c o me n d a mos que... -
Page 81: Descalcii Cación
Descalcii cación Los agentes de descalcii cación programa automático de descalcii cación. Descalcii car descalcii cación deberá ejecutarse descalcii cación no se desarrolla como se ! Ad v e r te n c i a No ing e r ir los líquid o s. No inte r rumpa nunc a e l prog r ama d e d e s - descalcii que el aparato con más frecuencia calcifi... - Page 82 Pulse y mantenga presionado el botón ► cii cación. ► Q D e s c a lc i - i car y O Automátic o parpad e a rán. ( D u rac i ón aproximad a d e 2 0 minutos. ) L a solución de descalcii cación se bombea a “Lista para usar”...
- Page 83 Eliminación Resolución de problemas E s te aparato e s tá se ñ alizad o se g ú n la D i re c t iva E u rope a 2 0 0 2 / 9 6 / C E sob r e aparatos e l éc t ric o s y e l e c t rónic o s usad o s ( m ate r ial re s id u al e l éc t ric o y e l e c t rónic o –...
- Page 84 Solución puede modiicarse del apartado “Controles e indicadores visuales“. El lotador de nivel del asegúrese de que lotador de No se h a inse r tad o e l C o mprue b e que h a ya inse r tad o O Automátic o T D I S C .
- Page 85 Solución supericie situada bajo el descalciicación. El lotador de nivel del P L l e n ar re c i pie n te se asegúrese de que lotador de e n c i e n d e aunque h a y suiciente agua en el...
- Page 86 Solución P 7 d H a y un e r ror e n la Apag u e la máquina c o n e l inte máquina. rruptor on/ o f f , e s pe r e 5 minutos y Q 7 e parpad e a n aproximad a me n te y vue l va a simultáne a me n te y no e s...
- Page 87 BOSCH, signiica la pérdida de garantía. de compra por el usuario inal, las piezas Exija su identiicación. Modiicaciones reservadas...
- Page 89 • • • • • • • • Deutschland, Germany...
- Page 90 (Pro Anruf 0,06 € aus dem Festnetz in DE) (Pro Anruf 0,10 € aus dem Festnetz in AT)
Need help?
Do you have a question about the Tassimo TAS 65xx and is the answer not in the manual?
Questions and answers